There are many exciting niches within the Web3 realm; however, NFTs continue to be all the rage. As you may know, 2021 presented us with a huge rise in NFTs, and their numerous use cases started to emerge. As such, NFT gaming made its way to the surface and has made programmers turn their full attention to NFT game development. Moreover, as characters are key elements in any type of game, knowing how to create NFT game characters is crucial. Now, if you’re already familiar with the process of creating non-fungible tokens, you know that there is a minting process involved. That being the case, it makes sense that one would actually have to mint NFT game characters for a blockchain game. Therefore, if you want to learn how to mint in-game NFT characters, follow along as we educate you further on this topic.
While the currently most popular NFTs are all about digital collectibles and art, Web3 gaming is poised to be the next big thing. You’ve probably even noticed how well Axie Infinity has gained popularity recently. Moreover, as with Axie Infinity and GameFi and play-to-earn (P2E) niches, NFTs play an important role. Furthermore, in-game NFTs can represent all sorts of objects. However, NFT game characters are one of the most crucial and essential aspects. Hence, we want to show you how to mint NFT characters effortlessly. Fortunately, we can accomplish this quickly and easily when using Moralis. This ultimate Web3 development platform is known as “Firebase for crypto” for a good reason. It enables you to cover blockchain-related backend by simply copying and pasting short snippets of code. Also, in combination with the ultimate Ethereum dApp boilerplate, you can have your own NFT game characters minting dApp (decentralized application) ready in no time.
NFT Game Characters Explained
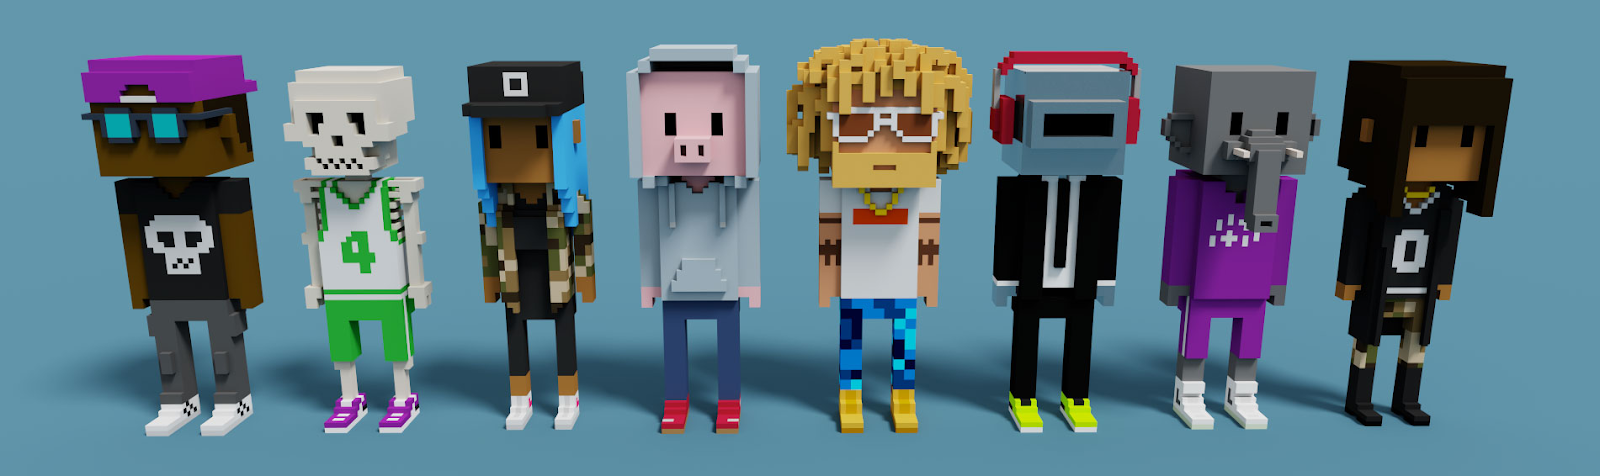
Before we move on to show you how to mint NFT characters using Moralis, we need to get you all up to speed. So, what are NFT game characters? Let’s break down the concepts of “NFT” and “game characters”; however, let’s focus on the latter. If you’ve played any games, you most likely know what game characters are. They represent a person behind the screen or any other entity acting in a game. Moreover, game characters that are not controlled by players are known as non-player characters (NPCs). Furthermore, the number of characters available in different games varies greatly.
However, when we add non-fungible tokens (NFTs) into the picture, things get a bit more complicated. Moreover, while most NFT newbies think of NFTs as JPEG files, NFTs are, in fact, much more. For one, JPEG files or any other type of files (PNG, MP3, MP4, PDF, GIF, etc.) are just the visual or hearing part of NFTs. The aspects that make these files NFTs are hidden in the backend and are far more important. Without smart contracts and programmable blockchains (such as Ethereum), these files would be just regular digital files. Moreover, as you most likely know, NFTs are crypto assets that represent uniqueness. The details that cover uniqueness are stored within each NFT’s metadata, which is stored on the blockchain. As such, there are no two NFTs alike. Hence, even if they represent the same digital file, their metadata is not the same.
Now, we can put it all together. Thus, NFT game characters are just like regular game characters but stored on the blockchain. In addition, this also means that users can actually own their characters. This gives ways to NFT game characters trading. Moreover, users can display NFT characters or use them on other supported NFT platforms.
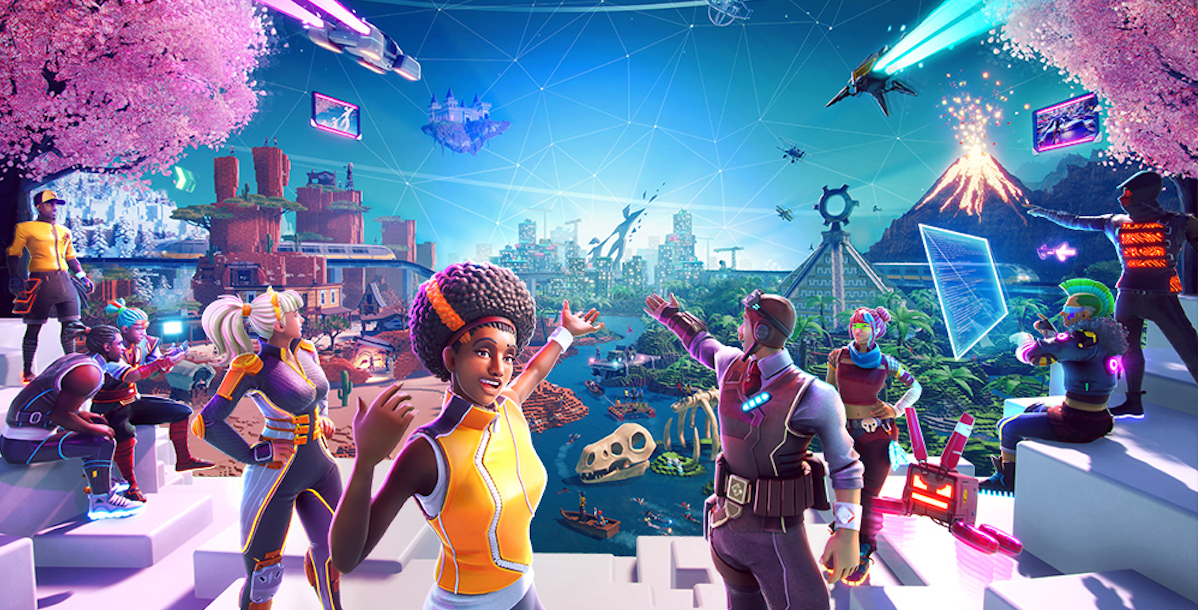
The Future of NFT Game Characters
Now that you know what NFT game characters are, you probably see the huge potential of the NFT use case. Since it’s still early in the game, NFT games and different metaverses are just starting to emerge. Moreover, they do not match Web2 or offline games yet in many cases. However, things are progressing fast in the crypto realm, and a lot of investors are pouring their money into this field. In turn, we could see NFT game characters applications explode and go mainstream sooner rather than later. This will most likely go way beyond gaming as well. For instance, we’ll most likely use NFT characters for online social interactions, which is huge. Thus, make sure to use the upcoming sections to learn how to mint NFT characters wisely.
How to Mint NFT Game Characters?
As mentioned above, we will show you how to mint NFT game characters the easy way. The first key to successfully completing this task is Moralis and its ultimate Web3 SDK, including Moralis’ NFT API. The second priceless shortcut is the ultimate Web3 boilerplate. However, since one of Moralis’ experts already applied the necessary tweaks to the boilerplate, you can use the finished code. As such, you can further speed up the process.
However, in order to get the most out of this article, we want to provide you with a clear picture. So, here’s how to mint NFT characters:
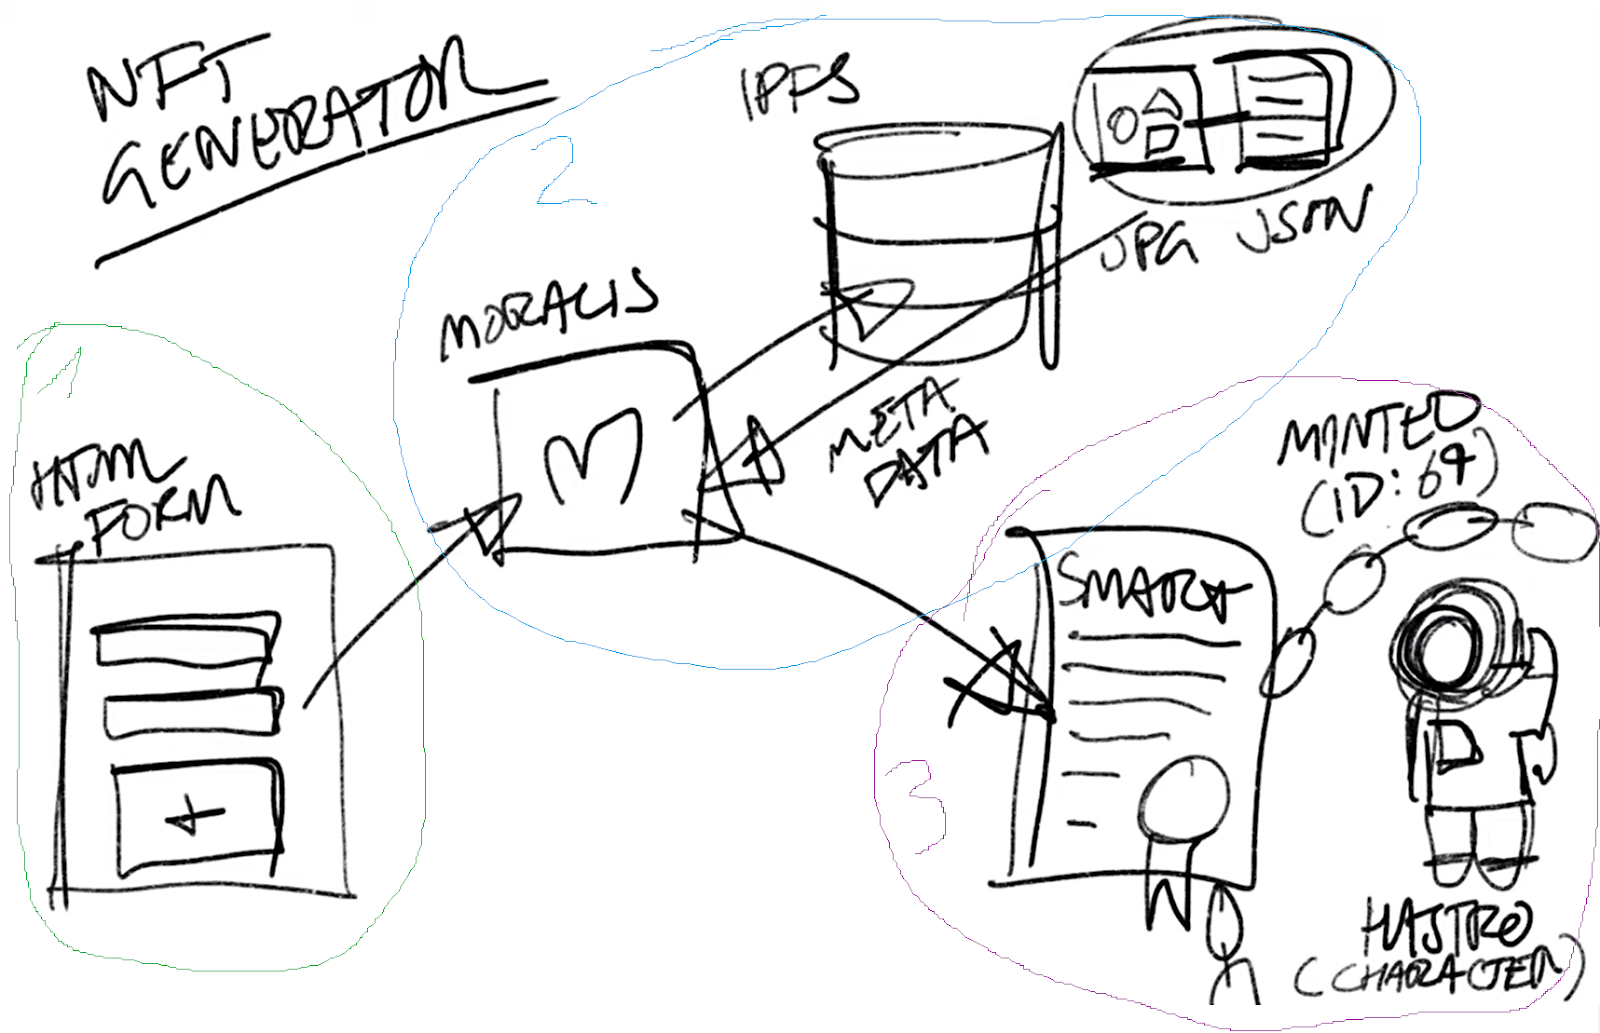
- Step 1: Frontend – Create a React.js project using a couple of libraries. This is enough to set a proper UI and UX in place, which will make things user-friendly. In addition, you need a standard HTML form with an upload field and a submit button.
- Step 2: Compiling Files and Data – By obtaining the data and an image file using the HTML forms, you need to compile these into JSON files. These are the files that will represent your NFTs’ metadata. Also, this is where Moralis will do most of the work for us. For one, thanks to its IPFS integration, it will enable us to store the uploaded images and generate JSON files in a fully decentralized manner. Furthermore, we will also get a unique hash identifier pointing to our compilation of JPEG and JSON files.
- Step 3: Minting – This is the part where we finally create NFT characters. By using an ERC-721 smart contract, we can use the hash identifier to convert our image and the corresponding JSON file into an NFT character.
Preview of Our NFT Character Generator
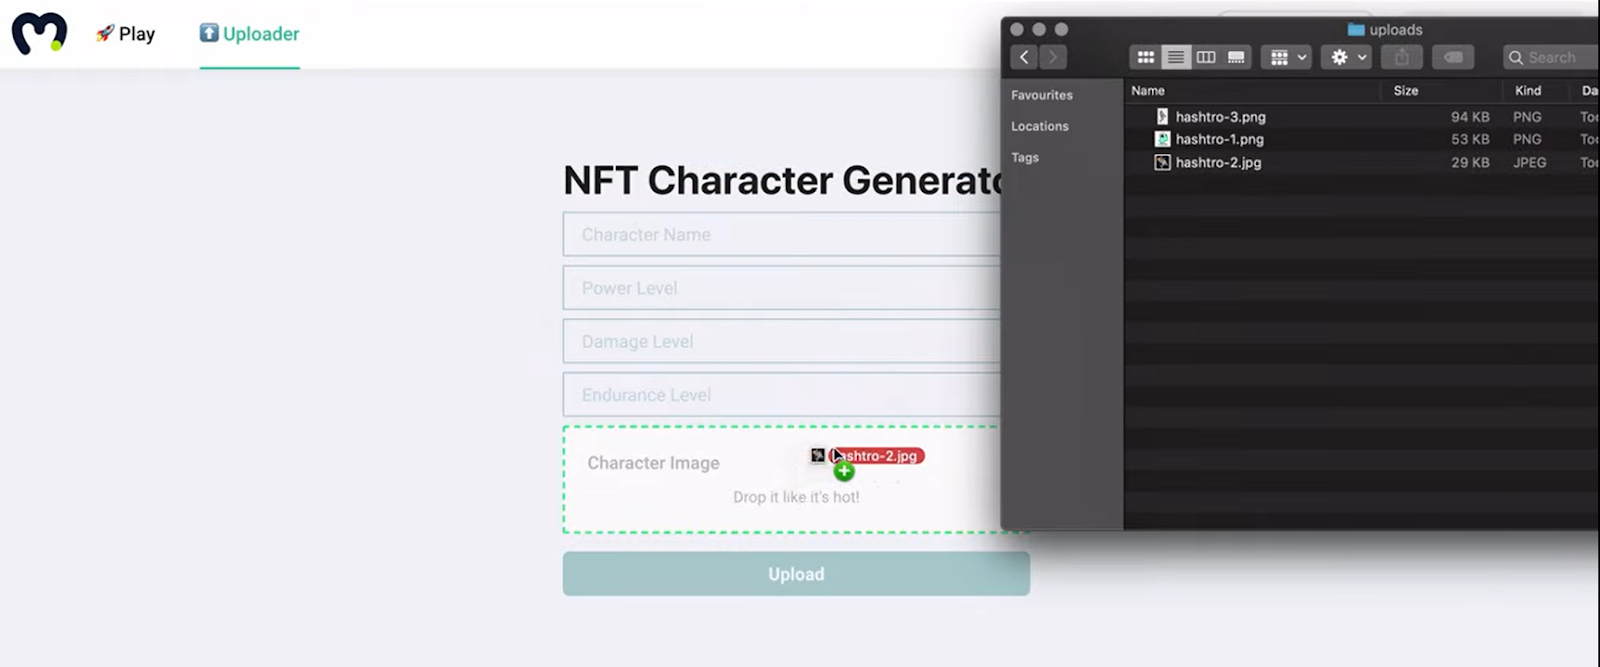
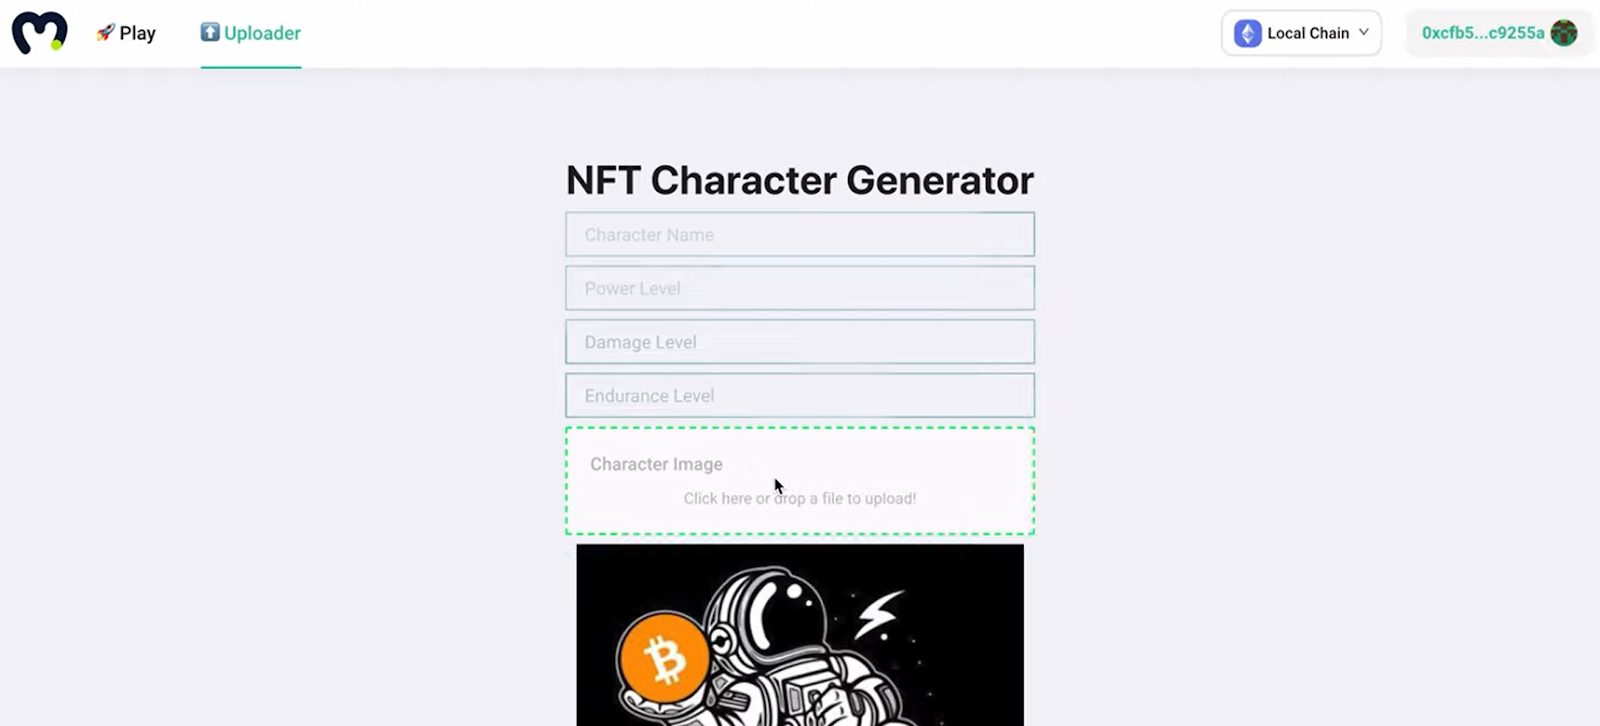
By implementing the steps above, you can easily create a dApp that will mint NFT game characters. As far as the frontend goes, we kept things as simple as possible. Our dApp enables users to name their character, define its power, damage, endurance levels, and upload their character image:
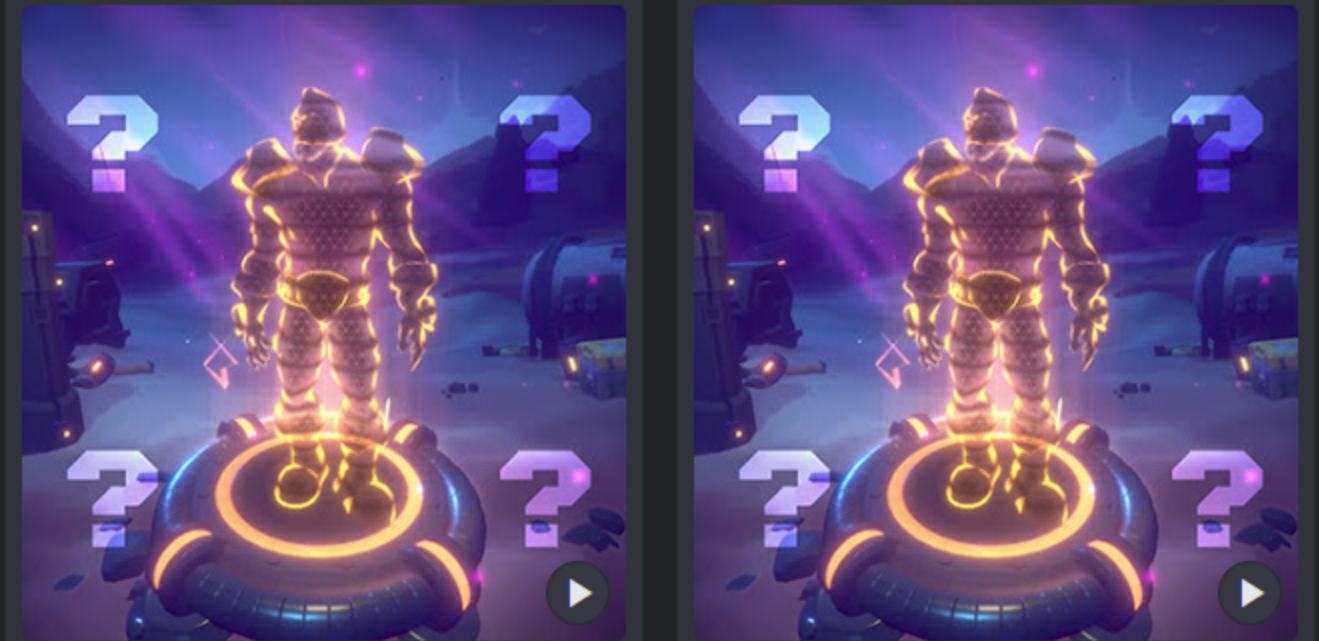
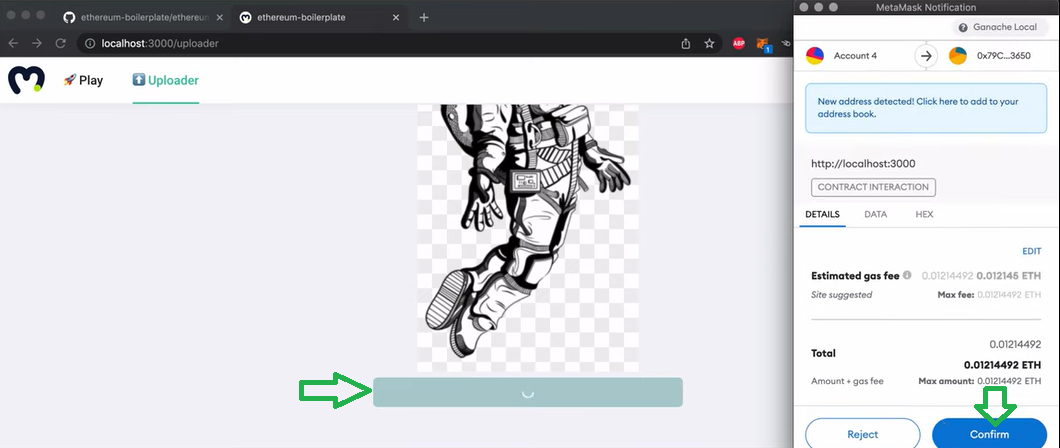
Next, by using a single button in combination with Moralis’ MetaMask integration, users easily mint their NFT characters:
For a more detailed preview, check out the video at the end of this article, starting at 5:10.
Mint NFT Game Characters – An Example Project
We encourage you to use our code and create your own version of an NFT minting dApp. However, in order to do that, you need to complete some simple initial setup steps first. To make things as simple for you as possible, we broke things down into simple steps. The first part will show you how to cover the initial Moralis setup. Moreover, the second part will guide you through the cloning of our code and initializing the Moralis SDK.
Initial Moralis Setup
In order to build dApps with maximum ease, you need to complete the initial Moralis setup. Here are the steps you need to complete:
- Create Your Free Moralis Account – Click the link to the left to access the signup page. Then, enter your email, create your password, and click on the confirmation link that will be sent to your email address. Of course, if you already have an active Moralis account, log in now.
- Create a Moralis Server – Once inside your Moralis admin area, select the “Servers” tab and click on the “+ Create a new Server” button (top-right corner). Next, a drop-down menu with three server types will appear (see the screenshot below). Select the network type that best suits your project. However, when example projects or dApp testing is in question, “Testnet Server” (Ethereum testnets) or “Local Devchain Server” are the ways to go.

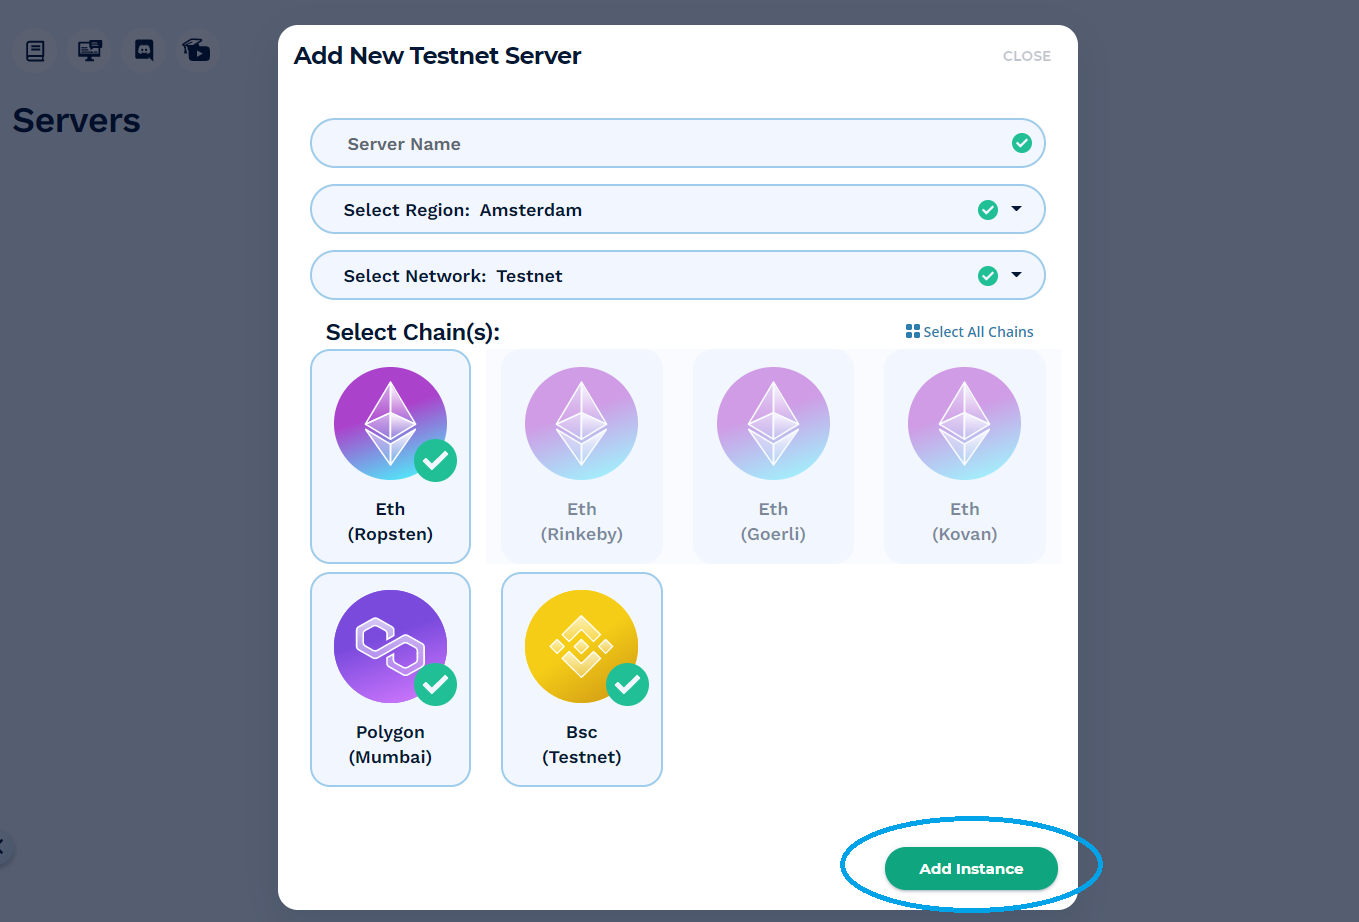
After selecting the server type, you’ll see a pop-up window asking for your server details. You’ll need to enter your server’s name (this can be anything you want), then select your region, network type, and chain(s). To run your server, click on “Add Instance”:
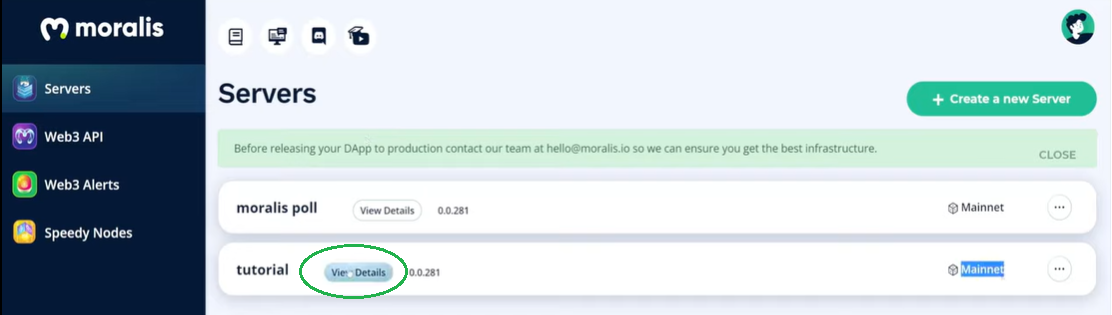
- Access Server Details – With your server up and running, you get to access its details (server URL and application ID) by clicking on “View Details”:
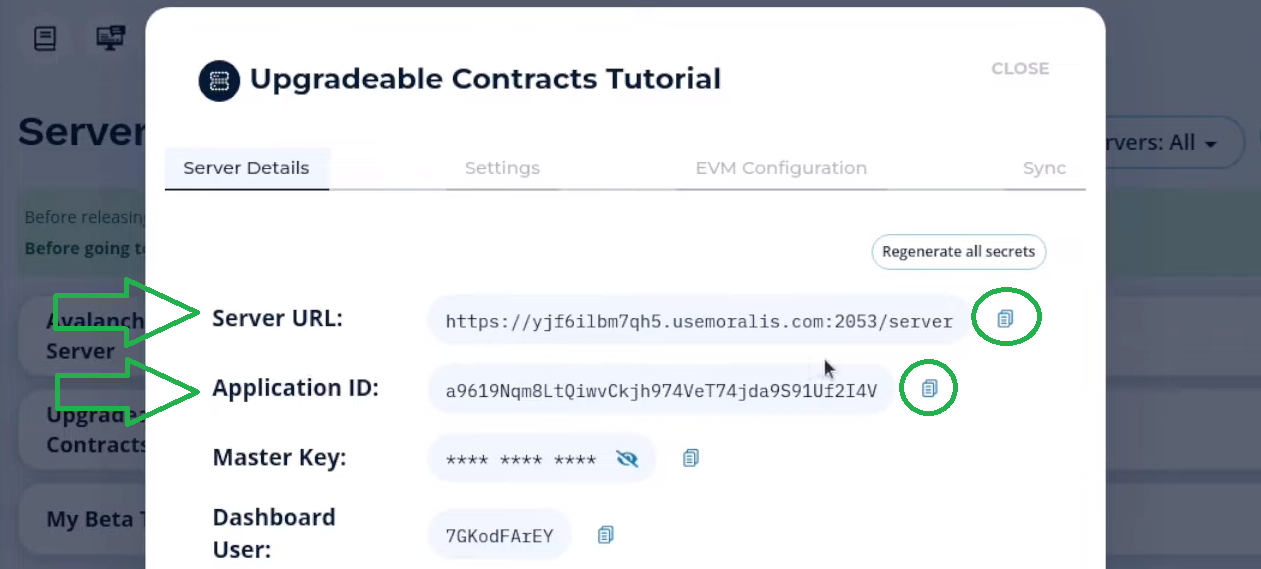
The details will be displayed in a new window. As such, you can simply copy your server’s URL and application ID by clicking on the copy icons on the right-hand side of each detail:
Initialize Moralis
Note: For now, skip this step. You will return and complete it once you have your “.env” file ready.
- Initialize Moralis – With your coding files prepared, you can initialize Moralis’ SDK by populating the relevant file. Whenever you use the boilerplate, you need to use the “.env” file for that purpose. As such, paste your server’s details in the designated spots:

Ethereum Boilerplate Setup
The Moralis expert who will show you additional details related to this example project in the video tutorial below prepared the code that you can use. Also, the code is available at GitHub. Moreover, he started with the ultimate Web3 boilerplate and applied some simple tweaks. As such, you have a chance to either start with the ultimate Web3 boilerplate and apply the tweaks yourself or use the finished code. Obviously, by using the latter, you will further speed up your progress. Furthermore, whenever you are not required to create a unique UI, starting with the Ethereum boilerplate makes a lot of sense. To access this boilerplate, use your browser’s search engine and type “Ethereum boilerplate” in the search bar.
Moving forward, we guide you through the process of cloning the “moralis-nft-game” code. However, the process is essentially the same for the Ethereum boilerplate (just use the related URLs). By cloning the starter code or the finished version, you will easily follow along with the code walkthrough herein.
Cloning the Code – Step-by-Step Instructions
Follow these steps to clone our modified boilerplate (already adjusted for the NFT minter dApp):
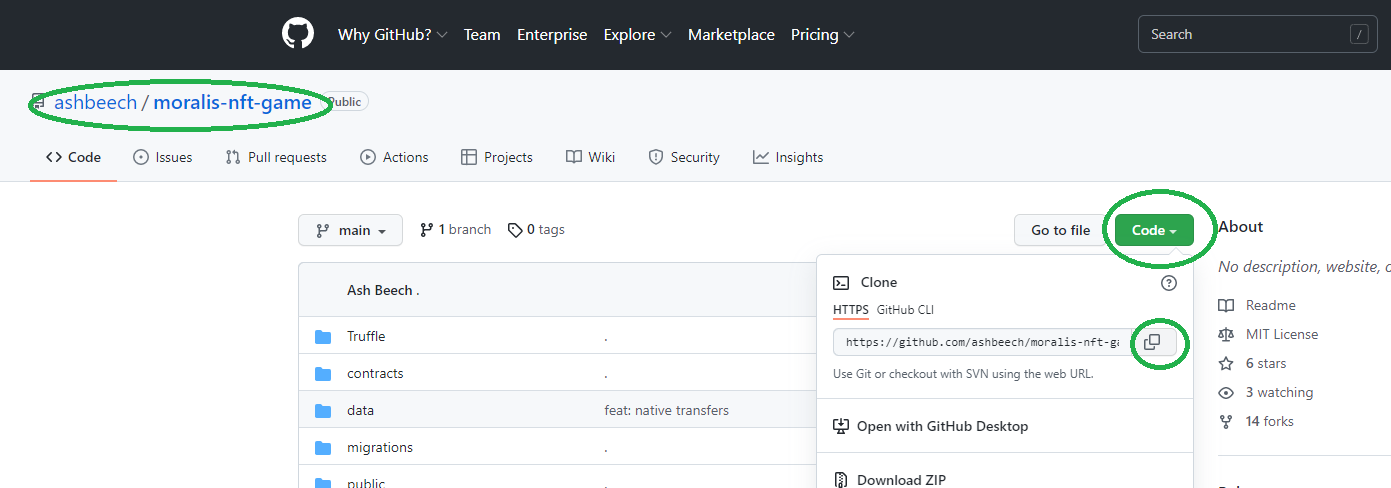
- First, click on the “moralis-nft-game” link given above. That way, you’ll access the code at our GitHub repository.
- Next, click on the “Code” button, followed by a click on the copy icon next to the HTTPS address:
- With the address copied, you get to clone our code. Then, use your code editor’s terminal (we normally use Visual Studio Code [VSC]) and enter this command line:
git clone [paste the copied HTTPS address here]
- After cloning the code, you need to install all dependencies. Again, use your terminal and enter these command lines:
- cd moralis-nft-game
- yarn install
Note: Both “yarn” and “npm” package managers are valid options. In case you decide to use “npm”, make sure to enter the correct commands.
- You now need to rename the “.env.example” file into “.env”. With that done, it is also time to complete step four from the previous section. Thus, make sure to properly populate your “.env” file with your server URL and application ID.
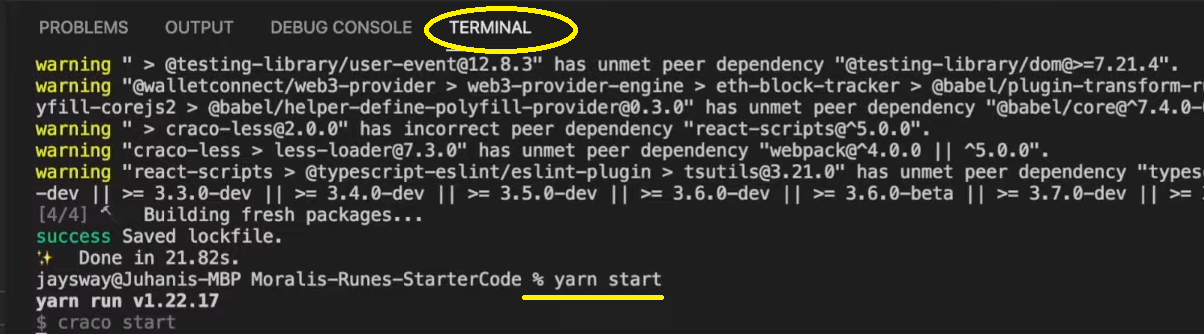
- Finally, you are ready to run your frontend by pasting or typing “yarn start” into the terminal:
Code Walkthrough
With the above setup completed, you are ready to take a closer look at the code. By doing so, you will learn which aspects of our example dApp are the most essential. As such, you will take a closer look at the “Uploader.jsx” file, where all the input fields are covered (2:28). Another key aspect of our minter dApp is the “Character.sol” smart contract. A Moralis expert will tell you more details about this smart contract in the video below, starting at 3:35. In addition, he’s using Truffle for the purpose of this tutorial.
As mentioned, below is the video that we’ve been referencing throughout the article. Assuming that you’ve covered the initial setup as per the instructions above, you can start at 2:04.
NFT Game Characters – How to Mint In-Game NFT Characters – Summary
At this point, you should have a clear understanding of what NFT game characters are. Also, you possess the skills necessary to mint NFT characters. Moreover, you also know that NFTs offer many different use cases and, thus, have a huge potential for future applications. Furthermore, following our lead, you’ve also learned how to mint NFT characters easily. In our example project, you’ve had a chance to create your own NFT minting dApps. The latter is a great tool to mint all sorts of NFTs. In addition, you’ve also learned how to work with Moralis and the Ethereum boilerplate. As such, you are ready to take on other example projects or even tackle your own dApp ideas.
If NFT development is your main interest, we recommend exploring NFT API alternatives and NFT token development. Also, make sure to learn how to develop your own NFT marketplace. Furthermore, by visiting the Moralis blog and the Moralis YouTube channel, you get to continue your free crypto education. Both of these outlets offer a ton of high-quality content. For instance, some of our latest topics cover the ultimate Web3UI kit, the best Web3 tech stack, how to get OpenSea API key, gasless transactions, Web3 login, Web3 authentication, and much more. However, if you want to go full-time crypto as soon as possible, you may want to consider taking a more professional route. If so, enrolling in Moralis Academy may be the next logical step for you.