Since the average user nowadays utilizes mobile devices more than anything, it is paramount that Web3 becomes mobile-friendly. Initially, the Web3 realm was accessible via computers. However, for blockchain to reach mainstream adoption, programmers must have a mobile-first approach when developing dApps. This is where React Native Web3 tools make all the difference for developers. Now, if you already have any experience with React Native, you already have an excellent head start. But, even if you are just getting started as a Web3 dev and you want to learn how to use React Native with Web3, knowing JavaScript is enough to kickstart your React Native Web3 journey. Also, with access to the right arsenal of tools, you can deploy iOS and Android Web3 apps effortlessly.
In this article, we’ll provide you with a complete guide to React Native Web3 development. We’ll guide you step by step through the setup process to simplify things. During the process, you’ll discover which of all the tools are considered the “must-haves”. Furthermore, we’ll start by covering the traditional mobile dev tools, such as Xcode and Android Studio. However, the real boost to your React Native Web3 development is Moralis. This ultimate Web3 development platform, also known as “Firebase for crypto”, is your bridge from Web2 to Web3. With Moralis on your side, you get to cover the blockchain-related backend by simply copying and pasting short snippets of code. In addition, by using Moralis, you also get to exploit the ultimate shortcut – the Ethereum React Native boilerplate. The latter enables you to create mobile Ethereum dApps in minutes. Moreover, make sure to create your free Moralis account before moving forward.

What is React Native Web3?
If you are completely familiar with “React”, “React Native”, and “Web3” terms, feel free to jump to the next section. However, if you are new to blockchain development and/or mobile development, make sure to read this section attentively and thoroughly.
So, what is a React Native Web3? For starters, let’s point out that React Native is quite similar to React. However, instead of utilizing web components as building blocks, it focuses on native ones. As such, React Native enables you to develop cross-platform mobile applications. Now, in case you are not really sure what React is, we recommend checking out our article covering the details of this JavaScript UI library. Moreover, it is important to note that React.js uses a templating language called “JSX”. Furthermore, the latter compiles code to plain JavaScript functions. Thus, knowing how to work with React is enough to transition easily to React Native development. However, learning as many React Native-specific aspects as possible, especially about native components, should be on your to-do list.

Now that you know what React Native is, let’s add “Web3” into the picture. The latter is the new era of the internet, which was introduced by blockchain technology. So, how does Web3 work? Ideally, it is a decentralized form of Web2 with a built-in digital monetary system. Furthermore, the current goal is to make the user experience similar to that of Web2 (most current websites). Yet, noticeable differences occur as early as when users utilize Web3 login or Web3 authentication. Moreover, as we undergo the transition from Web2 to Web3, there will be a lot of “Web2-Web3” hybrid applications. With that in mind, you now know that by “React Native Web3”, we refer to React Native applied for creating Web3 mobile apps.
Full React Native Web3 Dev Guide
Moving forward, we will guide you through the setup required to work with React Native. Moreover, as mentioned above, we will cover the Web3 part by introducing the Moralis SDK. That way, you will be able to incorporate backend functionality quickly and easily. Thus, you will have the time to focus on creating the best frontend. Hence, your mobile dApps will have a chance to offer an attractive UI and an excellent UX, which is the key to success.
Also, we will rely heavily on a Moralis expert’s video tutorial to make this even clearer. By doing so, you’ll have a chance to look over an expert’s shoulder as he performs all of the essential setup steps. In addition, you’ll also have an opportunity to follow his lead and create your own mobile dApp. First, he’ll show you how to create a mobile dApp from scratch. However, he’ll also show you how to use the Ethereum React Native boilerplate. The latter is, without a doubt, the ultimate shortcut to React Native Web3 development.
Start Your React Native Web3 Journey
If you have any experience with programming, you know that documentations are precious. As such, we recommend you start by visiting “ReactNative.dev” and then clicking on the “Guides” option:

There’s a lot of useful information in the “Introduction” section. However, if you are eager to get going, focus on “Environment setup”. Moreover, we believe that you could easily do this on your own, but we want to assist you as much as possible. Hence, here’s a great sum up of the required React-Native development tools:
- Command Line Interface (CLI) Tools (video below at 3:45):
- Node.js
- Ruby gem
- Cocoa pods (for iOS)
- ADB (Android debug bridge) (for Android; already available in Android Studio)
- iOS Development (video below at 9:26):
- Xcode (use the latest version)
- Android Development (video below at 12:07):
- Android Studio (use the latest version)
Note: For detailed guidance, refer to the video at the end of this article (use the given timestamps).

Create Your First React Native App from Scratch
Now, you are ready to start building. Moreover, since we know that some of you prefer to build things from scratch, you’ll have a chance to do precisely that (video below at 24:39). Also, you will learn how to overcome the challenges of certain errors (40:01). Furthermore, this is also the path to follow to learn how to use emulators for iOS and Android. All in all, you will create a pretty basic “Hello World” mobile application:

On the other hand, you might be more like us and prefer to get to the finish line in the shortest time possible. If so, using the boilerplate may be the right way for you. Moreover, this is exactly what we will focus on in the next section. This is also where we actually create a React Native Web3 dApp.
Note: In both cases (starting from scratch or using the boilerplate), the Moralis expert uses Visual Studio Code (VSC), which is our preferred code editor.
Furthermore, we also encourage you to take a closer look at React Native components (1:05:10):

A clear understanding of React Native components will help you use the Ethereum React Native dApp boilerplate even further.
Ethereum Mobile dApp Boilerplate – The Ultimate Shortcut to React Native Web3 Development
If you are serious about React Native Web3 development, you need to know that we’re still early in this sector. Thus, a lot of errors are quite common. However, our ultimate Ethereum React Native boilerplate has been available for quite some time now. Hence, we’ve already managed to improve it a lot, and things run smoothly. However, in case you do encounter any errors, make sure to let us know. As early adopters and frontier developers, we must work together for the most optimal progress.
To work with the boilerplate, you must first clone the code. Here are the steps you need to take to do that:
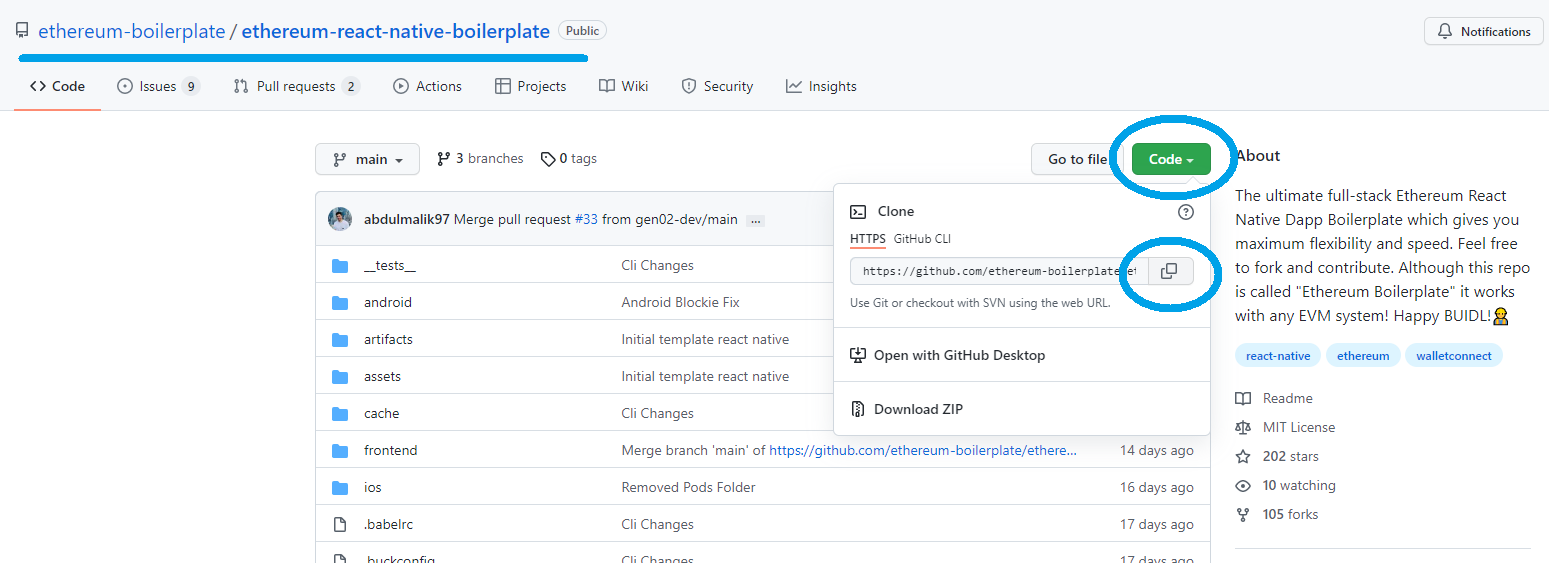
- Visit the Ethereum React Native boilerplate page at GitHub.
- Copy the HTTPS address:
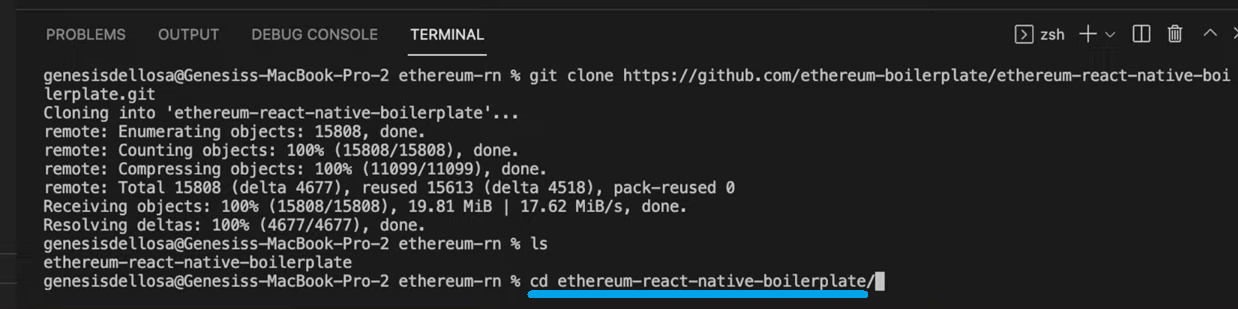
- Open a new project inside VSC. Then, use VSC’s terminal to clone the code using the “git clone” command followed by the above-copied HTTPS:

- With the code cloned, make sure to go into the corresponding folder. Again, you need to use the VSC’s terminal:
- Next, you need to install all dependencies. As such, use the “yarn install” command in the terminal.
- Now, you need to go to the iOS folder (type “cd ios” in the terminal). Once in the “ios” folder, run the “pod install” command in the terminal.
- You need to return to the root folder. You do this by entering “cd ..” in the terminal’s command line.
- All that is left to do now is to run the app by entering the right command in the terminal:
- For iOS: npx react-native run-ios
- For Android: npx react-native run-android or npx react-native start
Using Simulators to Run Your Mobile dApp
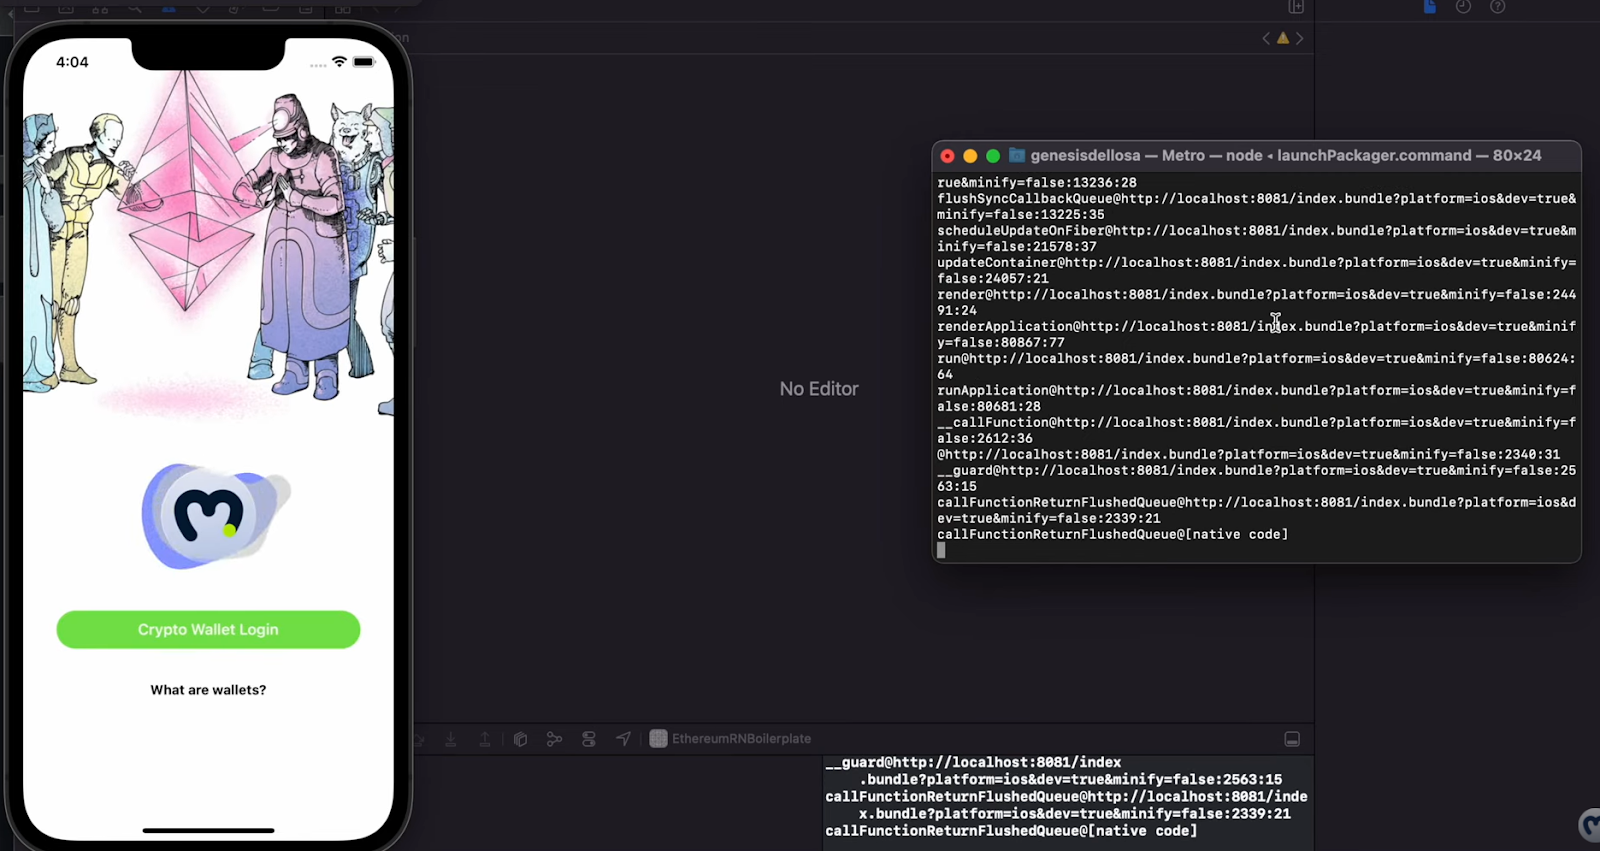
Once you complete the above steps, you can use Xcode to run iOS dApps and Android Studio to run Android dApps. For iOS, you’ll start by navigating to the “ios” folder inside your “ethereum-react-native-boilerplate” project using Xcode (1:24:10). For details, refer to the video below. This is also where you’ll see how easy it is to run your boilerplate-based mobile dApp. If you manage to follow the instructions properly, you will see the app running in your emulator:
With the iOS dApp up and running, it is time to repeat similar steps for Android. As such, you need to use Android Studio (1:28:21). This time, you need to locate the “android” folder within the “ethereum-react-native-boilerplate” project using Android Studio. You will also have a chance to see the expert tackle some hurdles with the Android emulator. The latter can be priceless in case you encounter the same issues. However, the goal is to get both emulators (iOS and Android) running your dApp:

In case you want to see how to change text or a button, follow the video starting at 1:42:20. You’ll clearly see how editing code automatically changes your Android and iOS version of the application. Moreover, this is also where you will get a chance to learn more about Web3 authentication. The latter is fully integrated with this boilerplate thanks to Moralis’ WalletConnect integration. Of course, to gain access to Moralis’ backend functionality, you also need to create your Moralis server (instructions below). Moving forward, you also have an opportunity to explore selecting physical devices on Xcode and Android Studio (1:49:18).
Creating a Moralis Server
Creating a Moralis server is an essential part of your web and mobile dApp development when using Moralis. Thus, make sure to complete these steps:
- Log In to Your Moralis Admin Area – At this point, you should already have your Moralis account ready; hence, just log in. However, in case you haven’t done so yet, create your free Moralis account now.
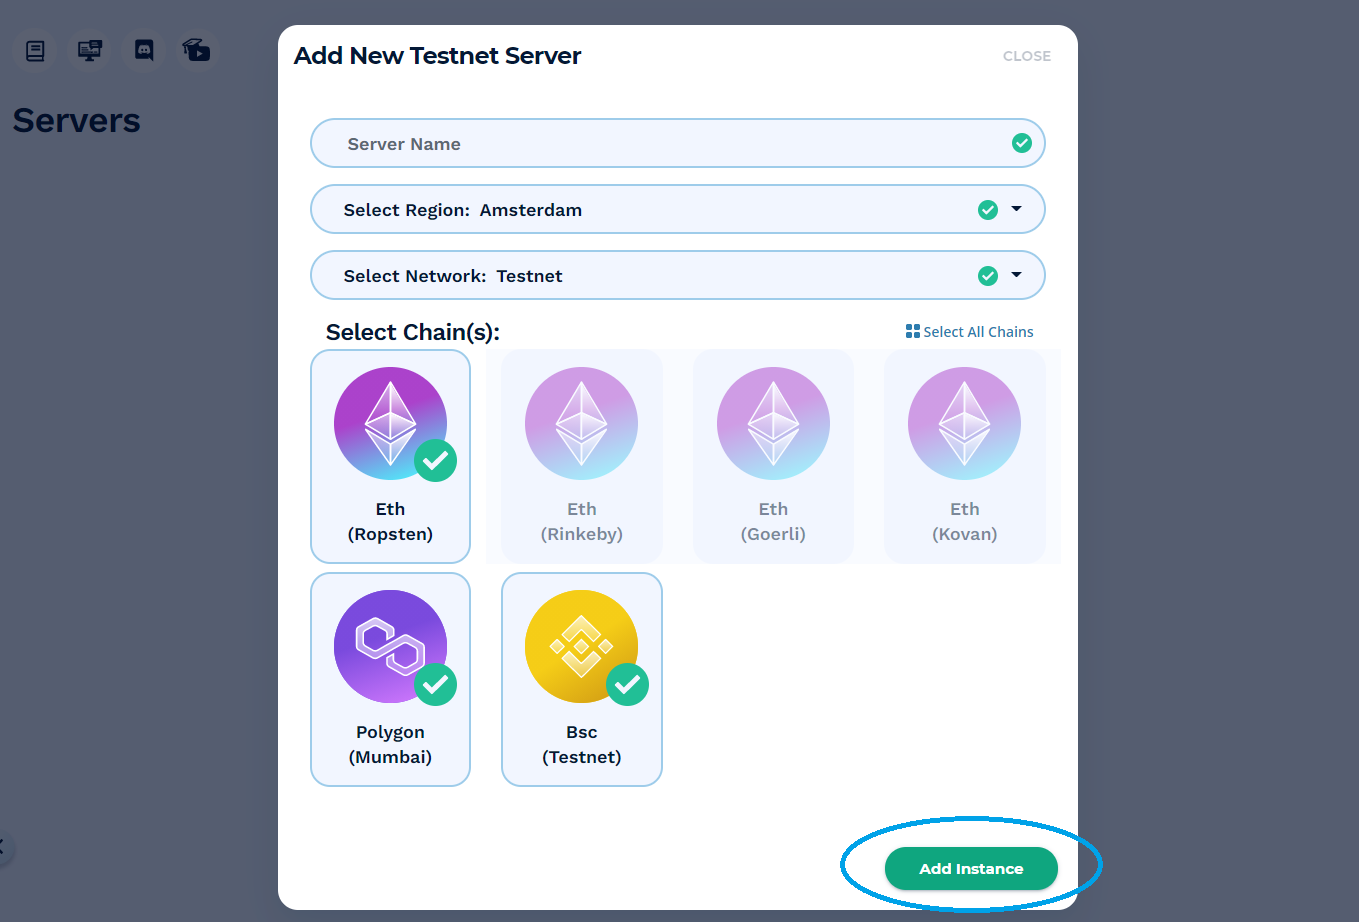
- Create a Moralis Server – Inside your Moralis admin area, go to the “Servers” tab. There, click on “+ Create a new Server” in the top-right corner (see the screenshot below). Next, you need to select the network type that best suits your needs from the drop-down menu that will appear. When working on example projects or testing your dApps, you should focus on the “Testnet Server” (Ethereum testnets) or “Local Devchain Server” options. However, when launching your dApps to the public, you’ll want to select “Mainnet Server”.

Next, you’ll see a pop-up window, which will ask you for your server’s details. These include your server’s name (this can be anything you want), your region, network type, and chain(s). Finally, to spin up your server, click on “Add Instance”:
- Accessing Server Details – Once your server is up and running, you get to access its details (server URL and application ID). For that purpose, you need to click on the “View Details” button next to your server:

You’ll see all the details displayed in a new window:

- Initialize Moralis – This is an essential step to using Moralis’ backend. Thus, make sure to populate the “.env” file after renaming it from “.example.env” to “.env”. Then, just paste your server’s details in the designated spot:

Here’s the video that we’ve been referencing throughout the article:
React Native Web3 – Full React Native Web3 Dev Guide – Summary
We’ve covered a lot of ground in this article. By now, you know what React Native Web3 is and why it is essential for crypto’s mainstream adoption. React Native enables you to develop mobile applications for iOS and Android simultaneously. Moreover, Moralis enables you to create mobile dApps for multiple programmable blockchains. As such, you get to future-proof your development progress and also target a large user base with minimal extra effort. In addition, you now know how to create React Native applications from scratch. However, you’ve also learned that there is a much faster path available – the ultimate Ethereum React Native boilerplate. By cloning this boilerplate, you can have your own mobile dApps ready in minutes.
In case you want to learn more about blockchain development, make sure to visit the Moralis YouTube channel and the Moralis blog. Both of these outlets offer a ton of valuable articles covering various crypto concepts, including educational example projects. For example, some of our latest topics dive into upgradable smart contracts, ERC721 smart contracts, the ultimate Web3 user interface kit, NFT API alternatives, Web3.js vs Ethers.js, Web3 tech stack, how to get an OpenSea API key, and much more. However, if you want to become a blockchain developer markedly quicker, you may want to consider a more professional approach. If so, consider enrolling in Moralis Academy!

