Would you like to build a Web3 multiplayer game using Unity Multiplayer where you can enter a playground to move and trade currency and NFTs? If so, you need to complete the following steps:
- Visit our GitHub page
- Download the GitHub’s repo (*.zip or *.git)
- Open the repo using Unity’s editor
- Set up Unity following the “README.md” file
- Set up the backend by completing the “Using Unity & PlayFab” tutorial
If you already possess some solid development skills, you can visit the repo to get started right away. However, you might need some assistance if you’re more of an aspiring blockchain developer. As such, follow along in this tutorial as we look at how to build a Web3 multiplayer game!
Overview
We all have different preferences when it comes to game types. However, most of us find multiplayer games the most entertaining. With Web3, things get even more thrilling! Although Web3 is still in its infancy, Web3 has already disrupted the gaming industry. Thus, now might be the best time to learn how to build a Web3 multiplayer game. Moreover, it’s now easier than ever to build such games, thanks to tools such as Unity Multiplayer. As far as integrating Web3 functionality, Moralis is the number one option. This ultimate Web3 API provider enables you to fetch on-chain data, implement Web3 authentication, and even interact with smart contracts.
Moving forward, we’ll take a closer look at what Unity Multiplayer is. Then, we’ll also quickly review Moralis’ features. After all, these are the tools we utilized as we made this tutorial on how to build a Web3 multiplayer game. Of course, we’ll also look closely at our example multiplayer Web3 game. Basically, we’ll do a proper demo of our game to ensure you can use it as a concept of what you can build. In fact, you can use our repository to build a game with multiplayer features in minutes. All you’ll need to do is clone our code, complete the initial setup, and enter your Moralis details.
In addition, we’ll also take a look at our web companion dapp, which is a great utility addition to our example multiplayer game. So, if you want to learn how to build a Web3 multiplayer game the easy way, make sure to create your free Moralis account and follow our lead.
What is Unity Multiplayer?
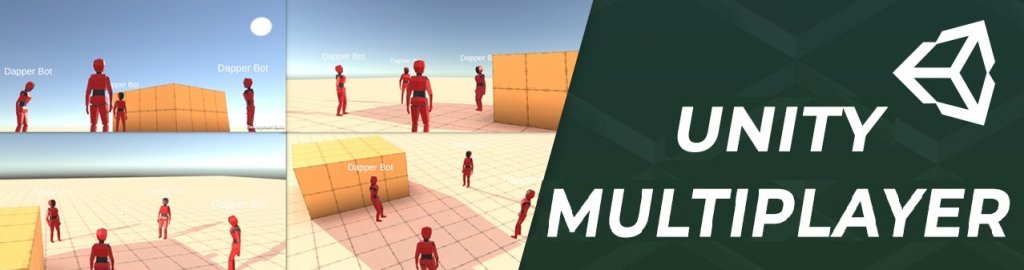
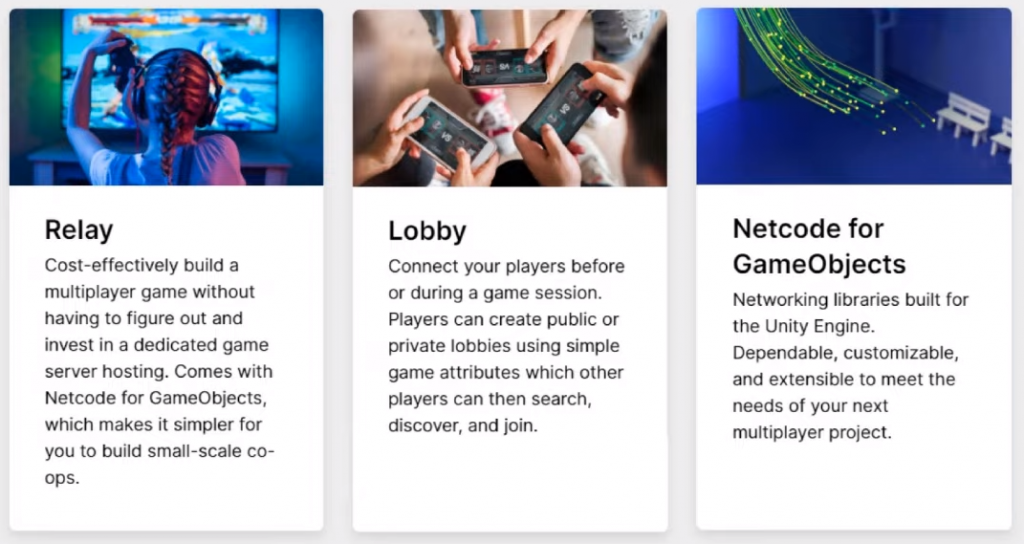
Unity Multiplayer refers to “Unity Multiplayer Networking”, which is Unity’s toolset for multiplayer game development. In 2021, Unity made a serious step forward toward multiplayer networking. That was when they officially pre-released Netcode for GameObjects with an extended feature focusing on moderate pace, small-scale, cooperative games. At the same time, Unity enhanced Unity Transport and added support for DTLS encryption. Furthermore, at that time, the Unity team released a new Network Profiler feature and multiplayer services – Unity Relay and Lobby.
However, it wasn’t until September 20th, 2022, that Unity devs no longer had to rely on third-party tools to support certain multiplayer game types. Since then, developers have had access to Netcode for GameObjects (NGO) 1.0. The latter goes hand in hand with new multiplayer solutions from Unity, including Game Server Hosting (Multiplay) and matchmaker solutions. This upgrade is part of Unity’s goal to contribute to the rise of online games with a series of out-of-the-box solutions. Though, it’s worth pointing out that Unity still offers you to mix and match their solutions with third-party tools to find the best tech stack for your projects.
Note: If you want to learn more about Unity’s Netcode for GameObject and other multiplayer tools, make sure to explore the Unity Multiplayer Networking docs.

Build a Web3 Multiplayer Game Using Unity Multiplayer and Moralis
Before we take a closer look at what it takes to build a Web3 multiplayer game and do a demo of our example game, let’s lay the proper foundation by answering some frequently asked questions:
- What is a multiplayer game? Multiplayer games share an experience with two or more players. As such, multiplayer features include connection and synchronization.
- What is Web3? Web3 is the latest evolution of the internet (evolving from Web2), which incorporates true ownership and monetization features made possible by blockchain technology. Moreover, Web3 introduces decentralization, immutability, and transparency. Some core Web3 functionalities include Web3 authentication, sending assets, fetching assets, interacting with smart contracts, and watching for real-time events.
When it comes to covering multiplayer features, our example game relies on Unity’s multiplayer features. On the other hand, we will use the power of Moralis to add Web3 functionality. After all, Moralis addresses the core Web3 requirements mentioned above and makes Web3 games and dapps (decentralized applications) creation much simpler. It achieves that by simplifying Web3 authentication implementation, communication with smart contracts, and much more. Moreover, Moralis is fully compatible with other leading Web3 tools and services. It also integrates with popular backend legacy systems and programming languages.
With these basics under your belt, you’re ready to take a closer look at our example multiplayer Unity game called “The Playground“.
Build a Web3 Multiplayer Game
You can easily build all sorts of Web3 multiplayer games using the above-presented tools. In The Playground, we ensured that the multiplayer feature matches players together and synchronizes their data. As such, every player can see other players’ character positions, account details, etc. We covered those aspects with Unity. On the other hand, we used Moralis to incorporate ERC-20 and ERC-721 tokens into our game.
Note: There are smart contracts behind every token, including our in-game example assets. However, the creation and deployment of these contracts exceed the purpose of this tutorial. However, you can learn more about it from our previous Unity tutorials on the Moralis YouTube channel and Web3 blog. Also, we won’t go into details about Web3 authentication in this article.
In The Playground, our ERC-20 tokens represent gold coins, while ERC-721 tokens represent NFT awards. This also means that players own their in-game assets. Furthermore, these assets are immutable and can be transferred to other accounts. Players can do that inside the game or outside the game using their Web3 wallets. Nonetheless, since these assets are stored on the blockchain, details about transfers and ownership are fully transparent.
With that said, it’s time to look inside our example Unity multiplayer Web3 game.
The Playground – Demo
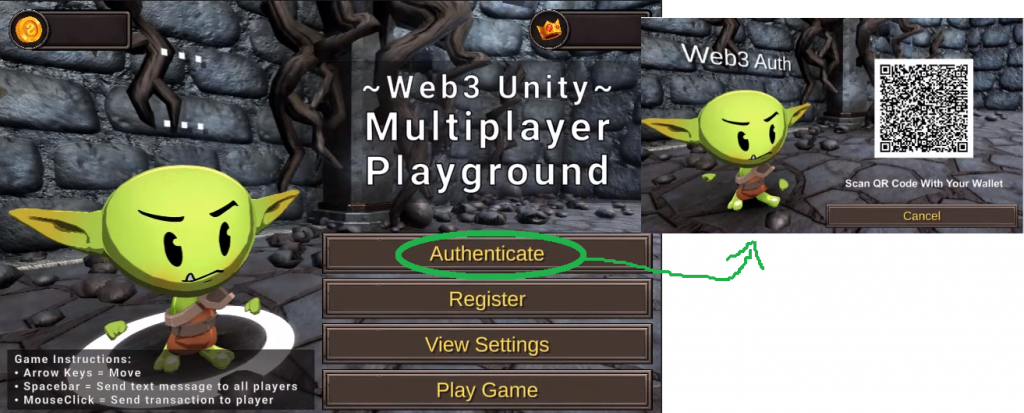
Like most Web3 games and dapps, The Playground starts with Web3 authentication. By clicking on the “Authenticate” button, users can scan a QR code with their favorite mobile wallets:
Users can click on the “Play Game” button to start the game in single-player mode. However, in this article, we’ll focus on multiplayer. Furthermore, we’ll run all player instances on a single desktop. However, the same would work for different PCs connected via LAN or the internet. So, here’s an instance of a player after authenticating via the MetaMask wallet:
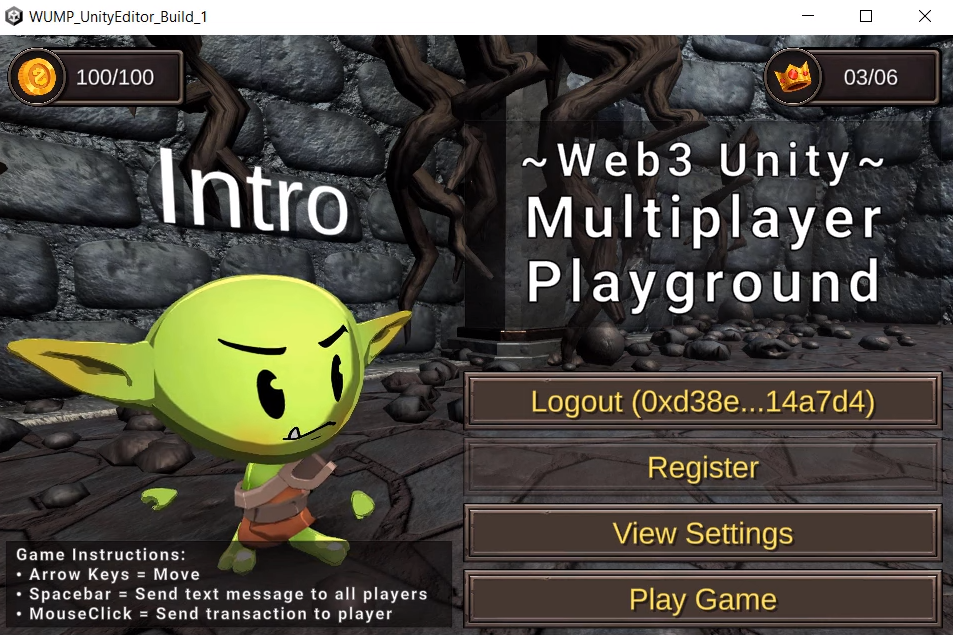
Looking at the above screenshot, you can see the count of gold coins in the top-left corner and the NFT reward count in the top-right corner. There are also game instructions in the bottom-left corner. Nonetheless, you can now see the “Logout” button followed by the example user’s account address in the place where the “Authenticate” button was before. To start a game, we need to click on the “Play Game” button, which displays our example room:
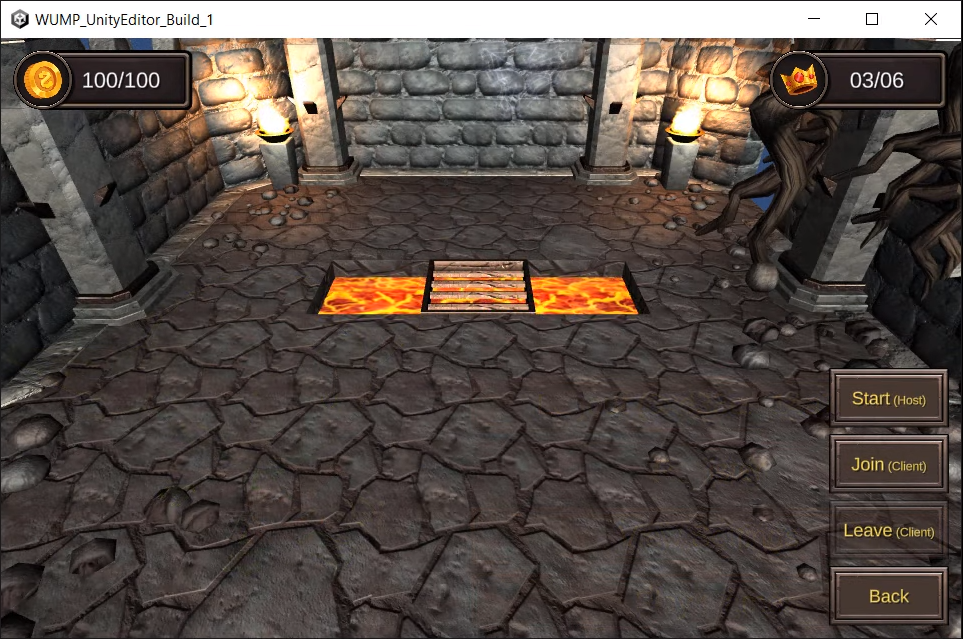
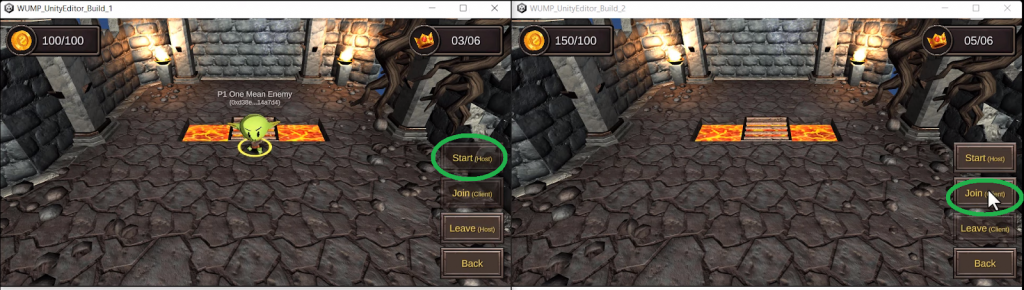
Before our character appears, we need to click on either the “Start” or “Join” buttons. However, since this is the first player, we need to go with the “host” option. Let’s first run several builds to simulate the multiplayer option properly:
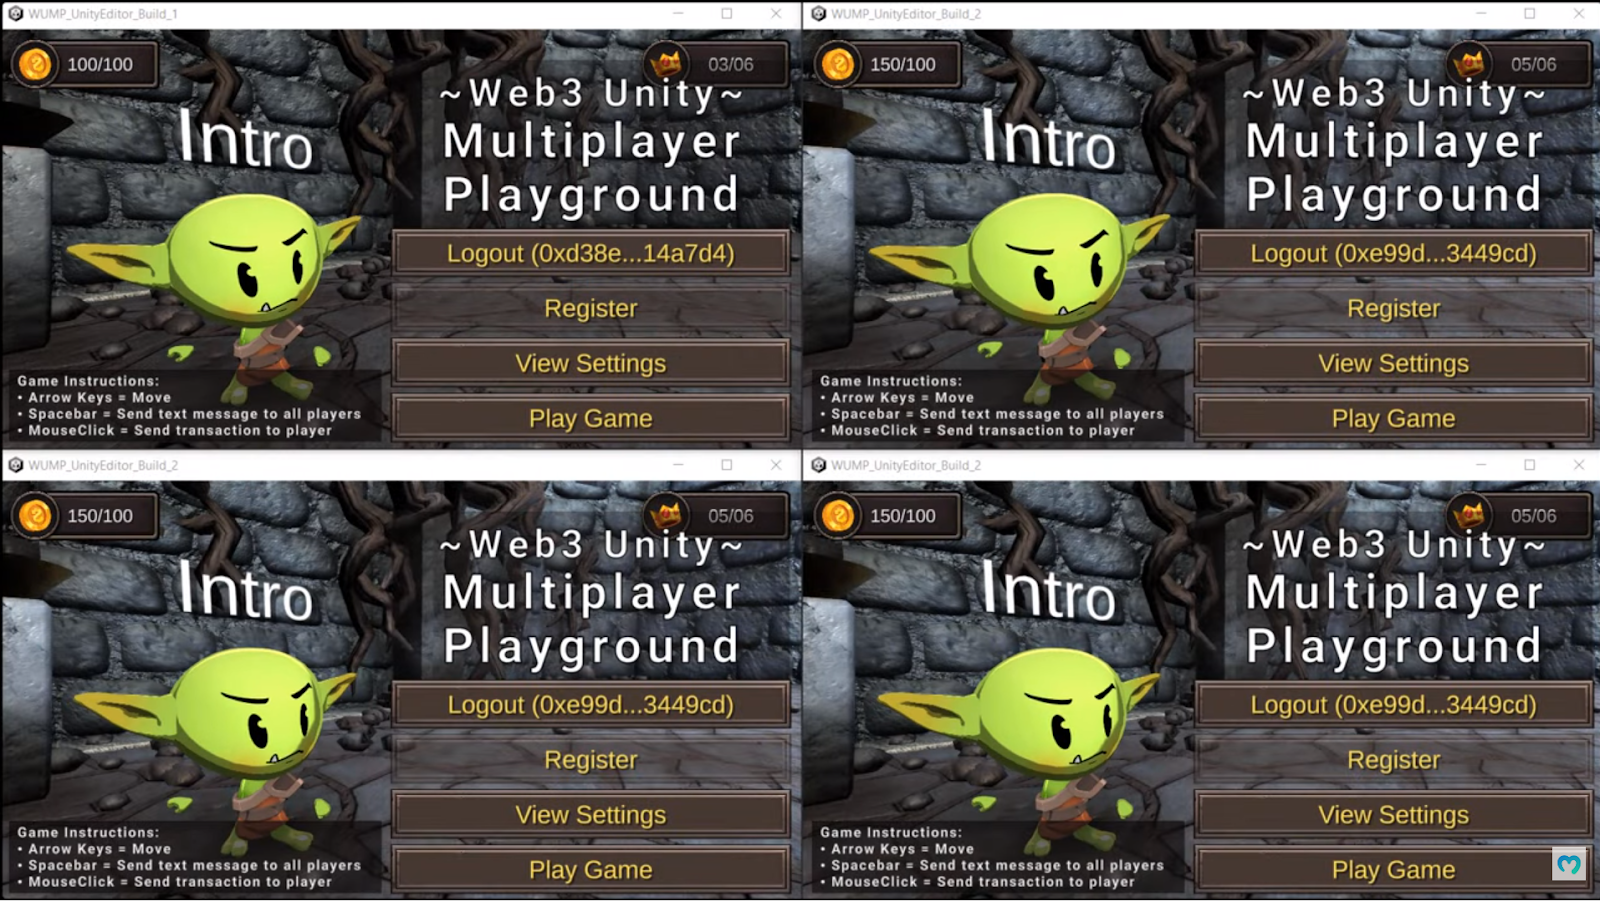
Local Four-Player Demonstration
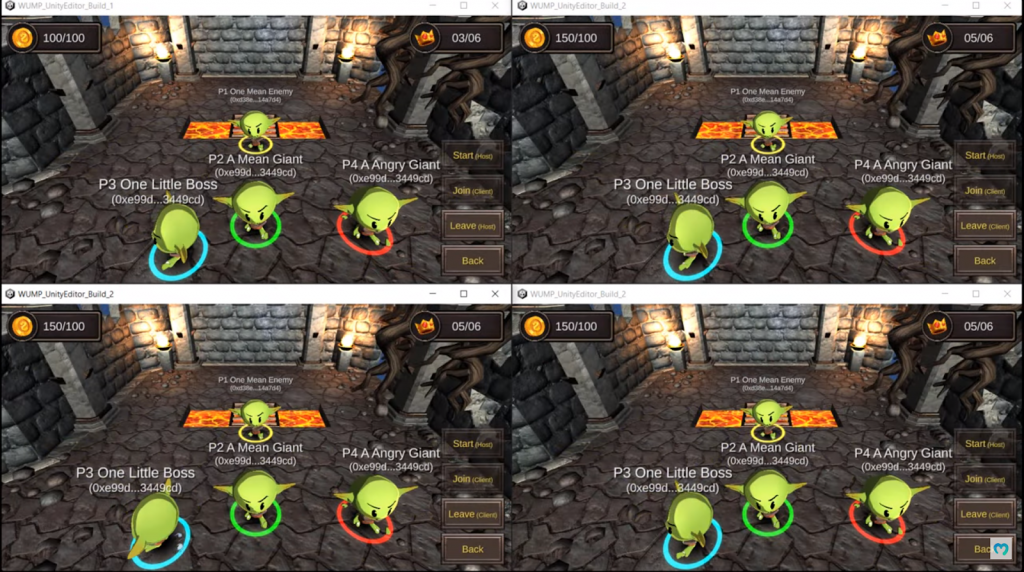
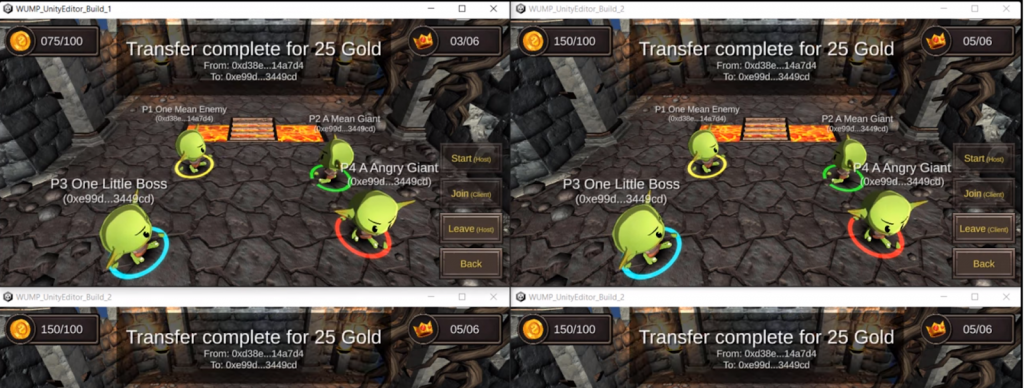
As you can see in the image above, we now have four different players, all authenticated. There’s no limit to how many players can join. However, we cannot display more than four at the same time. If you look closely, you’ll see that aside from the top-left player, we used the same address for the other three players. Hence, any token transactions will reflect on their screens. In reality, every player would have their own wallet.
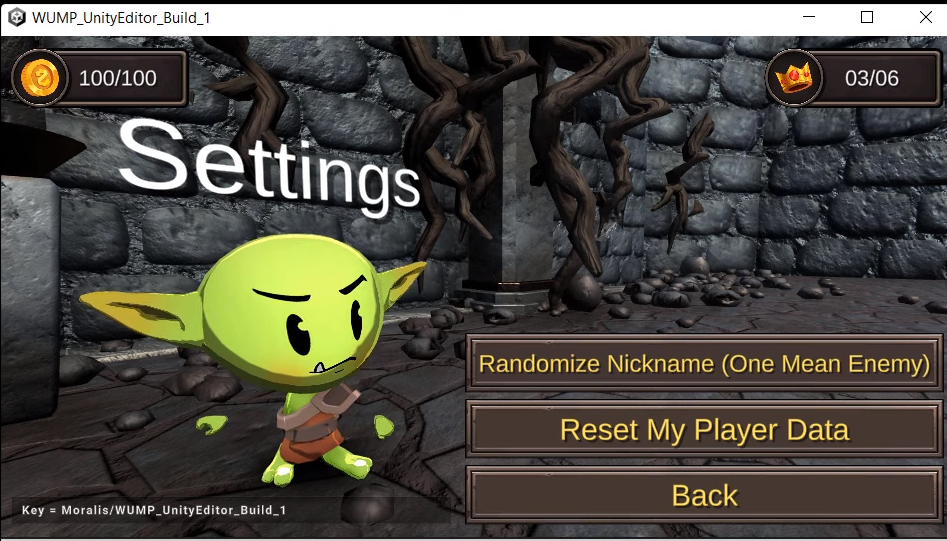
Each player can also randomize their nicknames and reset their player data (to be treated as a new player) via the “View Setting” option:
Furthermore, we hit the “Play Game” button on all four instances. Then, we use the top-right build (P1) player to click on the “Start (Host)” button while hitting the “Join” button on the other three builds (P2, P3, and P4):
As a result, each player now sees all the other three players, including their nicknames and wallet addresses:
By moving any player around, we can test the synchronization (see the video below, starting at 10:11). The physics also works – the characters cannot go into the lava pit, for instance, but they can cross the bridge. Also, players collide properly. Furthermore, any player can hit the “space” button to say hello:
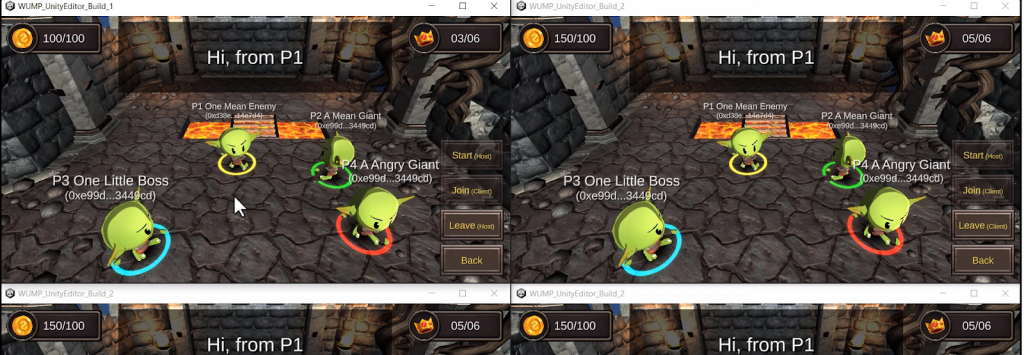
Aside from Web3 authentication, all of the above features are covered by Unity Multiplayer. However, players can also click on other players to transfer either their gold coins (ERC-20) or their NFT rewards (ERC-721).
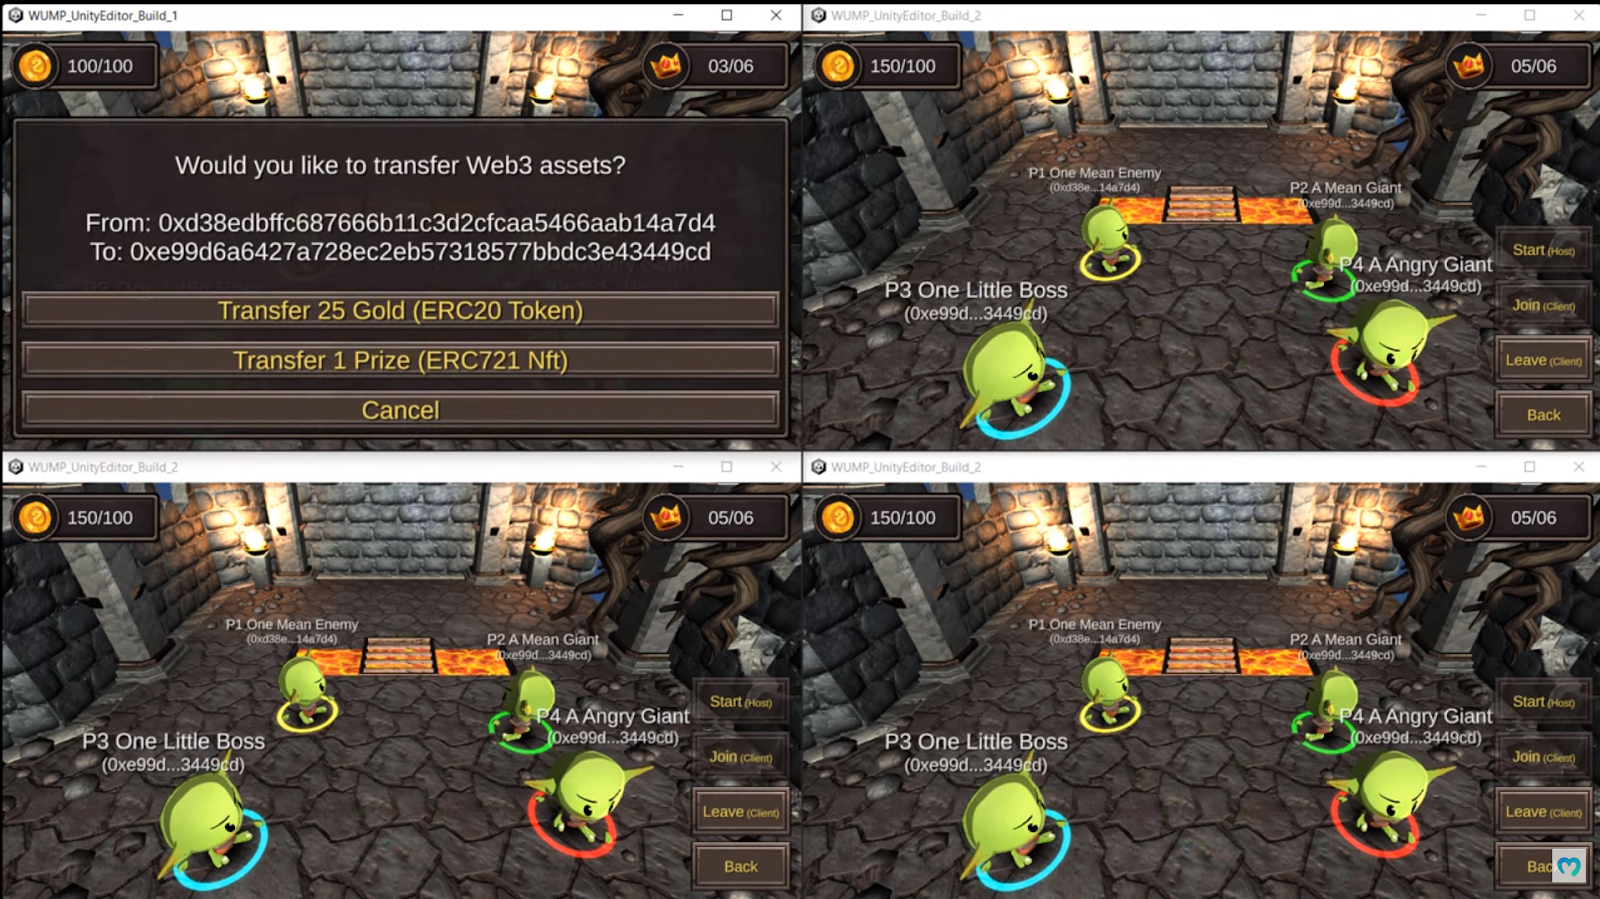
Token Transfers Inside The Playground
So, let’s use the top-left player (P1) to transfer tokens to another player. Remember, they all use the same address; hence, all of them will receive tokens. After clicking on another player, the sender gets to choose which tokens to send. Moreover, the interface also displays the addresses involved in a potential transaction:
Once the player selects which assets to send, the player must confirm the transaction using their wallet (the connected wallet):
The “Waiting For Transaction” message appears after confirming the transaction with the connected wallet:
Finally, after confirming the on-chain transaction, the recipient first receives a message:
Soon after the message arrives, the recipient also receives tokens, which are reflected in the player’s balance (from 150 to 175):

Of course, the same applies when transferring prizes (ERC-721 NFTs).
How to Build a Web3 Multiplayer Game Using Unity
After seeing the demo, you are probably eager to test our example game yourself, right? Fortunately, you can access the code on GitHub and build your own instance of our example Web3 multiplayer game in minutes. Although we outlined the steps at the outset of this article, let’s do a quick overview once again of the steps you need to complete:
- Visit the above GitHub link
- Download the repo (*.zip or *.git)
- Use the Unity editor to open the repo
- Set up Unity following the “README.md” file
- Set up the backend by completing the “Using Unity & PlayFab” tutorial that awaits you in the Moralis docs
Regarding the fifth step, make sure you skip the “.NET” steps in the documentation. Moreover, when adding Azure’s application setting and PlayFab’s functions, use the “Using Unity & PlayFab” tutorial and Visual Studio Code:

Want to Build a Web3 Multiplayer Game Yourself?
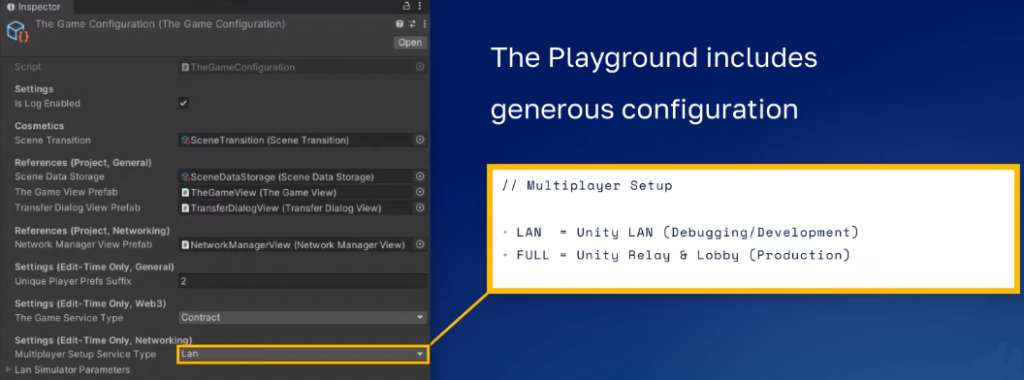
By following the outlined instructions in the previous section, you have the power and information to build your instance of The Playground multiplayer game. Use the video below (starting at 5:11) and learn more about the available options for completing the process. However, make sure to keep in mind that if you want to have such a game ready for production, you must also deploy your smart contracts. The latter will take care of your token minting and transactions. Moreover, while testing the multiplayer features, you’ll probably want to focus on the “Lan” option:
Furthermore, after gaining enough confidence by playing around with The Playground, you’ll probably want to focus on creating your own Web3 multiplayer games. This is when you’ll get to put Unity’s multiplayer features and the power of Moralis to full use. In addition, having a “web companion” dapp can make a huge difference. After all, such dapps enable you to create scoreboards, offer neat dashboards, give access to staff admins, or implement many other administrative purposes. To see our example web companion dapp for The Playground, use the video below, starting at 13:16.
Finally, here’s the video tutorial we’ve been referencing throughout this “build a Web3 multiplayer game” feat:
How to Build a Web3 Multiplayer Game Using Unity Multiplayer – Summary
Thanks to the latest update of Unity’s features regarding multiplayer, you no longer need to rely on third-party tools to cover that aspect of gaming. As such, Unity became an ever more powerful tool. In this article, you also learned that you can take Unity even a step further and use it to build a Web3 multiplayer game. To pull that off, you need Moralis – the ultimate Web3 API provider. The latter provides you with core Web3 features. You just need to copy-paste short snippets of code from the Moralis docs and add them to your backend code. Finally, you saw our example Web3 multiplayer game in action.
At this point, you know what tools to use and the steps to take to build a Web3 multiplayer game. If you are new to Web3 development, we encourage you to start with some other beginner-friendly challenges. For instance, you can use the Moralis documentation to create your first dapp using Unity and PlayFab. Next, use the existing Unity tutorials that you can find on the Moralis YouTube channel and the Moralis blog. Of course, these outlets are also great resources for exploring other blockchain development topics. Some of our latest articles focus on building Ethereum dapps, creating a Web3 Firebase login with MetaMask, creating a decentralized website on Ethereum, building Solana smart contracts, and much more.
In addition to the above free resources, you may also want to consider becoming blockchain certified. The best place to accomplish that is Moralis Academy. If you are into Web3 development, the “Unity Blockchain Game Development 101” course should be your starting point.
