Proficient smart contract developers strive to take contracts to the next level. Part of this includes ways to modify or upgrade a smart contract. However, the concept of “upgradable smart contracts” might be challenging to comprehend even for the experienced one. Thus, keep in mind that upgradable smart contracts definitely don’t fall into the “beginners” category. Nevertheless, this article will be highly useful even if you’re a beginner. So, what are upgradable smart contracts? Follow along in this guide as we’ll explore the fundamentals of upgradable smart contracts and look at how they work.
Moving forward, you will first learn what upgradable smart contracts are and how they function. Then, we’ll take a look at transparent vs upgradeable proxy. In addition, we’ll explain how to make a contract upgradable and address the main limitations of these types of contracts. Nonetheless, you will have a chance to take on an example project. In turn, you’ll have an opportunity to follow our lead and create your own NFT minting dApp (decentralized application). The latter will incorporate a smart contract, which you will be upgrading. Thus, you’ll properly learn how to work with upgradable smart contracts. Along the way, you’ll learn about the ultimate Web3 development platform, Moralis (a.k.a. Firebase for crypto). This excellent tool enables you to easily cover all of your blockchain-related backend needs. As such, make sure to create your Moralis account today.
As mentioned, upgradable smart contracts can be difficult to first understand. So, it’s recommended to learn some basics first. Therefore, before moving forward, we suggest understanding the questions of “how does Web3 work?”, “what is Solidity?” and “what are smart contracts?”.

What are Upgradable Smart Contracts?
You probably know that smart contracts are an essential part of all programmable blockchains (such as on Ethereum). By ensuring that things run according to predefined rules, smart contracts enforce the order. Without smart contracts, there would be no crypto tokens, NFTs, and no dApps. But, what are upgradable smart contracts? Well, first, you need to note that in this case, the word “upgradable” doesn’t mean mutable. One of the basic rules of EVM is that once a contract is deployed, it cannot be changed. Instead, an upgradable smart contract uses a special proxy pattern. The latter involves deploying proxy contracts and implementation contracts (logic contracts):

How do Upgradable Smart Contracts Work?
Looking at the schematic above, you can see that a user interacts with a logic contract via a proxy contract. This is possible thanks to the proxy contract’s ability to store the address of the logic contract. Then, we incorporate an upgrade by deploying a new logic contract. Of course, we also need to update the logic’s contract-related value in the proxy contract to actually implement the upgrade.
There are many proxy patterns available, which can be used to create upgradable contracts. Furthermore, while there are also many types of proxy patterns, most proxy patterns use transparent proxy and UUPS (universal upgradable proxy standard). Fortunately, these two types are also offered at OpenZeppelin, which makes things a whole lot simpler for devs. Moreover, this is also a shortcut that you will learn more about as we’ll take on an example project.
Transparent vs UUPS Proxy
As mentioned above, the transparent and the UUPS proxy patterns are the two most common types. While both types follow the same basic principle (as presented above), they have rather different designs under their hoods. As such, we need to make a quick comparison of them. Here are some main characteristics of each of the two proxy pattern types:
- Transparent Proxy Pattern Type:
- An upgrade is handled by proxy contract.
- Deployment is more expensive.
- It makes things easy to maintain.
- UUPS Proxy Pattern Type:
- An upgrade is handled by an implementation contract. This also means that you need to implement the upgrade functionality into the implementation contract. Otherwise, you will not be able to upgrade your smart contracts.
- Deployment is cheaper.
- It makes maintenance more challenging.

How to Make a Smart Contract Upgradable?
At this point, you know what upgradable contracts are, how they work, and what the two main proxy pattern types are. As such, you are ready to learn how to make a contract upgradable. Moreover, as mentioned above, we don’t need to start from scratch. Instead, we can use an OpenZeppelin implementation. Thus, we don’t need to build the proxy patterns ourselves. With that in mind, here are the steps that we must complete to make a contract upgradable:
- First, we need to inherit an initializable contract. This is done with a simple line of code:
contract ExampleContractName is initializable {}
By default, the above line of code is for the transparent proxy pattern. However, when using the UUPS proxy pattern, we need to add “UUPSUpgradable”. As such, this is the line of code to use in those cases:
contract ExampleContractName is initializable, UUPSUpgradable {}
- Next, we need to change the constructor to the initializer. This means we go from “constructor () {}” to “function initialize() public initializer {}”. Also, note that the name of the function doesn’t have to be “initialize”. However, the “initializer {}” part is essential.
- Then, we need to change all OpenZeppelin contract libraries to their upgradable versions. In turn, we ensure that our upgradable smart contracts are using upgraded libraries. Here are some examples:

- Moving forward, we need to call the “_init” functions of upgradable contracts in our initialize function. Here’s an example:
function initialize() initializer public {
__ERC1155_init(“”);
__Ownable_init();
__UUPSUpgradeable_init();
}
- Finally, we need to change “msg.sender” to “_msgSender()”. This will enable us to work with users’ wallet addresses instead of proxy addresses.
The Main Limitation of Upgradable Smart Contracts
Before we take on our example project, let’s also address the main limitation of upgradable smart contracts. The most important aspect to consider is storage collision:

Looking at the image above, you can see that there should be no new variables on top (nor in the middle of old variables) in the new implementation contract version. However, if you place new variables at the bottom, you avoid storage collisions.
Upgradable Smart Contracts in Action – An Example Project
As mentioned, you’ll now have a chance to use the above-obtained knowledge about upgradable smart contracts. Following our instructions, you will easily create an NFT minting dApp. Of course, aside from using OpenZeppelin, we will also heavily rely on Moralis. Why? Well, it makes things a whole lot simpler and faster. This is especially true when we combine the power of Moralis with the most practical Ethereum dApp boilerplate. This ultimate Web3 boilerplate enables us to have fully functional dApps with a clean UI up and running in minutes. Of course, both of these tools require an initial setup. Thus, let’s start with that. As such, we will show you how to create a Moralis server, initialize the Moralis SDK, and cover the initial setup for the Ethereum dApp boilerplate.
Moralis Setup
Whether you want to build dApps from scratch or use our Web3 boilerplate, you need to start with a simple Moralis setup. To complete the initial Moralis setup, follow these steps:
- Create Your Free Moralis Account – By clicking on the link to the left, you’ll land on the signup page. There, enter your email, create your password, and confirm the account creation by clicking on the confirmation link (check your email inbox). On the other hand, in case you already have an active Moralis account, simply log in.
- Create a Moralis Server – Within your Moralis admin area, go to the “Servers” tab. Next, click on “+ Create a new Server” (top-right corner). Then, you’ll see a drop-down menu offering different server types (see the screenshot below). Make sure to select the network type that best suits your needs. When working on example projects or testing your dApps, focus on the “Testnet Server” (Ethereum testnets) or “Local Devchain Server” options. However, once you want to make your dApp available to public users, select “Mainnet Server”.

Moving forward, you’ll see a pop-up window asking you to enter your server’s name (this can be anything you want), then select your region, network type, and chain(s). To finally spin up your server, click on the “Add Instance” button:

- Access Server Details – After creating your server, you get to access its details (server URL and application ID) by clicking on the “View Details” button:

You should now see your server’s details in a new window. Moreover, you can simply copy your server’s URL and your application ID. For extra conveniences, there are copy icons on the right-hand side of each detail:

Initialize Moralis
Note: Skip this step for now. You will be instructed when to return and complete it.
- Initialize Moralis – Once you get your coding files ready, you initialize Moralis and its SDK by populating the relevant file. When using the boilerplate, you use the “.env” file for that purpose. Hence, just paste your server’s details in the designated spot:

Ethereum Boilerplate Setup
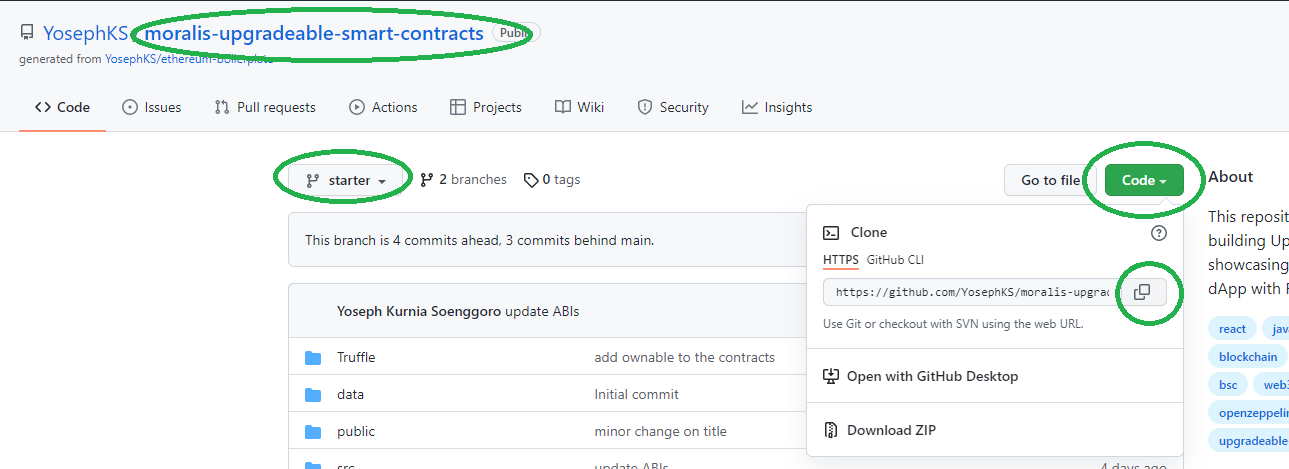
For the sake of this example project, we will be using the ultimate Web3 boilerplate. This will noticeably simplify and speed things up for us. As a matter of fact, we recommend you always use this boilerplate when it is not necessary to create a unique UI. Moreover, this boilerplate is publicly available on GitHub (just use Google and type “Ethereum boilerplate” in the search bar). However, we decided to make things even simpler for you by offering you access to our finished code (“moralis-upgradeable-smart-contracts”). Though, in order for you to do some actual coding, we recommend you start with our starter code, which is essentially just a slightly tweaked Ethereum boilerplate. By cloning the starter code or the finished version, you will easily follow along with the code walkthrough herein.
Ethereum Boilerplate Setup – Step-by-Step Instructions
Here are the steps you need to complete to use our modified boilerplate:
- Start by clicking on the “starter code” link above to access the code at GitHub.
- Then, click on the “Code” button and then copy the address by clicking on the “copy” icon:
- Next, clone the above-copied code address using your code editor’s terminal. We normally use Visual Studio Code (VSC); however, feel free to go with your preference. This is the command line you need to use:
git clone [paste the copied HTTPS address here]
- Now, it’s time to install all dependencies. As such, we use VSC’s terminal. These are the command lines we need to enter:
- cd moralis-upgradeable-smart-contracts
- yarn install
Note: Instead of using “yarn”, you may also use the “npm” package manager.
- Then, rename the “.env.example” file into “.env”. This also means you are ready to complete the final step (step four) from the previous section. As such, populate your “.env” file with your server’s details.
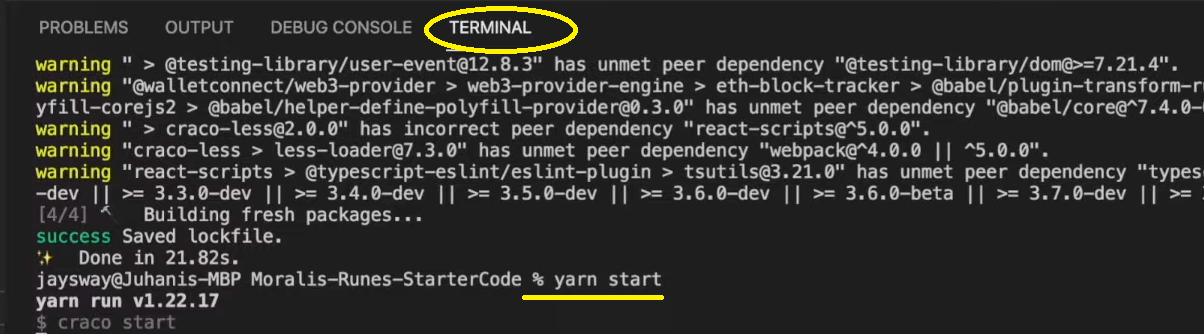
- With the above steps completed, you are ready to run your app. Thus, just paste or type “yarn start” into VSC’s terminal:
Once you complete the above setup, you also need to take care of a simple Truffle setup. For that purpose, make sure to watch the video below starting at 20:25.
Using Upgradable Smart Contracts – Web3 App Preview and Code Walkthrough
With the above setup completed, you are ready to roll up your sleeves and create your own version of an NFT minting dApp. To do so, follow along in the detailed instructions provided in the video tutorial below (starting at 23:32). There, a Moralis expert will primarily focus on smart contracts and demonstrate how to ensure that they are, in fact, upgradable. Moreover, you’ll also get to upgrade your contract yourself. In addition, he will show you how to use OpenZeppelin and Etherscan.
Furthermore, since creating dApps is a lot simpler if you know what are you actually creating, here’s our example dApp preview:

As you can see, our dApp looks pretty similar to the boilerplate dApp. This is also why the “authentication” button and the “NFTs” section demand no extra work. Thus, the video tutorial below mainly focuses on the “NFT Minter” section.
Here’s the video tutorial we’ve been referencing throughout the article:
What are Upgradable Smart Contracts? Full Guide – Summary
By now, you know what upgradable smart contracts are and how to create them. You should also be aware of the two main proxy pattern types and their key differences. Furthermore, the key limitation of upgradable contracts should also no longer be a stranger. Moreover, we hope you’ve taken on the above-presented example project. As a result, you should’ve learned how to set up Moralis properly and how to speed up your dApp development using the Ethereum boilerplate. With these powerful tools on your side, your future blockchain development will be a lot simpler.
If you want to continue your free crypto education, the Moralis YouTube channel and the Moralis blog are the places to be. Both of these outlets offer simple explanations of various blockchain aspects and countless example projects. For instance, some of our latest topics show you how to get an OpenSea API key in 2022, the ultimate Web3 tech stack, how to create a great dApp UI, how to build a Web3 login fast using Web3 authentication tools, details about gasless transactions, NFT API alternatives, Web3.js vs Ethers.js comparison, and much more.
On the other hand, you might want to go full-time crypto as soon as possible. If that’s the case, you definitely need to consider enrolling in Moralis Academy. By doing so, you will get access to professional courses, an advancing and supportive community, and expert mentorship. All of which are essential assets if you want to become a blockchain developer in 2022.