Are you in need of testnet tokens for the Oasis network? If so, then you are exactly where you need to be! In this tutorial, we will show you how to use an Oasis testnet faucet to get funds in three straightforward steps:
- Set Up a Web3 Wallet – Set up and download an Oasis-compatible Web3 wallet (we use MetaMask and Oasis Wallet throughout this tutorial).
- Add an Oasis Testnet – Depending on your development needs, add one of Oasis’ testnets to your Web3 wallet. We will mainly focus on the Oasis Emerald testnet, and you can find the network details for this option below:
- Network Name: Oasis Emerald Testnet
- New RPC URL: https://testnet.emerald.oasis.dev
- Chain ID: 42261
- Currency Symbol: TEST
- Block Explorer URL (Optional): https://testnet.explorer.emerald.oasis.dev
- Get Oasis Testnet Tokens Using a Faucet – Visit the Moralis testnet faucets page by clicking on the ”Get Testnet Funds” button above. Scroll down and hit ”Try Now” for the ”Oasis Network Testnet Faucet” alternative:

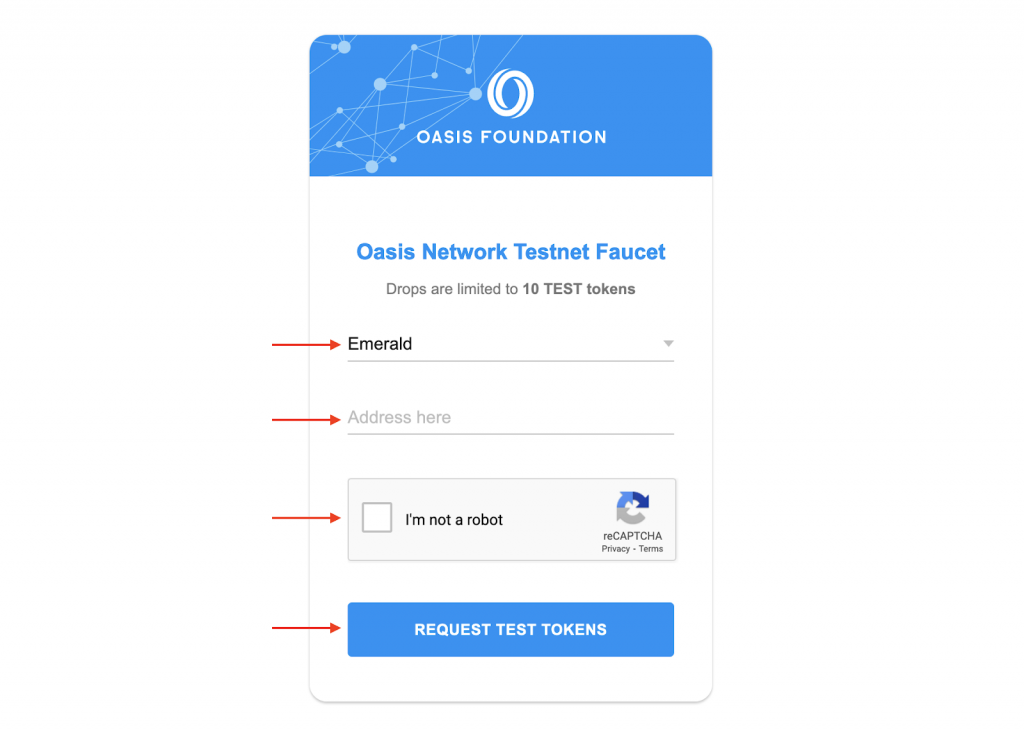
Select a testnet, input your wallet address, complete the captcha, and hit the request button:
It does not have to be more difficult than that to get Oasis testnet tokens using a crypto faucet. It is now up to you to be creative and start building unique decentralized applications (dapps) and other Web3 projects for the Oasis network!
Also, if you are interested in blockchain app development, it is definitely worth checking out the various Web3 APIs from Moralis. By registering with Moralis, you gain immediate access to a number of excellent enterprise blockchain solutions and can start leveraging the full power of blockchain technology today!
Overview
In this article, we will show you how to get testnet funds using an Oasis faucet in three steps:
- Setting Up an Oasis-Compatible Web3 Wallet
- Adding an Oasis Testnet
- Using the Oasis Testnet Faucet
By following the aforementioned steps, you will be able to get funds using an Oasis testnet faucet in no time! If this sounds exciting and you are eager to get going, you can jump straight into the tutorial by clicking here.
In addition to a comprehensive tutorial on how to use an Oasis testnet faucet, the article explores the Oasis blockchain in further detail. So, if you are unfamiliar with this network, we recommend you start by checking out the ”Exploring the Oasis Network and Faucets” section below the walkthrough!
What’s more, if you are serious about getting into Oasis development, make sure you check out additional blockchain development resources provided by Moralis. For instance, learn about the best Ethereum price API, enabling you to effortlessly get real-time token data across all major blockchain networks!
If you want to access these blockchain development tools, remember to sign up with Moralis now to leverage the full power of Web3 technology!
Oasis Testnet Faucet – How to Get Testnet Funds for the Oasis Network
In the following subsections, we will demonstrate how to get funds using an Oasis testnet faucet in three straightforward steps. If you have worked with Oasis development, you know that the network features multiple testnets. Since we cannot cover all of them, we will primarily focus on the Oasis Emerald ParaTime testnet. However, it does not matter what network you want to get tokens for; the process remains the same, with minor differences.
But to clear up any potential confusion, the third step is followed by a brief walkthrough of how to get testnet ROSE (Oasis’ native currency) tokens for the Consensus layer. We are also covering this network, as you need an Oasis address to acquire these tokens, but more on that later.
Remember that if you are unfamiliar with Oasis or need to refreshen your memory, you can scroll down and read more about the network below the tutorial. Otherwise, join us as we jump straight into the first step to show you how to set up an Oasis-compatible Web3 wallet!
Step 1: Setting Up an Oasis-Compatible Wallet
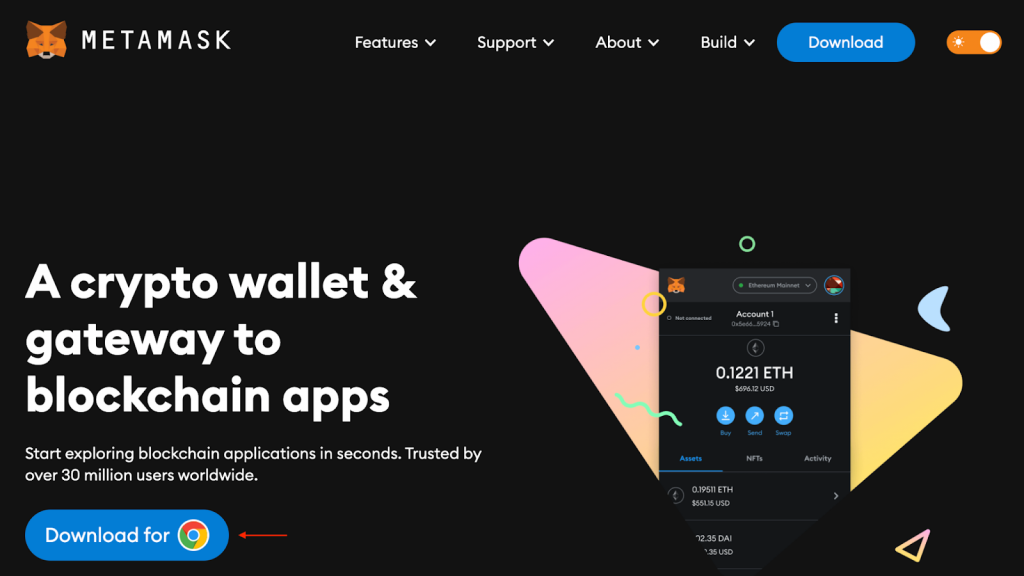
This article’s initial step will show you how to set up an Oasis-compatible Web3 wallet. More specifically, we will be using MetaMask throughout this Oasis testnet faucet tutorial. As such, the first thing you need to do is head on over to “metamask.io” and click on ”Download”:
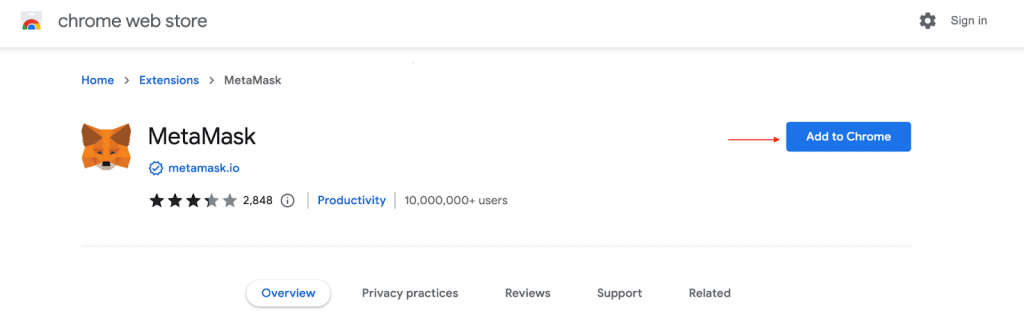
Clicking this button takes you to the following page, and you can proceed to add the MetaMask browser extension:
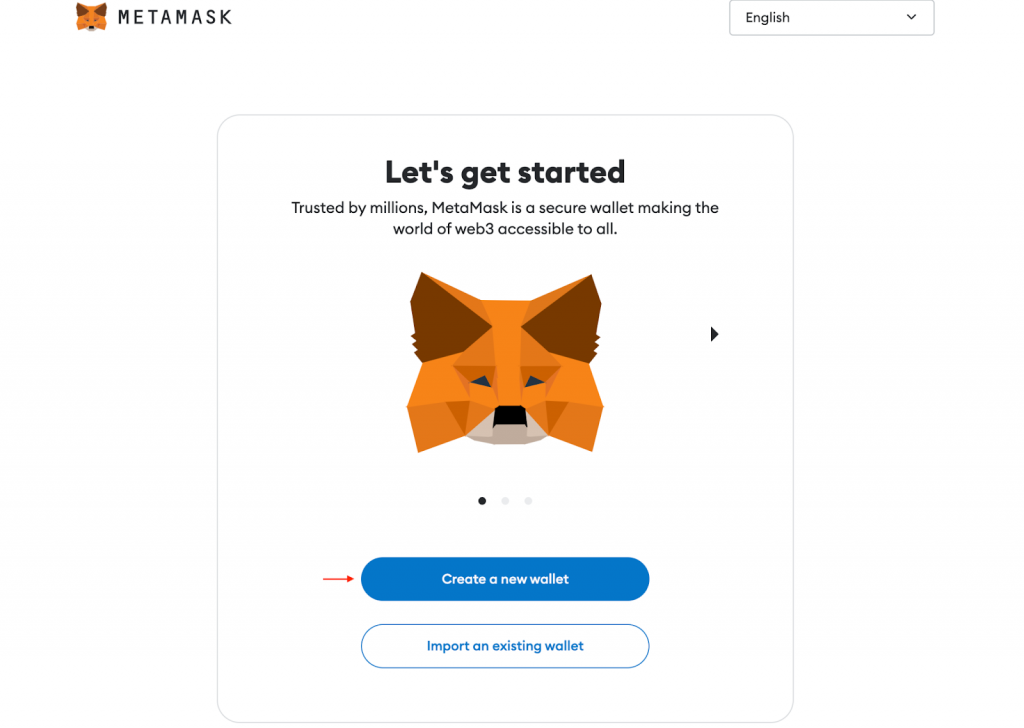
Once you add the extension, you will be redirected to the page below where you can set up an account by clicking on ”Create a new wallet”:
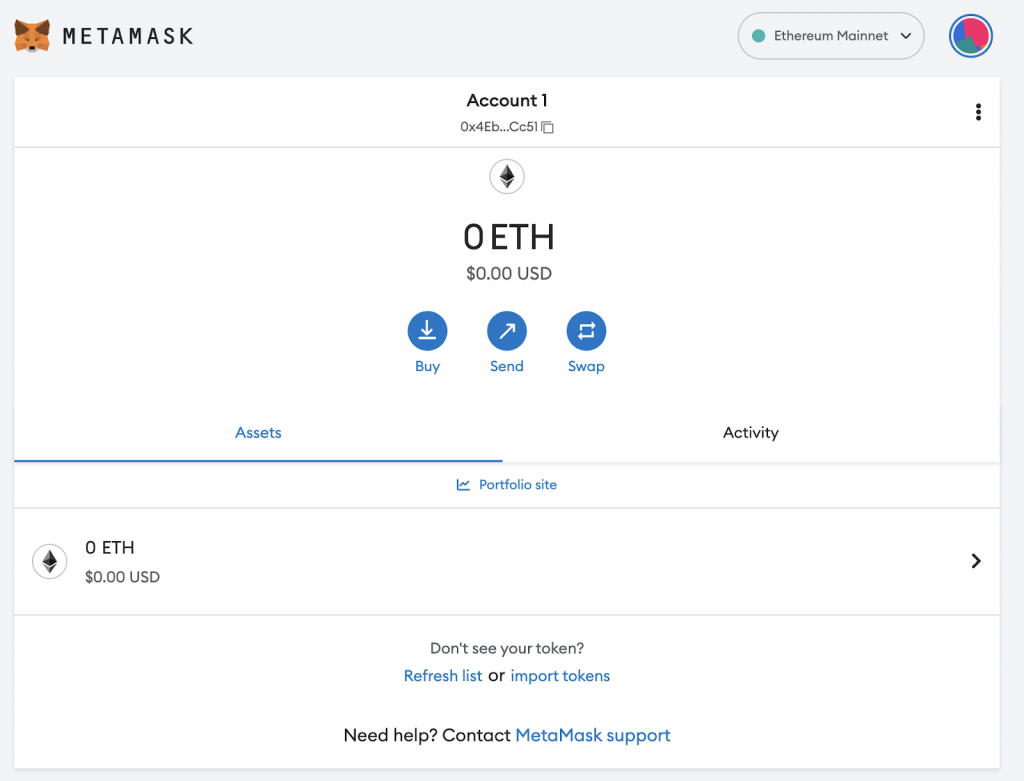
Next, when you’ve set up your account, your wallet will now look something like this:
Step 2: Adding the Oasis Emerald Testnet
With a MetaMask account at hand, the next step is adding the Oasis Emerald testnet to your wallet. To do so, open your MetaMask wallet, click on the ”Networks” drop-down menu at the top, followed by ”Add network”:
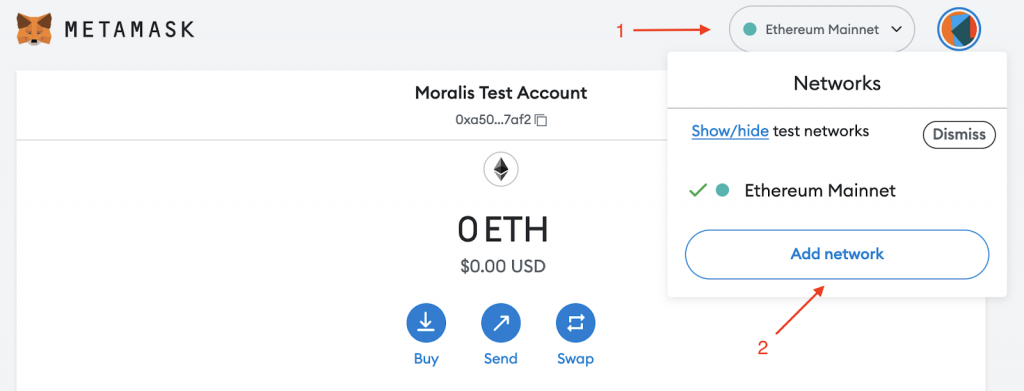
Next, select the ”Add a network manually” option at the bottom:
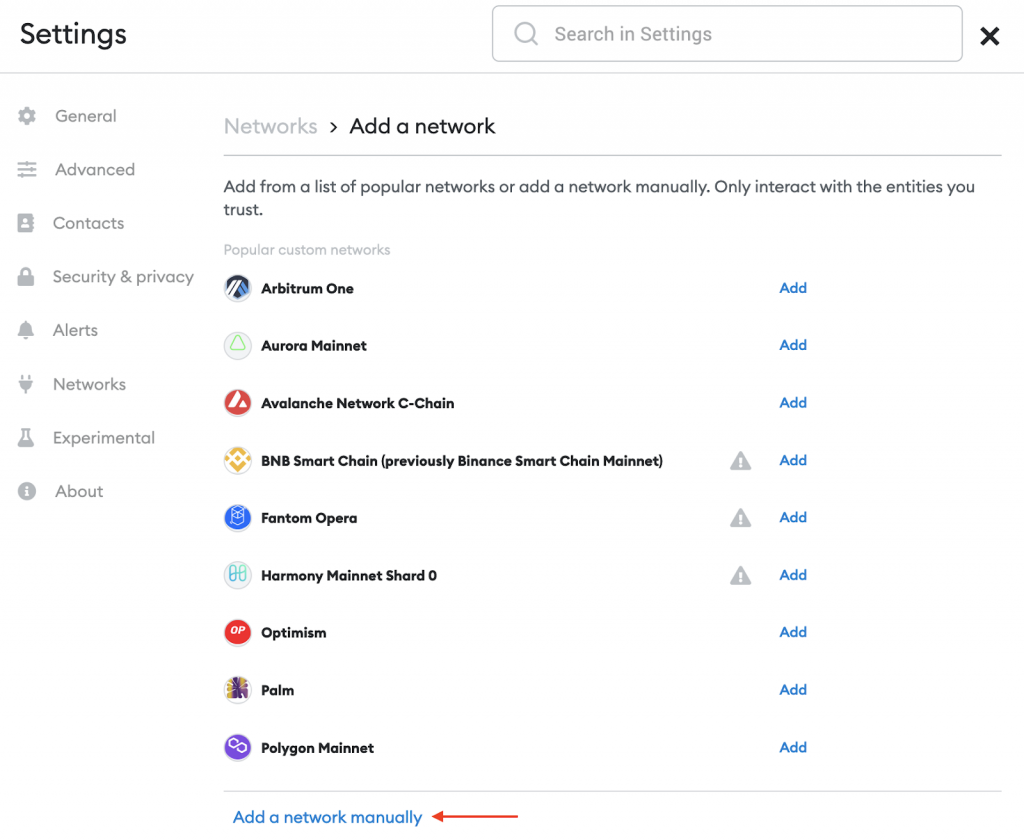
From there, you need to add the network name, an RPC URL, the chain ID, the currency symbol, and a block explorer URL:

You can find the correct parameters for the Oasis Emerald testnet down below:
- Network Name: Oasis Emerald Testnet
- New RPC URL: https://testnet.emerald.oasis.dev
- Chain ID: 42261
- Currency Symbol: TEST
- Block Explorer URL (Optional): https://testnet.explorer.emerald.oasis.dev
Once you input these parameters and hit ”Save”, you will have added the Oasis Emerald testnet to your MetaMask wallet:
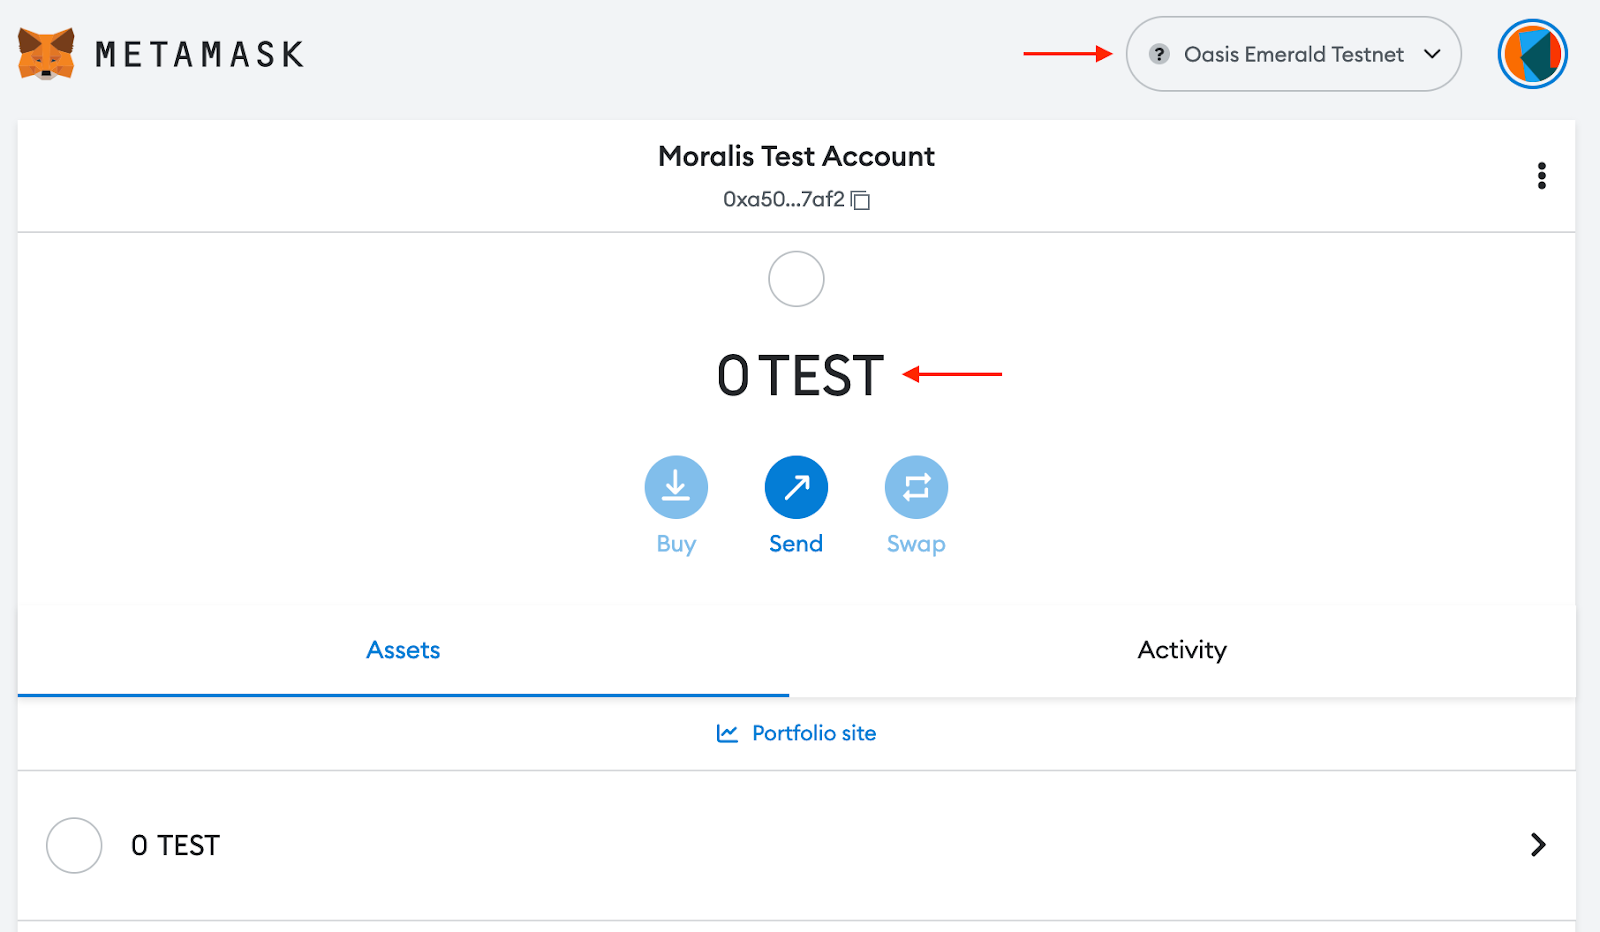
As you can see from the print screen above, we currently have zero testnet tokens, which takes us to the final step. In the next section, we will use the Oasis testnet faucet to get funds in no time!
Step 3: Using the Oasis Testnet Faucet to Get Funds
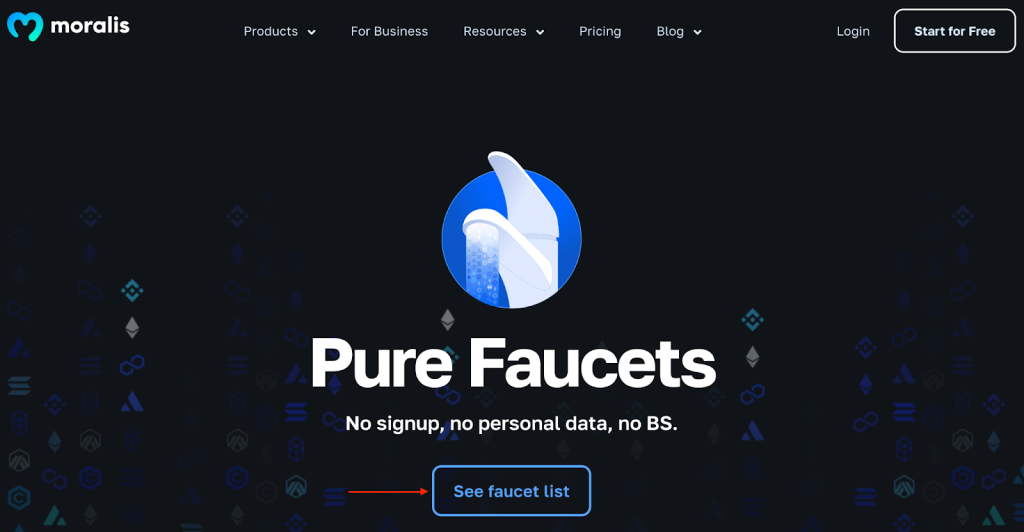
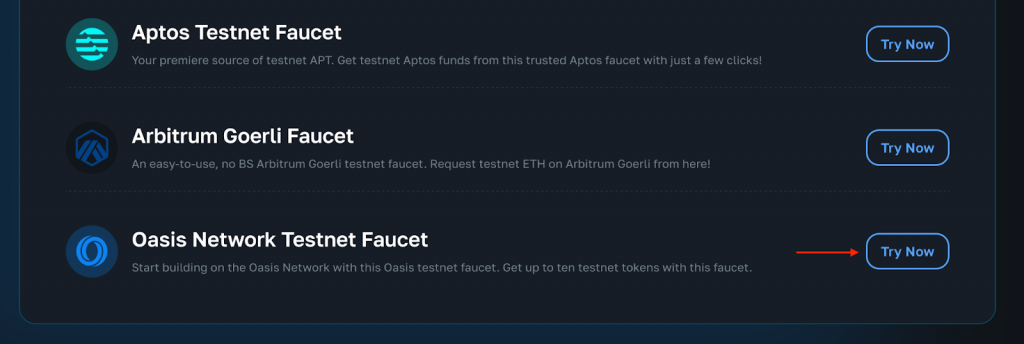
To begin with, you need to launch the Oasis testnet faucet. To do so, visit the Moralis testnet faucets page by clicking on the “Get Testnet Funds” button at the top of this article. Once on that page, click on the ”See faucet list” button:
From there, scroll down to the ”Oasis Network Testnet Faucet” option and click on ”Try Now”:
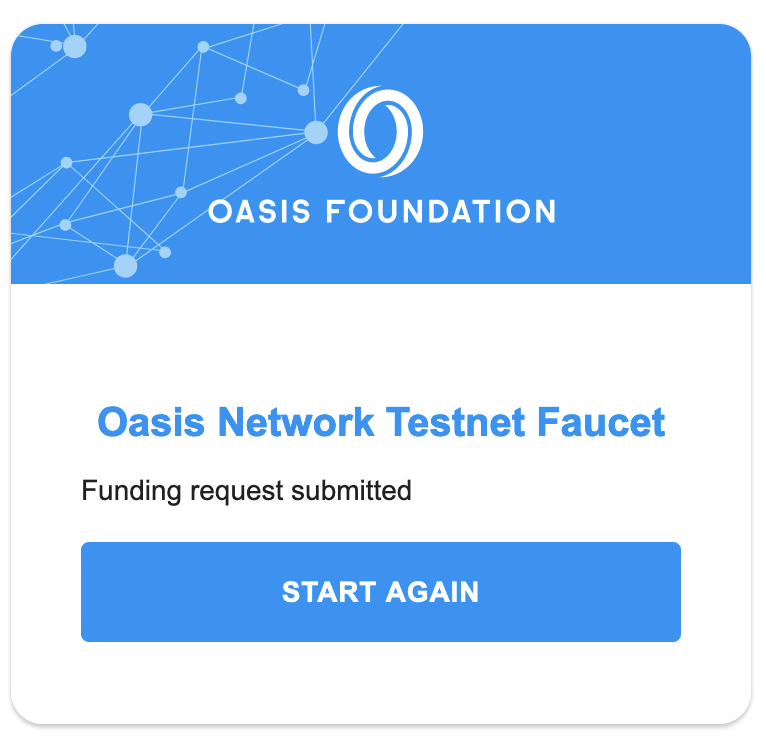
Clicking on ”Try Now” opens the Oasis testnet faucet in a new tab. Next, you need to select the ”Emerald” alternative, input your MetaMask wallet address, complete the captcha, and click on ”REQUEST TEST TOKENS”:

Once you click on this button, you will be redirected to the following page, where you can see that your funding request was submitted:
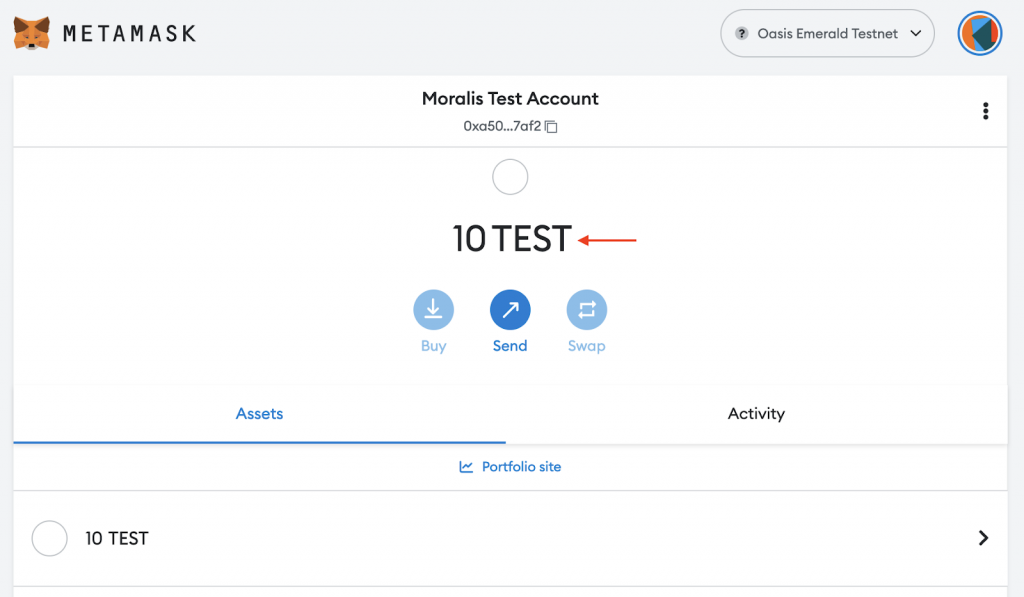
What’s more, you should now have a balance of ten ”TEST” tokens in your MetaMask wallet:
That’s it; congratulations, you have just used the Oasis testnet faucet to get funds! With testnet tokens at your disposal, you can begin building dapps and smart contracts for the Oasis Emerald ParaTime network!
If you are interested in smart contract development, you should know that security is a pressing issue. To learn more about this, check out our tutorial on smart contract security!
How to Get Consensus Testnet Tokens Using an Oasis Faucet
In the three-step tutorial above, we illustrated how to get tokens for the Emerald testnet, which is one of Oasis’ ParaTimes. However, if you want to use the Oasis faucet to get testnet tokens for the Oasis Consensus layer, you need an Oasis address. This means that the process somewhat differs. As such, let us briefly break it down in this section!
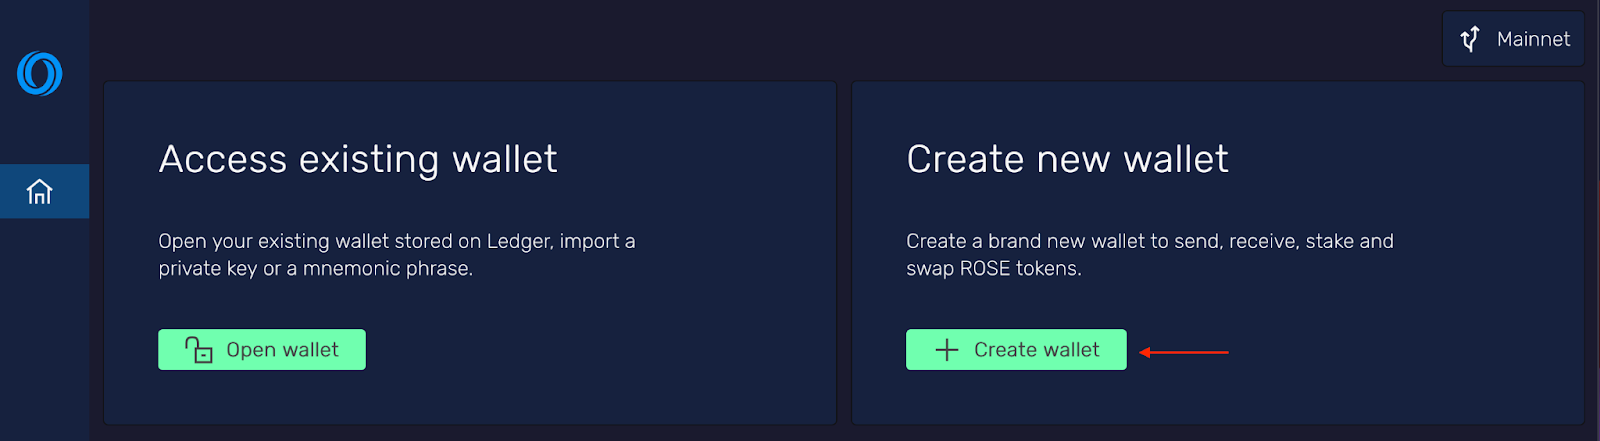
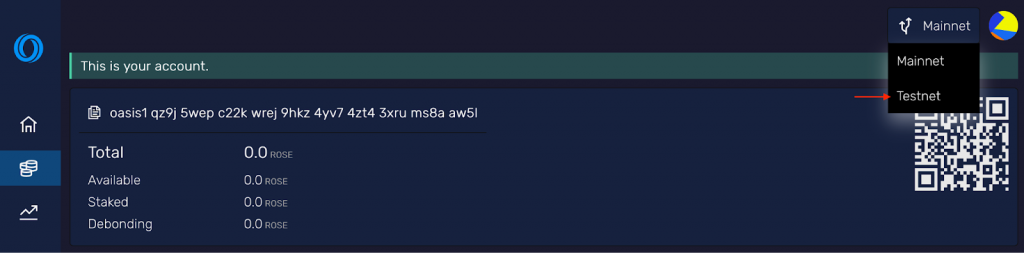
To get an Oasis address, you need to use another Web3 wallet, and our option for this tutorial will be Oasis Wallet. So, start by heading on over to “https://wallet.oasisprotocol.org/” and create a new wallet by clicking on ”+ Create wallet”:
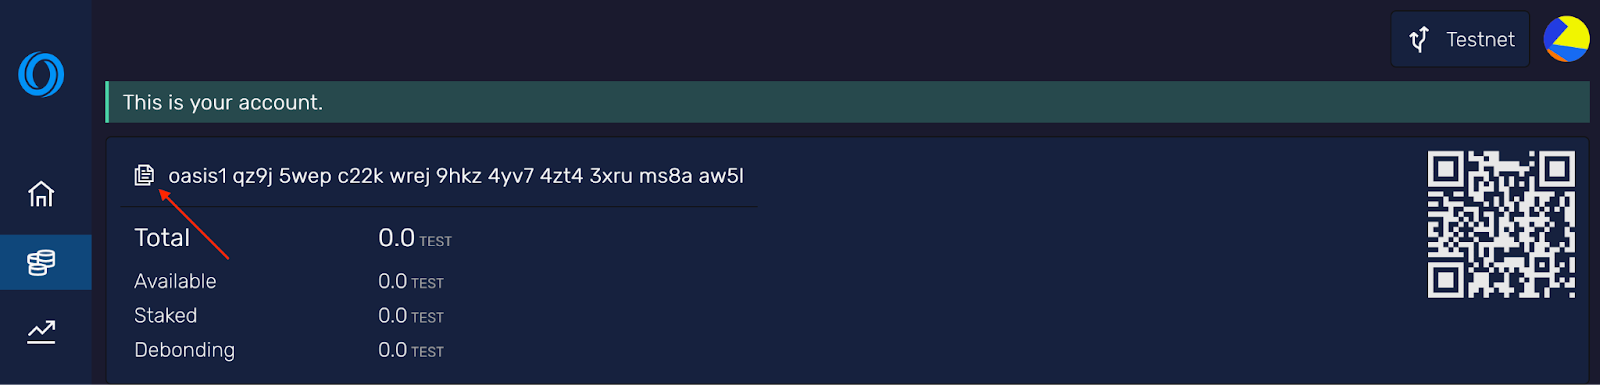
Once you are done setting up your wallet, swap to the testnet using the network drop-down menu at the top right:
From there, go ahead and copy your Oasis Wallet address:
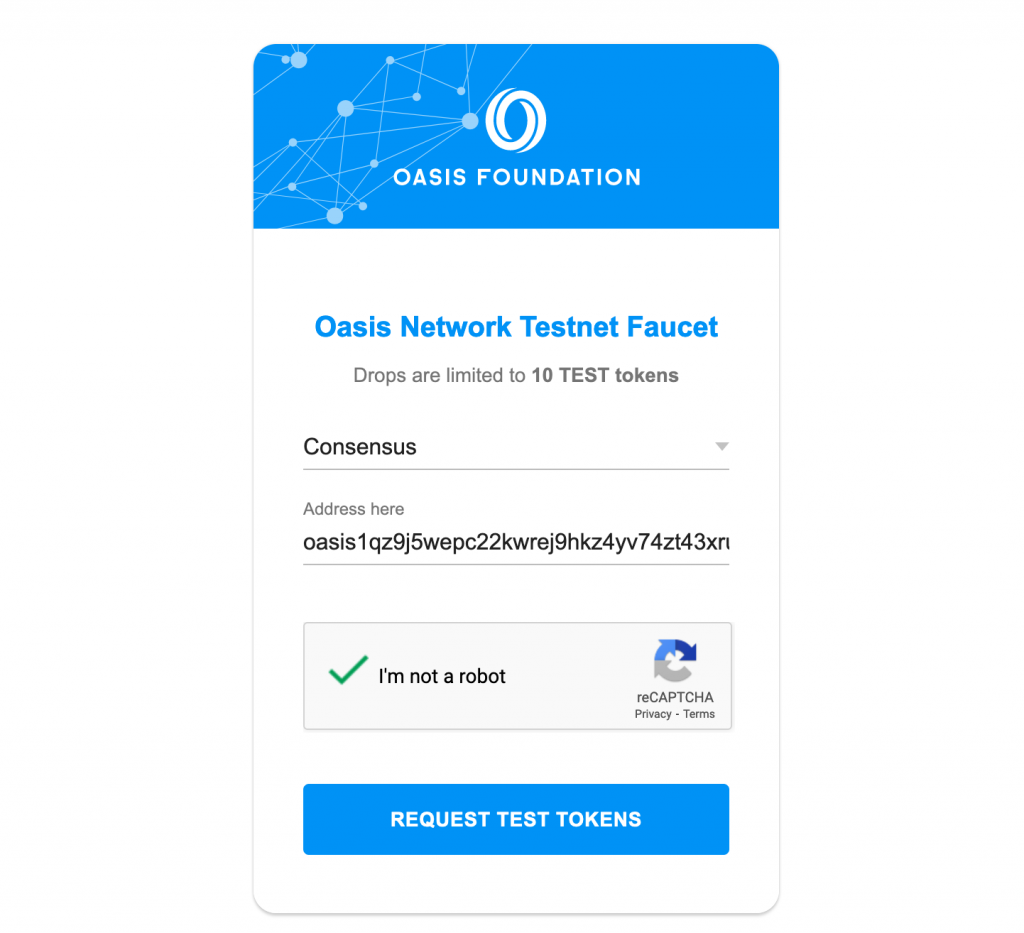
Next, go to the Moralis testnet faucets page, scroll down, and click on ”Try Now” for the ”Oasis Network Testnet Faucet” alternative:

You can then select the ”Consensus” network, input your Oasis address, complete the captcha, and click on the request button:
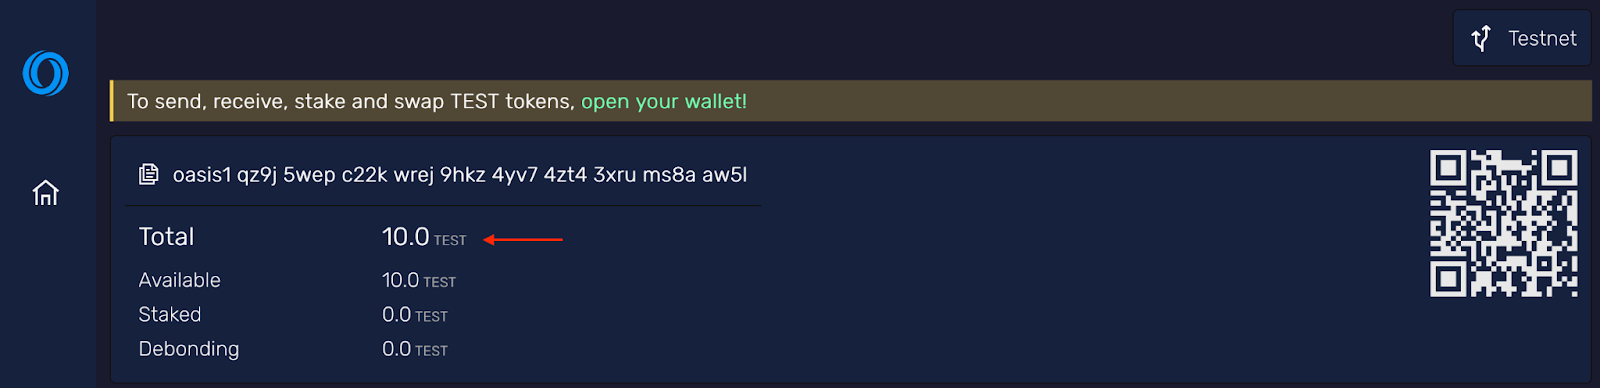
In turn, you should now have received ten ROSE Consensus testnet tokens in your Oasis Wallet:
Exploring the Oasis Network and Faucets
In the upcoming sections, we will explore the Oasis network in further detail. Along with taking a closer look at Oasis, the article also explores the intricacies of testnet faucets. This will give you a better idea of how the Oasis network works and why developers need faucets during their development endeavors. Nevertheless, without further ado, let us answer the question, ”what is the Oasis network?”.
What is the Oasis Network?
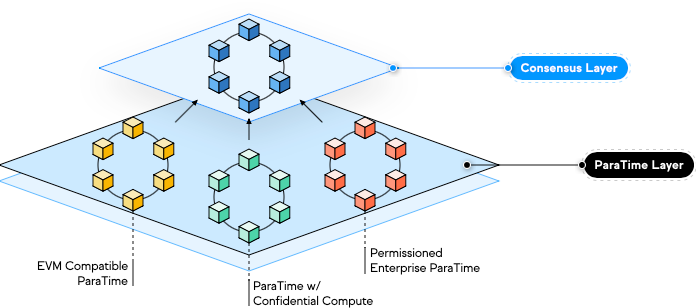
The Oasis network is a proof-of-stake (PoS), privacy-focused layer-1 smart contract platform. The network features a multi-layer modular architecture, enabling scalability and the flexibility to deploy privacy-focused smart contracts at a low cost.

The Oasis network consists of two main layers: the Consensus layer and the ParaTime layer. To understand how Oasis works, we need to break these two layers down; let us start with the former.
- Consensus Layer – This layer is responsible for enforcing the rules of the Oasis network. The Consensus layer ensures that nodes follow the rules, which come from Tendermint, and is mainly there to keep consensus across Oasis. What’s more, this layer additionally takes care of the generation and verification of blocks.
- ParaTime Layer – This layer is a smart contract execution layer made up of multiple parallel ParaTimes. ParaTimes are separate computing environments that coexist on the network’s second layer. All individual environments write their own transactions to the Consensus layer.
The ParaTime layer currently consists of three key ParaTimes: Emerald, Cipher, and Sapphire. Emerald is an EVM-compatible environment, enabling developers to use tools and languages they are accustomed to, such as Solidity. Cipher is an all-in-one privacy-enabled ParaTime, supporting technologies such as confidential smart contracts. Lastly, Sapphire is the first confidential EVM runtime in the industry.
Moreover, each of these runtimes features its own testnets, enabling developers to try contracts and dapps in safe and secure environments.
Thanks to the unique architecture of Oasis, the network is – according to their website – able to offer high performance and throughput, high customizability, a seamless development workflow, and brings privacy to Web3!
What are Testnet Faucets?
Executing transactions on a blockchain usually requires gas fees. This means that building platforms on a blockchain network can become rather expensive with all the testing during the development phase. To avoid this, developers use testnets to try their projects in secure and safe environments. However, even on testnets, developers are still required to pay gas. Fortunately, for these networks, it is possible to use so-called testnet faucets to acquire tokens free of charge!

Testnet faucets are generally web applications enabling anyone to request a fixed amount of testnet tokens. Although there are various faucets, most only require users to input a Web3 wallet address and hit a button to receive testnet funds. Once a user acquires tokens, they can be used to pay for transactions on the network they relate to.
Now, with a better understanding of what faucets are, let us explore the best Oasis testnet faucet in the next section!
Best Oasis Testnet Faucet
If you have some prior Web3 development experience, you know that finding good faucets can be a hassle. Some providers make it unnecessarily challenging to acquire tokens by requiring account signups or tweet verifications. On occasion, bad-faith actors are even looking to abuse free faucets to gain access to confidential wallet credentials.
To avoid this hassle, the team at Moralis compiled a comprehensive testnet facet list. This list consists of definitive and trusted crypto faucets for blockchain developers. No signups are needed, and you do not need to enter personal data when using these web apps. All you generally need to do is input your wallet address and hit a single button!

Among the featured alternatives on the list, you will find the best Oasis testnet faucet. With this faucet, you can acquire tokens for all Oasis’ testnets, including Emerald, Cipher, and Sapphire. So, if you want to get into Oasis development, check out the Moralis testnet faucet list immediately!
Along with the best Oasis testnet faucet, the list also features other prominent networks. For example, if you are an Ethereum developer, check out the Goerli faucet!
Summary – Using an Oasis Faucet to Get Testnet Funds
In today’s article, we taught you how to get testnet funds using an Oasis faucet in three easy steps:
- Setting Up an Oasis-Compatible Web3 Wallet
- Adding an Oasis Testnet
- Using the Oasis Testnet Faucet
If you have followed along this far, you now know how to get testnet tokens for any Oasis testnet. From here, it is time for you to be creative and start building sophisticated projects for the Oasis network!
If you found this article instructive, consider checking out other articles here on the Moralis Web3 blog. For example, learn how to build a decentralized cryptocurrency exchange. You can also tackle our IPFS Ethereum tutorial or read about the Alchemy NFT API.
Also, remember to sign up with Moralis if you want to access the industry’s leading Web3 APIs for free. By signing up, you can start building dapps smarter and more efficiently!
