Being able to handle on-chain and off-chain data when creating Unity Web3 games is crucial. Fortunately, the ultimate Web3 backend platform, Moralis, provides an excellent solution to those wondering “how to store off-chain data?”. Moreover, this “Firebase for crypto” platform makes it possible for you to have off-chain and on-chain data neatly indexed in one place. When you create your free Moralis account and spin up a Moralis server, you automatically get access to your Moralis dashboard. The latter serves as a database for all your Web3 development needs. This is also the tool to use when you want to index the blockchain. In combination with the Moralis “sync” feature, you can easily sync and index smart contract events. However, in this article, we will focus on how to store off-chain data.
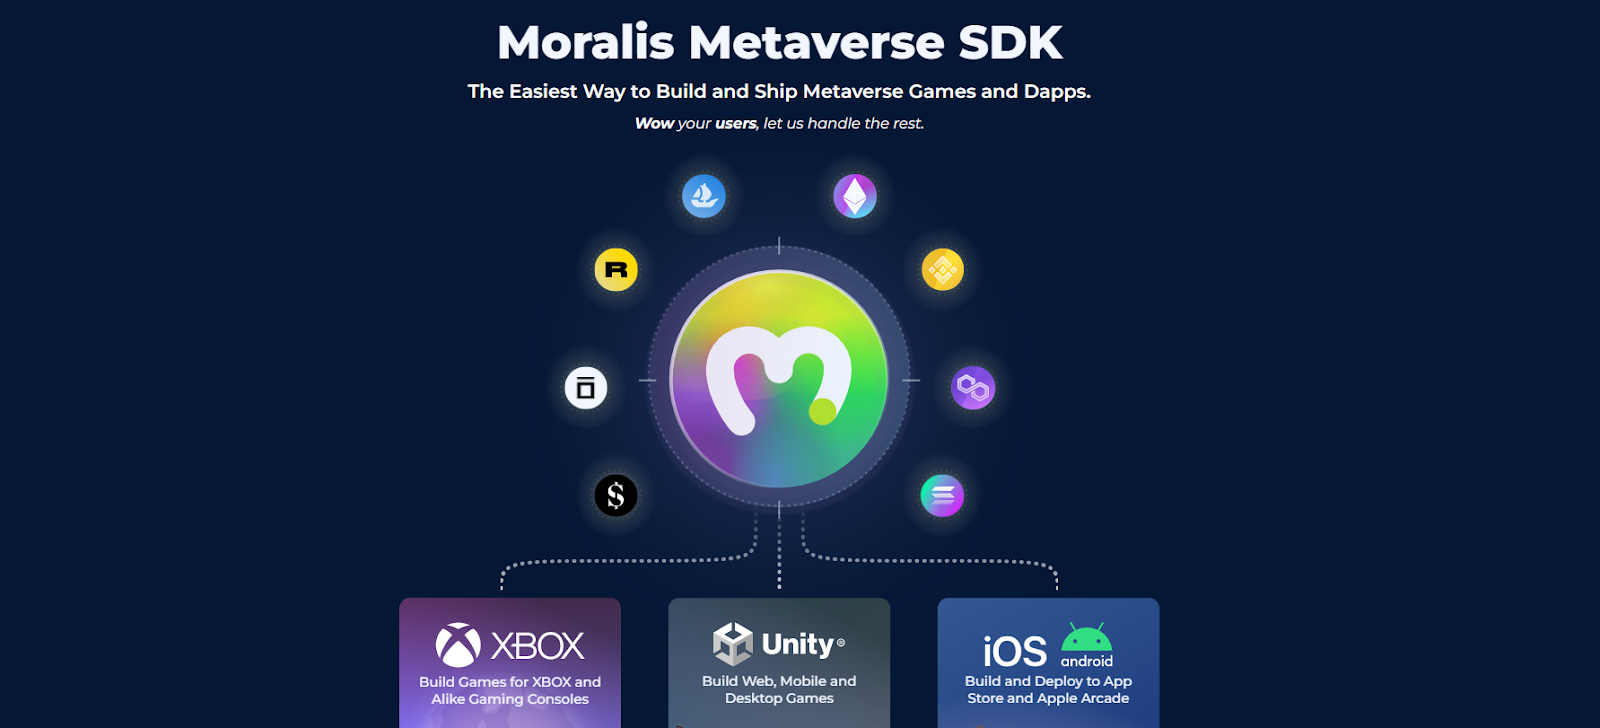
Herein, we will take on a Unity example project. We will show you how to connect Unity to the Moralis Web3 database. Also, we will cover how to store off-chain data and how to retrieve it from that database. Furthermore, an important part of our quest herein will be the initial Moralis setup. The latter is the key to accessing Moralis’ SDK and Metaverse SDK. With that part covered, we can start creating all sorts of scripts using Moralis’ Web3 API. Hence, we get to copy short snippets of code from Moralis’ documentation and put it to work. Moreover, if this is your first rodeo with Moralis’ Metaverse SDK and Unity Web3, make sure to pay close attention to the first upcoming section. On the other hand, if you’re familiar with the SDK and Unity, feel free to skip to the part that focuses on how to store off-chain data.
Unity Web3 Programming Simplified
If you already have some experience with Unity, then Moralis’ Metaverse SDK will simplify the transition to Web3 game development. Aside from Web3 basics, your Unity skills are all you need. Moreover, this is the first time we will focus on showing you how to store off-chain data for your Unity projects. However, we’ve covered quite a few other Unity Web3 example projects so far. Our beginner’s guide to that topic (the “Unity Web3” link in the introduction) is an excellent place to start. Also, it covers the basics of the metaverse. In addition, that guide also explains why now is the best time to dive deeper into Web3 games and GameFi development.
In our other Unity example projects, we’ve also covered how to do blockchain game transactions, connect a Unity game with Web3 login, and how we can connect a Unity app to a Web3 wallet. We’ve also shown you how to build a Web3 MMORPG and a medieval metaverse game. So, if you joined us on any of these example projects, you already know the basics. As a result, you know how to cover the initial Moralis setup and connect Unity with Moralis’ SDK. Hence, you can jump over to the “How to Store Off-Chain Data for Your Unity Game” section. Although, feel free to go through those same steps herein to refresh your memory. However, before we tackle the initial setup, let’s make sure you all know what Moralis is.
Moralis – Beyond the Key to Unity Web3 Development
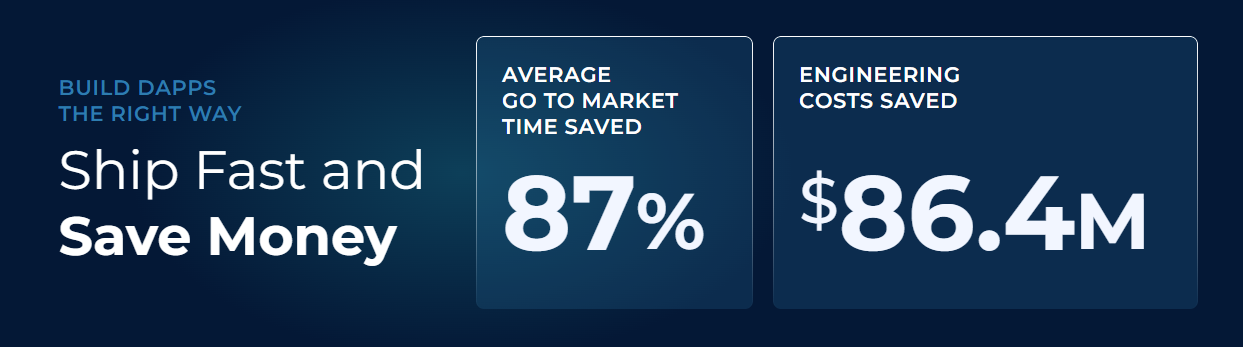
Of course, Moralis is the key to Unity Web3 development; however, it is so much more. It is the pinnacle of the current Web3 tech stack. It enables JavaScript-proficient developers to make a seamless transition to the blockchain realm. This also makes Moralis the ultimate tool for developing decentralized applications (dapps). Its extensive Web3 API, including the Ethereum API and NFT API, enables you to focus your maximum attention on the frontend. Hence, you get to spend more time and other resources on creating a phenomenal Web3 UI. On average, Moralis helps dapp creators save 87% on development time. As a result, you will deploy your product faster and also receive your users’ feedback sooner. In turn, this gives you an unbeatable advantage.
Furthermore, Moralis is all about cross-chain interoperability. This means that you get to use the same code to deploy your dapps on all supported blockchains. Hence, you get a much broader reach, and you also future-proof your work by not being stuck to any particular chain. Sure, for now, Ethereum is still the “king” among programmable blockchains, but who knows what the future will bring. There are already several reputable alternatives showing impressive traction. Now, it is true that many of them (e.g., Avalanche, Polygon, BNB Chain, etc.) are EMV-compatible. However, Ethereum’s future looks pretty solid for now. Nonetheless, with Moralis, you can tackle all niches of this booming industry. From NFT marketplaces to DeFi exchanges, Moralis has your back(end). So, in case you still haven’t created your free Moralis account, do so now. You’ll need it as we move forward.
How to Store Off-Chain Data – The Initial Setup
To make things as simple as possible for you, we made the entire code for this example project accessible at GitHub. However, the simplest way to get all the files you need is to download our example project’s ZIP file:
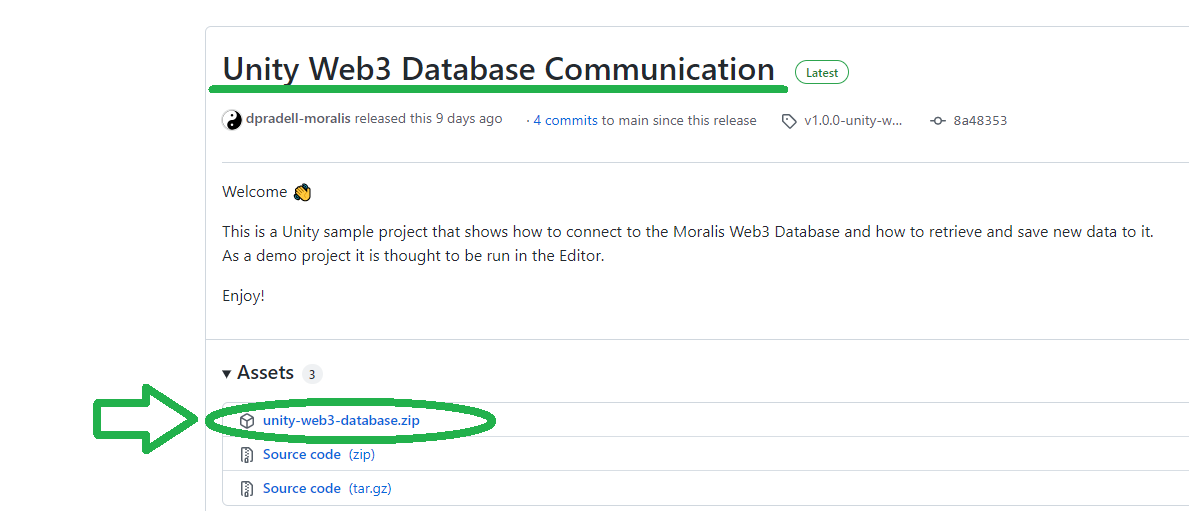
With the above ZIP file at your disposal, you first need to unzip it and open it with Unity. Next, access the “Scenes” folder, where you’ll find the “Main” file. Open it:
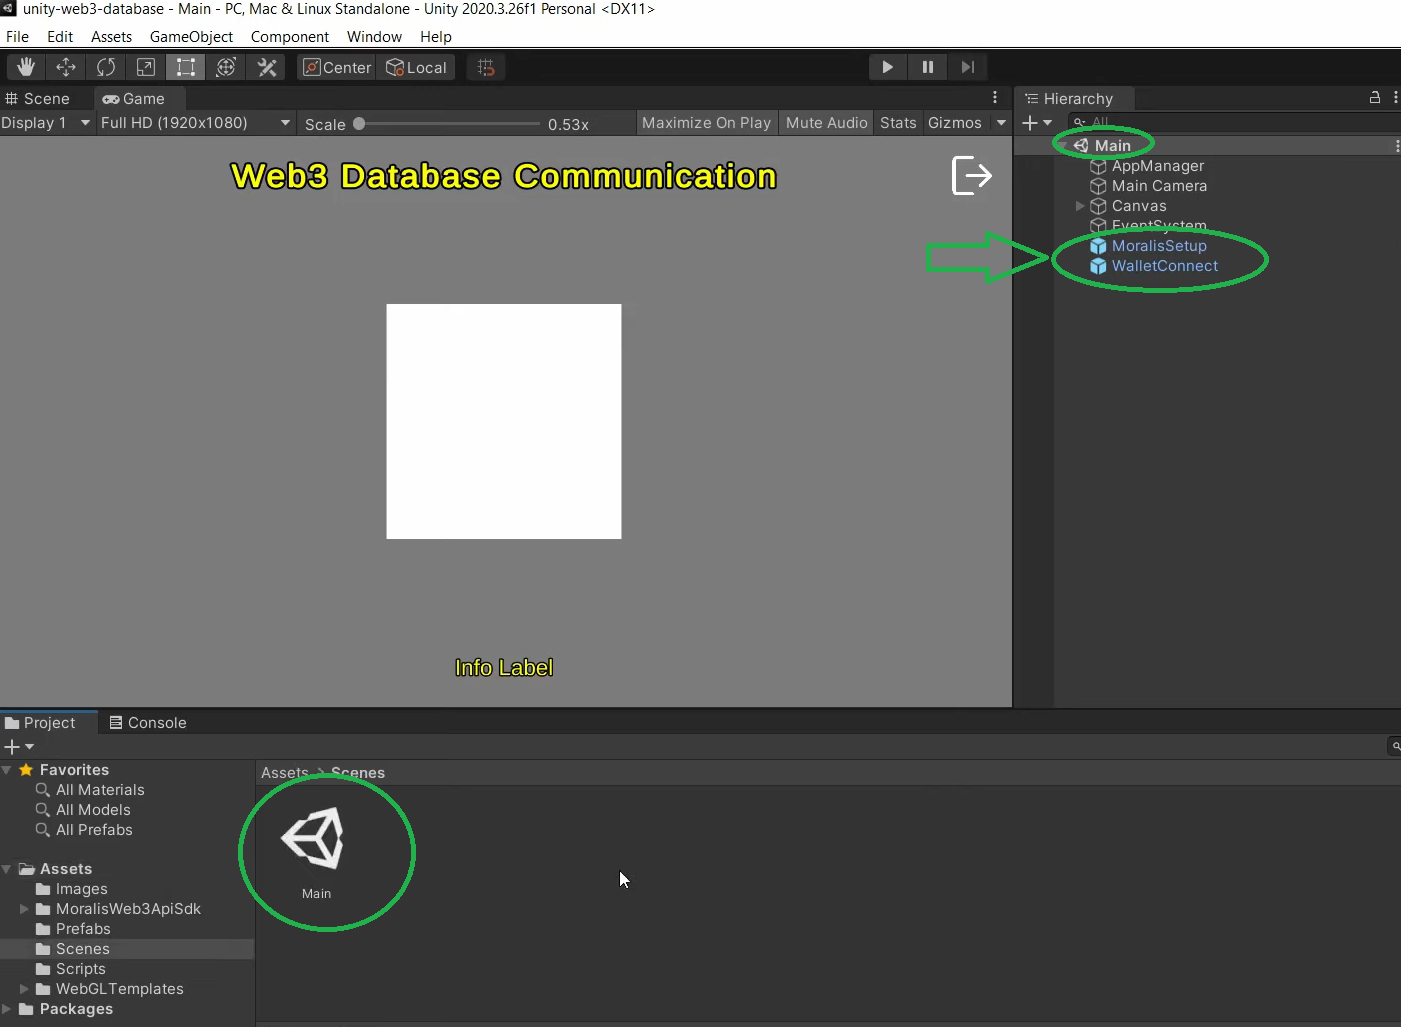
Looking at the screenshot above, you can see that “Main” contains two important prefabs: “MoralisSetup” and “WalletConnect”. In the former, we need to enter specific details that we can get from Moralis.
Connecting to Your Web3 Database
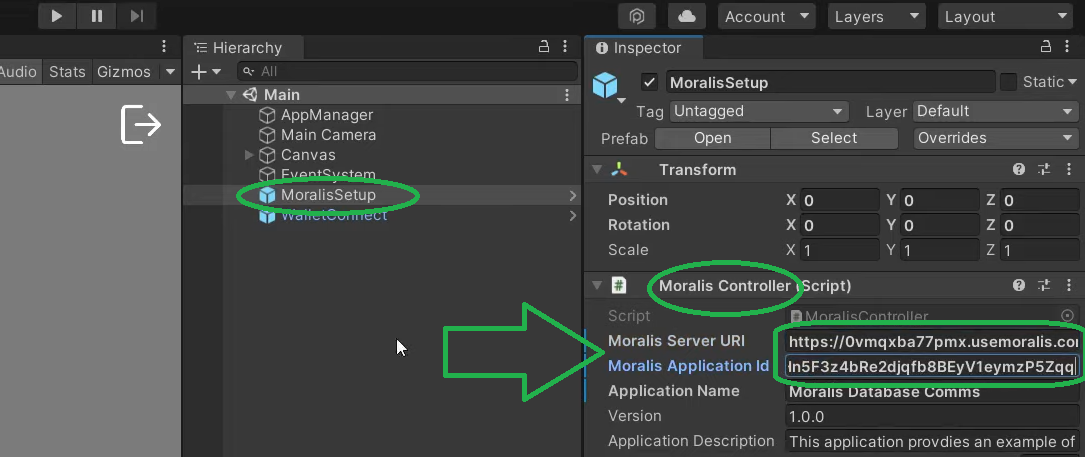
Select the “MoralisSetup” prefab from the hierarchy. Then, you’ll be able to see this prefab’s details on the right-hand side. If you focus your attention on “Moralis Controller (Script)”, you’ll notice two entry fields asking for your Moralis server’s details:
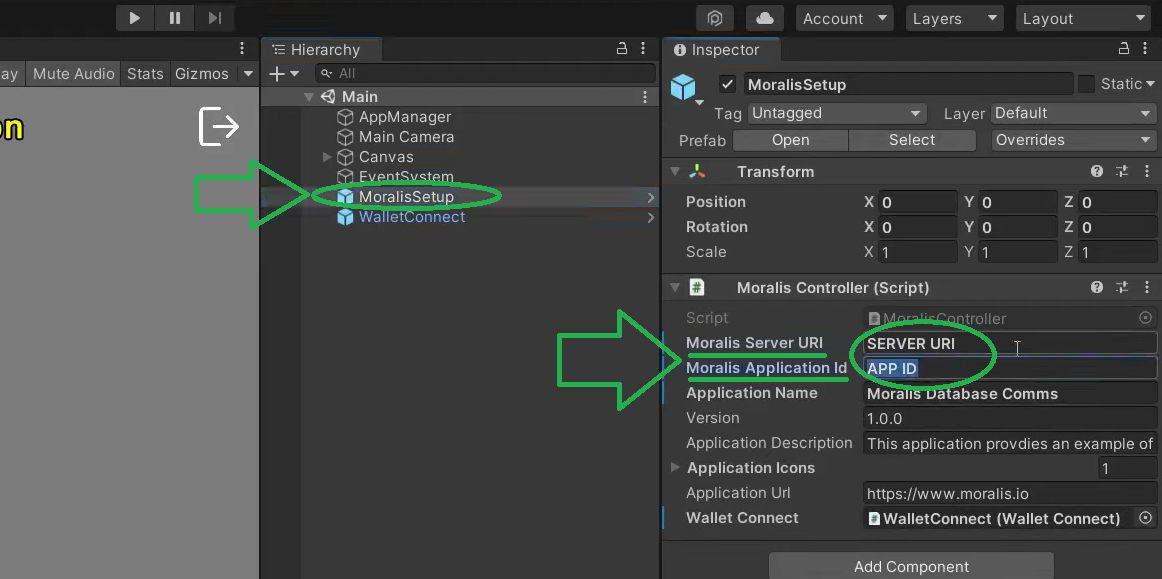
Looking at the image above, you can see that you need your Moralis server URL and application ID. This means it’s time to create your own Moralis server and copy the required details.
Initial Moralis Setup
The following steps are required whenever you want to use the Moralis SDK. So, whether you are working on Web3 games or other dapps, this is your starting point. So, here are the steps you need to complete:
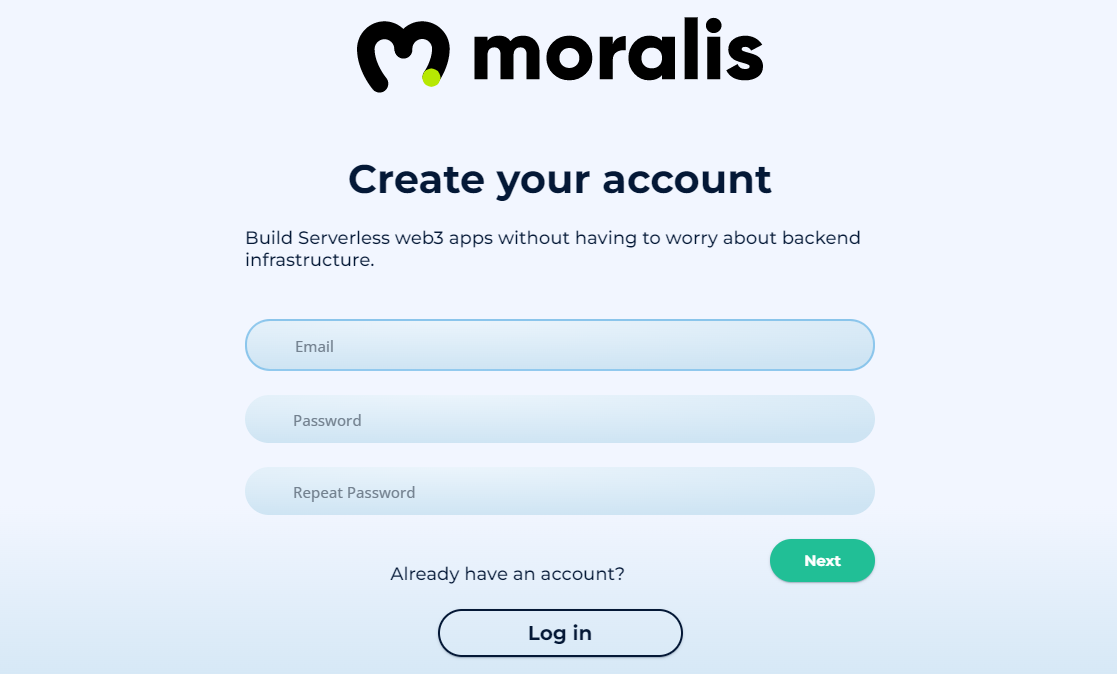
- Log In to Your Moralis Account – By now, you’ve probably already created your free Moralis account. Hence, you can simply log in. On the other hand, if you don’t have a Moralis account yet, use the “create your free Moralis account” link mentioned in the intro. It will take you to the signup page, where you’ll need to enter your email, create your password, and click on the confirmation link (check your email inbox).
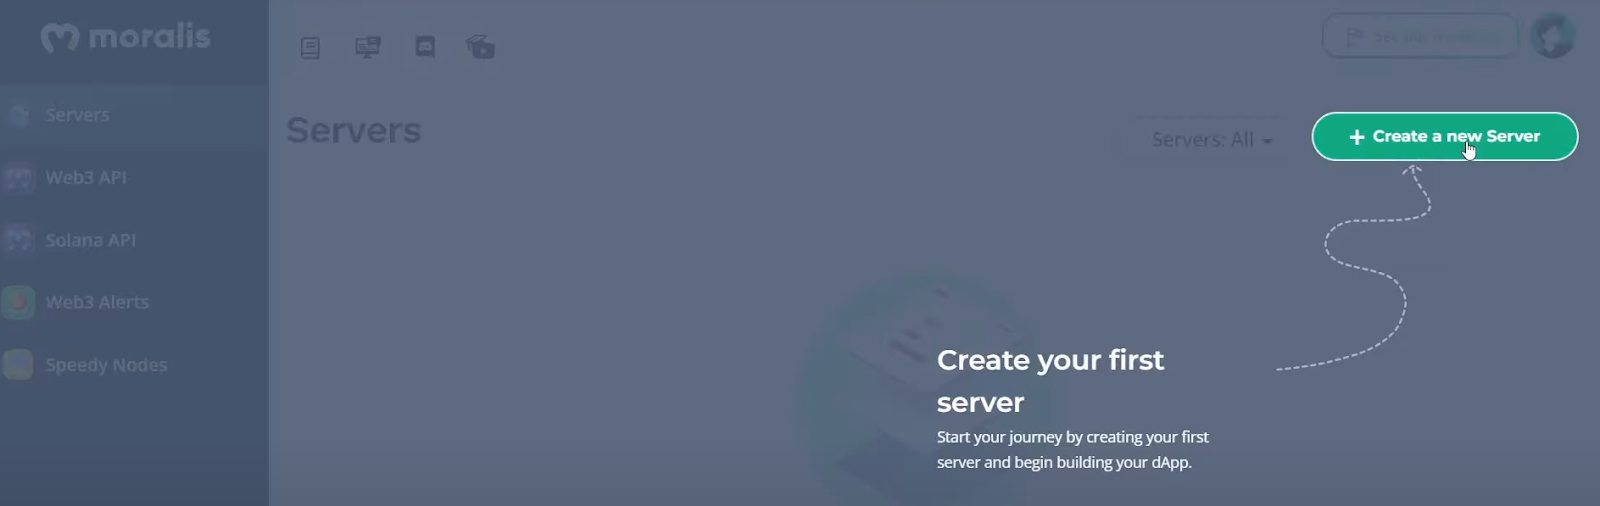
- Create a Moralis Server – Once logged in, you will access the “Servers” tab. There, click on the “+ Create a new Server” button located in the top-right corner. As a new user, you can follow the on-page tutorial:
Then, you’ll see three network-type options (see screenshot below). Now, for example projects or testing dapps, “Local Devchain Server” or “Testnet Server” are the best options. However, to go live with your dapp, you’ll need to select “Mainnet Server”.

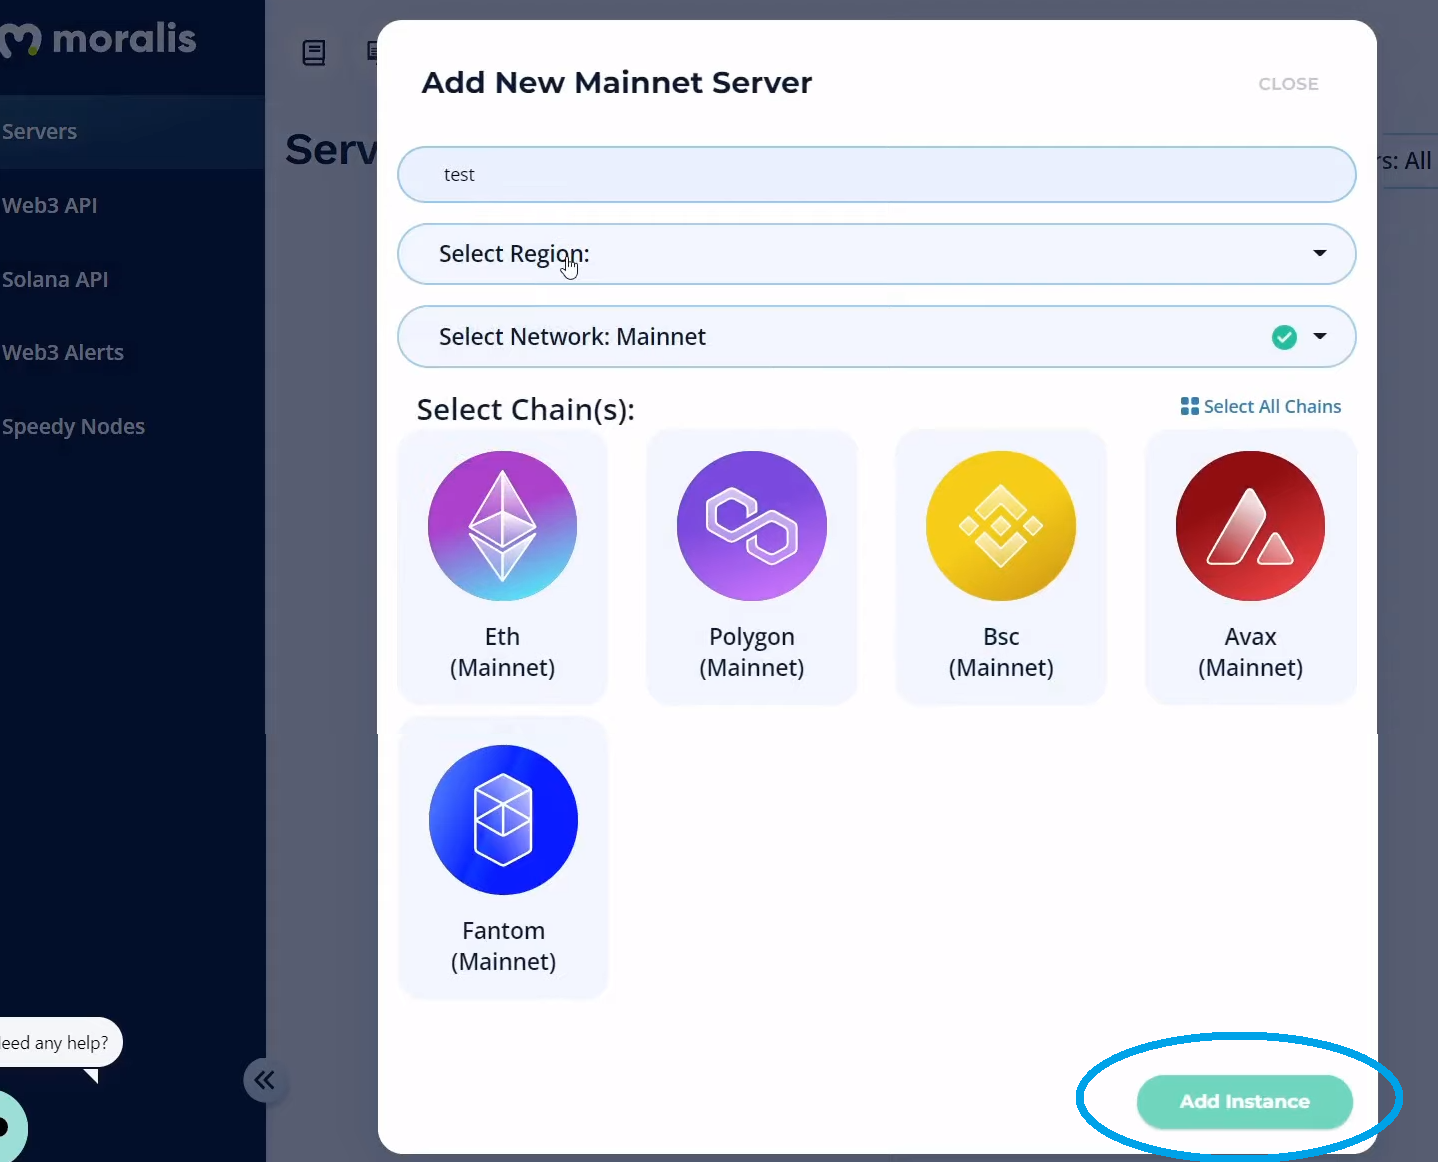
Next, a pop-up window will ask you to enter your server details. Hence, enter your server’s name, then select your region, network type, and chain(s). To spin up your server, click on “Add Instance”:
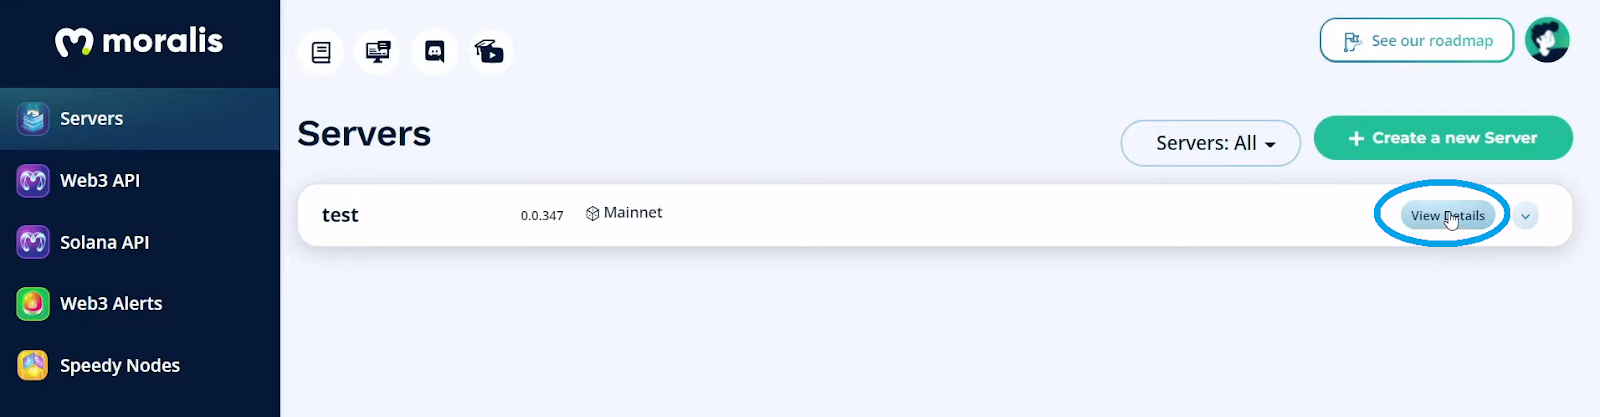
- Access Your Server’s Details – Now that your server is up and running, you can access its details. You do this via the “View Details” button:
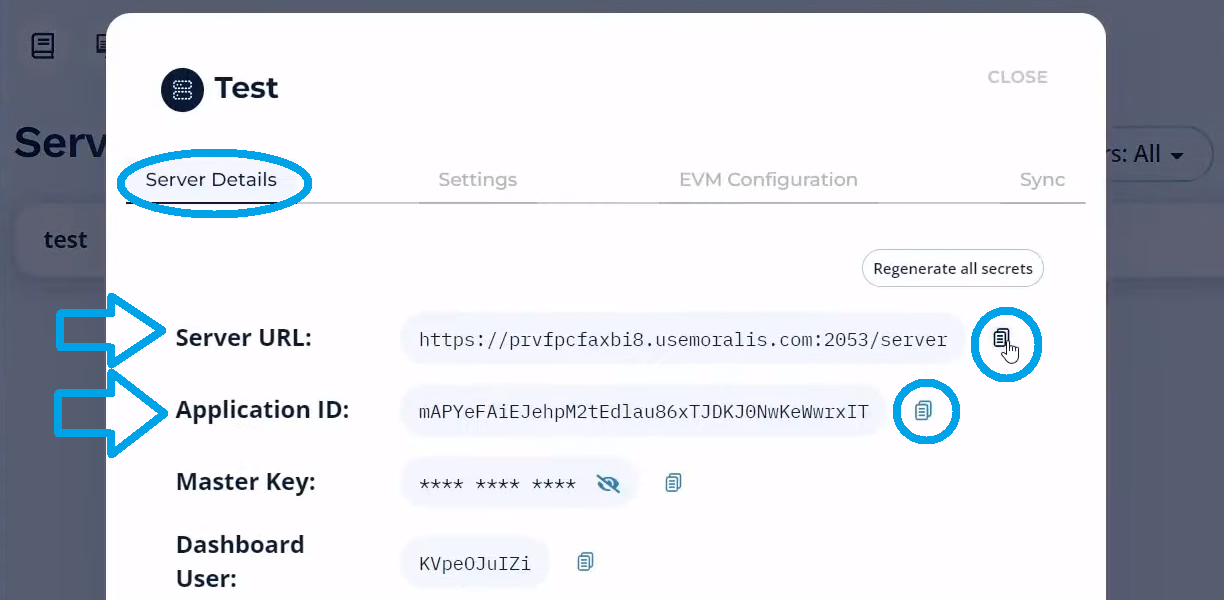
After clicking on “View Details”, you’ll see the information you need in a new window. Then, use the copy icons on the right-hand side to copy your server’s URL and application ID:
- Populate Unity – Finally, you get to paste the above-copied details into the appropriate fields inside “Moralis Controller” in Unity:
How to Access Your Web3 Database
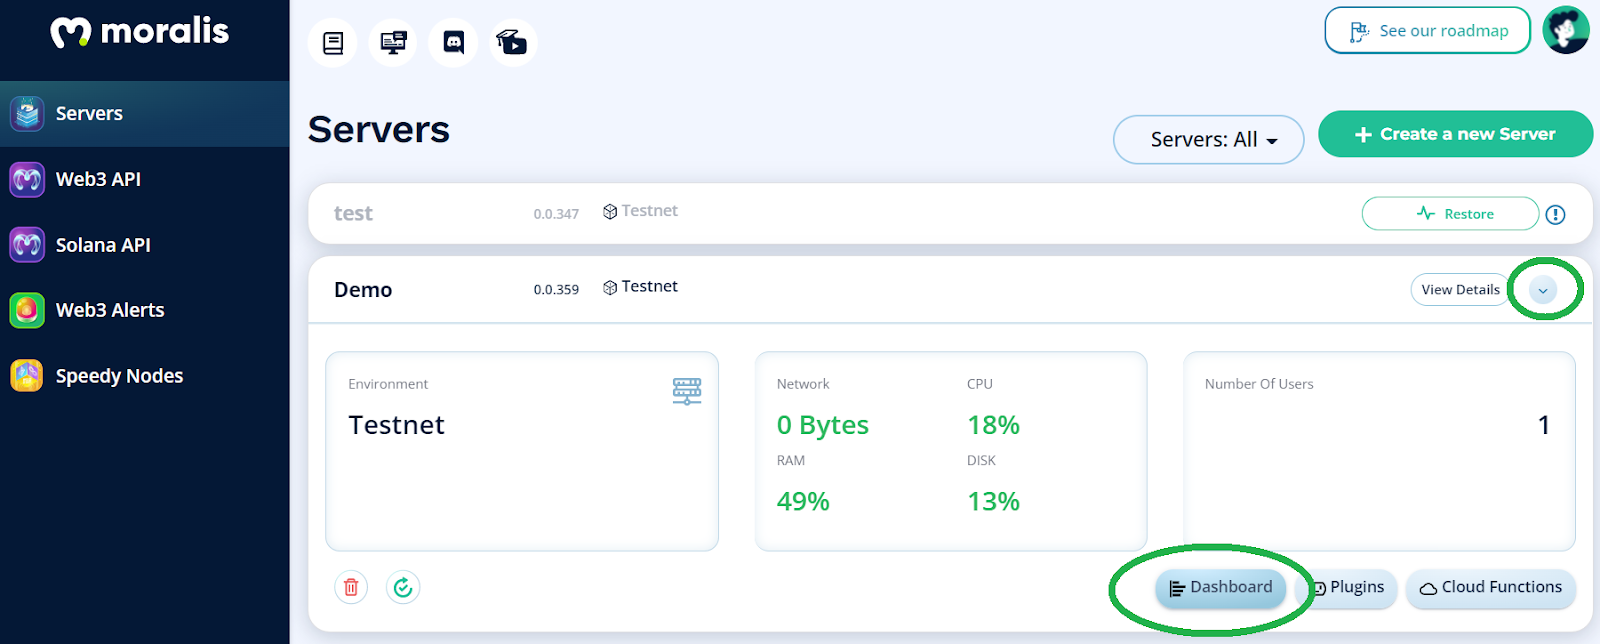
Once you’ve created your Moralis server, you can also access your Web3 database. To do this, click on the arrow on the right-hand side of “View Details”. By doing so, you will open other details and access three additional buttons – “Dashboard”, “Plugins”, and “Cloud Functions”:
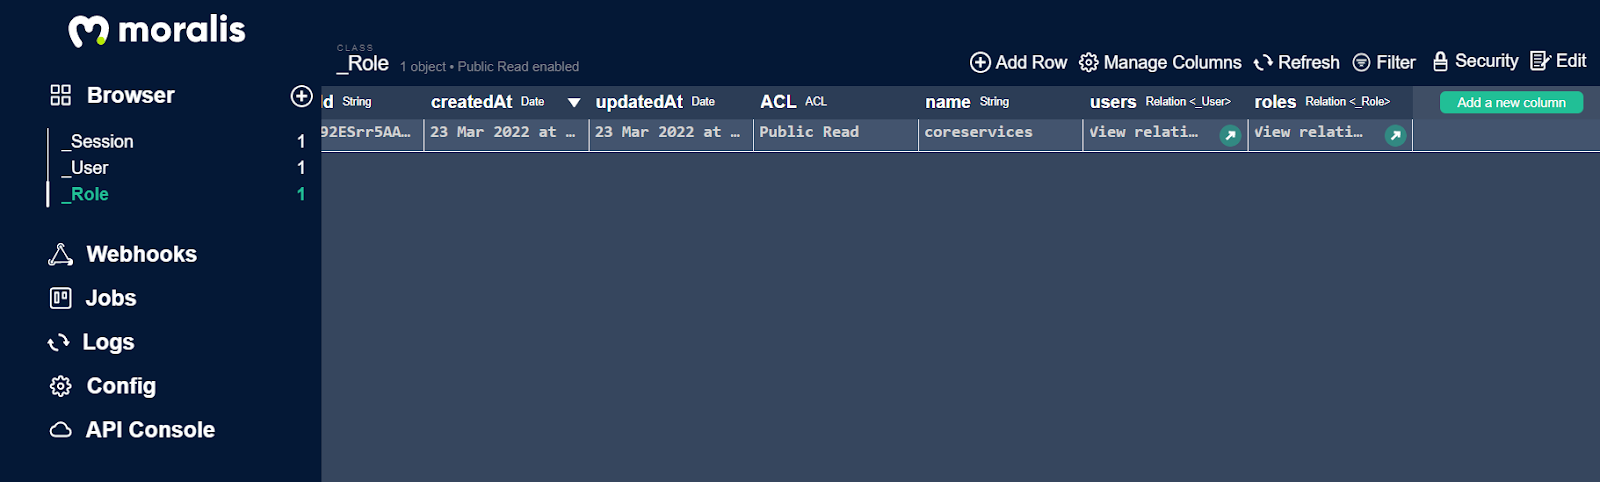
To access your dashboard, click on the “Dashboard” button. Since we haven’t taught you how to store off-chain data yet, you should be looking at an empty database with default classes:
Moving on, you’ll learn how to store off-chain data for your Unity games and populate your dashboard. With off-chain data properly indexed, you’ll also be able to use the data for all sorts of features in your game.
How to Store Off-Chain Data for Your Unity Game
Before we hand you over into the capable hands of a Moralis Unity expert, let’s do a quick overview of our example project’s result. Our “how to store off-chain data” quest will result in a relatively simple Unity application. Further, the interface will be pretty basic. Actually, here’s what the Web3 authentication screen looks like:
Thanks to Moralis’ WalletConnect integration, users can sign in using their Web3 wallets by scanning the QR code above. Once logged in, users get to edit their usernames and create enemies:
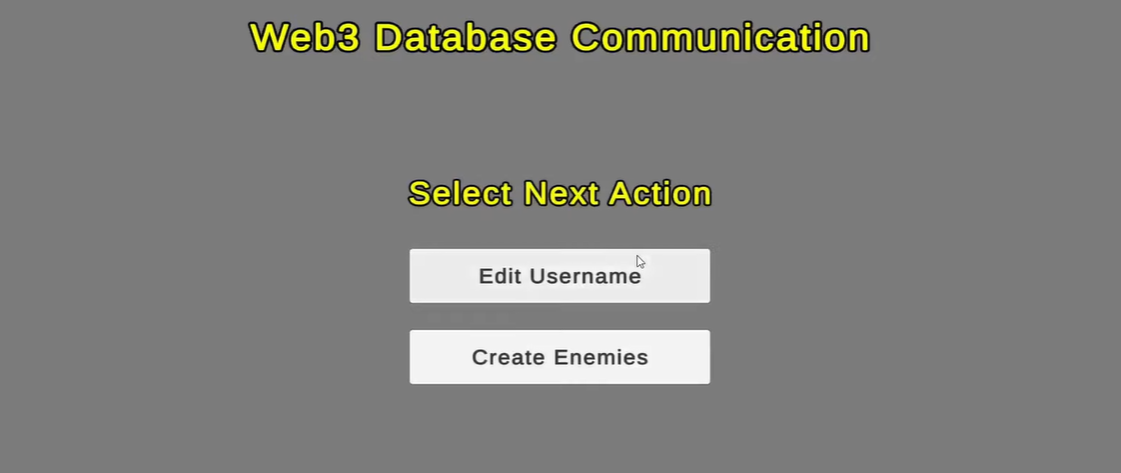
We chose these two functionalities to best demonstrate how to store off-chain data. As such, you will get to learn how to save new data to your Web3 database and how to retrieve the saved data. Moving on, if users click the “Edit Username” button, they access this screen:
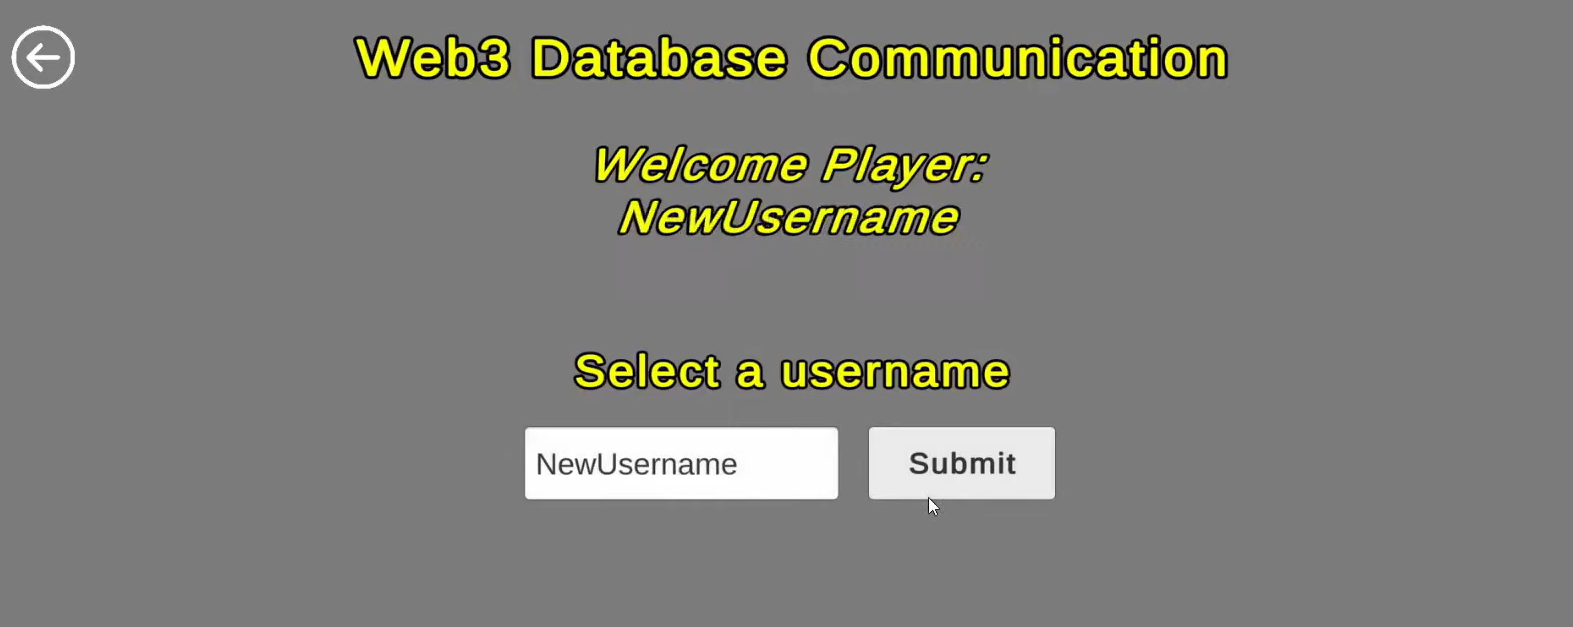
By default, usernames are users’ wallet addresses. However, by using the above entry field and the “Submit” button, users can change their usernames. Of course, these changes are stored in the Moralis database. On the other hand, users can also select “Create Enemies” from the previous screen:
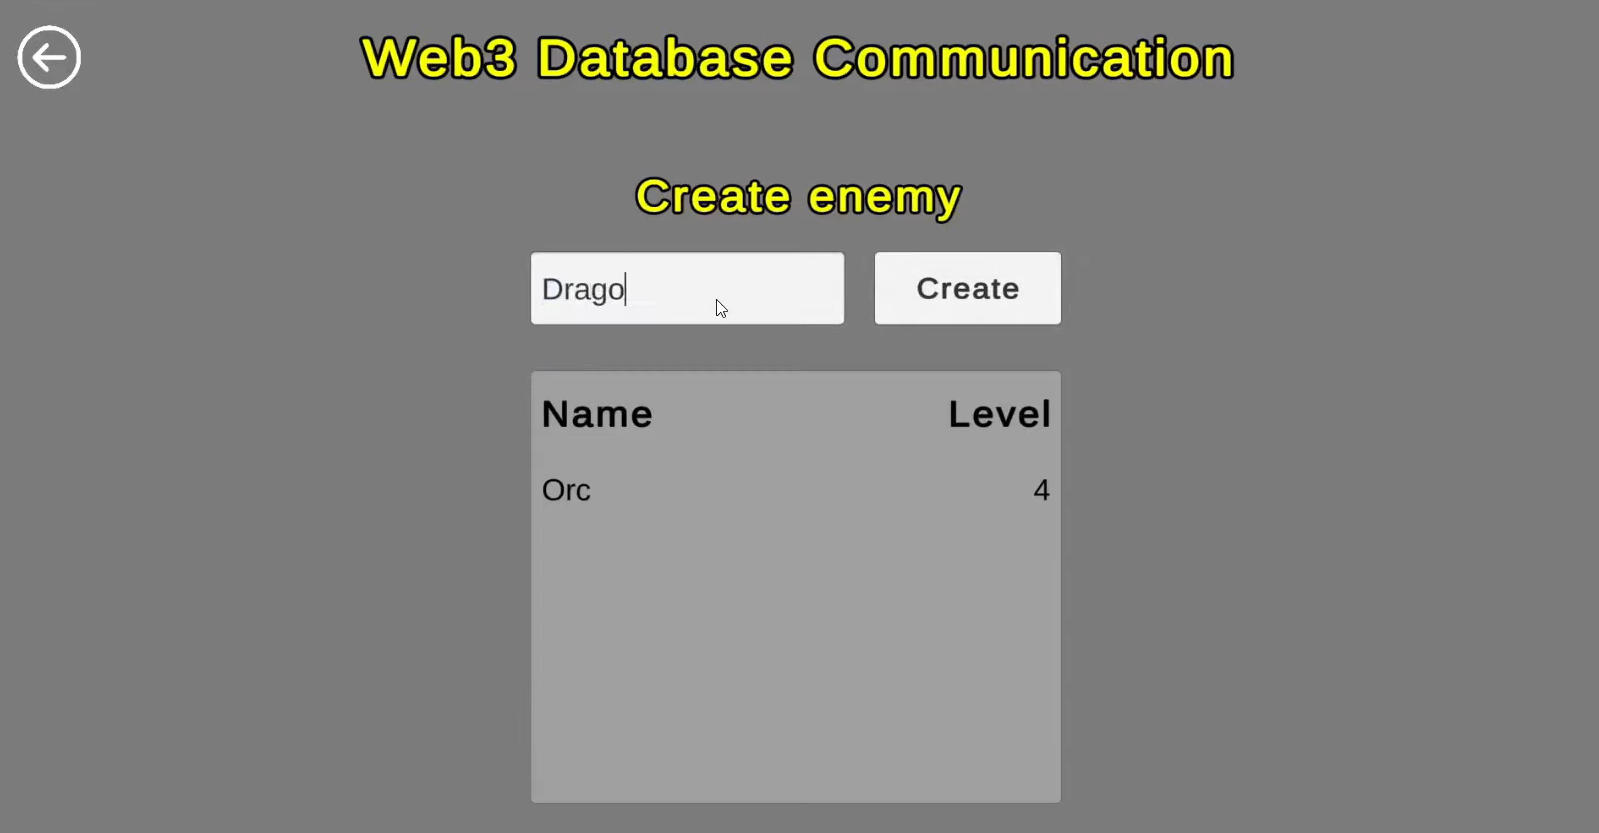
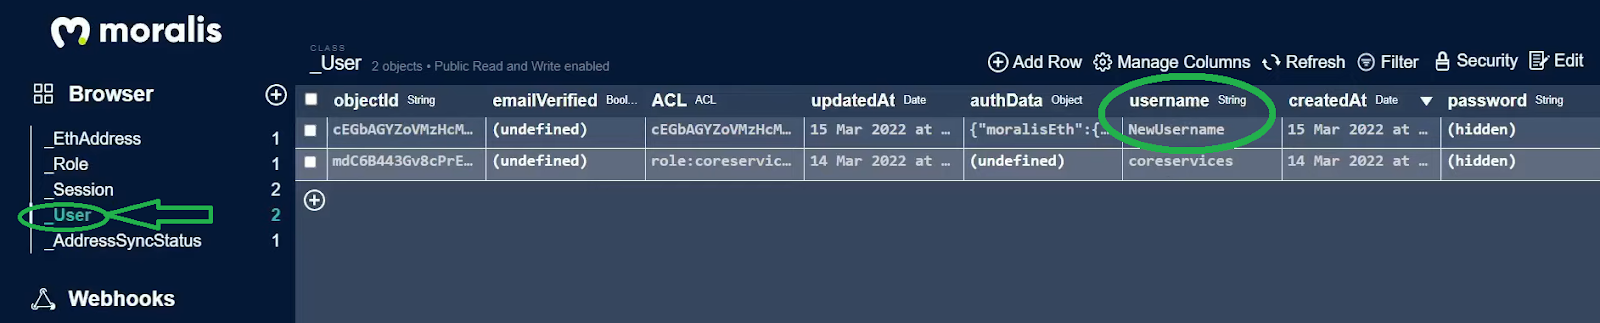
Inside the “Create enemy” panel (as seen above), users can name an enemy they want to create and then confirm their action by clicking on the “Create” button. Moreover, the newly created enemies also get stored in our Moralis database. Actually, you can see both the usernames and the enemies indexed in our database in the screenshots below:
- Usernames Indexing:
- Enemies Indexing:

Now that you know what we will be building, it’s time to roll up your sleeves and get things done. In case you haven’t completed the above-presented initial setup yet, do so before moving on to the code walkthrough.
How to Store Off-Chain Data – Code Walkthrough
Even if you are not a video person, you should watch the video below. It will provide you with a detailed code walkthrough for both the “Edit Username” and “Create Enemies” features. To dive deeper into the former, jump over to 4:07 of the video below. You’ll first see how our example Unity application stores the data to our Web3 database. Next, you’ll have a chance to take a closer look at the “AppManager” script. There, you’ll see the details of login, with the focus on “WalletConnectHandler”, which does the heavy lifting. You’ll also look at the inside of the “WalletConnect” prefab. In addition, you will learn how the app is activating the “Username” panel from the “Selection” panel. To properly understand this part, you will have a chance to take a more detailed view of the “UsernamePanel” script (8:14).
Starting at 10:16, you’ll get a chance to see the same detailed presentation of the “Create Enemies” feature. That includes the scripts and snippets of code that ensure things run smoothly.
Finally, here’s the video we’ve been referencing throughout this section:
How to Store Off-Chain Data – Unity Web3 Database – Summary
Even as a complete beginner to Web3 Unity, you were able to get through everything you need to know to get started. You now know how to complete the initial Unity and Moralis setup and how to access your Moralis database. Furthermore, you also know how to store off-chain data using Moralis’ SDK. If you enjoyed this example project, we recommend you check out our other Unity Web3 quests. You can find the links in the “Unity Web3 Programming Simplified” section.
However, if you are interested in exploring other aspects of blockchain development, make sure to use the Moralis blog and the Moralis YouTube channel. Both of these outlets provide to-the-point explanations of various crypto terms and countless tutorials. Furthermore, they may serve as a solid base for your free Web3 education. Moreover, some of the latest topics teach you how to reduce Solidity gas costs using gas optimization in Solidity, how to create an Ethereum NFT, how to build a 2D Web3 game, how to create a Web3 music platform, and much more.
Although, if you are eager to get into Web3 more confidently, you might need to take a more professional approach. As such, you ought to consider enrolling in Moralis Academy. Aside from accessing high-quality courses, you will also get a personalized study path, become a member of one of the most incredible communities, and access expert mentorship. With all these valuable resources, you will become a Web3 developer in no time.
