Creating a DEX has been quite difficult in the past. Why? Because it has required considerable backend development, which is both resource-intensive and time-consuming. In terms of performance and user experience, most DEXs could be better.
However, by using Moralis, you can skip most of this since the platform already has a capable backend infrastructure. As a result, all blockchain projects can reduce their development time drastically. Furthermore, Moralis gives you access to a long list of excellent development tools for creating and deploying dapps. These technologies are helpful for all Web3 development projects, not just DEX creation.
This tutorial will teach you how to build a Uniswap DEX clone with HTML, CSS, JavaScript, and Moralis on the Ethereum network.
Table of Contents
- What is a DEX (decentralized exchange)?
- What is Moralis?
- Project Setup and Installation
- Moralis Server Setup
- Installing the 1inch DEX Plugin
- Building a Uniswap DEX
- Conclusion
Here is a link to the live demo and the GitHub repositories – Uniswap DEX with Moralis.
What is a DEX (Decentralized Exchange)?
A decentralized exchange, or DEX, is a peer-to-peer marketplace where cryptocurrency traders can transact directly with one another. DEXs enable financial transactions to execute without being mediated by banks, brokers, payment processors, or any other type of intermediary.
Smart contracts and order book relaying are two prominent means of functioning, although many additional options and degrees of decentralization are available.
Decentralized exchanges lessen the danger of theft from exchange hacking by removing the necessity for traders to send their assets to the exchange before completing a trade. Still, liquidity providers must transfer tokens to the decentralized exchange.
DEXs often replace traditional exchange order books, which match buyers and sellers based on order prices and volume, with “liquidity pools.” These are pots of cryptocurrency assets that sit beneath the exchange’s surface, waiting to clear any buy or sell orders. The investments in the pool come from investors who deposit money to profit from transaction fees charged to pooling users.
What is Moralis?
Moralis is a service that brings together a variety of tools and resources for building decentralized software that connects to the blockchain, such as Ethereum, Polygon, and Binance Smart Chain (now BNB Chain).
Moralis’ ultimate Web3 development platform, which includes built-in cross-chain capability, allows novice and experienced developers to work quickly and easily. Furthermore, Moralis provides you with a Web3 backend infrastructure that lets you concentrate on frontend development. It essentially takes care of all the complicated, behind-the-scenes Web3 things required to make your dapps operate.
Moralis is also controlled and infinitely scalable, so your dapps will scale without difficulty. Let’s take a look at how to build a Uniswap DEX clone – you might know Uniswap either from the exchange, or the Uniswap (UNI) token.
Project Setup and Installation
To quickly get started with the project setup and installation, we will clone this project on GitHub and ensure that we are on the setup branch. Next, we will launch the project locally after cloning it.

Moralis Server Setup
Let’s start by setting up our Moralis server, as we’ll use it to develop the Uniswap DEX in the next section. We’ll set up a server on our Moralis admin panel. Register one here if you don’t already have an account. Signing up is easy, and you can get started for free.
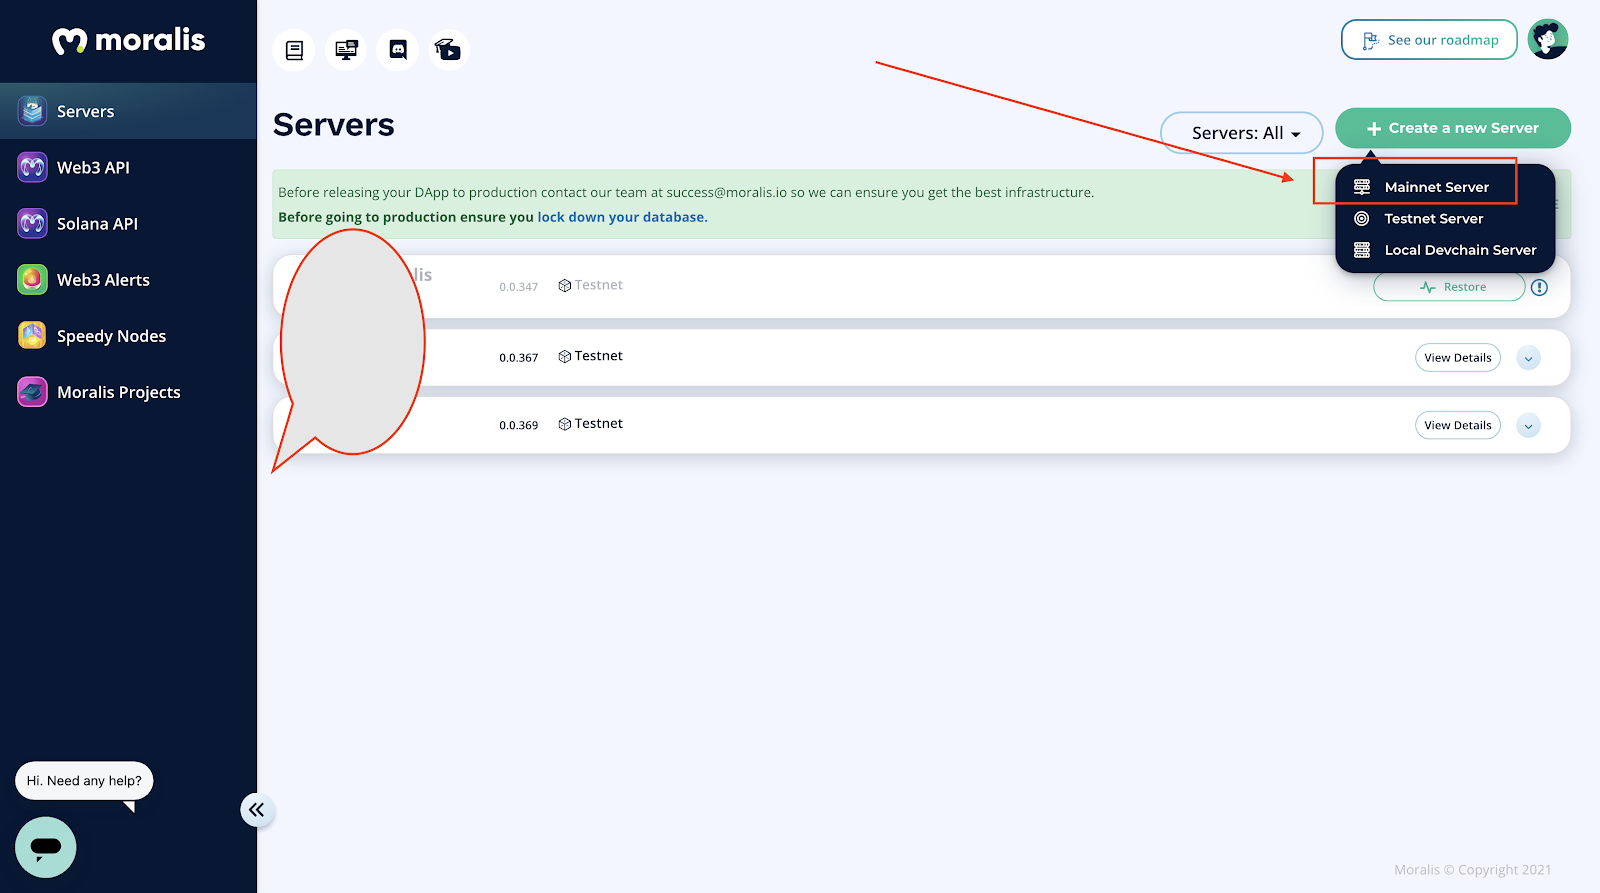
We will click on the create a new server as shown below, then select the mainnet server on our admin panel:

We will now enter our server details as shown below:

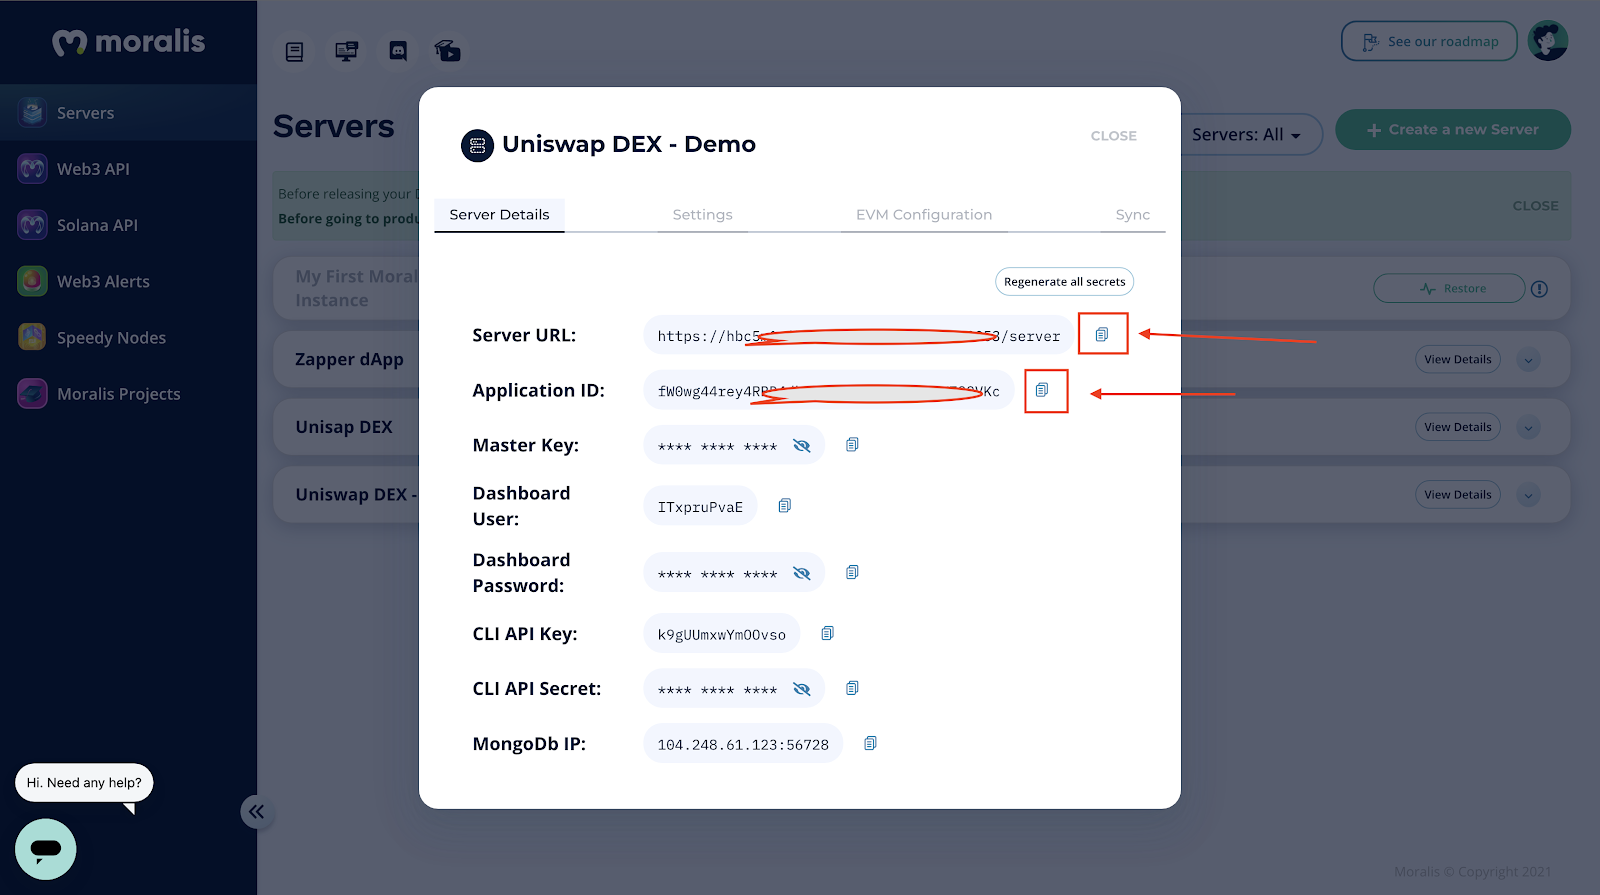
Our server will be ready in a few seconds, and we will have to access our server URL and application ID from the freshly created server instance on our Moralis admin panel.
We will use these details to connect to the server instance from our application, as shown below:

Installing the 1inch DEX Plugin
In this section, we will be adding the 1inch DEX plugin to the server. We’ll need to visit the Moralis plugin store, which we can find by clicking on the Plugins button on the server and then clicking on Go to Plugin Store.


The site will redirect us to the Moralis plugin store, where we can install the 1inch plugin, which integrates the DeFi / DEX aggregator 1inch to any project that uses Moralis.


Building a Uniswap DEX
We’ll proceed to initialize Moralis after completing our setup and user interface (UI).
We’ll need to get the server URL and application ID from the previously created server. By selecting the View Details button of our server, we’ll be able to obtain this information. Then, in the script.js file, we can copy and paste this information into our application:
See the Pen Create Uniswap DEX Clone 1 by Moralis Web3 (@moralisweb3) on CodePen.
We’ll add four global variables after Moralis has been set up. The first variable is for the current user, the second is for the trade item, the third is for the selection, and the fourth is for the tokens:
See the Pen Create Uniswap DEX Clone 2 by Moralis Web3 (@moralisweb3) on CodePen.
We’ll add user login capabilities shortly, but first, we’ll create an initialize function that runs when our app starts with the code snippet below:
See the Pen Create Uniswap DEX Clone 3 by Moralis Web3 (@moralisweb3) on CodePen.
Login Implementation
Let us update the script.js file with the following code snippet:
See the Pen Create Uniswap DEX Clone 4 by Moralis Web3 (@moralisweb3) on CodePen.
In the code snippet above, we validate if a user is logged in using the Moralis API and then update the text for the two buttons in our application to Connected and Swap:


Token Implementation
We will implement a function called availableTokens to get all supported tokens on the chain and then add them to our drop-down list that is currently empty.
We do this with the following code snippet:
See the Pen Create Uniswap DEX Clone 5 by Moralis Web3 (@moralisweb3) on CodePen.
Inside the initialize function, we will call the availableTokens function to get all the supported tokens:
See the Pen Create Uniswap DEX Clone 6 by Moralis Web3 (@moralisweb3) on CodePen.
We should have all the supported tokens populated inside our drop-down list as shown below:

Search Implementation
Instead of scrolling through the extensive token list, we’ll use the token search capability in our dropdown to look for a specific token using the following code snippet:
See the Pen Create Uniswap DEX Clone 7 by Moralis Web3 (@moralisweb3) on CodePen.
Let us update the index.html file to reflect the search functionality changes by adding the onkeyup attribute to the input tag:
See the Pen Create Uniswap DEX Clone 8 by Moralis Web3 (@moralisweb3) on CodePen.
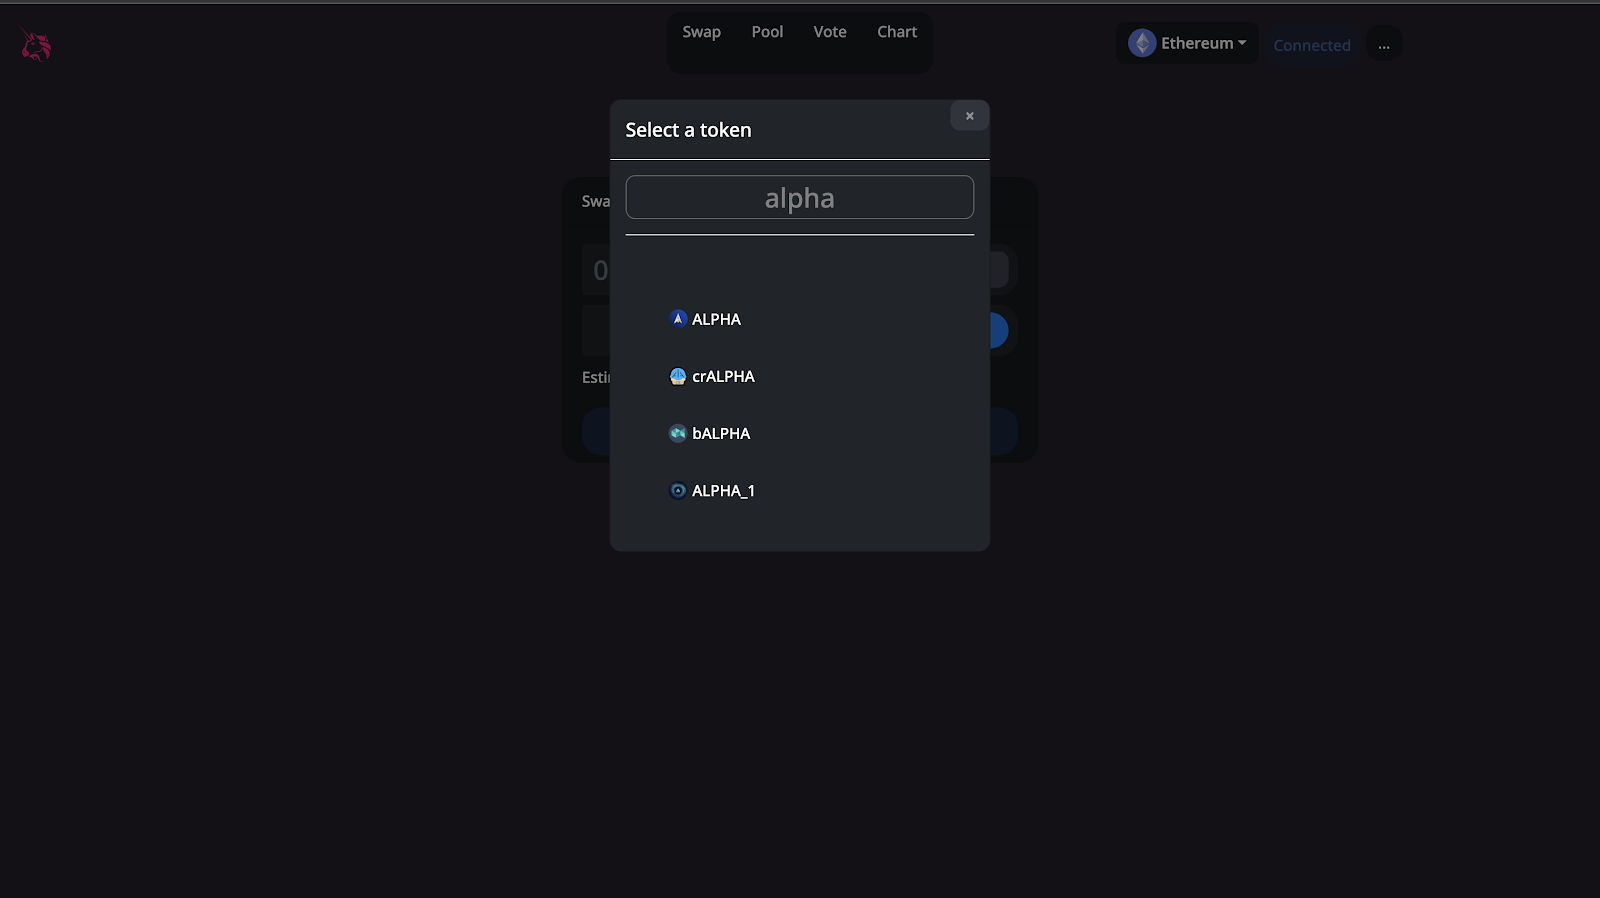
Our search functionality now works as shown below:
Render Selected Token Implementation
We will implement the rendering of a selected token in this section. At the moment, we cannot select a token from the list.
Thus, let’s update the script.js with the following code snippet:
See the Pen Create Uniswap DEX Clone 8 by Moralis Web3 (@moralisweb3) on CodePen.
Once the user selects a token, the code snippet above renders the token’s image and symbol. Depending on whatever element the user interacts with, it does this for both the from-token-selected and to-token-selected details:

Get Token Quotation and Display Amount
We’ll implement the getQuotation function in this section. This function retrieves the token’s current price and displays the amount the user will earn if they proceed with a trade.
We can achieve this with the following code snippet:
See the Pen Create Uniswap DEX Clone 10 by Moralis Web3 (@moralisweb3) on CodePen.
Next, we will call the getQuotation function when a token is selected. Let us update the selectToken function with the following code snippet:
See the Pen Create Uniswap DEX Clone 12 by Moralis Web3 (@moralisweb3) on CodePen.
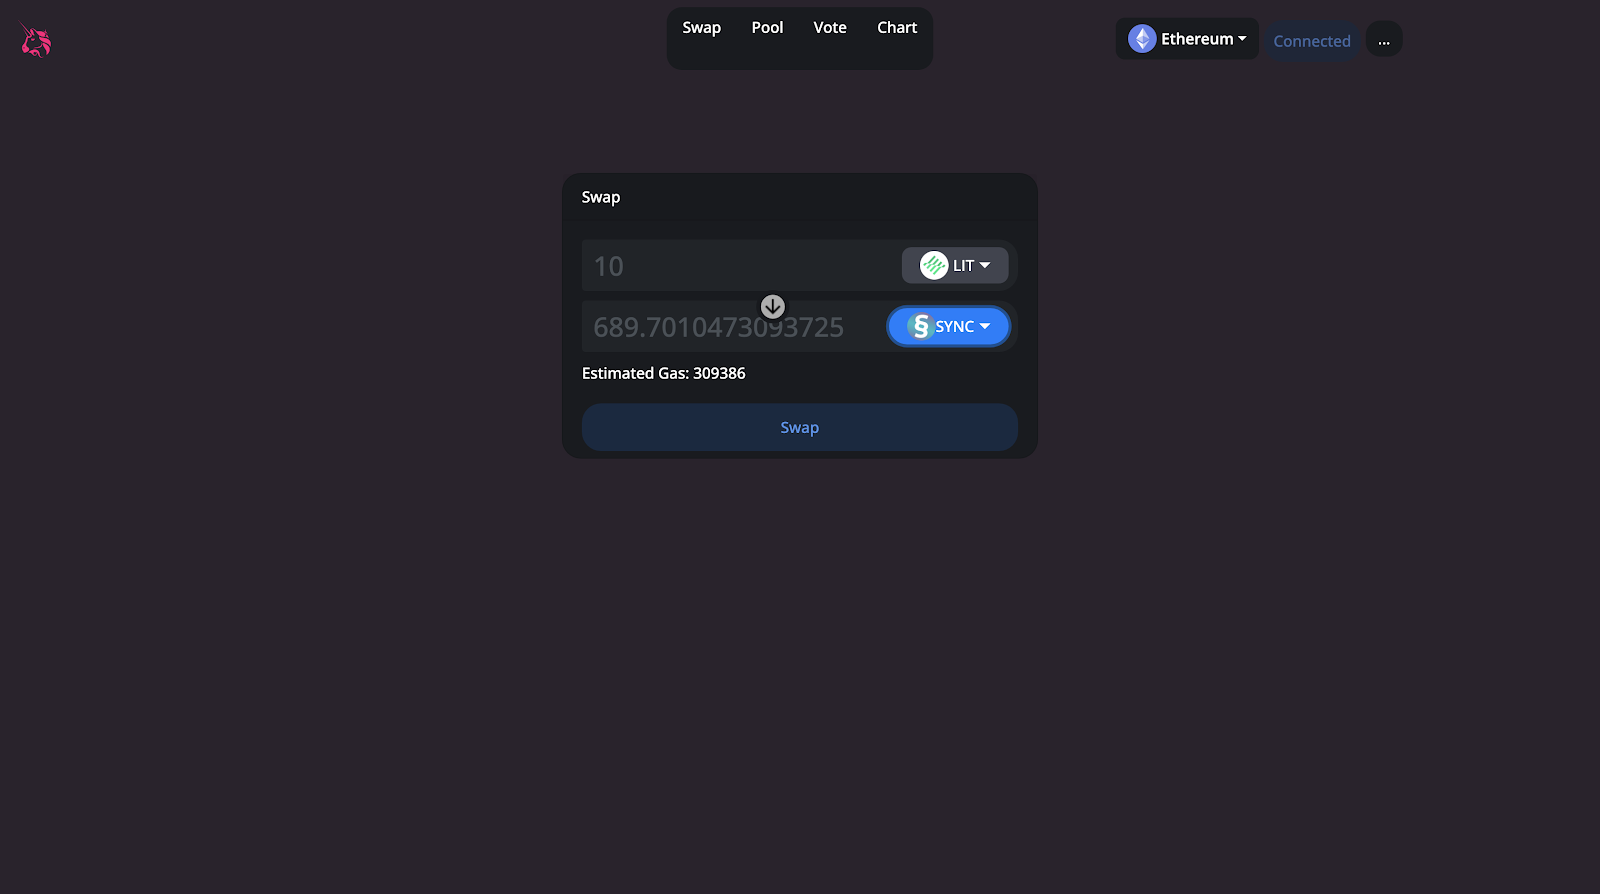
Upon selection, it will fetch and display the current price, estimated gas fee, and the amount the user will earn for the selected token, as shown below:
Swap Implementation
We’ll create two different functions to send tokens: validateSwap and Swap.
For the swap to occur, the Moralis 1inch plugin must be allowed for the smart contracts. As a result, before calling the Swap function, the validateSwap function checks if the user has provided an allowance:
See the Pen Create Uniswap DEX Clone 12 by Moralis Web3 (@moralisweb3) on CodePen.
Next, we will implement the onCllick functionality for the swap with the code snippet below:
See the Pen Create Uniswap DEX Clone 13 by Moralis Web3 (@moralisweb3) on CodePen.
Voila We have now successfully built the Uniswap DEX clone application. As such, let’s test our application:


Conclusion
This tutorial shows how to build a decentralized application using the ultimate Web3 development platform and the most advanced Web3 API – Moralis – to build a Uniswap DEX clone dapp. Using Moralis, you can build a wide variety of different Web3 dapps. Sign up with Moralis today to start building your own Web3 project!
