When we allow a claimable in-game item to be minted as an NFT, we enhance the benefits of Web3 gaming. For example, by minting game assets as NFTs, they can be tradable on marketplaces such as OpenSea. Another benefit of allowing users to mint game assets as NFTs is that players can truly own their in-game assets. If you’d like to know how to mint game assets as NFTs, this article includes the necessary steps needed to accomplish this task. As with any Web3 project, the backend is, for many, quite challenging. However, with Moralis, all your backend endeavors become a straightforward process. Therefore, you can’t miss out on letting this ultimate Web3 backend platform handle your development needs. So, want to learn how to mint game assets as NFTs? Start by creating your Moralis account now!
Moralis comes with an impressive Web3 SDK and the Moralis Metaverse SDK. As such, you can build a 2D Web3 game quickly. Also, Unity Web3 programming and creating a 3D play-to-earn (P2E) game will feel like a breeze. However, to mint game assets as NFTs and make GameFi possible, smart contracts are one of the key aspects. Thus, we will focus on one particular metaverse smart contract – “AssetFactory”. This contract was designed to enable Web3 game devs to mint game assets as NFTs. Moving forward, we’ll walk you through that smart contract. Hence, you will see that you don’t need to be a Solidity expert to implement NFT minting features. In addition, tools such as Remix and OpenZeppelin make this an easy process. After this walkthrough, you’ll be able to use Moralis and Unity to start creating Web3 games. Now, let’s explore how to mint game assets as NFTs!
Mint Game Assets as NFTs – “AssetFactory” Code Walkthrough
Note: You can access the “AssetFactory” smart contract code on GitHub. Also, we encourage you to use Remix, paste in the code, and follow our lead. That way, you’ll be able to deploy the contract and test mint some potential NFTs.
As mentioned, we will guide you through the code of our useful smart contract herein. So, let’s start at the top, where we have the pragma line:
// SPDX-License-Identifier: MIT
pragma solidity ^0.8.0;
Following are the OpenZeppelin contracts that we need to import. In doing so, we get to use the details of these verified contracts to make our work a lot simpler. As such, we save time without compromising security.
import "@openzeppelin/contracts/token/ERC1155/ERC1155.sol";
import "@openzeppelin/contracts/utils/math/SafeMath.sol";
import "@openzeppelin/contracts/utils/Strings.sol";
import "@openzeppelin/contracts/access/AccessControl.sol";
import "@openzeppelin/contracts/access/Ownable.sol";
The actual code of our contract starts with:
contract AssetFactory is ERC1155, AccessControl, Ownable {
This line contains the name of our smart contract and defines that we will focus on the ERC-1155 token standard. Next, we define all the variables that we are going to be using inside our smart contract:
  string public name; // Token name
  string public symbol; // Token symbol
  string public contractURI; // Token uri
  uint256 public circulation; // Total circulating supply
  uint256 public cost; // Per token cost
  uint256 public expiry; // Whitelist expiry time i.e. 3600
  bool public paused = false; // Pause critical funcs
By looking at the comments next to the lines of code above, you can see that we define a variable for token name, token symbol, token URI, total circulating supply, and cost per token. In addition, we define the “expiry” and “paused” variables, which we will use to define a whitelist expiry and pause critical functions.

Safety Features – “Whitelist” and “Owners” Structs
Our smart contract contains two structs that enable us to track data in our contract:
  // Whitelist data storage
  struct Whitelist {
    address buyer;
    uint256 timestamp;
    bool listed;
  }
  // Owner data storage
  struct Owners {
    address prev;
    address current;
    uint256 timestamp;
    uint256 total;
  }
The “Whitelist” struct is not a whitelist in a traditional “NFT drop” sense, meaning that we don’t use it to allow specific addresses to mint a collection early. Instead, we use this struct to ensure a smooth onboarding experience for players. By containing a player’s address (“buyer”), our whitelist ensures that players can claim characters without the risk of those characters being “rugged” from underneath them. Basically, a whitelist, in this sense, is acting as a kind of token airlock. Hence, a player’s selection is secured until a player actually completes the purchase. Furthermore, the “Owners” struct ensures that a particular address doesn’t own more than a maximum number of a specific type of asset. As such, we can create a leveled playing field per address accessing the game at any given time.
In addition, we then map each of the above two structs to an index of a token ID:
  // Mapping each user to corresponding whitelist data
  mapping(uint256 => Whitelist) public whitelist;
  // Token owners
  mapping(uint256 => Owners) public owners;
  // Create role identifier for whitelisting
  bytes32 public constant WHITELISTER_ROLE = keccak256("WHITELISTER_ROLE");
Our smart contract has two explicitly declared roles: the default admin and “whitelister_role” (see above). We create this separate role due to operational security around the “whitelister” role. In short, the role of the whitelister is going to be a set of cloud functions. These cloud functions will be programmatically signing transactions that the whitelister role is responsible for. Thus, these functions must be non-critical and limited to this role only.
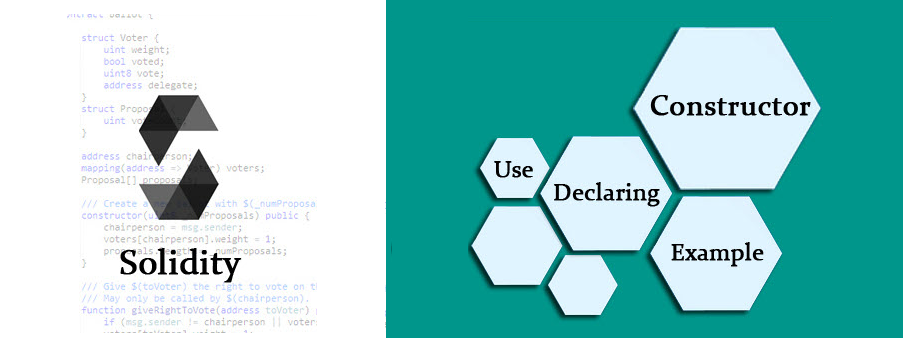
The Constructor to Mint Game Assets as NFTs
We built the constructor of the “AssetsFactory.sol” smart contract to be agnostic to the asset type we are deploying. This allows us to create a new asset while setting all the key descriptive variables:
  constructor(
    address _root,
    string memory _name,
    string memory _symbol,
    string memory _uri,
    string memory _cURI,
    uint256 _expiry,
    uint256 _cost
  ) ERC1155(_uri) {
    _setupRole(DEFAULT_ADMIN_ROLE, _root);
    _setupRole(WHITELISTER_ROLE, _root);

    name = _name;
    symbol = _symbol;
    cost = _cost;
    expiry = _expiry;
    circulation = 0;
    contractURI = _cURI;
  }
Looking at the lines of code above, you can see that the constructor covers the admin wallet’s address name (“_root”) and all details of the asset (name, symbol, etc.) as presented previously. Then the code sets the above-explained two roles – the whitelister role and the default admin role. Moreover, the following are also the lines of code for our single function modifier:
  modifier onlyAdmin() {
    require(isRole(DEFAULT_ADMIN_ROLE, msg.sender), "Restricted to admins.");
    _;
  }
The above modifier will be used whenever a function, which needs to check if the address calling it is an admin account, is called.
Flexibility Around Roles
Since we want this smart contract to possess flexibility around roles, this is what the “addAdmin”, “addToRole”, “renounceAdmin”, and “isRole” functions are allowing for:
  function addAdmin(bytes32 roleId, bytes32 adminRoleId) external onlyAdmin {
    _setRoleAdmin(roleId, adminRoleId);
    //emit AdminRoleSet(roleId, adminRoleId);
  }

  function addToRole(bytes32 roleId, address account) external onlyAdmin {
    grantRole(roleId, account);
  }

   function renounceAdmin() external {
    renounceRole(DEFAULT_ADMIN_ROLE, msg.sender);
  }

  function isRole(bytes32 roleId, address account) public view returns (bool) {
    return hasRole(roleId, account);
  }
The above functions work based on introducing the inherited access control functionality from the imported OpenZeppelin contracts. These functions give an admin account the right to grant and renounce roles to specific account addresses. Moreover, it enables this flexibility around roles after the contract has been deployed.
Read-Only Functions
Next, we have read-only functions, which also need to do their part when you want to mint game assets as NFTs:
  function getContractURI() public view returns (string memory) {
    return contractURI; // Contract-level metadata
  }


  function isWhitelisted(address _address, uint256 _tokenId)
    public
    view
    returns (bool)
  {
    bool userIsWhitelisted = false;
    if (whitelist[_tokenId].buyer == _address) {
      userIsWhitelisted = whitelist[_tokenId].listed;
    }
    return userIsWhitelisted;
  }


  function getCost() external view returns (uint256) {
    return cost;
  }
The “getContractURI” function obtains contract level metadata. As such, this enables marketplaces to gain descriptive information about an asset. Moreover, “isWhitelisted” ensures that the game can track who is whitelisted at any given time. It does so by taking in users’ addresses and token IDs and returning either “true” or “false”. Nonetheless, the “getCost” function returns the cost of the asset.
Write Functions to Mint Game Assets as NFTs
The important write functions of our example smart contract can be called either by an admin or a whitelister. The game studio using this smart contract decided to implement batch minting. Furthermore, the team also wanted the game’s assets to be viewable on OpenSea ahead of the game’s release date. As such, we created a smart contract that enables bulk pre-minting of all the needed assets. In addition, this also makes the ERC-1155 perfectly suited for this project. That way, a single transaction mints potentially thousands of tokens each time the game studio wants to create new assets. Of course, this pre-minting comes with some demands. Hence, we need to upload all the metadata and file assets corresponding to asset tokens in advance. We also need to ensure data integrity. As such, we use IPFS to host the metadata and the corresponding files.
Here’s our “batchMint” function:
  function batchMint(
    address _to,
    uint256[] memory _tokenIds,
    uint256[] memory _amounts
  ) external onlyAdmin {
    _mintBatch(_to, _tokenIds, _amounts, "");

    if (_tokenIds.length > 0) {
      for (uint256 i = 0; i < _tokenIds.length; i++) {
        uint256 tokenId = _tokenIds[i];
        owners[tokenId] = Owners(
          address(0), // prev
          address(this), // current
          block.timestamp, // timestamp
          0 // number of owners
        );
        circulation += _amounts[i]; // if amount is larger than 1 we need to make sure circulation is correctly incremented
      }
    }
  }
Setting Variables on the Fly
Nonetheless, we also want to be able to set certain asset variables on the fly. Hence, we included a way to set URIs, the whitelist expiry time, the pausing of critical functions, and the cost of an asset:
  function setURI(string memory _uri) public onlyAdmin {
    _setURI(_uri);
  }

  function setExpiry(uint256 _expiry) external onlyAdmin {
    expiry = _expiry;
  }

  function setCost(uint256 _newCost) external onlyAdmin {
    cost = _newCost;
  }

  function setPaused(bool _paused) external onlyAdmin {
    paused = _paused;
  }
Particularly interesting is the “setCost” function, where we also ensure that the cost is pegged to a familiar currency. As such, we use the “cost” variable for pegging the asset price to the US dollar. We do this programmatically via cloud functions.
Furthermore, if you remember, we mentioned that the whitelister role is a programmatic one. Essentially, it’s going to be a bot, which will use the “addToWhitelist” function:
  function addToWhitelist(uint256 _tokenId, address _address)
    external
    onlyRole(WHITELISTER_ROLE)
  {
    // Buyer address must not already own.
    require(
      owners[_tokenId].current != _address,
      "Address already owns this token."
    );
    // Listing created/updated against address.
    whitelist[_tokenId] = Whitelist(_address, block.timestamp, true);
    emit Whitelisted(_tokenId, _address, block.timestamp);
  }
The above function plays an important role as it is the only way for players to gain an asset via playing the game.
The Buy Function
Once the players have been whitelisted, the buy function comes to play. As such, this function is mainly checking if the address is whitelisted. It also checks if the players are adhering to certain specifications of the game’s design. Only if those conditions are met can the assets be transferred to a player’s Web3 wallet. At the same time, the buy function also exchanges the payable message into the game studio’s wallet.
Here’s the buy function:
 function buy(
    uint256 _tokenId,
    address _buyer,
    uint256 _amount,
    bytes memory _data
  ) external payable {
    require(!paused, "Contract is currently paused.");

    address owner = owner();
    uint256 available = balanceOf(owner, _tokenId);

    // Must be tokens remaining in owner balance.
    require(available >= _amount, "No tokens remaining.");

    if (isRole(DEFAULT_ADMIN_ROLE, _buyer) == true) {
      // Bypass payment if buyer is on excluded list.
      _safeTransferFrom(owner, _buyer, _tokenId, _amount, _data);
      return;
    }
    // Buyer address must not already own.
    require(
      owners[_tokenId].current != _buyer,
      "Address already owns this token."
    );
    // Buyer must be whitelisted for token id.
    require(
      whitelist[_tokenId].buyer == _buyer,
      "Address is not listed for this token."
    );
    // Buyer must be whitelisted.
    require(whitelist[_tokenId].listed, "Address is not on the list.");
    // Whitelist entry must not have expired.
    require(
      block.timestamp <= (whitelist[_tokenId].timestamp + expiry),
      "Whitelist entry expired."
    );
    // Amount paid must meet token value.
    require(msg.value == cost, "Value is not correct.");
    // Commence transfer.
    _safeTransferFrom(owner, _buyer, _tokenId, _amount, _data);
    // Transfer amount paid into previous token owner's address.
    payable(owner).transfer(msg.value);
  }

Going Beyond Unity’s Frontend
With all of the above functions, players can mint game assets as NFTs and gain ownership of those assets. However, we also want to track ownership beyond the game’s Unity frontend. That means we need to make the ownership trackable by the secondary marketplaces, such as OpenSea. We achieve that with the “_beforeTokenTransfer” function:
  function _beforeTokenTransfer(
    address operator,
    address from,
    address to,
    uint256[] memory ids,
    uint256[] memory amounts,
    bytes memory data
  ) internal virtual override {
    require(ids.length == amounts.length, "Mismatched params.");
    for (uint256 i = 0; i < ids.length; i++) {
      // Mark buyer address as owner.
      owners[ids[i]].prev = from;
      owners[ids[i]].current = to;
      owners[ids[i]].timestamp = block.timestamp;
      owners[ids[i]].total + 1;
      emit newOwner(to, ids[i]);
    }
    super._beforeTokenTransfer(operator, from, to, ids, amounts, data);
  }
Mint Game Assets as NFTs – Deploy our Smart Contract
The above functions wrap up the functionality of our smart contract. However, to mint game assets as NFTs, you need to deploy this smart contract. Fortunately, you can do this easily with Remix. For starters, you need to compile your instance of the above-presented contract:

Once the smart contract is compiled, you get to deploy it. For the sake of this tutorial, we will use Polygon’s testnet (Mumbai). As such, make sure to have your MetaMask connected to that network. You also need some “play” MATIC, which you can get from a Mumbai testnet faucet.
Note: If this is your first time using MetaMask, we encourage you to check out how MetaMask for developers works.
Finally, here’s the screenshot that will help you deploy the smart contract:

In case you’d like a more detailed walkthrough of the entire code, use the video below. Jump to 8:16 for detailed guidance on deploying the contract. At 9:09, you’ll also have a chance to learn how to use Remix to batch mint example NFTs.
How to Mint Game Assets as NFTs – Summary
Assuming you’ve covered the above sections, you know how to mint game assets as NFTs. Well, at least the smart contract part – the engine that makes this feature possible. Essentially, you had a chance to go through the entire code and even deploy your own instance of the contract. However, in order to make the most out of this smart contract, you need a game to implement the contract. For this, you have two options. You can wait for our tutorial for the game that this contract was designed for, or you can take on some of our existing Unity Web3 example projects.
Since we are firm believers in learning by taking action, we encourage you to learn how to communicate with a Web3 database from Unity, how to do blockchain game transactions with Unity, and how to connect a Unity game with Web3 login. After completing these tutorials, you’ll be ready to build a Web3 MMORPG, a metaverse dapp, or a medieval metaverse game.
On the other hand, you might be eager to explore other aspects of the crypto realm. If so, make sure to visit the Moralis blog and the Moralis YouTube channel. Both of these outlets offer a ton of high-quality content, serving as your free ongoing crypto education. For instance, some of the latest articles cover how to build a Web3 Twitter clone or a decentralized autonomous organization (DAO), SPL vs ERC20 tokens comparison, how to build a Solana token dashboard, how to create your own metaverse, how to create a BNB NFT, fractional NFTs, dynamic NFTs, and NFT-based memberships explanations, how to build a Uniswap DEX clone, and how to get blockchain SMS notifications. Nonetheless, if you want to take a more professional approach, consider enrolling in Moralis Academy.

What is ERC-4337? Full EIP-4337 Guide