A Solana token dashboard can provide several features for a user. For example, it can display a user’s portfolio of NFTs and the balance of various tokens. A visual interface such as this, combined with Web3 authentication, forms the basis of a dapp’s simple DeFi dashboard. Although most decentralized applications exist on Ethereum, Solana’s impressive bull run in 2021 had developers explore its blockchain, realizing that Solana’s incredible speed and low fees made it an ideal choice for dapp development. As such, numerous Web3 applications started to emerge. As a result, more and more developers want to learn how to build dapps on Solana. To start, programmers would benefit from creating a dapp with a neat dashboard. Fortunately, this is what we’re about to show you herein. So, follow along as we explore how to build a Solana token dashboard with the best tool from the Web3 tech stack, Moralis!
By building a Solana token dashboard, you will learn more about Moralis. This “Firebase for crypto” option is the ultimate Web3 backend platform that supports multiple chains and platforms. Aside from the Solana API, the Moralis SDK also includes the Ethereum API. Hence, you can also use it to cover your backend needs on EVM-compatible chains. Furthermore, working with Moralis is as straightforward as it gets, as you can copy and paste single lines of code from the Moralis documentation when implementing various Web3 functionalities. Moreover, thanks to Moralis’ developers, there are additional shortcuts at your disposal. By using phenomenal boilerplates available on GitHub, you can create all sorts of dapps in a matter of minutes. In fact, if you follow our lead in this article, you will utilize this kind of shortcut and build your Solana token dashboard quickly and easily.

Why Build on Solana?
When it comes to blockchain development and Web3, we are basically just getting started. Hence, there are new programmable chains emerging quite regularly. Of course, Ethereum remains the behemoth. However, this reputable network comes with exorbitant fees. As a result, developers are eager to explore alternatives that are often referred to as “Ethereum killers”. Solana is one of those chains that offers high performance with relatively few issues and extremely low gas fees. Although, you should take the word “killers” lightly. Based on our expertise, the future will offer several reputable chains, and Ethereum is most likely here to stay. Accordingly, cross-chain interoperability will be the name of the game.

Fortunately, this is what Moralis has built into its foundation. Essentially, you can use the same code (with a few small tweaks) to deploy your Solana dapps on other chains in the future. As such, you can future-proof your work. However, as you start your journey to build a Solana token dashboard, we always recommend starting using Solana’s testnet (devnet in Solana’s case) to create a stress-free environment for your blockchain development feats.
Build a Solana Token Dashboard with Moralis – Example Project
As mentioned, we are going to show you how to easily create a Solana token dashboard herein. By using Moralis and a boilerplate template, you will be able to finish this example project in under 15 minutes. In short, these are the steps you will complete along the way:
- Complete the initial Moralis setup.
- Clone the “solana-defi-dashboard” code.
- Install all dependencies by entering the “yarn install” command in Visual Studio Code (VSC).
- Populate the “.env” file with your Moralis server URL and application ID.
- Run the app by entering the “yarn start” command in VSC.
- Implement Web3 authentication with the Phantom Web3 wallet.
- Ensure proper fetching of users’ portfolio data.
However, before we walk you through the above actions, let’s make sure you have a clear picture of what we’ll be building. As such, let’s do a quick demonstration of our example Solana token dashboard.

Demo of Our Solana Token Dashboard Example
Here’s what users see when they land on our Solana token dashboard:

As with all Web3 applications, users need to authenticate themselves first. However, since Solana is not an EVM-compatible chain, we do not authenticate with MetaMask. Instead, we use the Phantom wallet, which will prompt users for their password and approval after clicking on the “Connect Wallet” button:

Here is what our Solana token dashboard looks like once authenticated:

As you can see, it displays a user’s address, offers the user to disconnect the wallet, and a way to switch between mainnet and devnet. Nonetheless, it also displays the native token and other Solana token balances. The above screenshot clearly shows 0.5 SOL in the connected wallet, which is on-chain data.

You can look at the above image to see that the data is truly obtained from the blockchain. This includes the example user’s wallet address and the token balances of that address. However, since this wallet only contains native tokens (SOL), let’s shift to the devnet. There, this example wallet holds other Solana tokens as well:
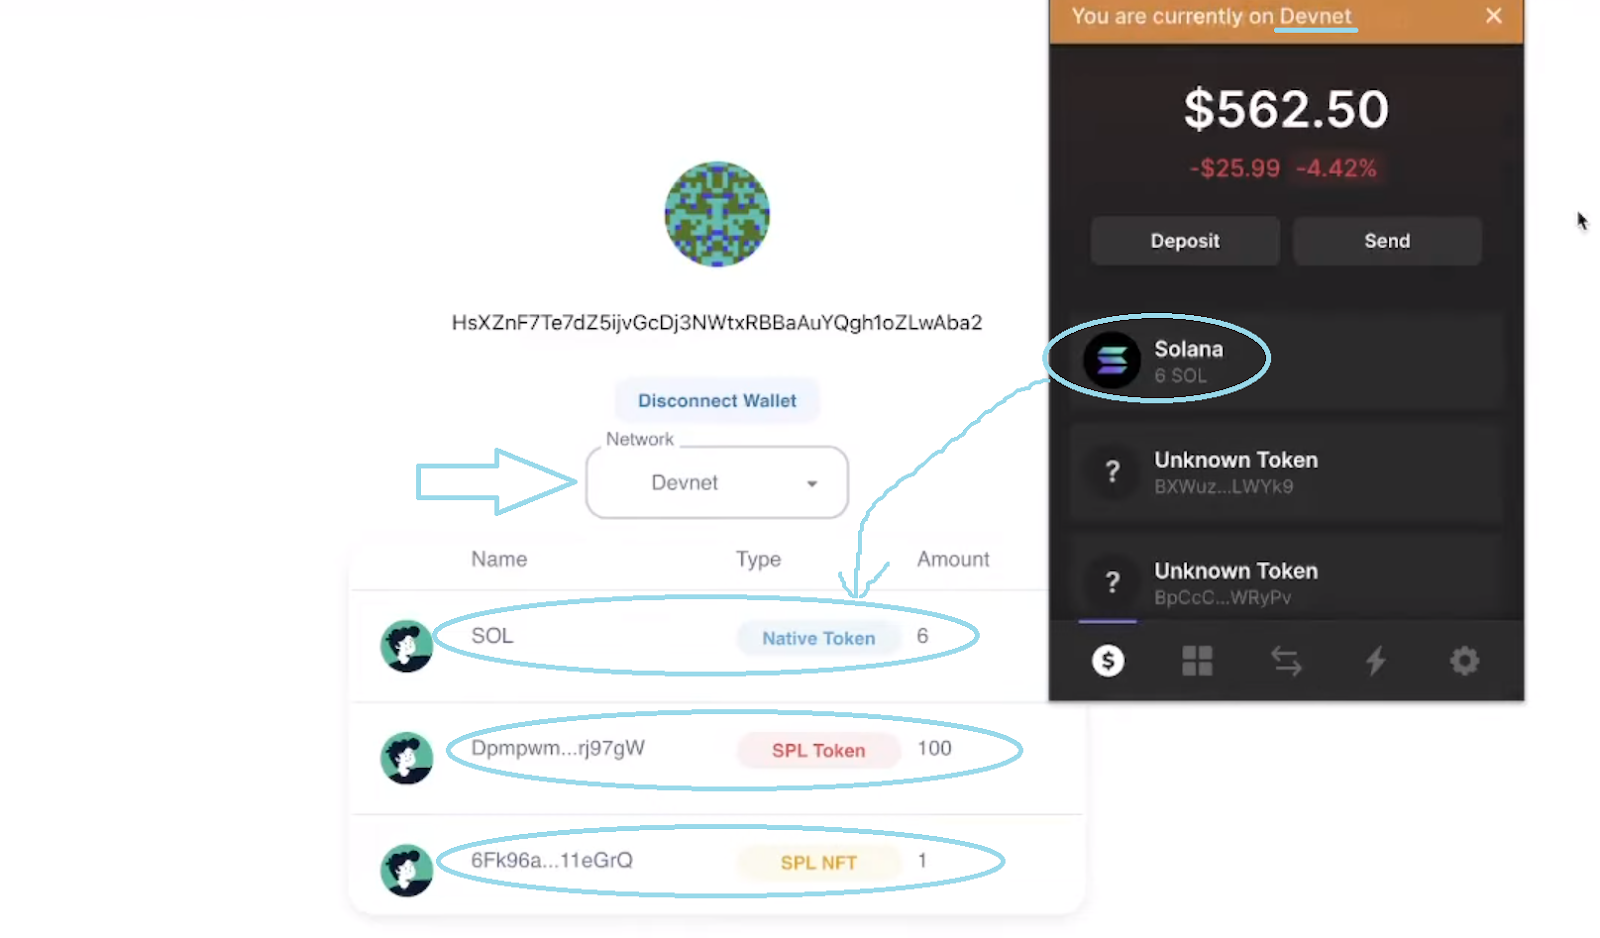
The above screenshot clearly indicated all tokens, including SPL standard NFTs.
Build a Solana Token Dashboard Step-by-Step
After seeing the above demo, you have probably decided to jump in on the action and build your own Solana token dashboard. Fortunately, there’s no hard work involved. After all, you’ll be using our boilerplate and Moralis’ SDK to get to the finish line in record time.
Initial Moralis Setup
Whether you are building a Solana token dashboard or Web3 apps on other supported chains, you must first complete the following steps to use Moralis:
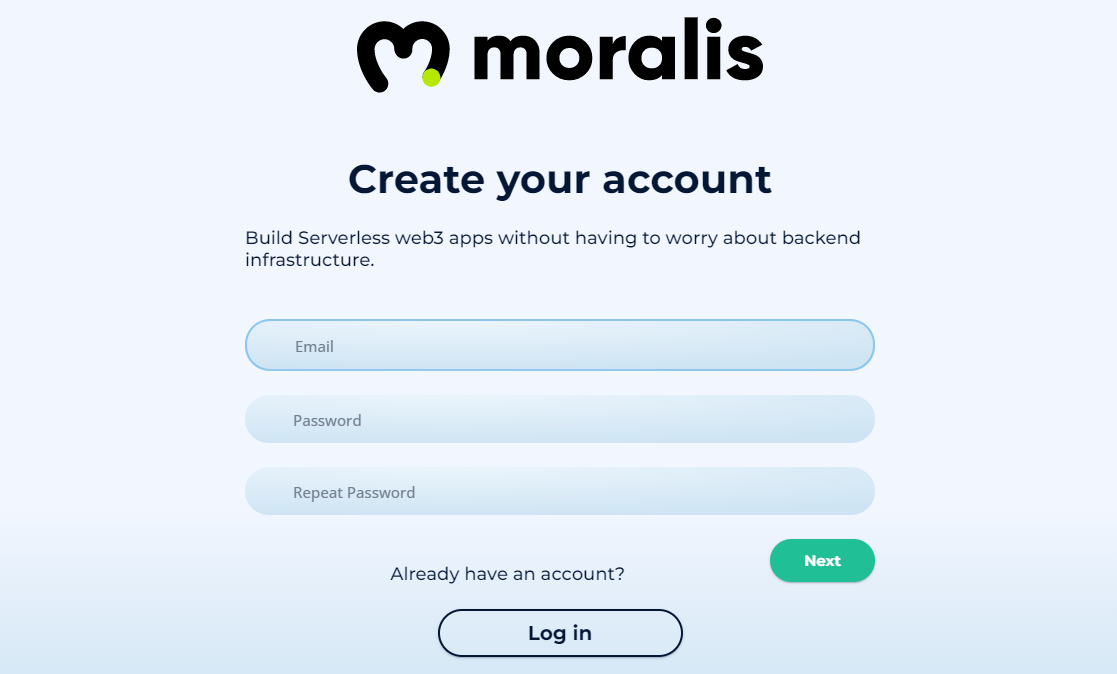
- Create Your Moralis Account – Create your account on Moralis’ signup page. There, you must enter your email address and create your password. Then you should also click on the confirmation link in your email inbox. However, if this is not your first rodeo with Moralis, just log in.
- Create a Moralis Server – Once logged in, you need to create a Moralis server. To do so, go to the “Servers” tab of your Moralis admin area and click on “+ Create a new Server”. New users are also guided by the on-page tutorial:

Then, you need to select the network type suitable for your project (see screenshot below). Since this is an example project, “Testnet Server” will be the best fit:

Next, you have to enter your server details. So, start by entering your server’s name, which can be anything you want. After that, select your region, network type, and chain(s). Then spin up your server by clicking on the “Add Instance” button:

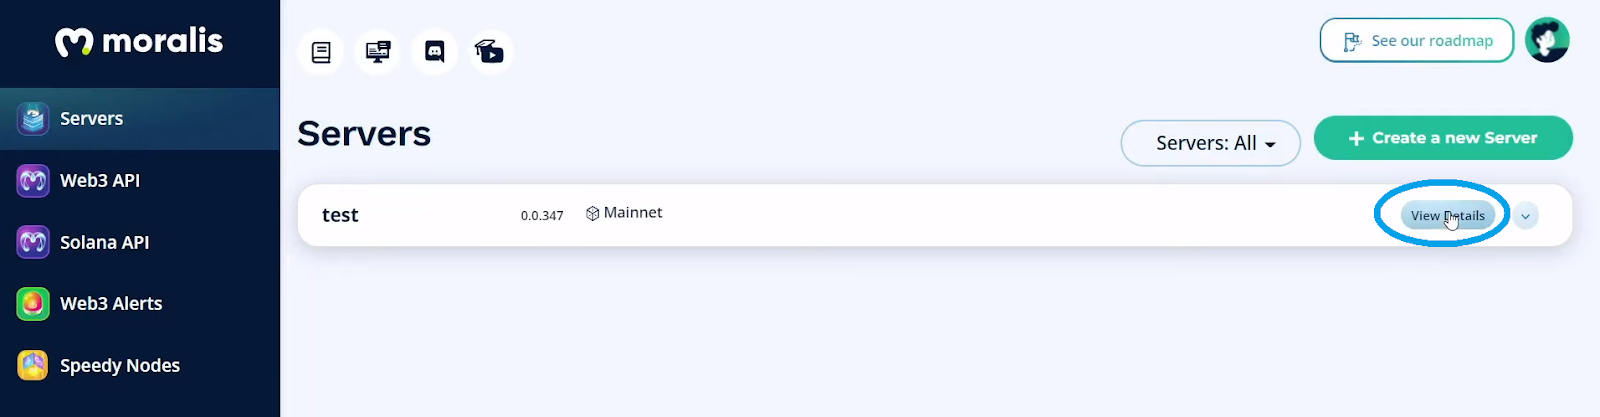
- View and Copy Your Server’s Details – Now that your server is spinning, you get to view its details. To do this, click on the “View Details” button:
This will open up a new window with all the necessary details. Simply use the copy icons next to the server URL and application ID:
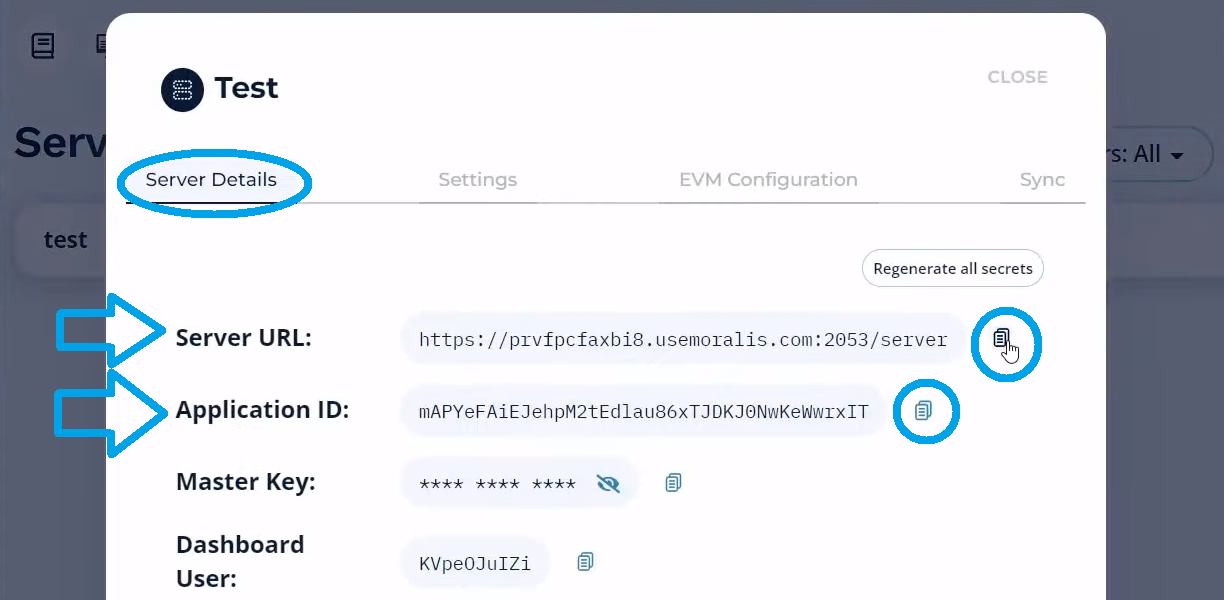
You will use these details to populate one of the boilerplate files later on. However, you must first clone our code.
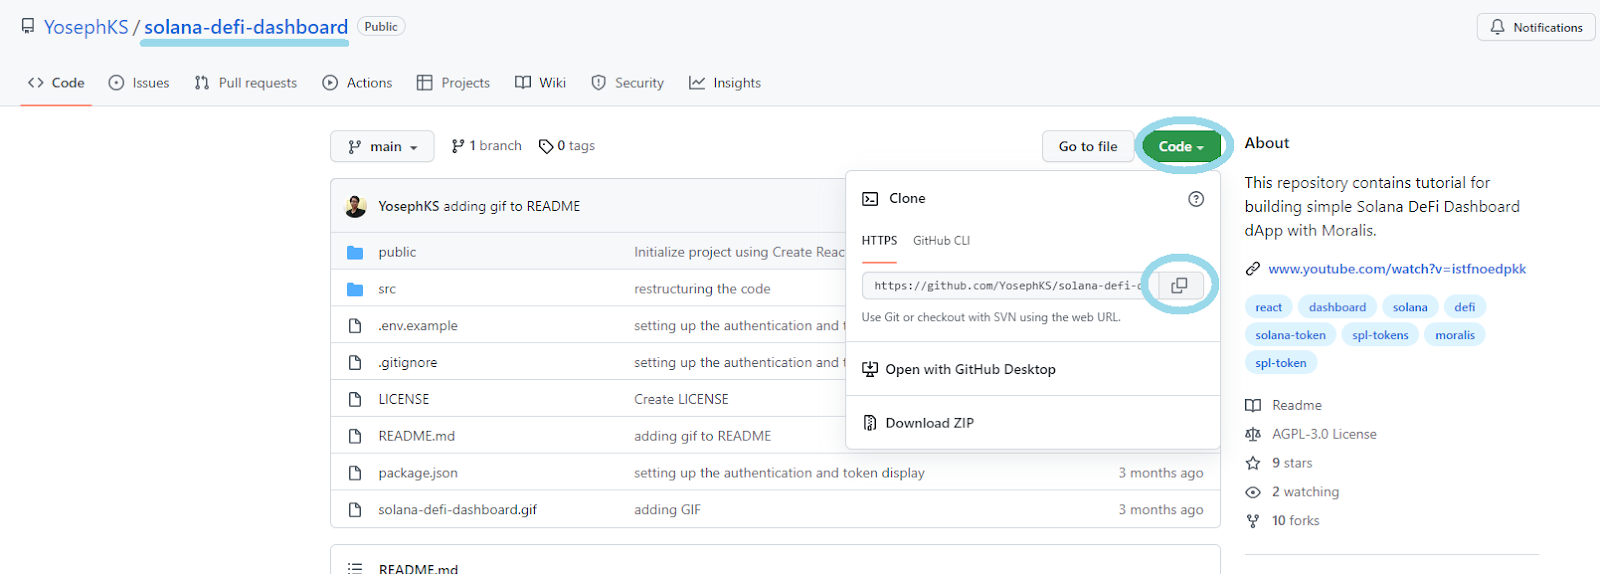
Clone the “solana-defi-dashboard” Code
Start by using the “solana-defi-dashboard” link provided in the overview list above. Once on our GitHub page, copy the code’s address:
Then, open your favorite code editor (we prefer to work with Visual Studio Code [VSC]) to clone the code. Inside VSC, you need to open the terminal and then enter the “git clone” command followed by the above-copied address to clone the code:
git clone https://github.com/YosephKS/solana-defi-dashboard.git
After cloning the code, you’ll be able to see the following folders and files related to our example project:

Install All Dependencies
You also need to install all dependencies. As such, you want to use your VSC terminal again. First, “cd” into the right folder. If you are using the same names as us, then this is the command line you need to use:
cd moralis-upgradeable-smart-contracts
Then, enter “yarn install”. Once the installation is complete, you’ll get the “yarn.lock” file:

Note: You may also use npm. In that case, you will get “package-lock.json” instead of “yarn.lock”.
Populate the “.env” File
As you can see in the image above, there’s the “.env.example” file, which you can copy and rename into “.env”. Of course, you can also rename it directly. Then, open the “.env” file and paste in the details obtained in the third step of the “Initial Moralis Setup” section:

Note: Do not use the above server URL and application ID. Instead, make sure to paste in your server’s details.
Run the App
You are now all set to run your application by entering “yarn start” inside your terminal’s command line. If you’ve completed all of the above steps properly, you should see this screen:

You should already be familiar with the screenshot above as we used it in our demo earlier herein. Also, you know what the Solana token dashboard interface looks like once a user authenticates. However, you don’t know yet how the Web3 authentication process is performed and how it fetches users’ portfolio data. Hence, let’s focus on these two aspects next.
Note: Since you’ve cloned our code, both Web3 authentication and users’ data portfolio fetching are already implemented. As such, the following section is just a code walkthrough.
Web3 Authentication and Users’ Portfolio Data Fetching
The core logic of our dapp, which also includes these two basic but powerful features, is covered in the “App.js” file. As far as the authentication on the Solana network goes, Moralis implements the Phantom wallet. First, you need to import the Moralis SDK and Solana API from “react-moralis”:
import {
  useMoralis,
  useMoralisSolanaApi,
  useMoralisSolanaCall,
} from "react-moralis";
The above gives you access to some pretty powerful hooks. As such, you get to use “authenticate” to create your “onConnectPhantomWallet” function:
  const onConnectPhantomWallet = async () => {
    await authenticate({
      type: "sol",
    });
  };
The above lines of code handle Web3 login with the Phantom wallet. This means that our dapp’s “Connect Wallet” button will call this function.
As far as the fetching of users’ portfolio data goes, the above “import” already ensures we have full control. Hence, we can use these hooks to define necessary constants:
  const { account } = useMoralisSolanaApi();
  const { fetch, data, isLoading } = useMoralisSolanaCall(account.getPortfolio);
Moreover, “getPortfolio” does all the heavy lifting. We also use the “fetch” function, which obtains users’ (logged in) addresses either on the mainnet or devnet:
  useEffect(() => {
    if (isAuthenticated && user.get("solAddress")) {
      // Fetch only when authenticated
      fetch({
        params: {
          address: user.get("solAddress"),
          network,
        },
      });
    }
  }, [fetch, isAuthenticated, user, network]);
If you prefer video tutorials, make sure to watch the video below starting at 23:16. In that video, a Moralis expert completes all of the described steps outlined above. This is also where you can get a more detailed code walkthrough of our dapps authentication and portfolio fetching (starting at 27:15).
How to Build a Solana Token Dashboard – Summary
We hope you’ve followed our lead and that you now have your own version of a Solana token dashboard. If so, you’ve learned how to complete the initial Moralis setups. Hence, you now know how to obtain your server URL and application ID to populate a “.env” file. Furthermore, you’ve also learned how to easily implement Web3 authentication and how to fetch users’ portfolio data. Thanks to Moralis’ SDK, both of these features require relatively short snippets of code. Nonetheless, if you enjoyed this example project, we recommend you also learn how to create a Solana token.
In addition, you might want to shift your attention to other programmable chains. As such, we encourage you to check out how to create a Polygon token, a BNB Chain token, or an Avalanche dapp. All these tutorials and many others are at your disposal on the Moralis YouTube channel and the Moralis blog. These are some of the latest topics: how to create a BNB NFT, fractional NFTs guide, details about dynamic NFTs, NFT-based memberships, a play-to-earn (P2E) game smart contract, building a Uniswap DEX clone, how to get blockchain SMS notifications, adding a Web3 connect wallet button to your website, building a play-to-earn game, Mumbai testnet faucet, and Web3 without MetaMask. Nonetheless, all this valuable content can serve as your free ongoing blockchain development education.
On the other hand, you might be eager to become a Web3 developer and go full-time crypto fast. If that’s the case, taking a more professional approach usually works best. As such, we recommend you enroll in Moralis Academy, where pro-level courses await you. On top of that, you will also get a personalized study path, expert mentorship, and membership in one of the most incredible communities in the crypto realm.

