The blockchain industry is filled with decentralized applications (dapps) we can interact with. However, to interact with the Web3 realm, we must utilize an essential feature that all dapps include – Web3 authentication. Moreover, with so many Web3 wallets used for authentication on the market, your website must include a function where users can connect any type of wallet they might have installed on their mobile device. Fortunately, with WalletConnect and Moralis, we can implement a Web3 “connect wallet” button to your site that lets users authenticate themselves. Sounds daunting? Don’t worry! Follow along herein as we show you how to add a Web3 connect wallet button to your website quickly and easily!
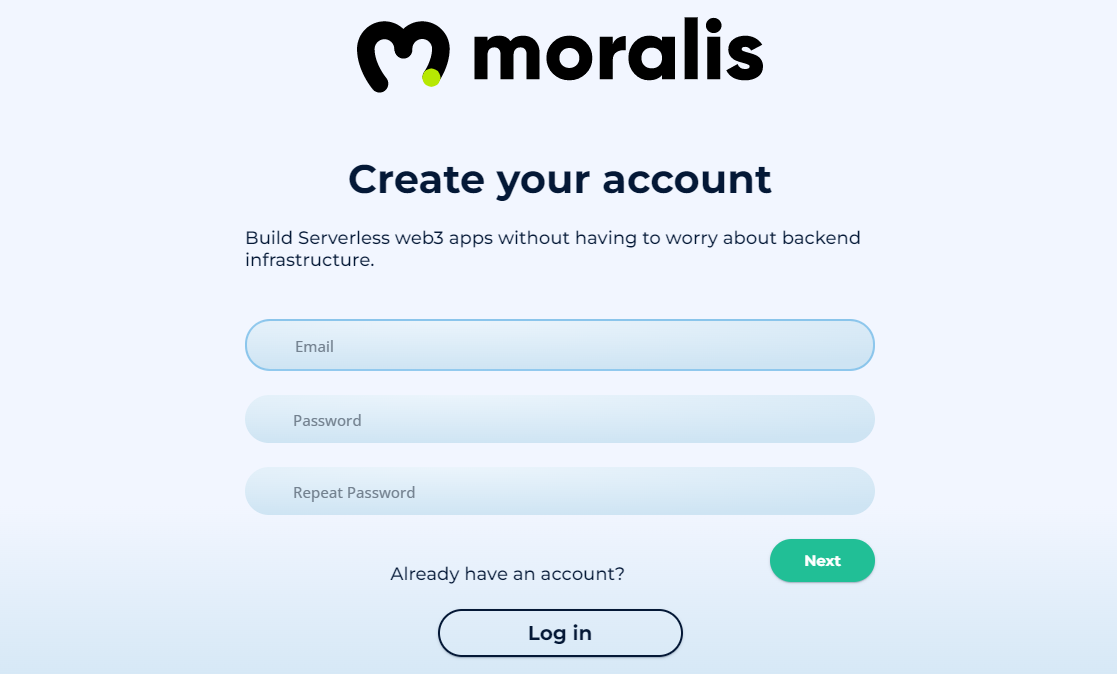
If you’ve been exploring the crypto space for a while, you know that things move fast in this evolving industry. Yes, we’ve seen exponential growth in blockchains and Web3 use cases. Also, we’ve seen advancements in dapp development as programmers build next-gen applications effortlessly. Such advancements could not be possible if programmers utilized primitive tools. Today, there are practical tools at your disposal that enables you to avoid dealing with the limitations of RPC nodes. These tools include open-source platforms and online IDEs that provide templates and let you deploy smart contracts, such as Remix and OpenZeppelin. However, the pinnacle of the current Web3 tech stack is Moralis. Moralis is the best Web3 backend platform with cross-chain and cross-platform interoperability. It includes powerful plugins and integrations, such as IPFS, MetaMask, and WalletConnect. With Moralis, you get to implement a Web3 connect wallet button effortlessly. Thus, create your free Moralis account.

Add a Web3 Connect Wallet Button to Your Website with Moralis
As mentioned earlier, we will demonstrate in this article how easy adding a Web3 connect wallet button to a website is. Hence, we will take on an example project where we will create a pretty simple website. For that purpose, we will use JavaScript (JS). Also, we will cover all our blockchain-related needs with Moralis. Furthermore, Moralis integrates various Web3 authentication solutions, which will make our job quite simple. As such, use the above link to create your free Moralis account.
Moralis comes with MetaMask and WalletConnect integrations. These two options are more than enough to integrate a Web3 connect wallet button to any website. By default, Moralis offers you to authenticate with MetaMask. However, with some effortless tweaks to your code, you can easily connect users with WalletConnect.
Moving forward, we will look at our demo dapp. We will first use Moralis’ default Web3 authentication. Then, we will walk you through the code and the tweaks needed to make a transition to WalletConnect login. The latter is particularly neat because it enables users to sign in by scanning a QR code. In addition, Moralis can also serve as a WalletConnect Android SDK alternative. After applying the necessary tweaks to our code, we’ll run our demo app. This time, you’ll be able to see WalletConnect as an excellent way of Web3 login in action.

Web3 Connect Wallet Button Prompting MetaMask or WalletConnect – Example Project
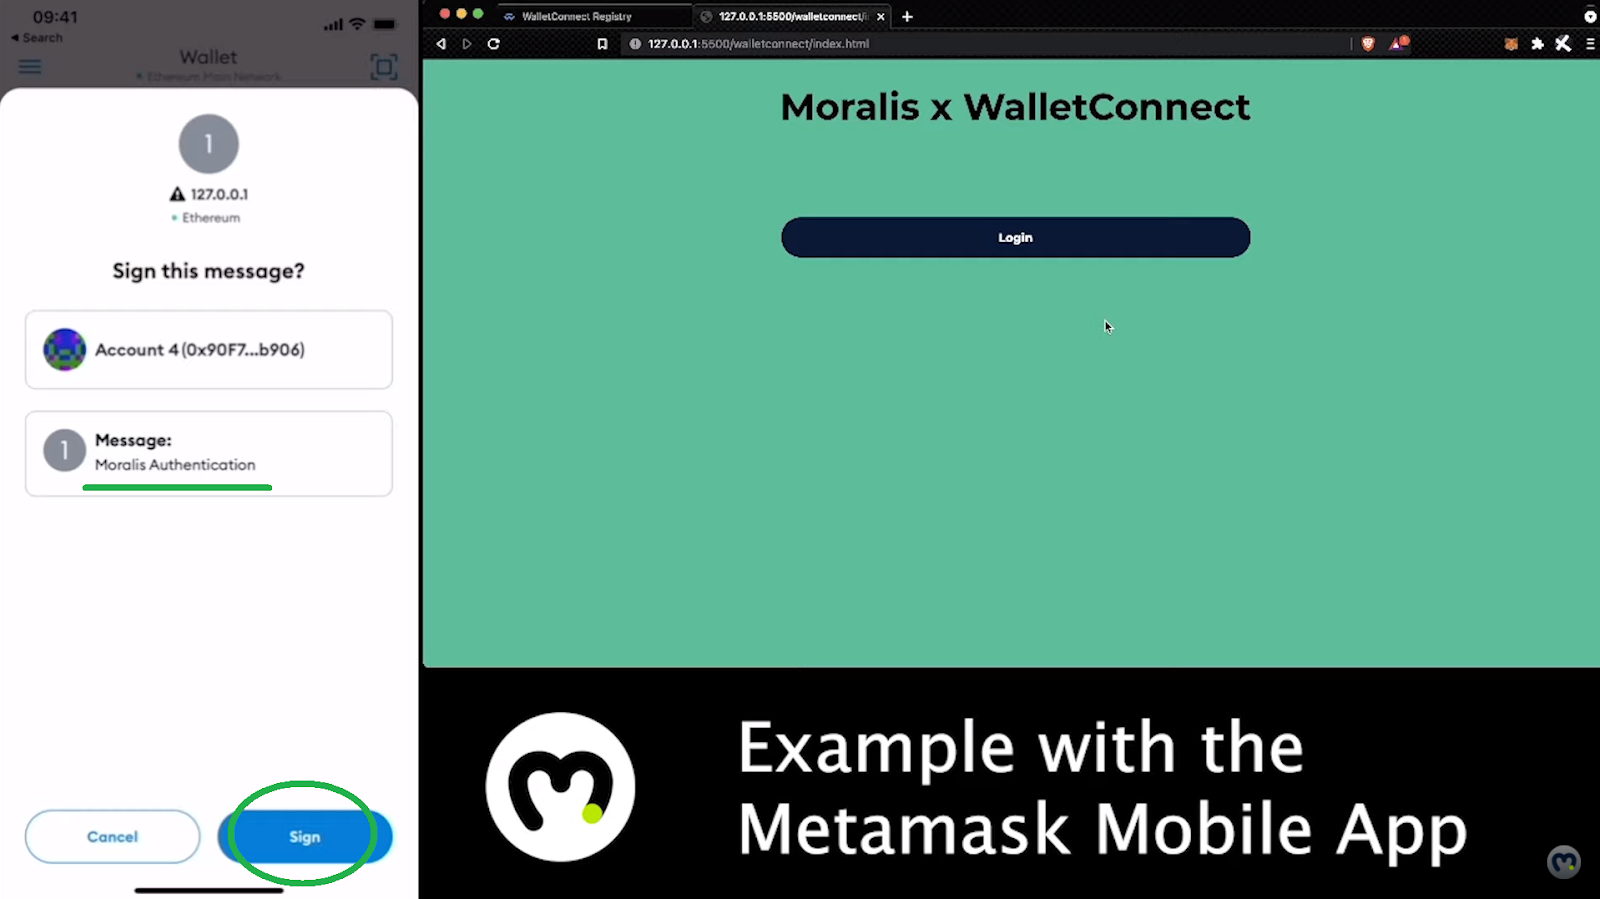
As mentioned above, we are starting today’s example project with a demonstration of a Web3 connect wallet button prompting MetaMask. So, as you can see in the screenshot below, our example dapp includes a large login button. The latter is our Web3 connect wallet button:

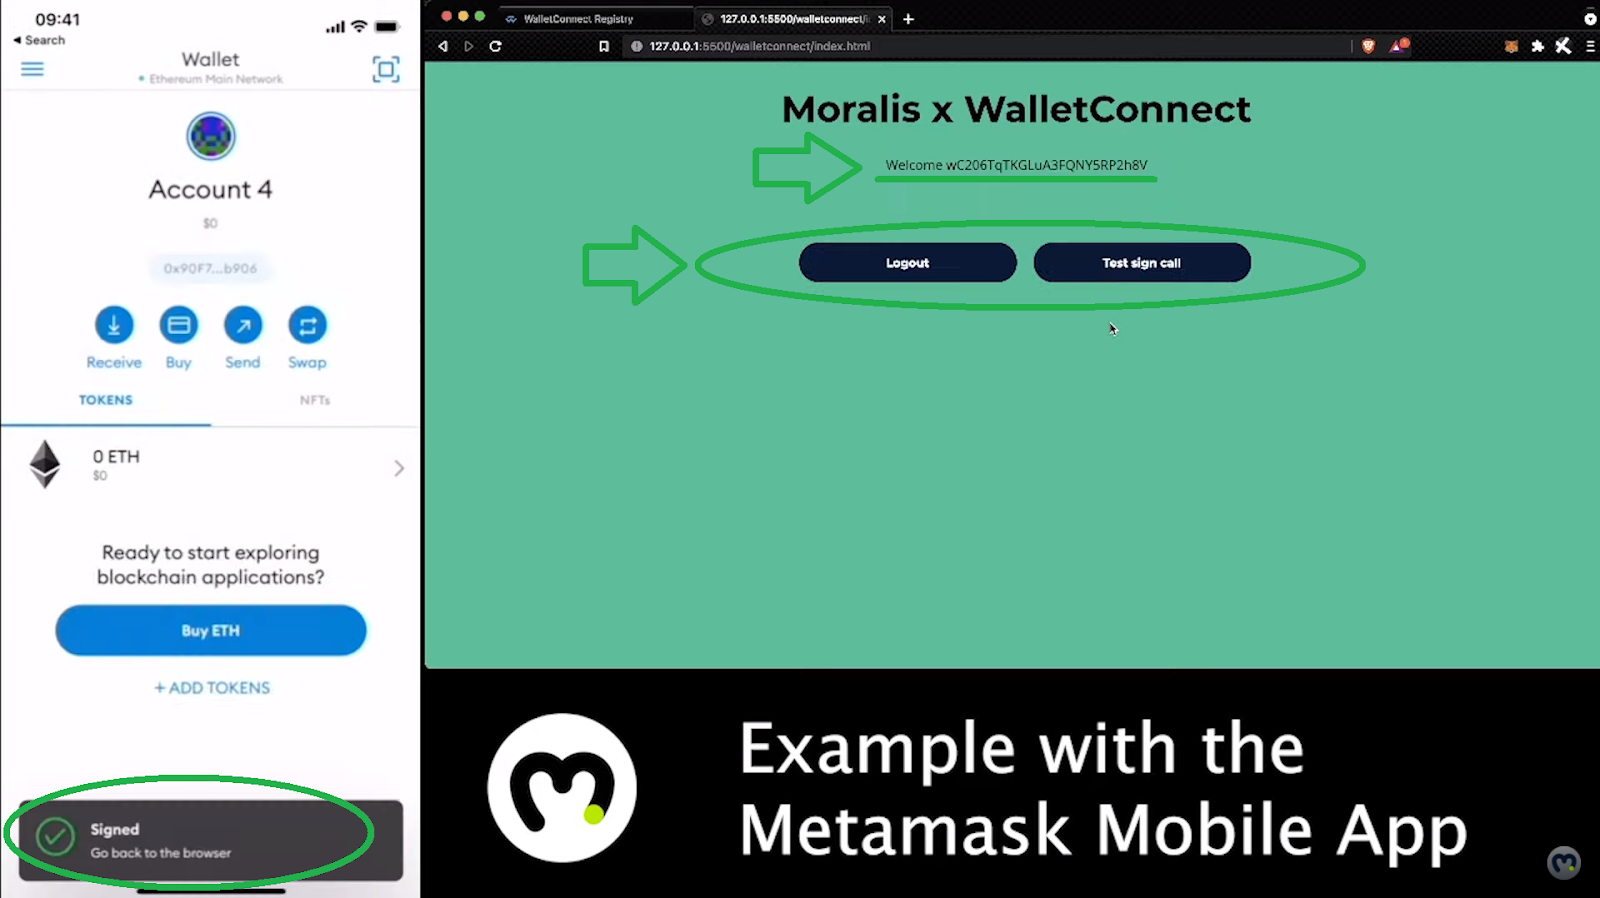
Once users click on the “Login” button, their MetaMask extensions prompt them with a signature request. They need to click on the “Sign” button in order to confirm the “Moralis Authentication” message. By doing so, users are greeted by a welcome message followed by their addresses. Moreover, now they have an option to log out or to do a test sign call. The letter serves as an example transaction. So, for the sake of this demo, let’s click on the “Test sign call” button:

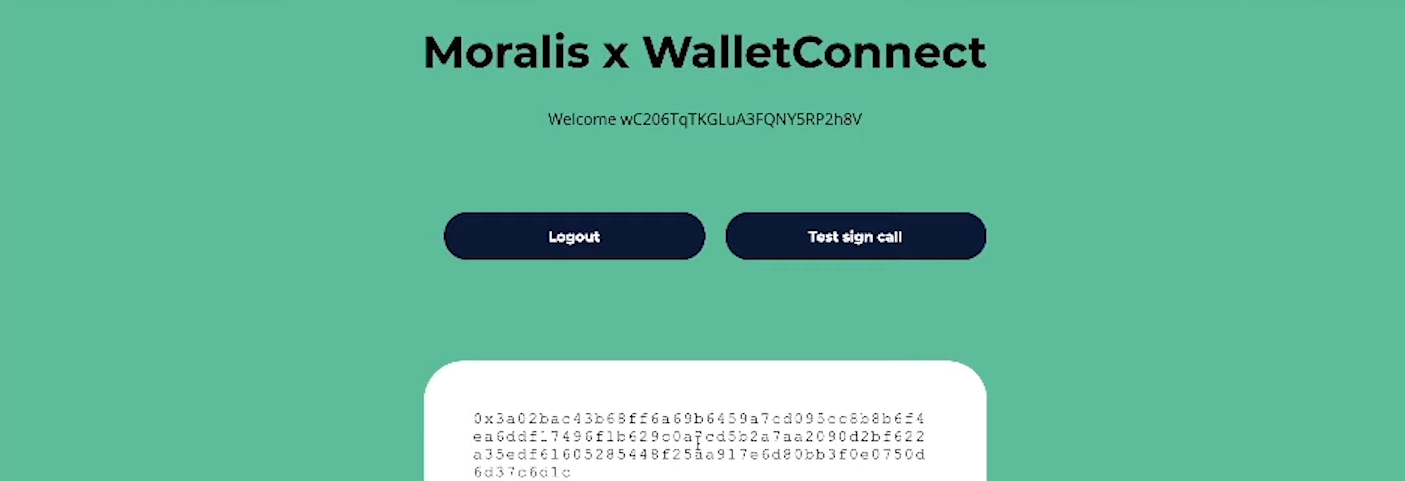
As you can see in the image above, MetaMask again prompts the users with a signature request. This time, the message in question is “Hello world”. To proceed, users need to click on the “Sign” button, which returns the transaction’s hash:

With the above demo under our belts, you can see that we kept things relatively simple and neat. The point of this example project is to show you how easy it is to add a Web3 connect wallet button with Moralis.
Code Walkthrough of Adding a Web3 Connect Wallet Button
Note: You can access the entire code on GitHub. The latter includes the following files: “index.html”, “script.js”, and “style.css”. As mentioned, we will use JavaScript and Moralis to add Web3 authentication to our example website. As such, we will focus on the “script.js” file here.
Let’s start at the top and have a look at the first three lines of our “.js” file:
const serverUrl = "https://xxxxx.grandmoralis.com:2053/server"; //Server url from moralis.io
const appId = "YOUR_APP_ID"; // Application id from moralis.io
Moralis.start({ serverUrl, appId });
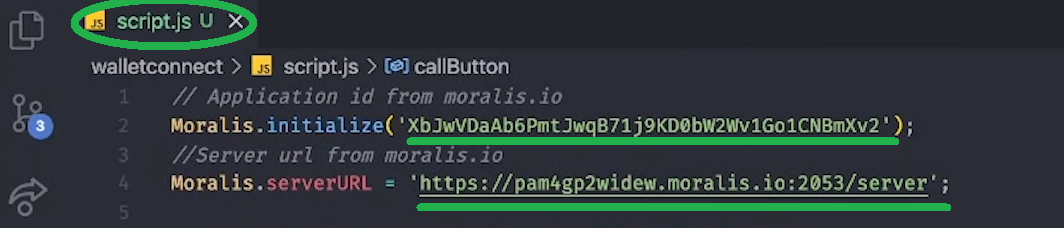
This is where our code requires our Moralis server’s details. That way, it gets to connect with the Moralis SDK and use it for its Web3 needs.
Note: In case you want to create your own instance of our example dapp, you need to obtain your own Moralis server URL and application ID. To do this, use the “Initial Moralis Setup” section towards the end of this article.
Moreover, our code is rather simple and has less than ninety lines of code. As far as the users are concerned, the core of our app are the following functions: “authenticate()”, “logout()”, and “testCall()”. Hence, let’s take a closer look at these functions:
async function authenticate() {
  try {
    user = await Moralis.authenticate();
    web3 = await Moralis.enableWeb3();
  } catch (error) {
    console.log('authenticate failed', error);
  }
  renderApp();
}

async function logout() {
  try {
    await Moralis.User.logOut();
  } catch (error) {
    console.log('logOut failed', error);
  }
  result = '';
  renderApp();
}

async function testCall() {
  try {
    result = await web3.eth.personal.sign('Hello world', user.get('ethAddress'));
  } catch (error) {
    console.log('testCall failed', error);
  }
  renderApp();
}
However, among the above three functions, it is “authenticate()” that makes our Web3 connect wallet button work. As such, let’s devote some additional attention to it.

The “authenticate()” Function
Looking at the code above, you can see that the “Moralis.authenticate()” and “Moralis.enableWeb3()” methods have no arguments. This is because the code in the above form targets Moralis’ default Web3 authentication method, which is MetaMask. However, if we want to use WalletConnect instead, we would need to add the proper arguments inside the above two methods.
Transition from MetaMask to WalletConnect
Going from Moralis’ default Web3 authentication method to using WalletConnect instead is pretty easy to implement. All it takes is to add “{provider: ‘walletconnect’}” as an argument inside the “Moralis.authenticate()” and “Moralis.enableWeb3()” methods. As such, this is how our tweaked “authenticate()” functions look like:
async function authenticate() {
  try {
    user = await Moralis.authenticate({ provider: ‘walletconnect’});
    web3 = await Moralis.enableWeb3({ provider: ‘walletconnect’});
  } catch (error) {
    console.log('authenticate failed', error);
  }
  renderApp();
}
Moreover, we must also add the same argument inside the “enableWeb3()” function:
async function enableWeb3() {
  try {
    web3 = await Moralis.enableWeb3({ provider: ‘walletconnect’});
  } catch (error) {
    console.log('testCall failed', error);
  }
  renderApp();
}
Furthermore, as you can see on GitHub, we can make our code neater if we define a new constant:
const provider = 'walletconnect';
Then, we can use “{provider}” instead of “{provider: ‘walletconnect’}” as an argument inside the above methods.
Web3 Connect Wallet Button to Prompt WalletConnect – Demo
Now that we have tweaked our code by simply adding proper arguments to certain methods, we are ready to do another demo of our example dapp. Since WalletConnect enables us to log in by scanning a QR code, we will also take a look at a phone’s screen. So, this is what we are starting with:

The above image clearly indicates an example user’s MetaMask mobile app on the left and our example dapp on the right.
Note: For this demo, we (as an example user) are using our MetaMask mobile app. MetaMask is just one of the hundreds of different mobile crypto wallets that WalletConnect supports. It is the one we happen to use.
Moving forward, we need to click on our example dapp’s Web3 connect wallet button:
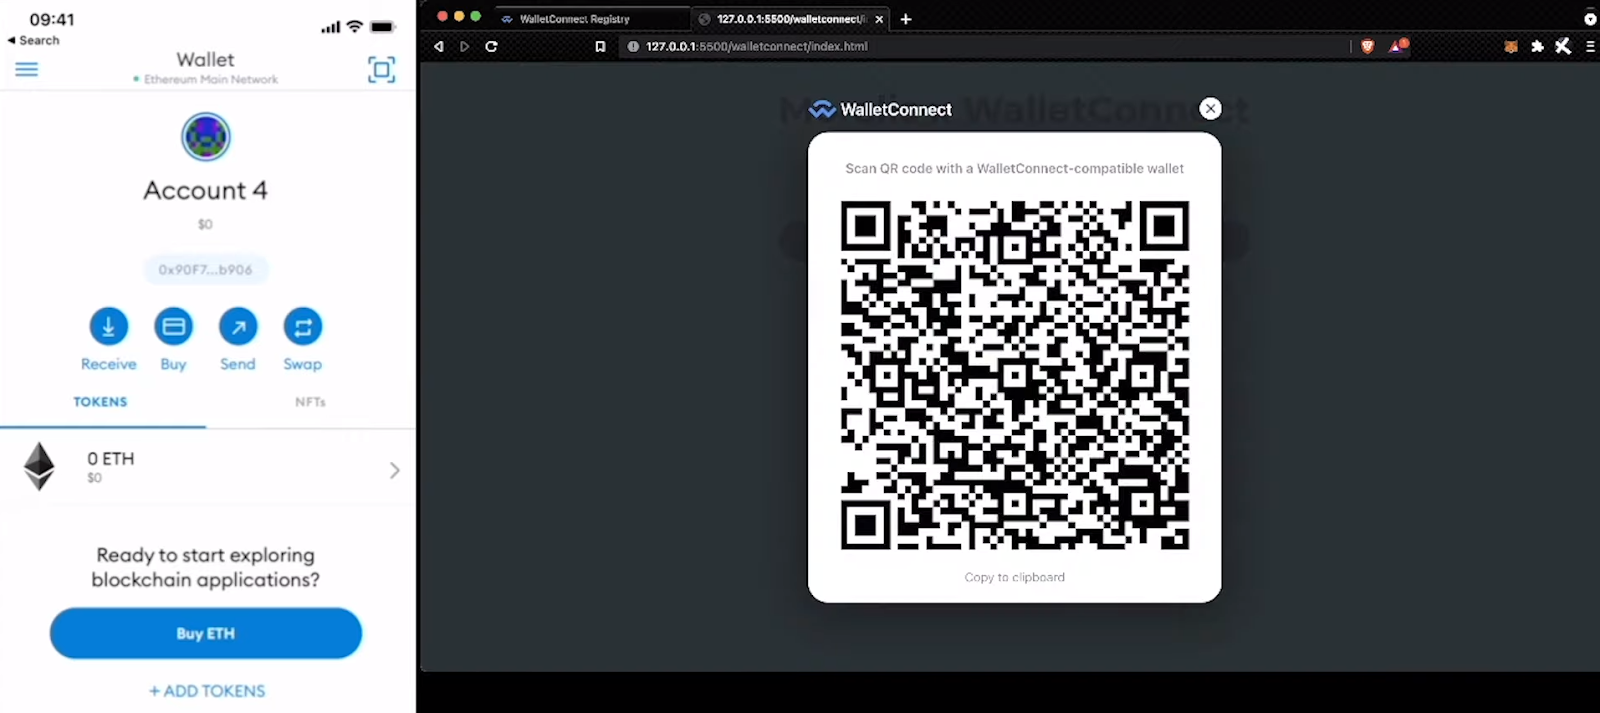
After clicking on the “Login” button, a QR code modal pops up. So, in order for users to log in, they need to scan the code with one of their mobile wallets. Inside the MetaMask mobile app, there’s the “scan” icon to do this (other wallet apps use similar icons):

Next, users need to point their phones’ cameras towards the screen to scan our example dapp’s QR code:
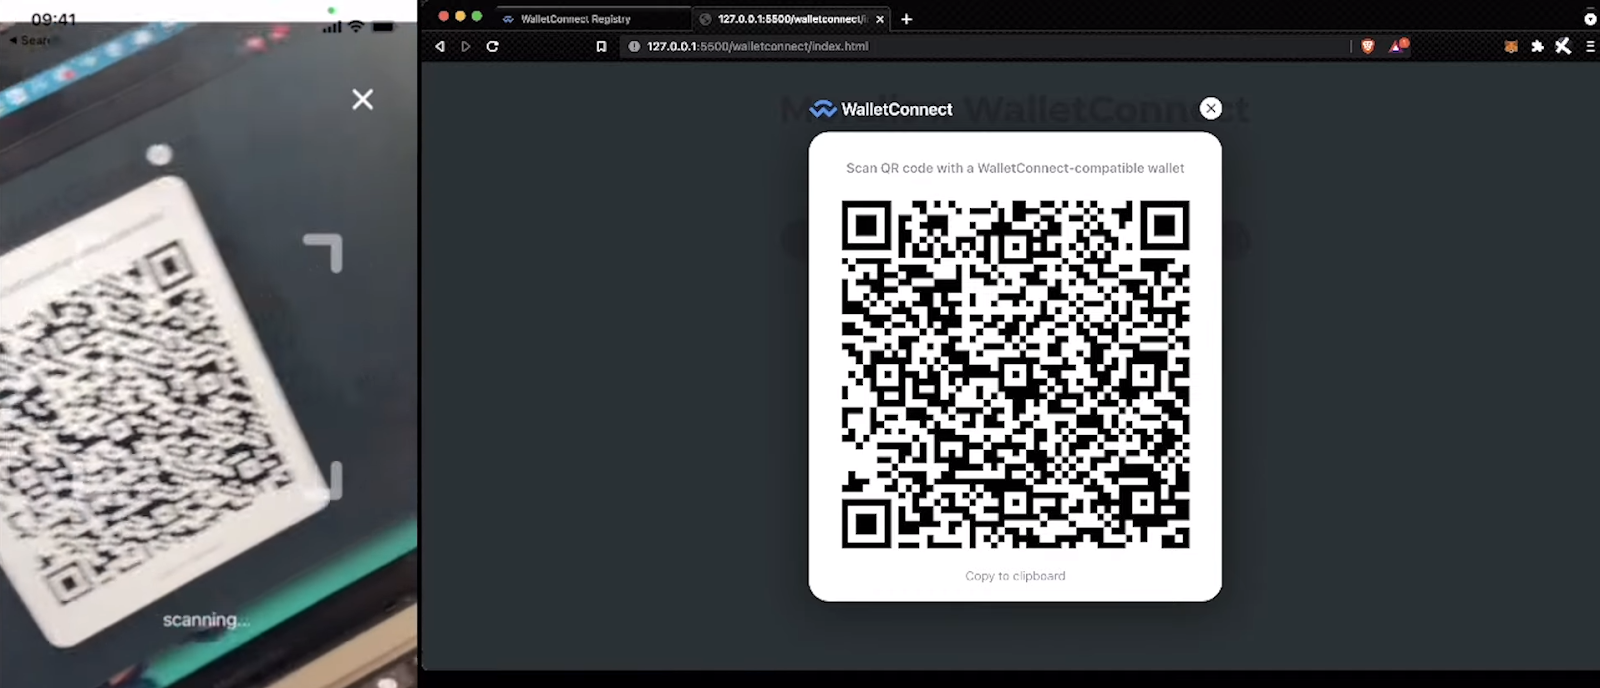
After scanning the code, a pop-up message will appear on users’ mobile wallet apps:

To connect, users need to tap the “Connect” button. Next, users also need to sign the “Moralis Authentication” message to complete the authentication process:
Once users sign the above message, they will land inside of our example dapp. As such, just like in the case of using MetaMask authentication, they are greeted with our welcome message. They also have the “Logout” and the “Test sign call” options:
Test Transaction with WalletConnect – Demo
Just like we did in the case of being authenticated with MetaMask, let’s now execute our example dapp’s test transaction. As such, let’s click on the “Test sign call” button. Since we’re already signed in with our mobile wallet app, we don’t need to scan the QR code again. Instead, we just need to tap the “Sign” button on our phone to sign the “Hello world” message:

As a result, we receive a confirmation response inside our example dapp:
For those of you who prefer video tutorials, here’s a clip of the above demos and code walkthrough:
Initial Moralis Setup
When you want to use Moralis to create dapps or Unity Web3 games, you need to complete the following steps:
- Log In to Your Moralis Account – Use the link to log in to your Moralis account. On the other hand, in case you haven’t created your Moralis account yet, do so now. You can use the “create your free Moralis account” link stated at the beginning of this article.
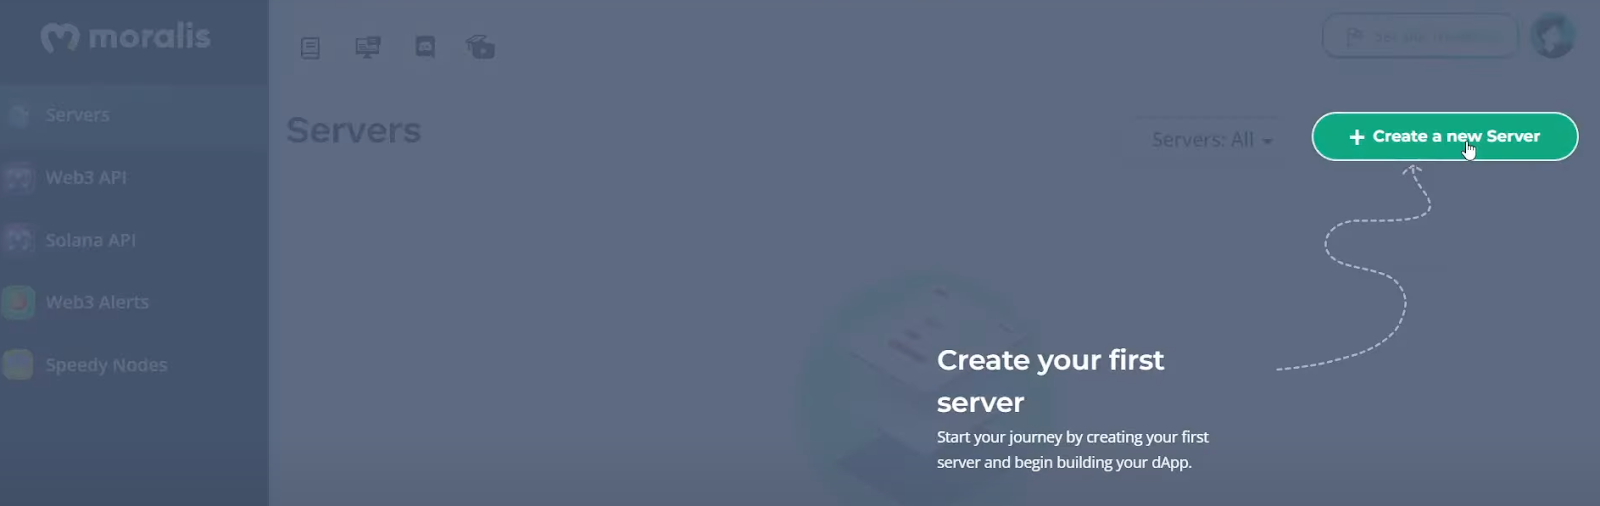
- Create a Moralis Server – Within your Moralis admin area, you need to click on “+ Create a new Server”. If this is your first time using Moralis, the on-page tutorial will guide you:
As the screenshot below indicates, you’ll need to select the proper network type. Since our example dapp only focuses on “sign” transactions, you can go with “Mainnet Server”.

To spin up your server, you need to name it, select your region, network type, chain(s), and click on “Add Instance”:

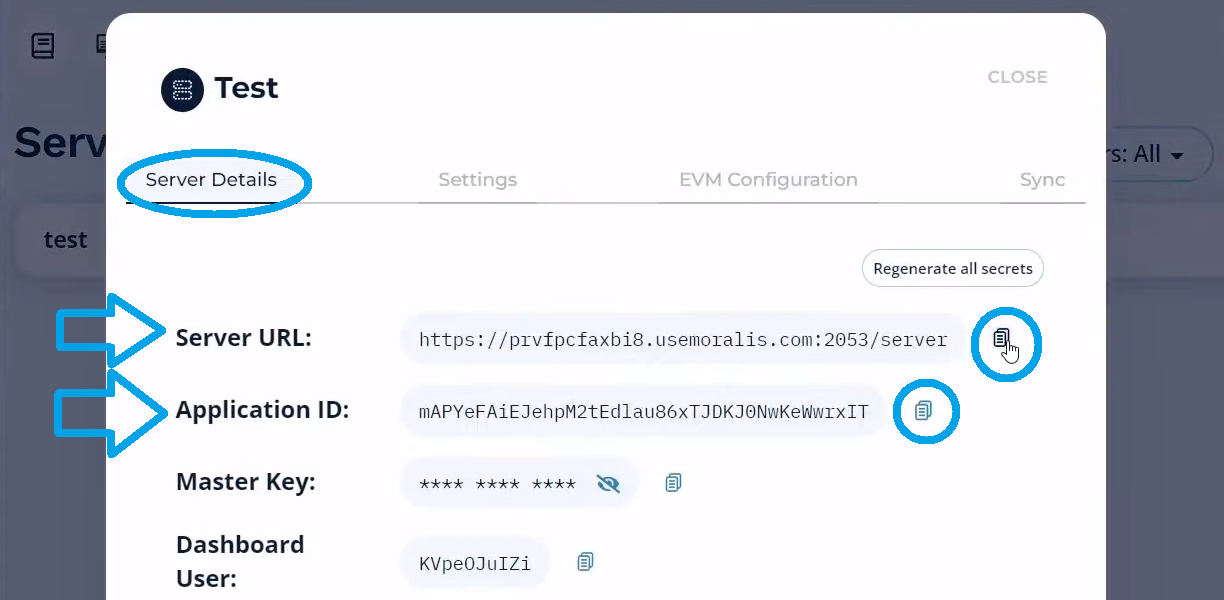
- Obtain Your Server’s Details – With your server up and running, you get to access its details by clicking on the “View Details” button:

The above button will open a new window containing the details. So, use the copy icons on the right-hand side to copy your server’s URL and application ID:
- Populate the “script.js” File – Populate the top two lines of your “script.js” file:
How to Add a Web3 Connect Wallet Button to Your Website – Summary
In this article, we’ve covered quite a distance. We completed an example project where we created a Web3 connect wallet button. Initially, we utilized that button to initiate the MetaMask authentication process. The latter is also the default option when working with Moralis. However, in the second illustration, we used WalletConnect. The transition from the first example to the second one was effortless. We only had to add the right argument inside the “Moralis.authenticate()” and “Moralis.enableWeb3()” methods. Nonetheless, along the way, you also learned how to complete the initial Moralis set up in four simple steps. As such, you are now ready to take on other example projects. You can find those on the Moralis blog and the Moralis YouTube channel.
If you prefer to dig deeper into Web3 authentication, we recommend you explore Web3 without MetaMask. In turn, you will learn how to do Web3 authentication via email and how to implement Web3 social login. As such, you’ll be able to boost Web3 user onboarding success rates. However, these two outlets cover many other topics as well. For instance, some of the latest articles include guides on how to build a play-to-earn game, Mumbai testnet faucet, creating a Binance NFT, a full guide on how to claim an in-game NFT, what Ethereum Name Service (ENS) is, what Web3 contracts are, and much more.
If you want to become a blockchain developer and go full-time crypto in no time, you might want to consider enrolling in Moralis Academy. That will give you access to top-notch blockchain development courses. You will also get a personalized study path, expert mentorship, and become a part of an advancing and supportive community.
