The birth of the first programmable blockchain, Ethereum, signaled the real beginning of Web3. Accordingly, Web2 programmers started to transition their programming endeavors toward blockchain and dapp development. Since we are still relatively early to the age of Web3 and are hovering between the Web2 and Web3 era, now is an excellent time to learn dapp development. Moreover, this dapp development tutorial is a great place to start! This guide will take you through the necessary stages of building a dapp, including working with smart contracts – the backbones of decentralized applications. In addition, the upcoming dapp development tutorial will show how you can become a Web3 developer with your existing JavaScript (JS) skills!
The latter is possible thanks to the ultimate Web3 backend platform – Moralis. This “Firebase for crypto” operating system provides you with the tools to create dapps with maximum ease. As such, you will not need to deal with the limitations of RPC nodes. Furthermore, this pinnacle of the current Web3 tech stack offers a single workflow for building high-performance dapps. Moreover, you get to index the blockchain, store off-chain data, and manage on-chain inventory effortlessly. In addition, Moralis is all about cross-platform and cross-chain interoperability. Hence, you get to use the platform you prefer and not limit yourself to any particular chain. Nonetheless, since we will be using Moralis as we tackle the dapp development tutorial in this article, make sure to create your free Moralis account before moving forward.
What are Dapps?
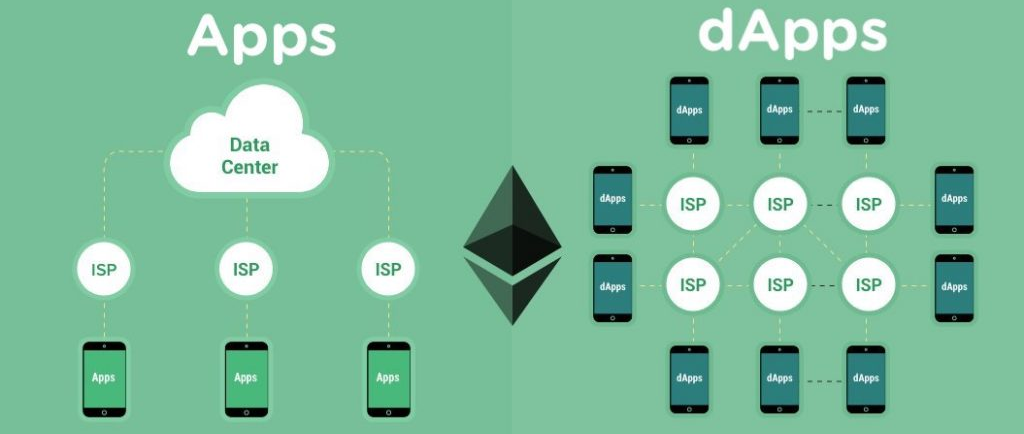
Before we move on further, let’s make sure you all know the basics. So, what are dapps? Just breaking down the word “dapp” already gives you a much deeper understanding. The “d” stands for “decentralized” and “app” for “application”. Furthermore, just like regular applications, decentralized apps too can come in various forms. Dapps can be Web3 websites, Web3 mobile apps, Web3 games, etc. Ultimately, if an application interacts with any particular blockchain in any way, it is labeled as a dapp.
When it comes to decentralized applications, they all incorporate Web3 authentication. A Web3 wallet such as MetaMask enables dapps to perform Web3 login and authenticate users. However, we must point out that most internet users currently use the more familiar method, Web2 login. Thus, it usually makes sense (depending on your audience) to include the familiar gateways. Fortunately, you can create dapps that include Web3 authentication via email using the right tools. Of course, you can further boost Web3 user onboarding by implementing Web3 social login. Still, most dapps authenticate with MetaMask.

Dapp Development Tutorial – Demo
It might be counterintuitive to start at the end. However, we value your time; thus, we want to ensure you know what to expect from this dapp development tutorial. In addition, it will also help you decide if you want to roll up your sleeves moving forward.
So, this is the gist of our example dapp’s frontend:
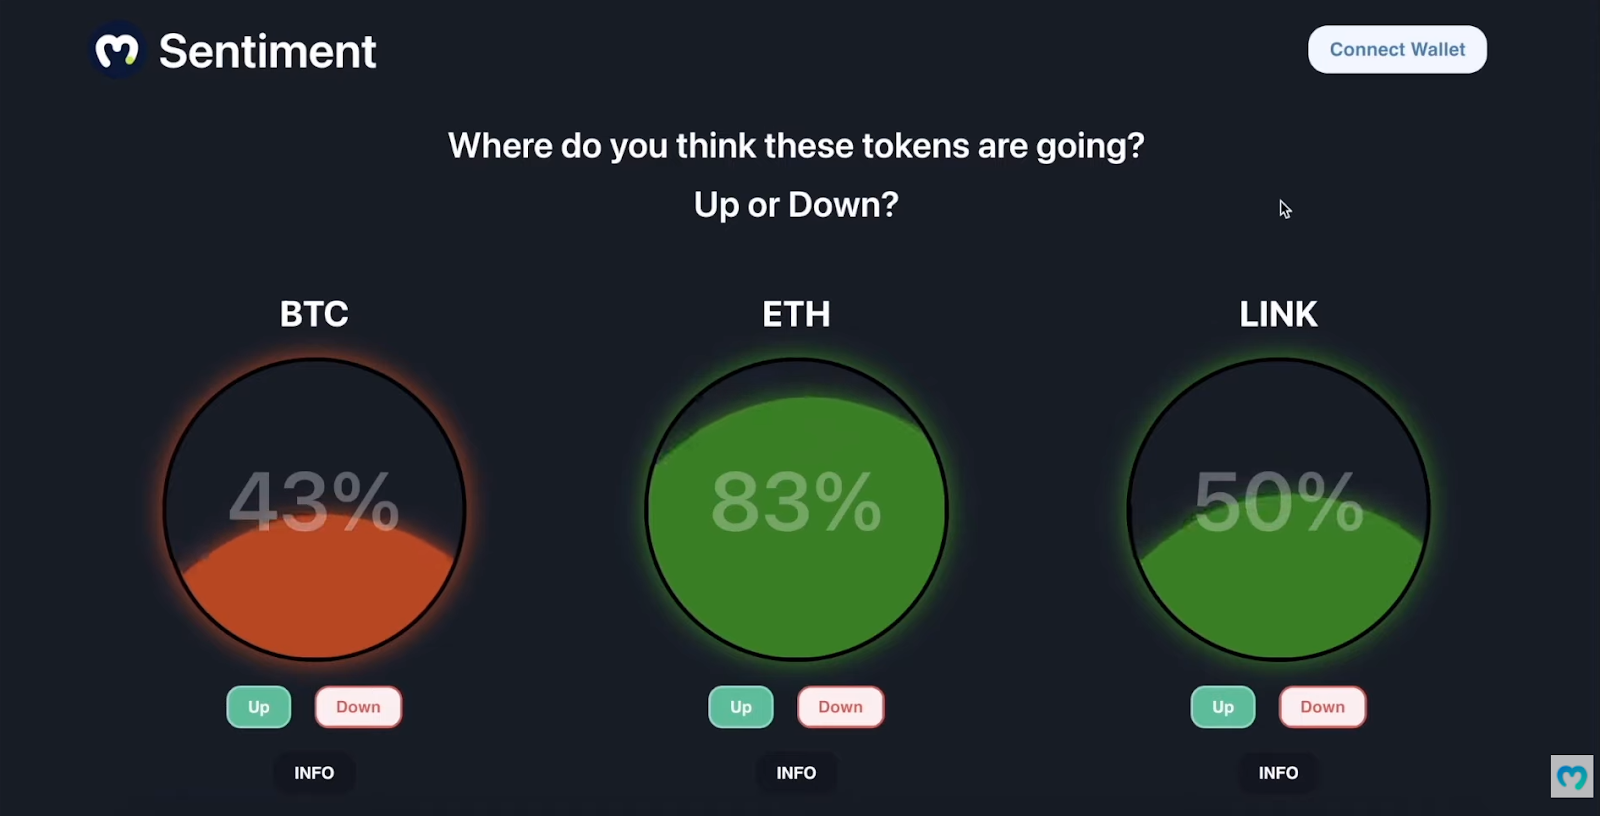
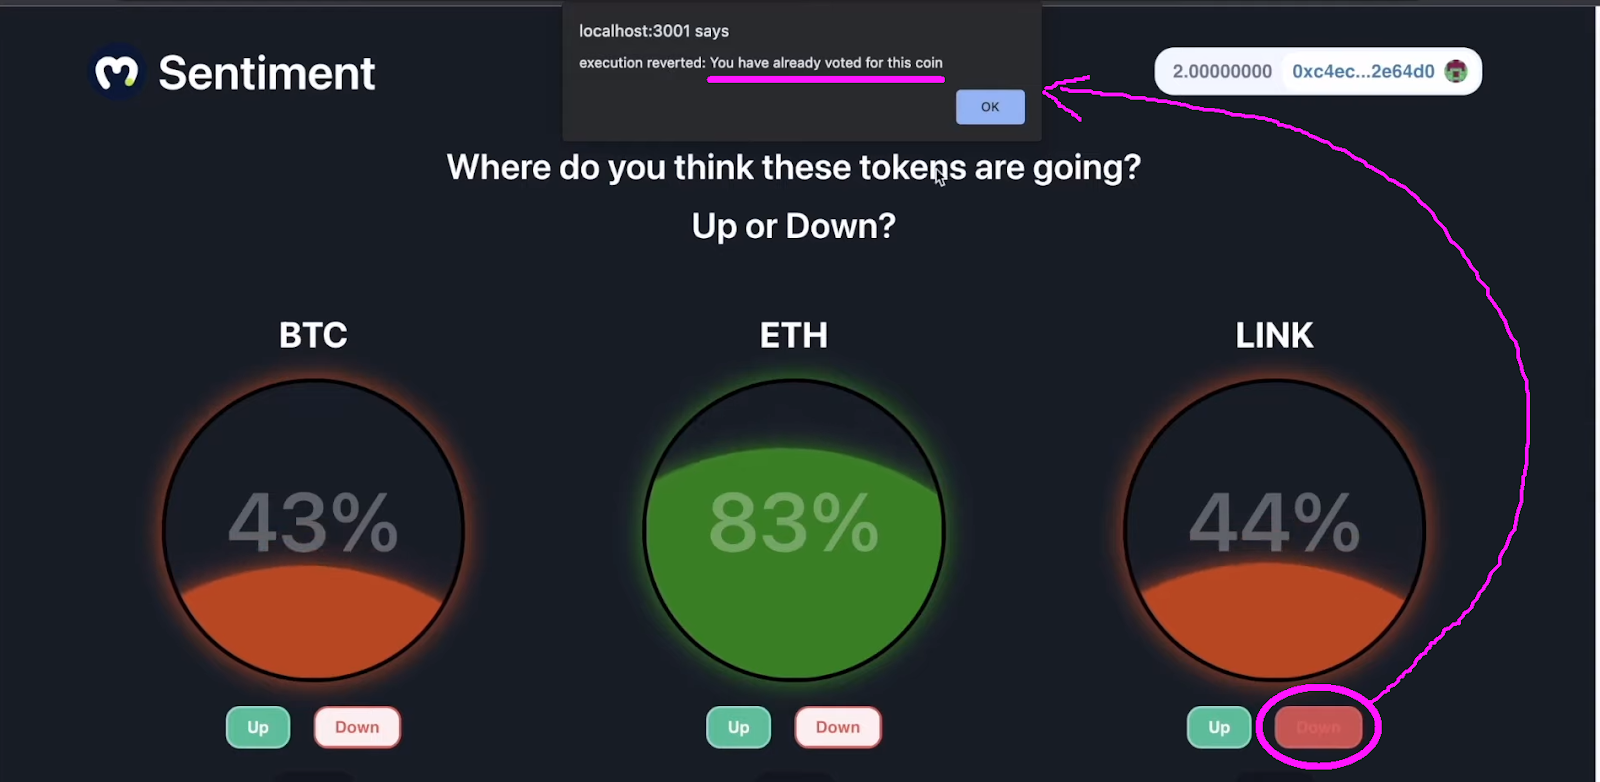
Looking at the screenshot above, you can see that you’ll have a chance to build a crypto sentiment dapp. The latter comes with a clean design and an intuitive UI. Also, the “liquid” inside each bubble is actually animated. To have the latter illustrated, you might want to watch the video at the end of the article, starting at 0:19. Aside from the above coins (BTC, ETH, and LINK), our dapp displays several other leading coins when users scroll down the page:
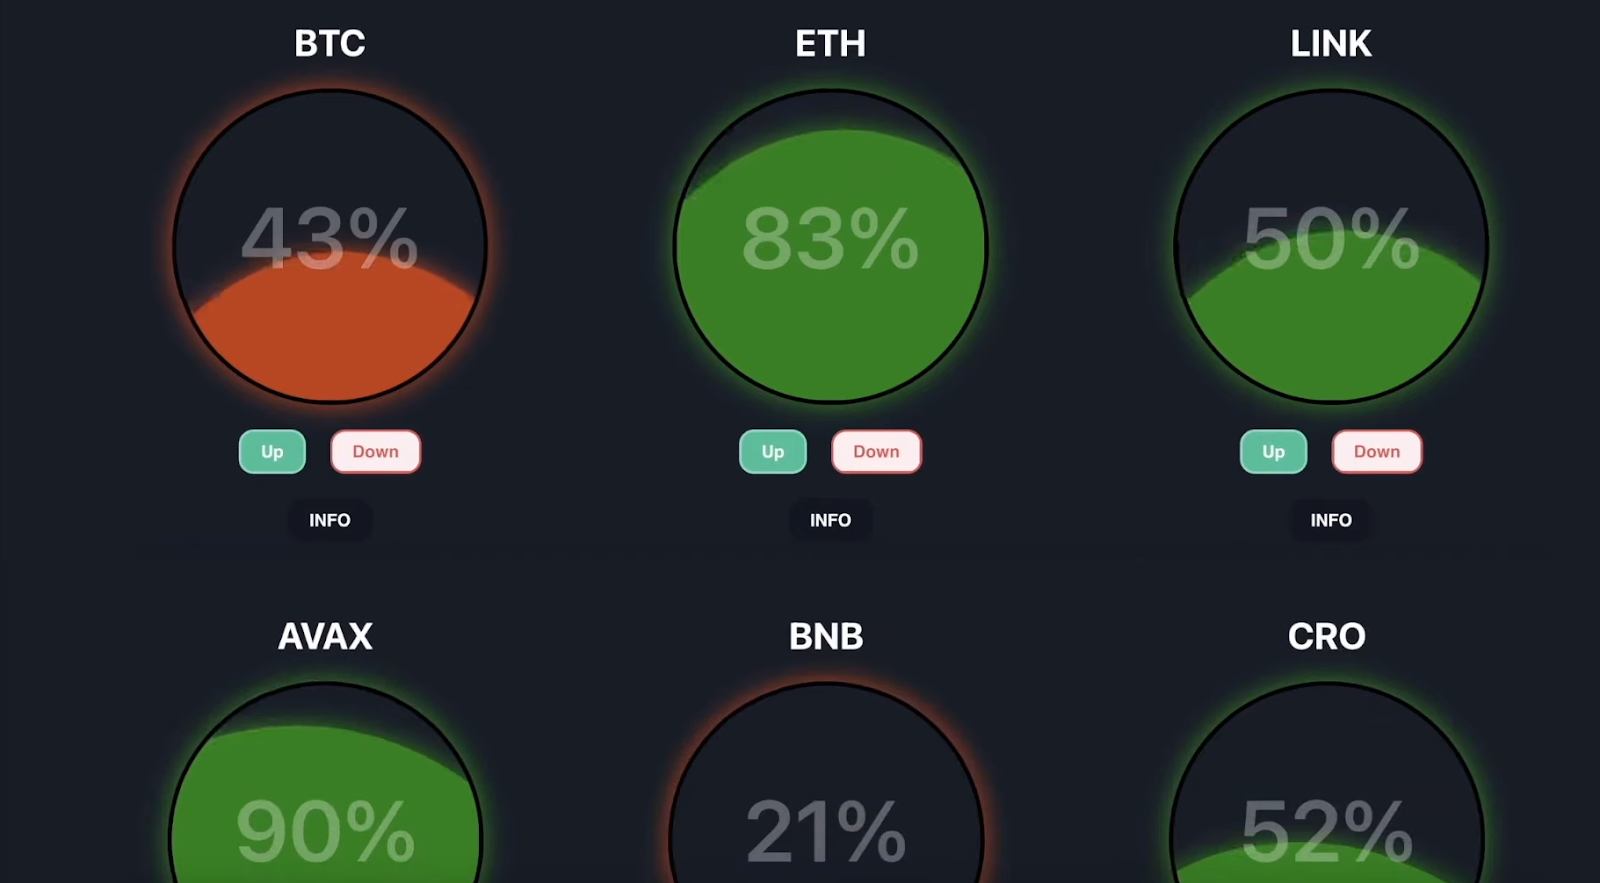
Note: We designed our smart contract to enable its owners to easily add other tickers. You’ll see that in the dapp development tutorial below.
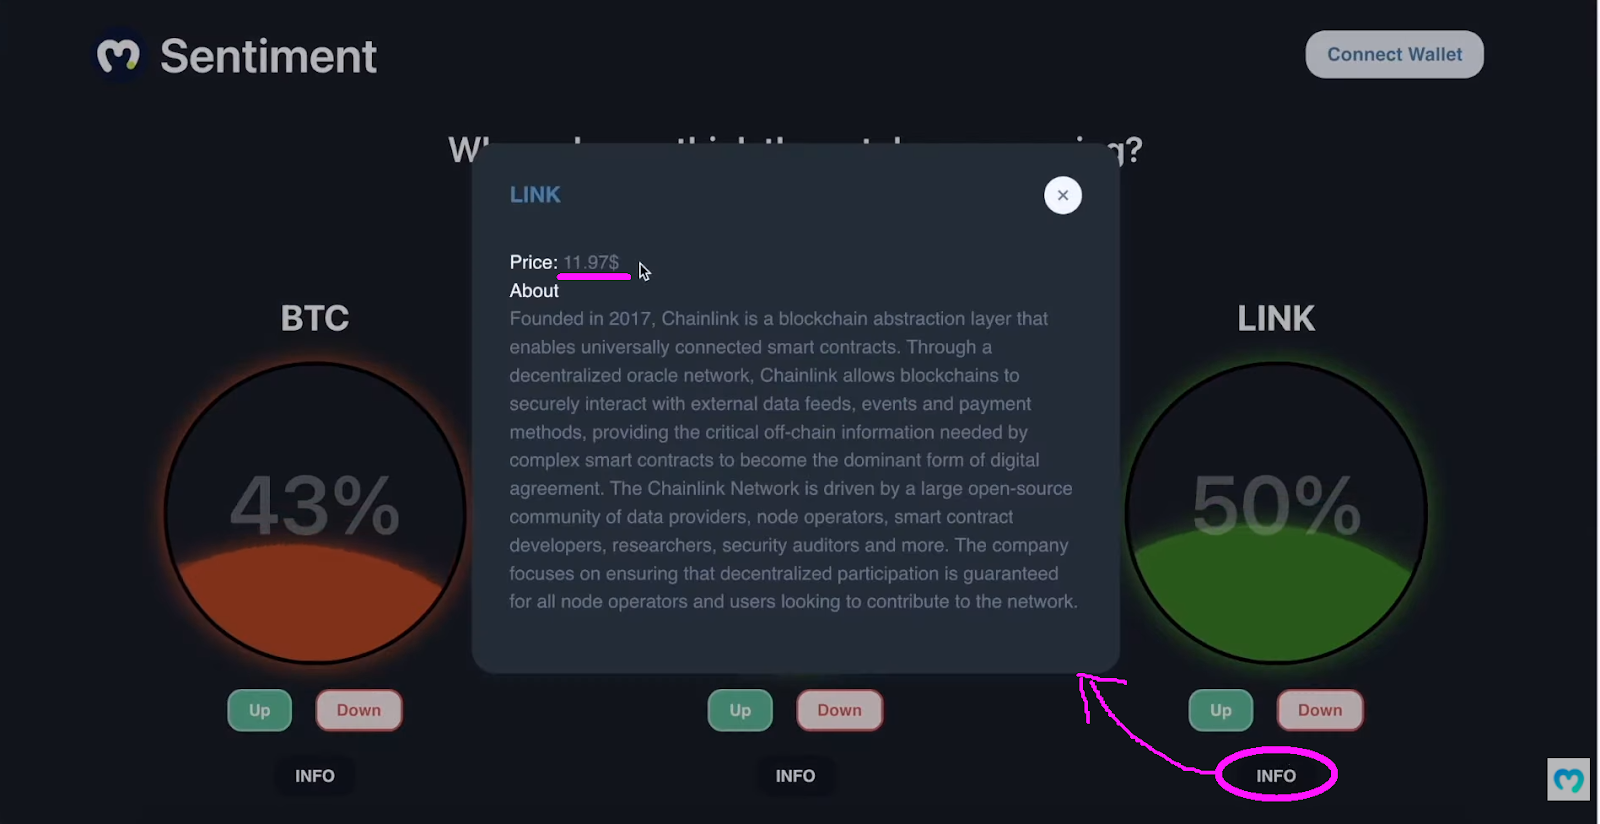
As you can see, there are percentage values inside the bubbles. They indicate voters’ opinions. For example, when more than 50% of voters think that the price of a coin will go up, the “liquid” turns green. On the other hand, when the majority of voters believe that the price will drop, the “liquid” turns red. In addition, our example dapp has four types of buttons. These are the “Up”, “Down”, and “INFO” buttons for each ticker and the “Connect Wallet” button in the top-right corner. Thanks to Moralis and web3uikit, the latter takes care of authenticating users. As far as the “info” buttons go, they open the “about” info and the current prices in a new pop-up window:
Web3 Login and Voting Demo
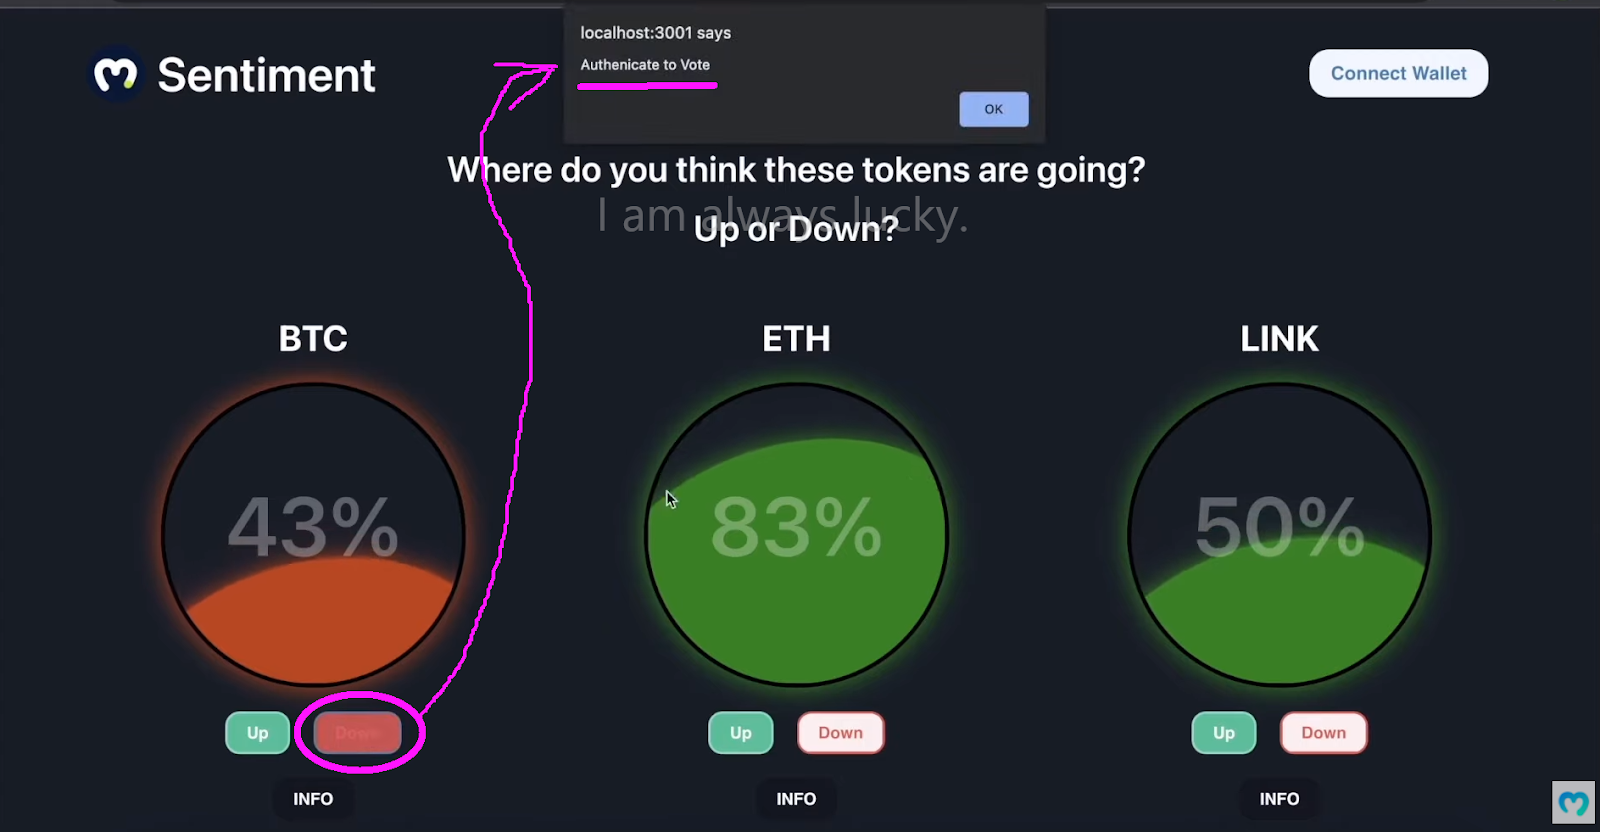
As explained in the “What are Dapps?” section, users need to perform Web3 authentication to use the dapp. So, if users try to vote while signed out, they will receive a warning message:
As such, users need to use the “Connect Wallet” button to authenticate themselves:
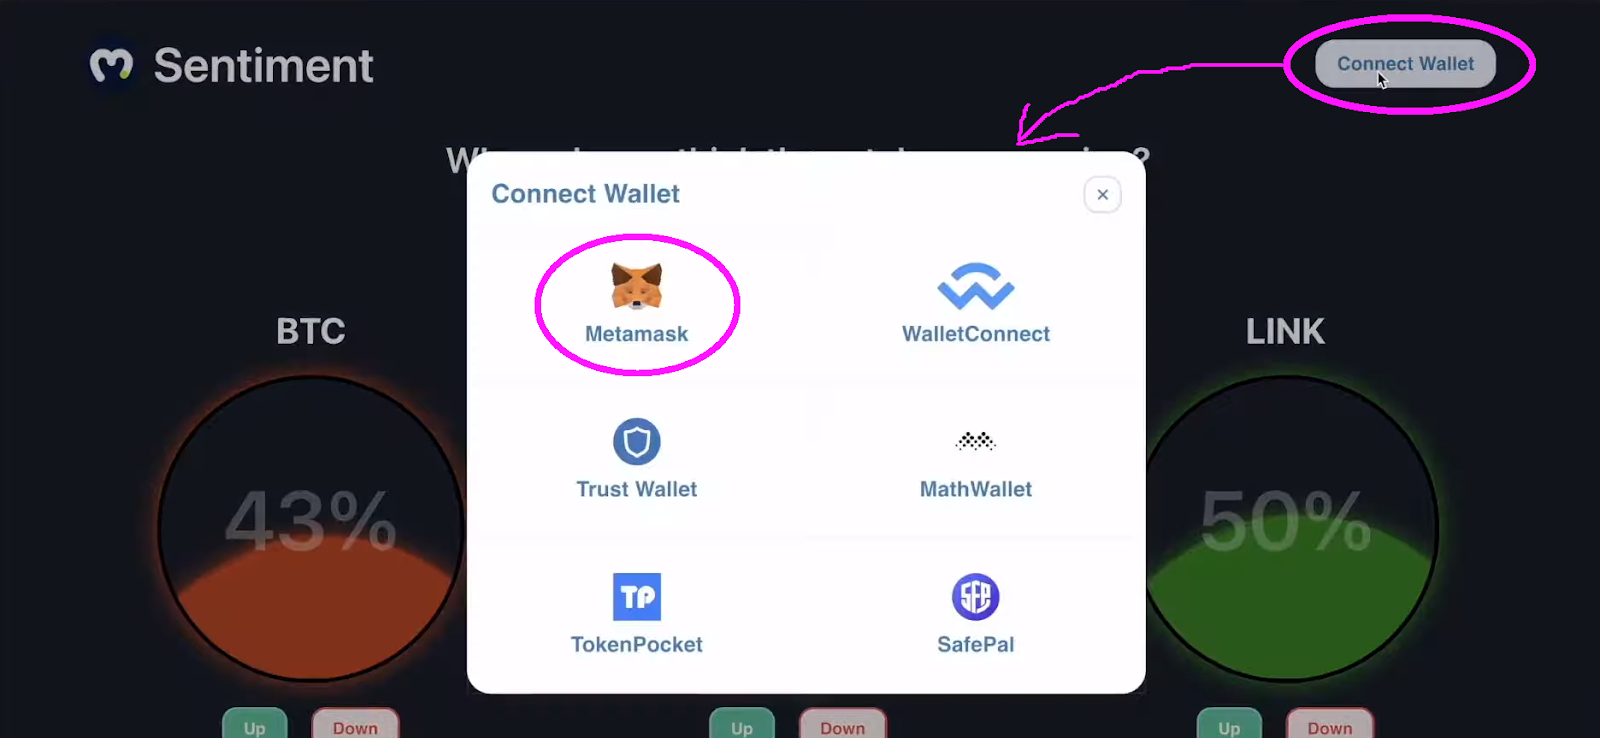
As the screenshot above indicates, the example user selects MetaMask, prompting his MetaMask extension. Accordingly, the user needs to sign the signature request to proceed:

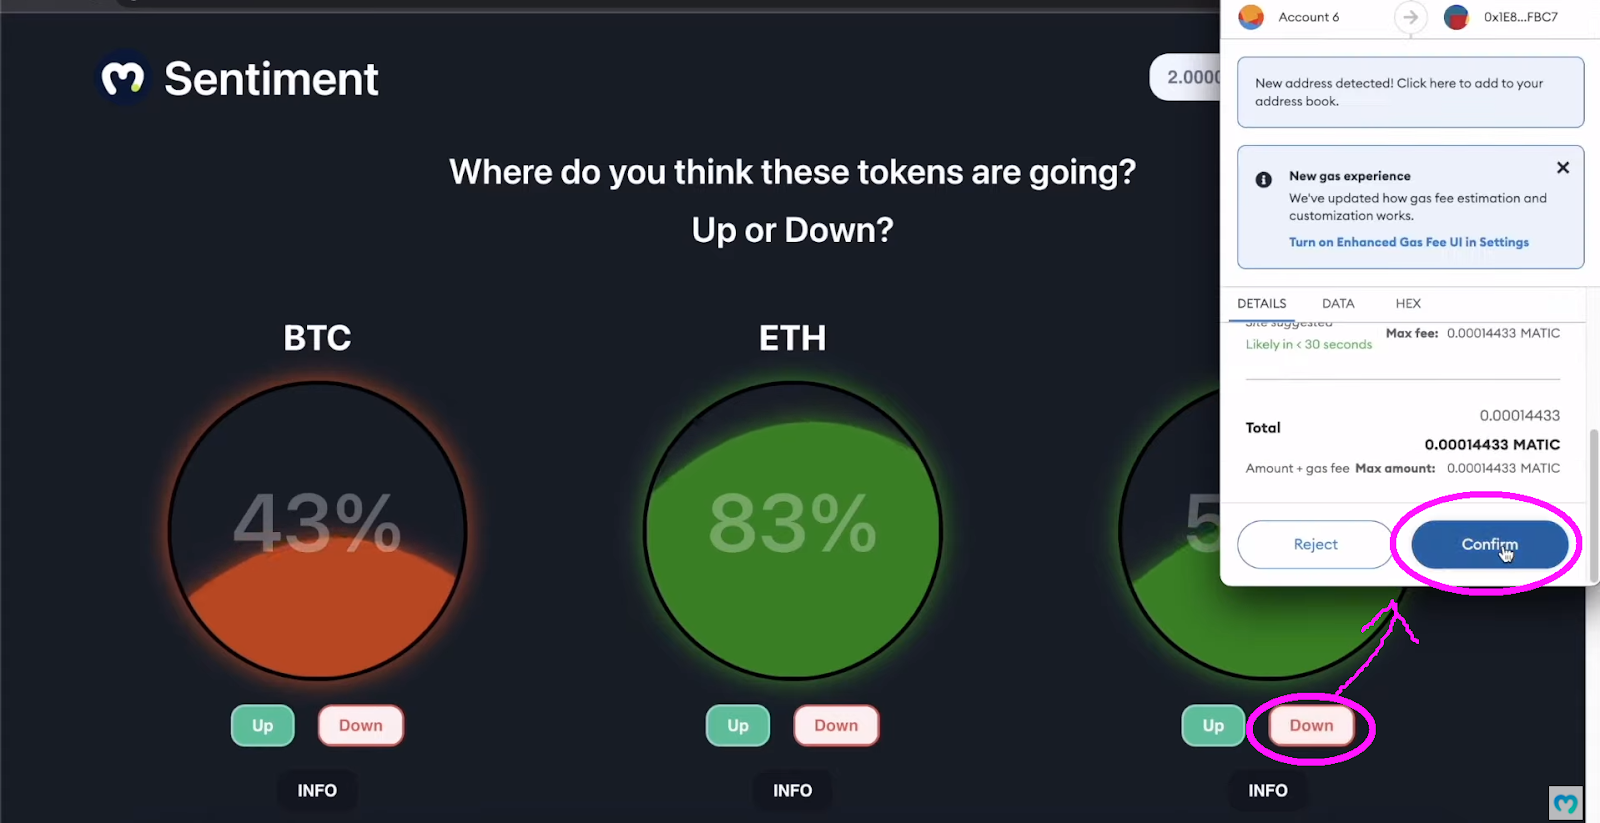
Once signed in, the user can cast his votes using the “Up” and “Down” buttons. If the example user decides to vote for LINK’s price to go down, he clicks on “Down” under LINK. Furthermore, you should keep in mind that our dapp includes on-chain voting. As such, the user needs to confirm his vote:
After the user confirms the on-chain transaction related to his vote, the coin’s sentiment changes; of course, the significance of the change depends on the total number of votes. Nonetheless, our smart contract behind this dapp also prevents users from voting more than once per ticker. As such, the example user can’t vote for LINK again:
That’s it for the UI demonstration of our example Web3 application. Although, let’s confirm that the above-demonstrated transaction really got recorded to the Mumbai blockchain (Polygon’s testnet). For that purpose, we use PolygonScan (testnet).
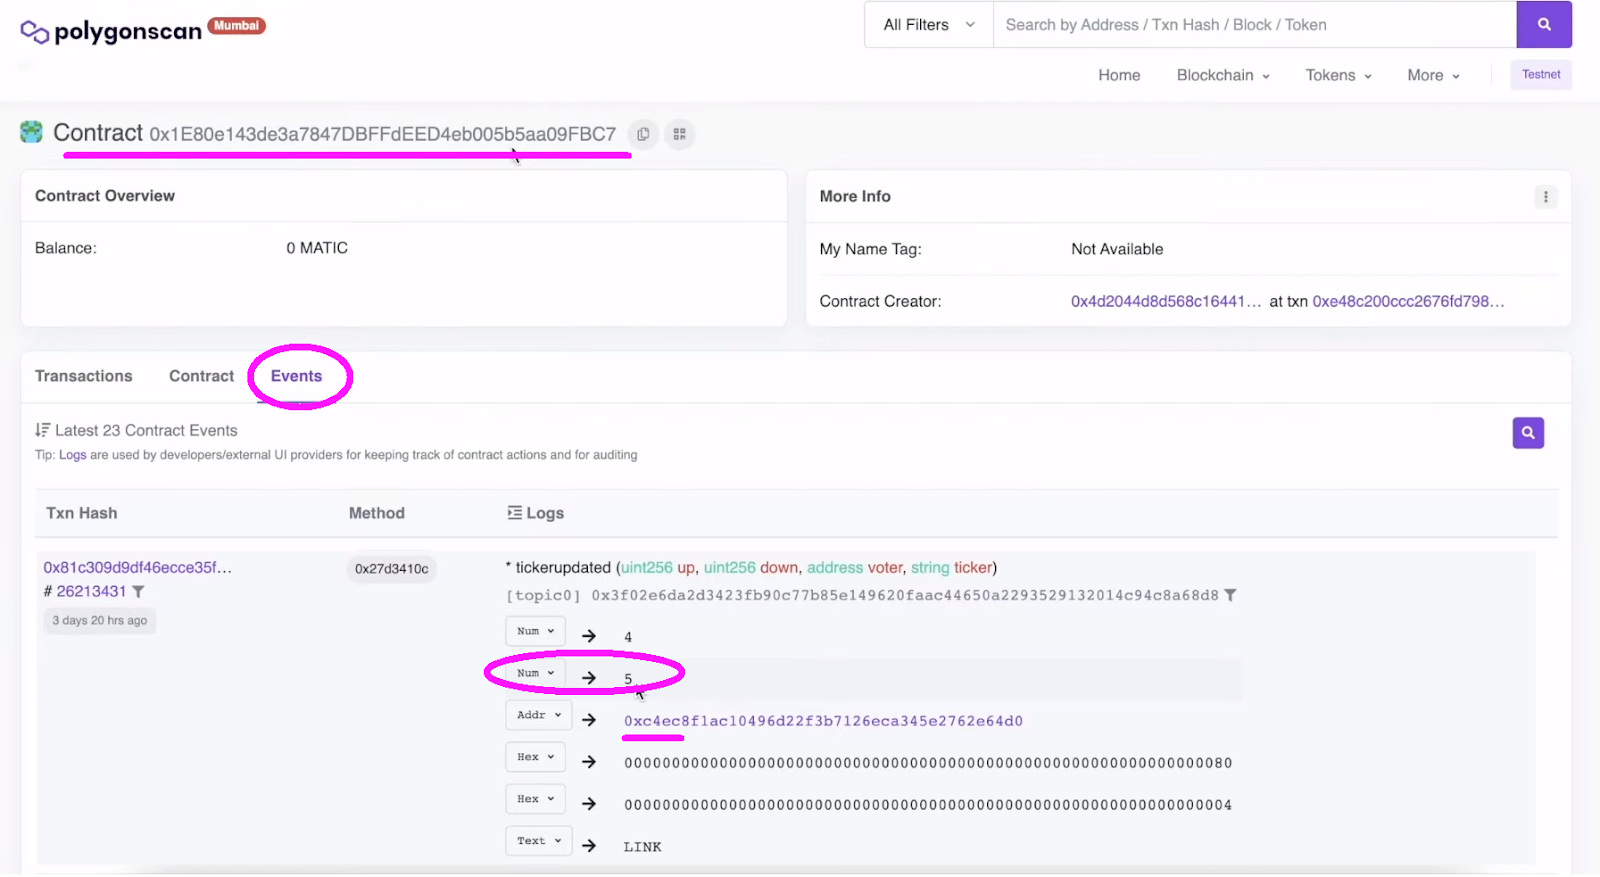
Looking at the screenshot above, you can see our smart contract’s event. The market value is the one related to LINK’s downvotes.
Dapp Development Tutorial – Using Hardhat, React, and Moralis
We hope you are eager to build your own version of the above-demonstrated dapp. As you can see, this is a proper and fully functional application, which has several moving parts. Hence, this is not the most basic dapp development tutorial. However, it is one of the best ways to learn about all the most common features of decentralized apps. So, if you decide to roll up your sleeves, you will learn how to:
- Use Hardhat to create, compile, and deploy smart contracts.
- Create a neat Web3 frontend using React and web3uikit.
- Use the Moralis SDK to sync and index smart contract events.
Note: The upcoming dapp development tutorial is based on the video at the bottom of this article. So, for more details, make sure to use it in combination with timestamps that you will see moving forward. The following sections and the video tutorial assume that you will use our starter code. Of course, that doesn’t mean you can’t use our final code and fast-forward your progress.
The Initial Setup of Our Dapp Development Tutorial
First, clone our starter code and open the project inside your favorite code editor. We are using Visual Studio Code (VSC):
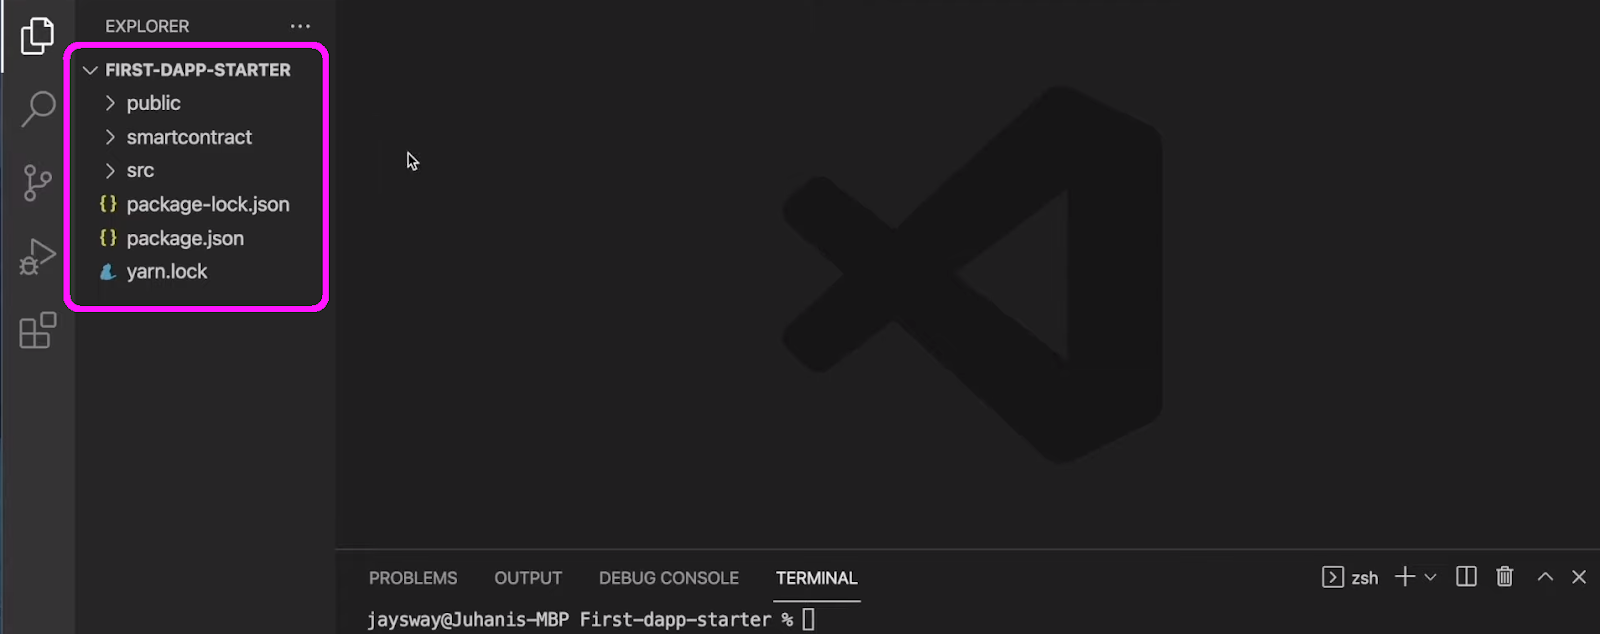
The above screenshot marks the initial layout of our example project. Furthermore, since we will be using Hardhat to work with our smart contract, you also need to complete some setups related to that dev environment. Use the video below starting at 4:16. Use the “cd smartcontract” command to navigate to the “smartcontract” folder. Then, enter “npm i -D hardhat” to install Hardhat:

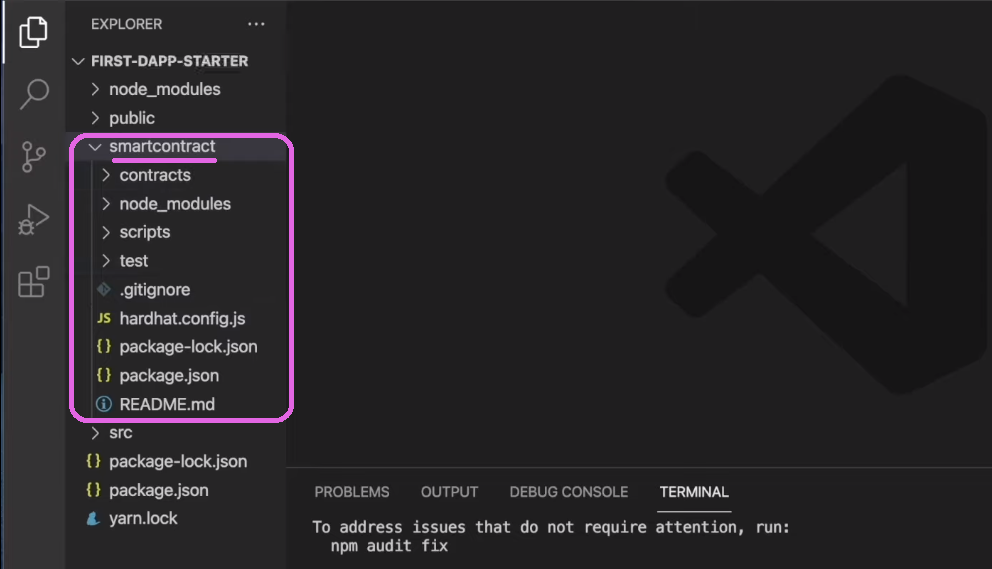
Next, use the “npx hardhat” command to initiate a new Hardhat project. Then, select “Create a basic sample project” and hit “enter” a couple of times while reading what the terminal is asking you:

With a new Hardhat project successfully created, you can see some new elements inside the “smartcontract” folder:
Finally, you need to install two other dependencies. Use the following commands:
- “npm i -D dotenv”
- “npm i -D @nomiclabs/hardhat-etherscan”
Using Hardhat to Create, Compile, and Deploy Smart Contracts
Using the video below, starting at 5:35, you’ll get to learn how to create a proper smart contract. You will use an existing template file (“Greeter.sol”), rename it, and delete its content. If you want to write the contract yourself, use the video tutorial below for a detailed code walkthrough. However, you often get to create killer dapps by copying already verified smart contracts. An excellent place for such Web3 contracts is OpenZeppelin. As such, you can also just copy the entire code, which we made available on GitHub (“MarketSentiment.sol“).
Note: In case you are familiar with Remix, you can also use that IDE to compile and deploy the above smart contract.
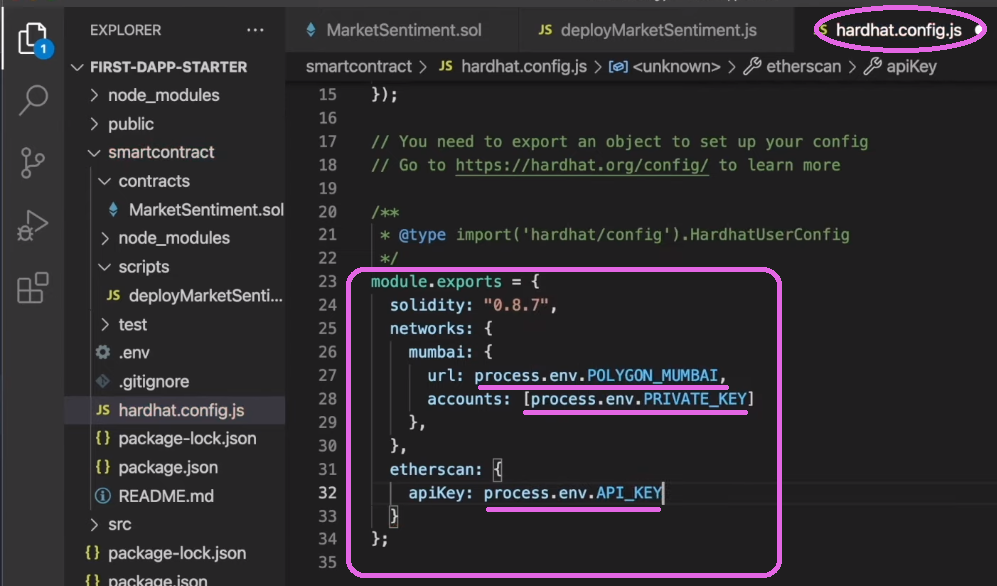
With the Solidity code ready, you need to use Hardhat to compile and deploy the smart contract. You can use any of the networks supported by Moralis; however, we recommend that you follow our lead and focus on Mumbai (Polygon’s testnet). You need to tweak the “sample-script.js” file to do this successfully. Basically, you need to update it to match the new name of your “.sol” file (16:58). Starting at 18:05, you’ll start tweaking the “hardhar.config.js” file. There, you’ll also learn to create your “.env” file, which will host three important pieces of information:
- PolygonScan’s API key to verify your smart contract (19:08)
- Mumbai testnet’s endpoint (19:54)
- Your crypto wallet’s private key (20:40)
Environment Variables
To get your PolygonScan’s API key, you must create your free PolygonScan account. Also, to obtain Mumbai testnet’s endpoint, you can use Moralis Speedy Nodes (assuming you’ve created your free Moralis account):
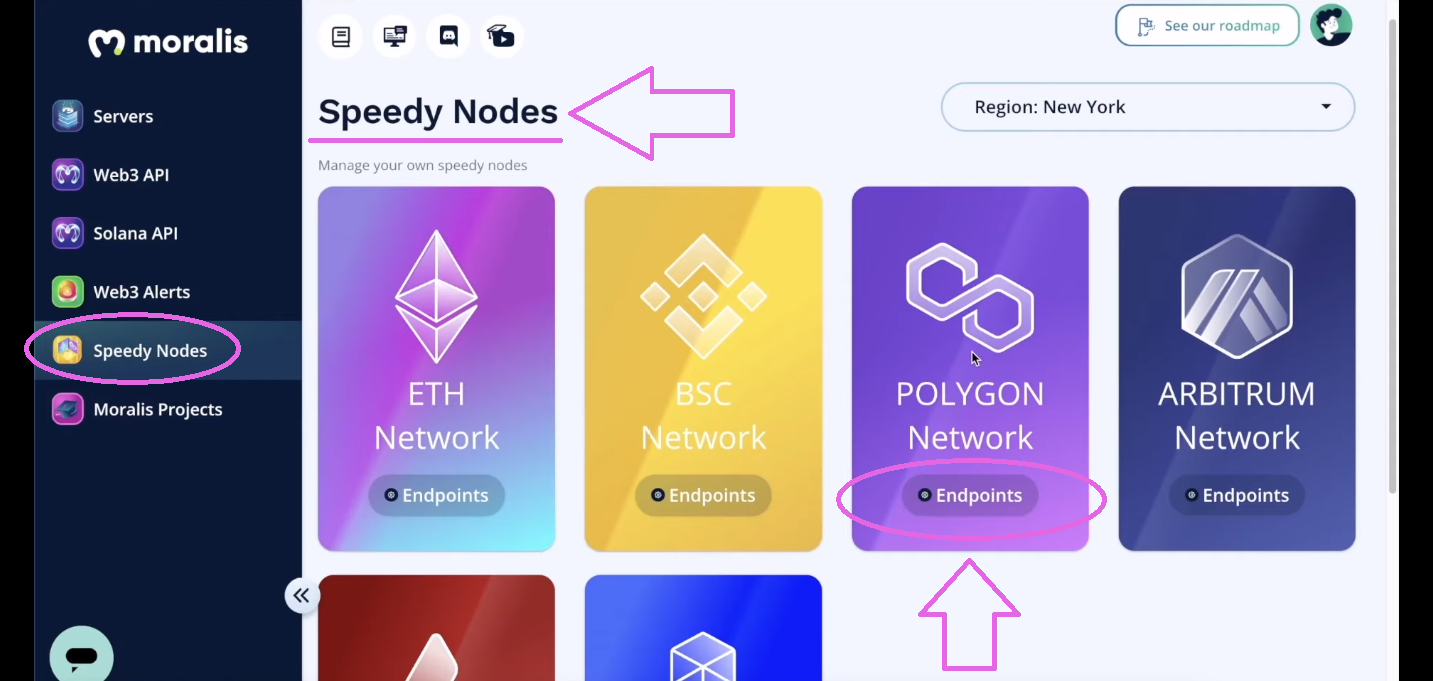
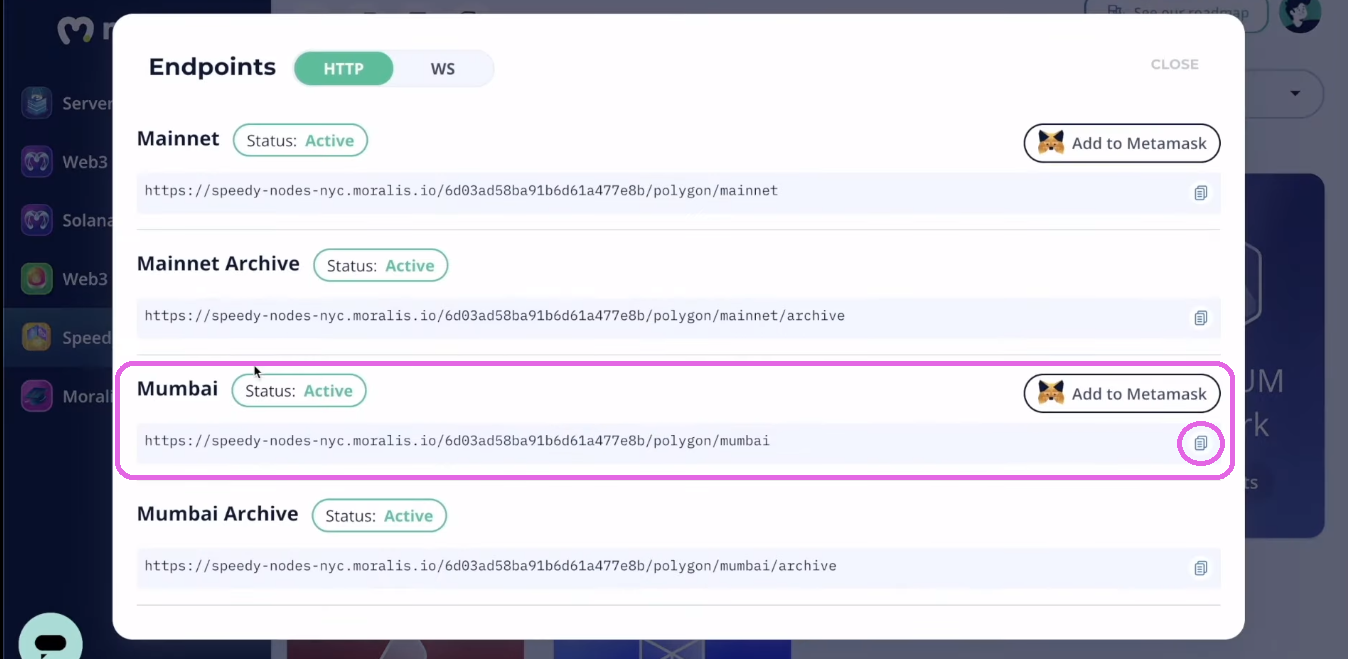
After clicking on the “Endpoints” button, you’ll see this pop-up screen where you get to copy the URL:
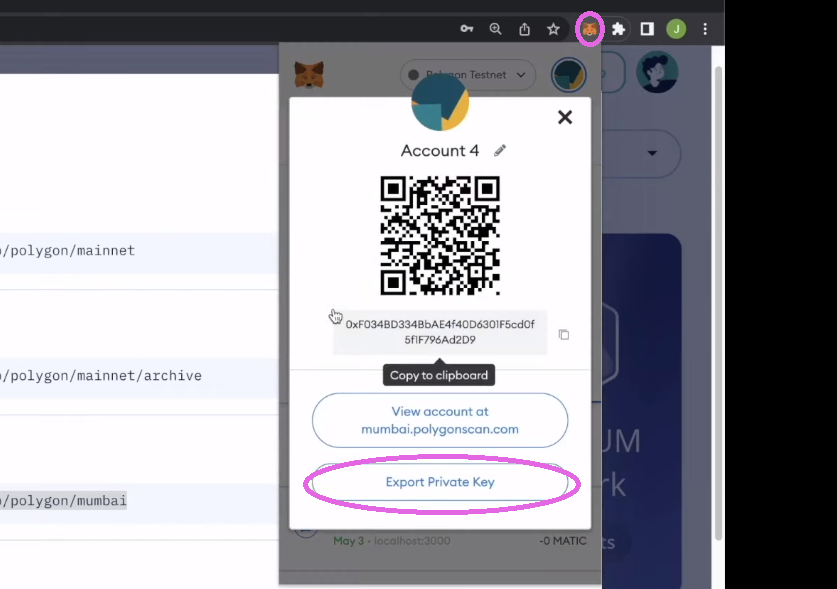
As far as your wallet’s private key goes, you can use MetaMask to export it:
At this point, you should have the values for all three above-listed environment variables ready:

Then you’ll return to “hardhat.config.js” for some final tweaks (21:10):
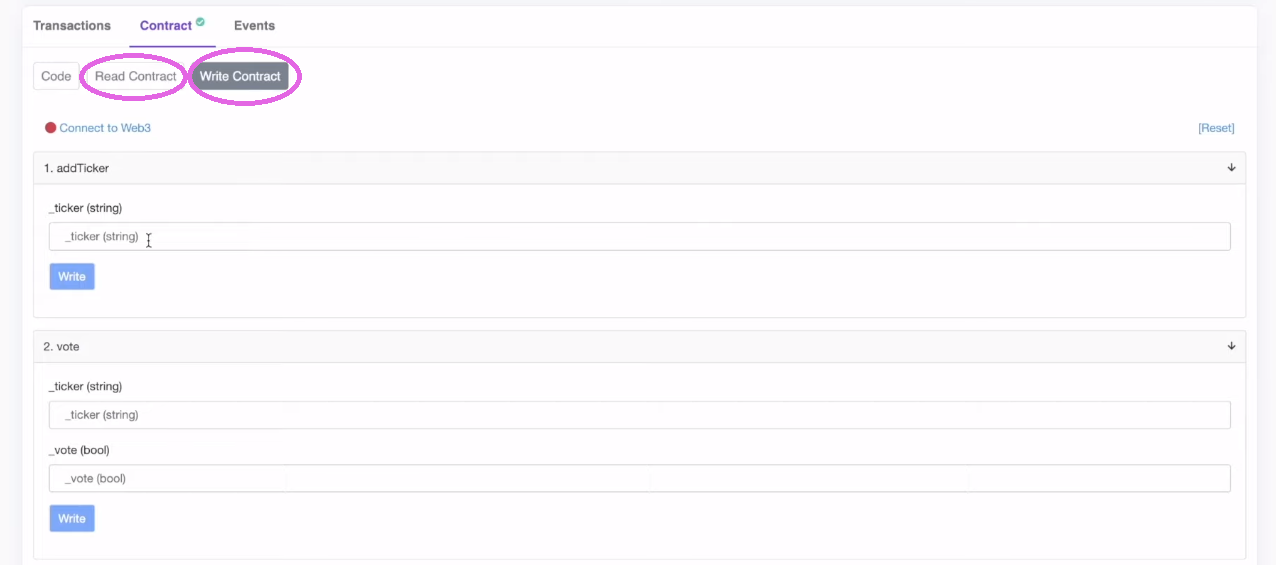
Finally, starting at 22:38, the video dapp development tutorial below will show you how to deploy and verify your contract. Once your contract is live on Mumbai, you can interact with it using PolygonScan (23:38):
Dapp Development Tutorial – Frontend
With your smart contract live, you have the engine of your dapp running. As such, it’s time to create a proper frontend to enable users to interact with your smart contract. Here are the main stages, which the video below will take you through:
- Initializing the React app (29:01)
- Creating your single page dapp’s header (30:03)
- Adding the coin component (32:26)
- Implementing the vote buttons (38:23)
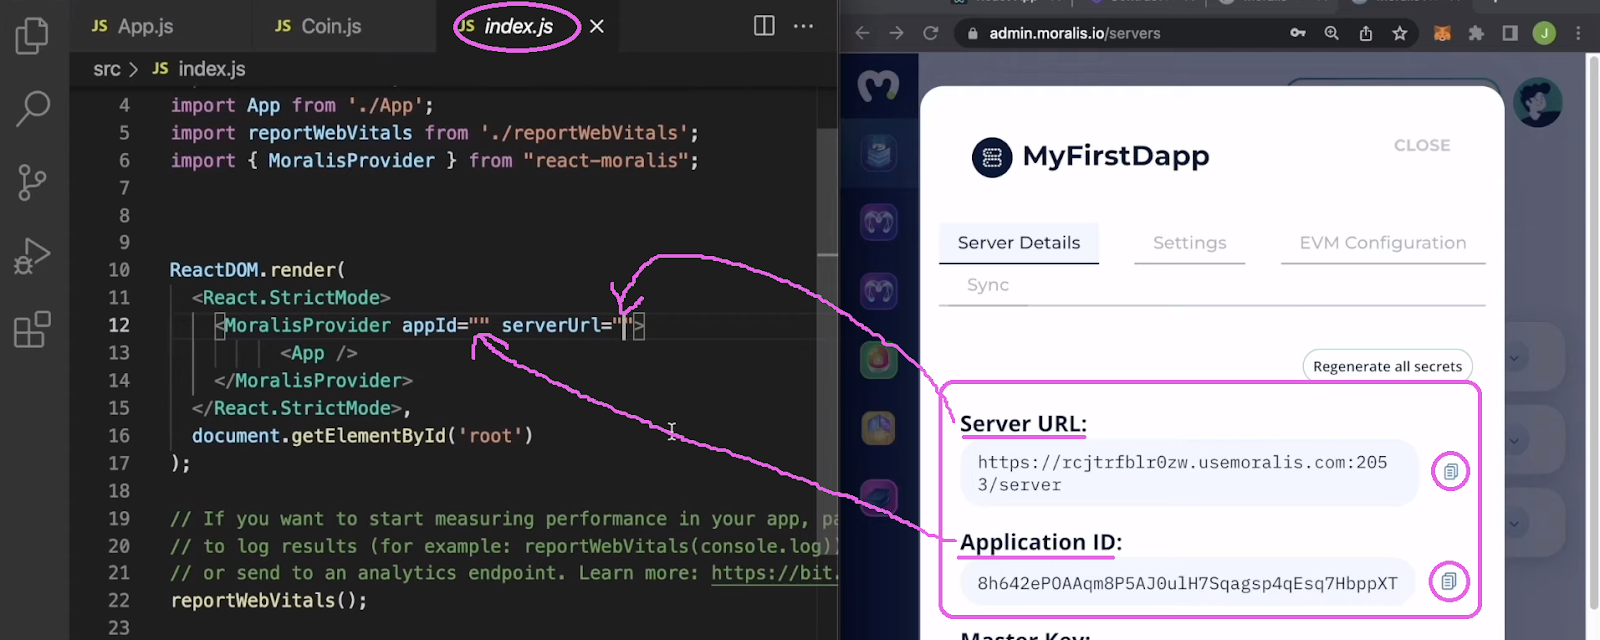
With the frontend covered, you are ready to make the application live. For that purpose, you will want to create a Moralis server (40:12) and copy your server’s details into the “index.js” file:
Then, starting at 41:26, you will take care of the info modal. Nonetheless, you will use the powerful Moralis Web3 API to ensure that the “info” modals include token prices (47:27).
Dapp Development Tutorial – Backend
With your smart contract up and running, your frontend ready, and your Moralis server spinning, it’s time to complete the last piece of the puzzle. Hence, you need to connect your React app to your smart contract (50:30). This is the part that will help you turn your React application into a dapp. Fortunately, you get to do this without breaking a sweat, thanks to the Moralis “Sync” feature and dashboard.
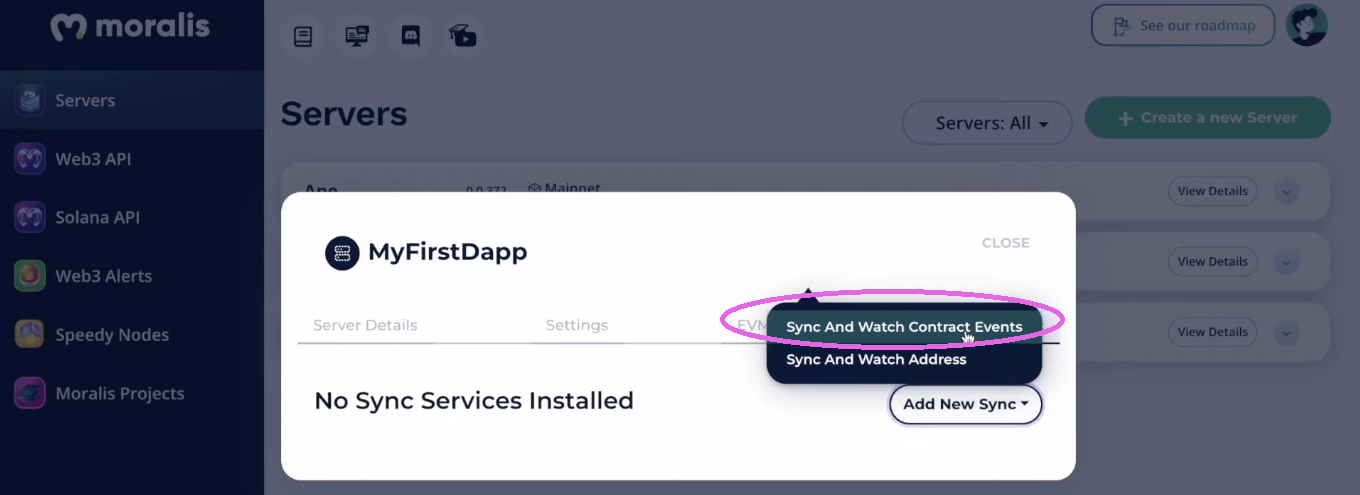
Starting at 50:45, this dapp development tutorial will show you how to create a new sync event:
After successfully creating your new sync, the Moralis dashboard will do the indexing automatically. Furthermore, you can easily use all the details related to your smart contract events inside your dapp. Hence, your frontend gets to reflect the live on-chain data, which is the basis for the percentage sentiment score.
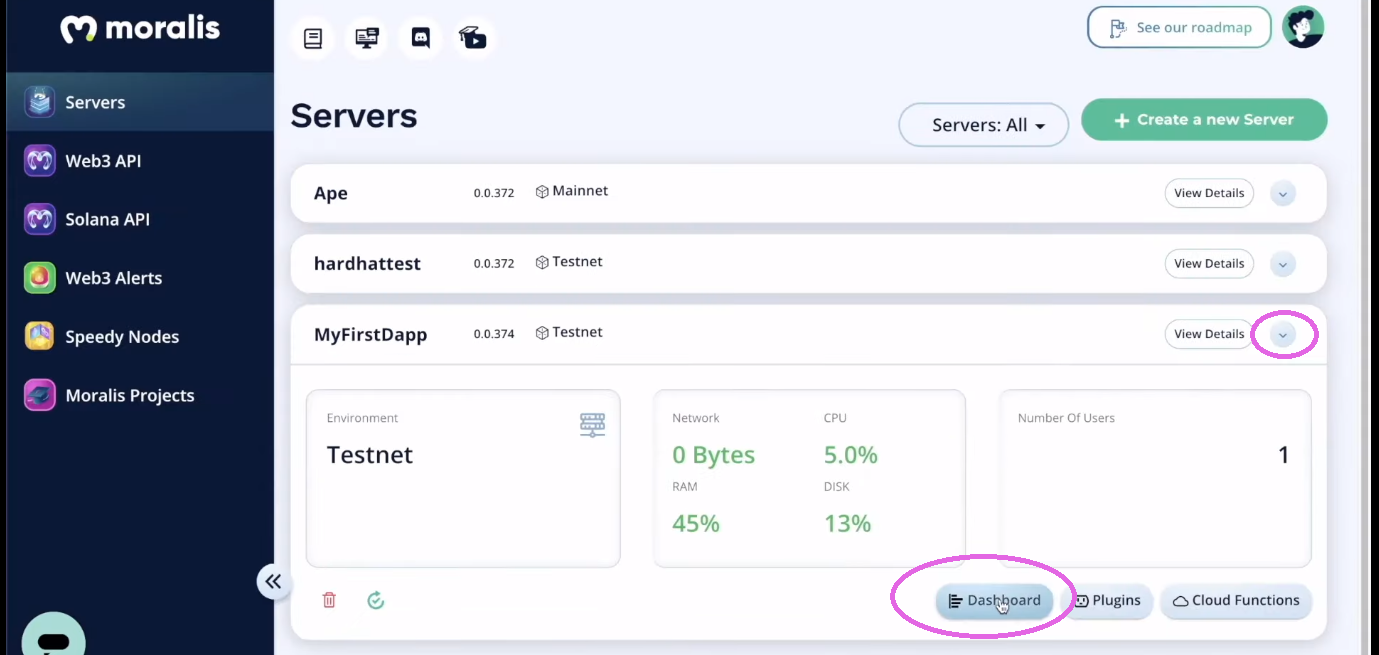
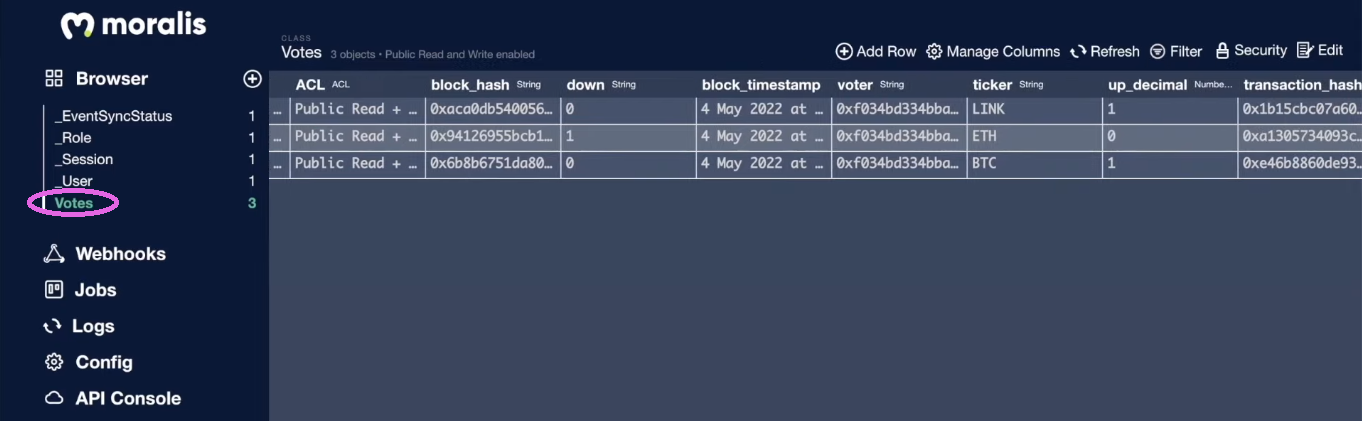
Once you have your Moralis server up and running, you get to access your Moralis dashboard:
If you used the same name for your “TableName” inside the “sync” setting, you now have the “Votes” class in your Moralis dashboard:
Dapp Development Tutorial – Full Guide to Building a Dapp – Summary
We must admit that this dapp development tutorial was quite extensive. Yet, it still got you through all the steps in less than 70 minutes. It covered all crucial parts of dapp development – the smart contact, the frontend, and the backend. As such, you now have a full picture of the process behind Web3 application development. If you enjoyed this tutorial, we recommend you check out our “clone” dapp development tutorials:
- Web3 Twitter Clone
- Uniswap DEX Clone
- Web3 Netflix Clone
- Web3 Spotify Clone
- Coinbase Clone
- Reddit Clone for Web3
- OpenSea Clone
On the other hand, you might want to start with simpler example projects. Perhaps, you want to avoid dealing with smart contracts for now. If that’s the case, you ought to create your own dapp in minutes using the ultimate Web3 boilerplate. Or, create a mobile Ethereum dapp using our Ethereum mobile boilerplate. Moreover, you can find many other simple dapp development tutorials on the Moralis YouTube channel and the Moralis blog. Some of the latest articles focus on blockend development, how to authenticate Solana users with the Phantom wallet, how to create an NFT on-chain inventory system, SPL vs ERC20 tokens, building a DAO, and how to mint game asset as NFTs. Moreover, there easiest way to become a blockchain developer is right at Moralis Academy.
