Predicting the future is something none of us can accomplish. However, with a crypto sentiment dapp, users can vote and, in turn, give their input regarding where the price of an asset is heading, for example. If you’d like to build such a dapp (decentralized application), read on! By following our lead, we can create a crypto sentiment dapp in less than 70 minutes. In addition, you’ll learn how to write, compile, deploy, and verify Solidity smart contracts using Hardhat. We will use React to build a simple single-page web application for a neat frontend. Also, we will use web3uikit – the leading Web3 UI library for Web3 apps. Although, the most precious takeaway from our tutorial is learning about Moralis!
With Moralis – the ultimate Web3 backend platform – you get to save an average of 87% on your development time. Further, with this “Firebase for crypto” platform, you can become a Web3 developer using your existing frontend skills. That is how JavaScript and Unity-proficient devs have been deploying killer dapps for a while now. Yes, that’s right, you no longer need to deal with all the limitations of RPC nodes. Instead, you use Moralis’ single workflow and, thus, make the most out of the current Web3 tech stack. Once you have the Moralis SDK connected to your application, you can easily cover blockchain-related backend programming with short snippets of code. This is where Moralis’ documentation makes things as straightforward as it gets. Moreover, Moralis lets you get started for free. Hence, create your free Moralis account and join us as we create a crypto sentiment dapp!

Our Crypto Sentiment Dapp – Demo
Moving forward, we want to make sure you know what to expect from our Web3 app. Hence, we’re about to look at a demo of our finished crypto sentiment dapp. As such, you will be able to decide if you want to commit your valuable time to this example project.
So, here’s our single-page dapp:
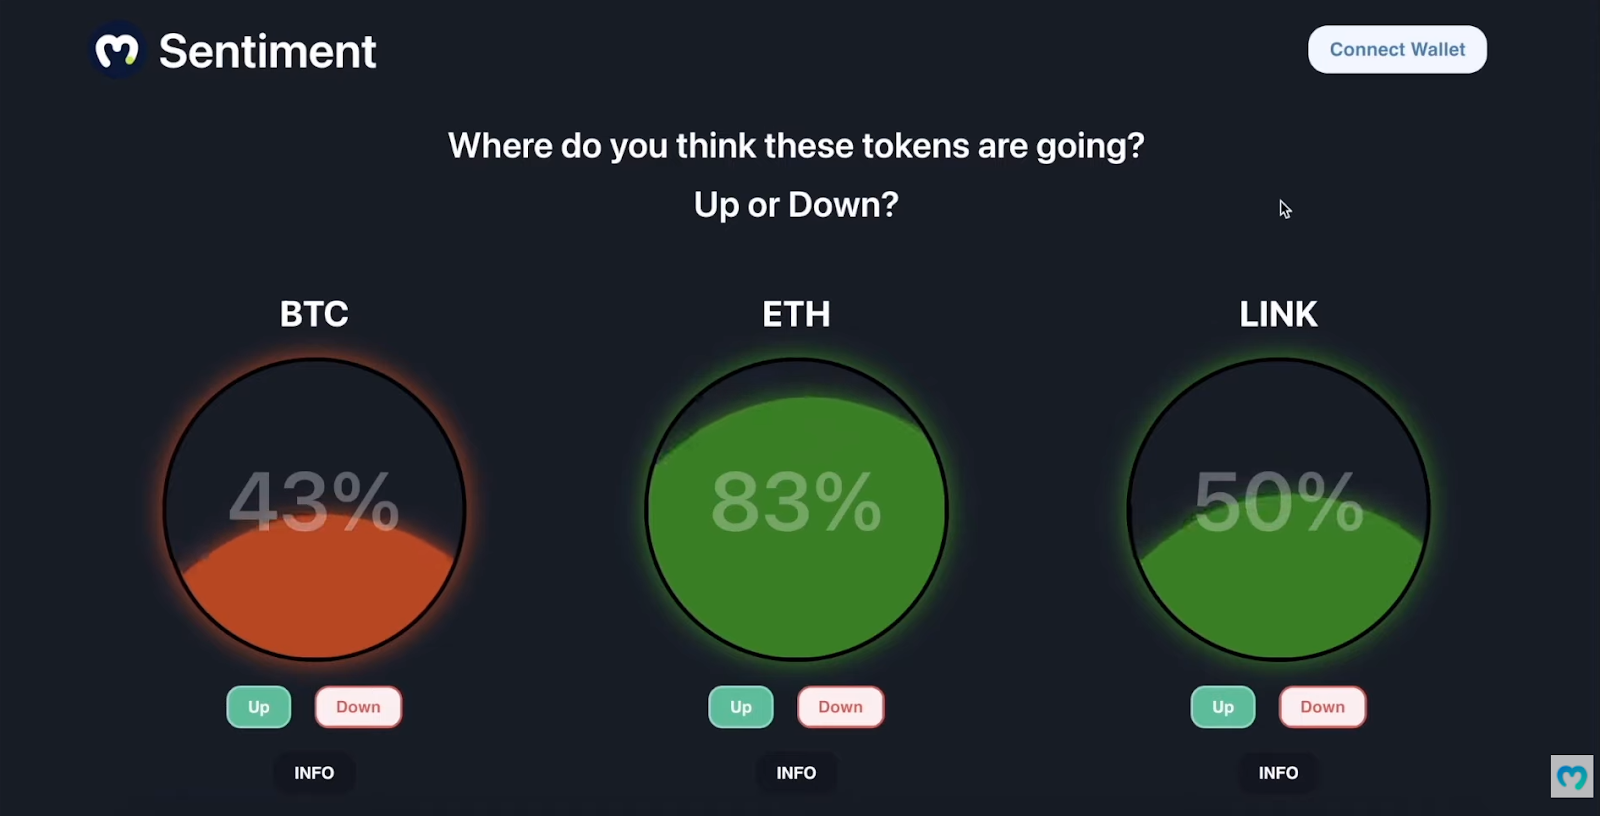
As you can see from the screenshot above, our crypto sentiment dapp offers a clean design, and its UI is quite intuitive. However, what you can’t see in the image above, is that the bubble’s “liquid” for each cryptocurrency is animated. As such, you might want to check out the video at the end of this article (0:19). Aside from the three cryptocurrencies displayed above (BTC, ETH, and LINK), our dapp covers other leading coins and tokens. They are displayed as users scroll further down the page:
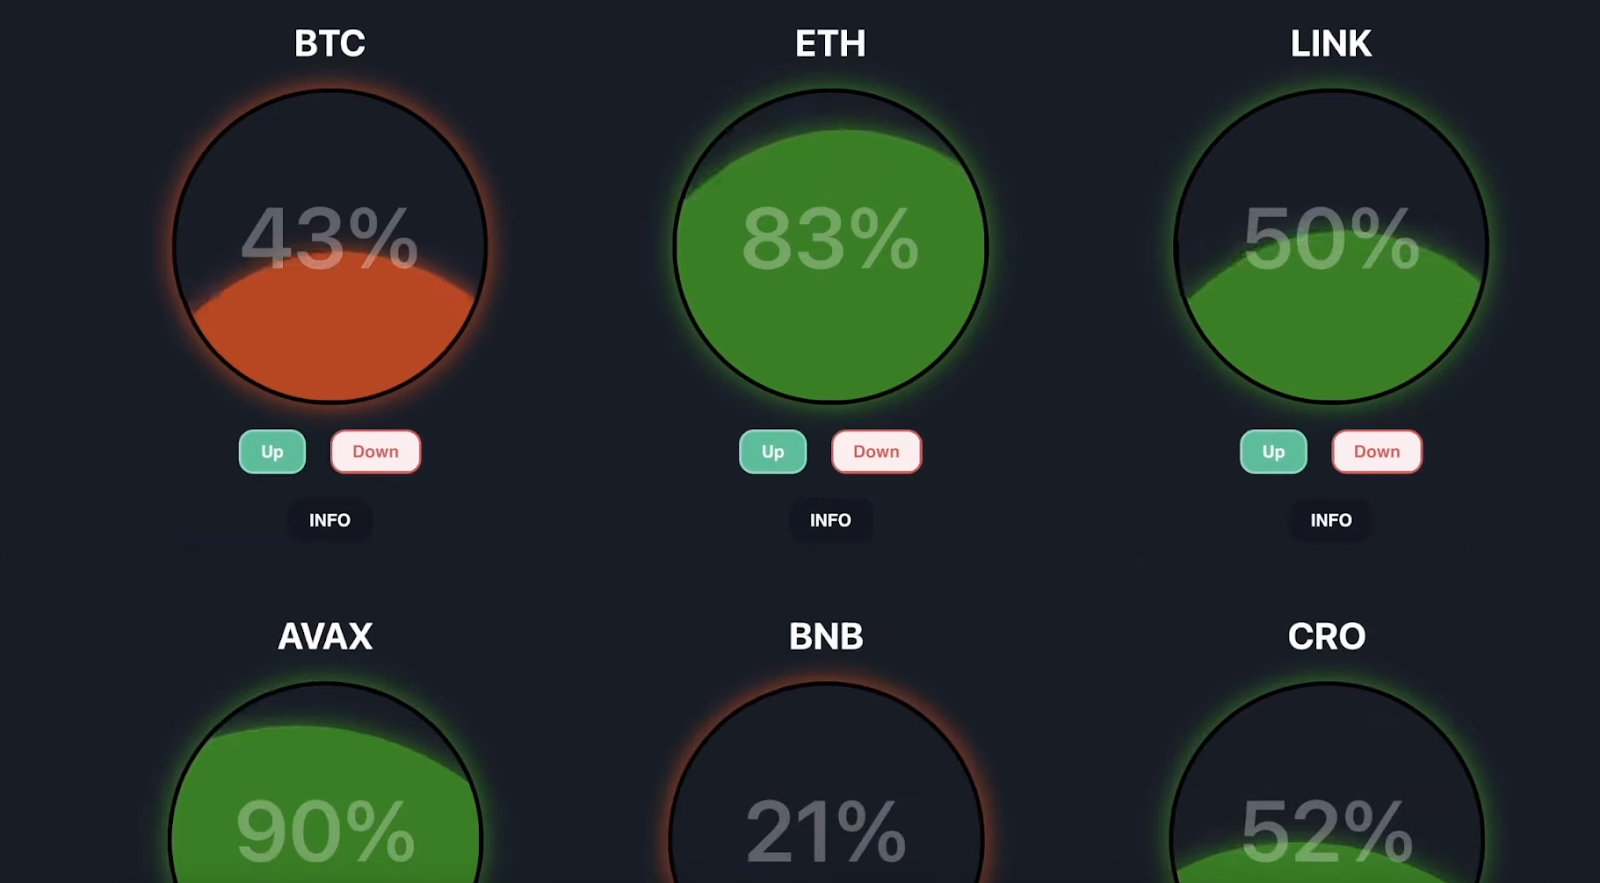
We can easily add other coins. Furthermore, the percentages inside the bubbles indicate voters’ opinions. The higher numbers (green “liquids”) indicate that the majority of voters believe the coin’s price will go up. On the other hand, the lower percentages (red “liquids”) signify that most voters believe the price will decline. In addition, there are several buttons inside our dapp. In the top-right corner, we have the “Connect Wallet” button, which takes care of Web3 authentication. Then, there are three buttons for each coin: “Up”, “Down”, and “INFO”. If users click on the info button, they get to see the current price of that coin and its description:
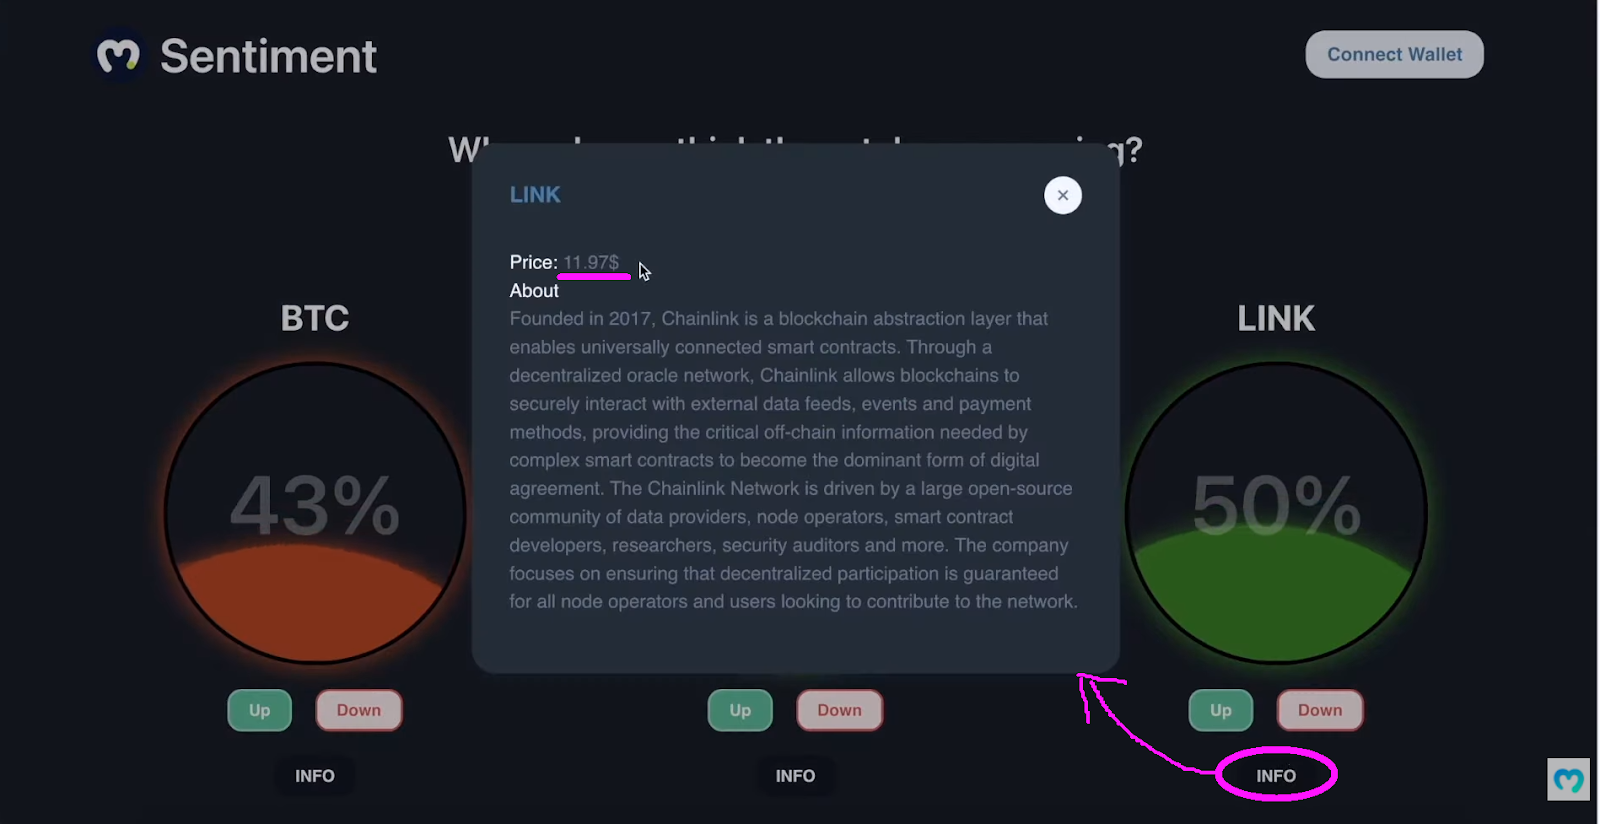
We get to display the prices effortlessly, thanks to the Moralis Web3 API. While “info” is available to all users, voting is limited to those who complete Web3 login:
Web3 Authentication and Voting Inside Our Crypto Sentiment Dapp
Users must log in to place their votes using our smart contract as demonstrated above. Hence, they need to use the “Connect Wallet” button first:
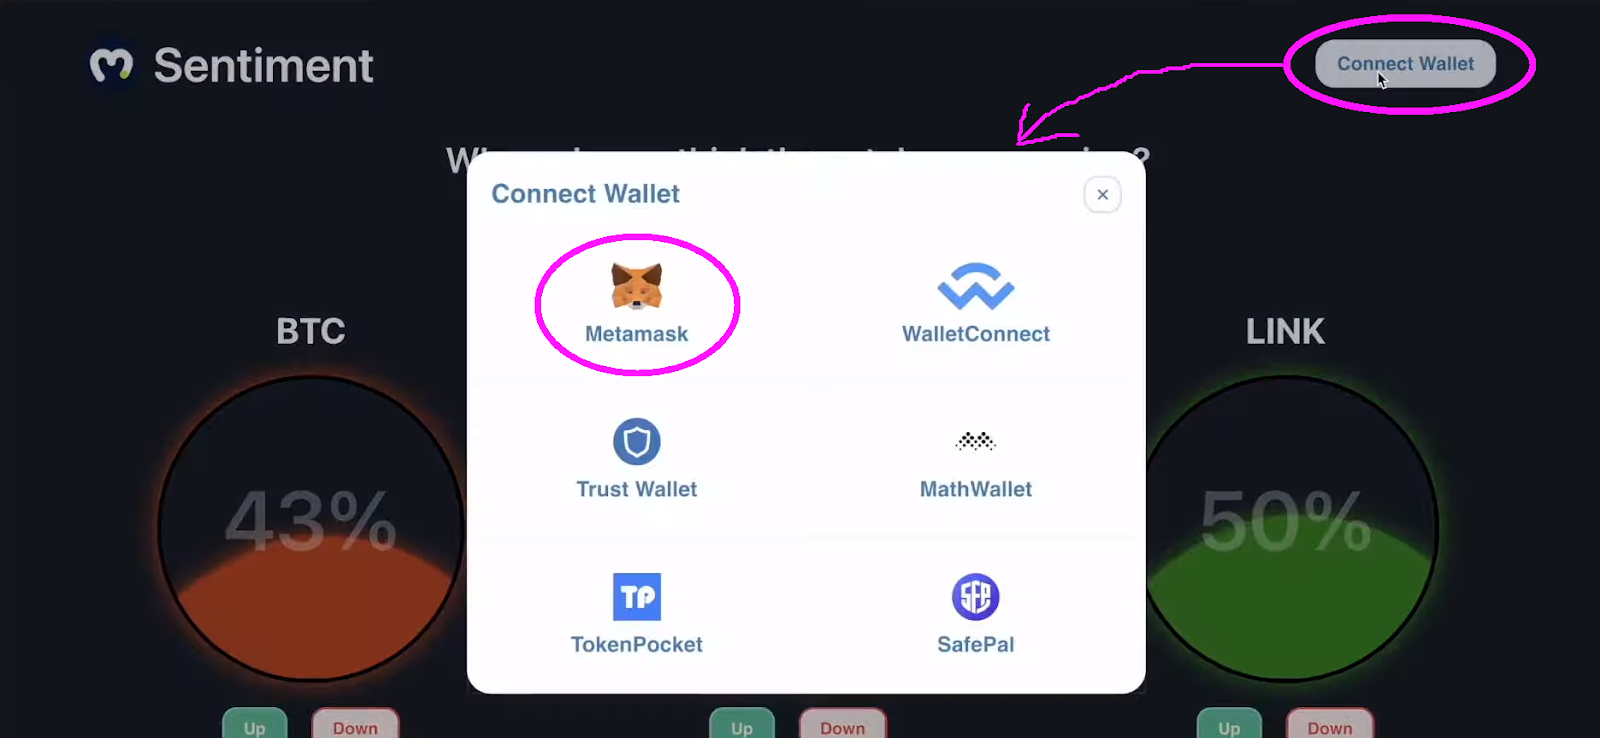
You can see in the above screenshot that the example user decided to use the MetaMask Web3 wallet. Thus, his MetaMask extension prompts him with a signature request. So, the user needs to click on the “Sign” button to authenticate with MetaMask successfully:
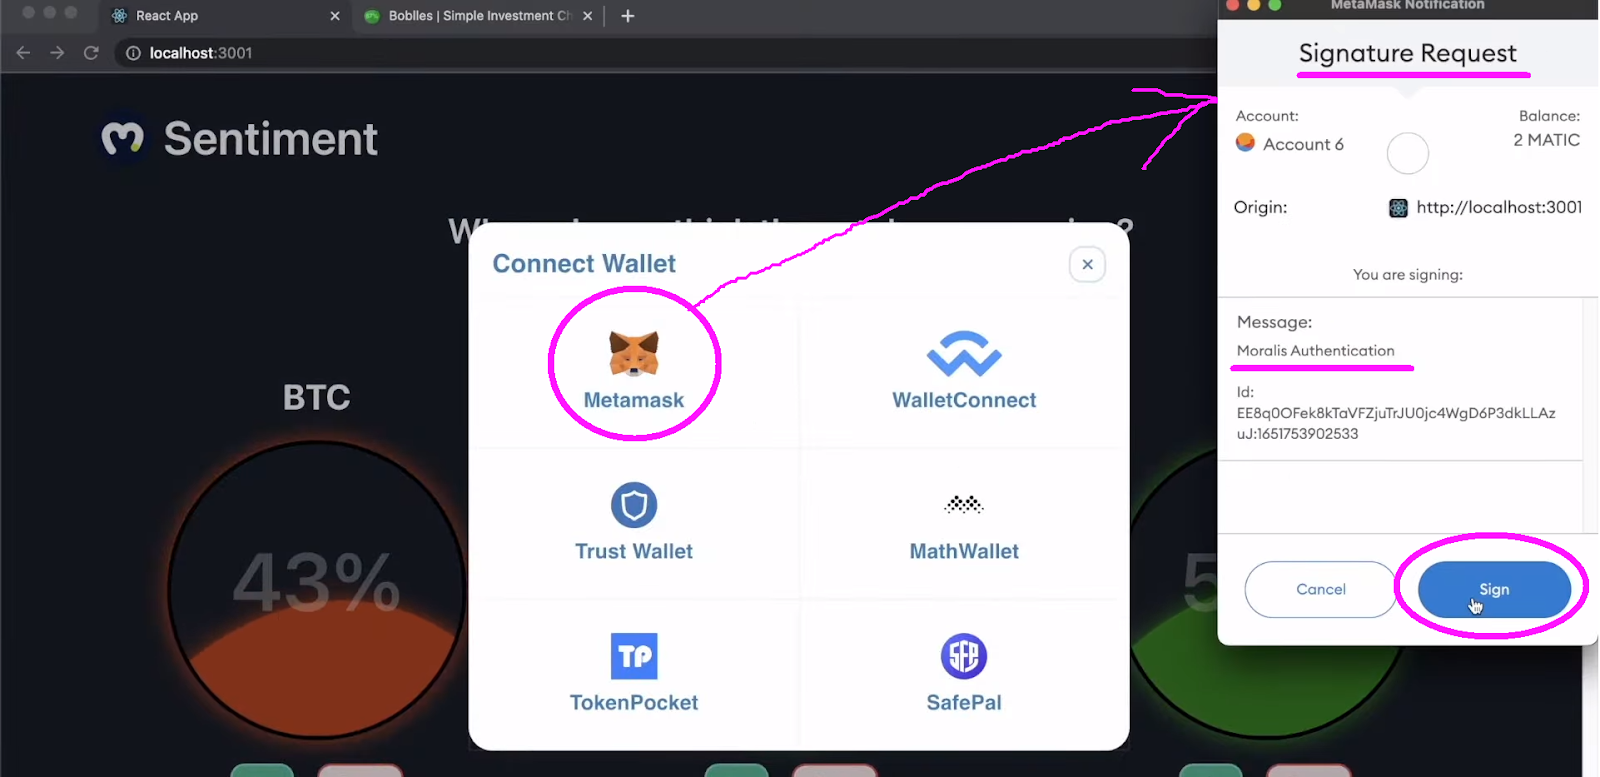
Now that the example user is signed in, he can use the “Up” and “Down” buttons to submit his votes. So, if, for example, the user decides to down-vote LINK, he needs to click on the “Down” button. Since this is on-chain voting, his vote needs to be confirmed by an on-chain transaction. Accordingly, his MetaMask extension comes to play again:
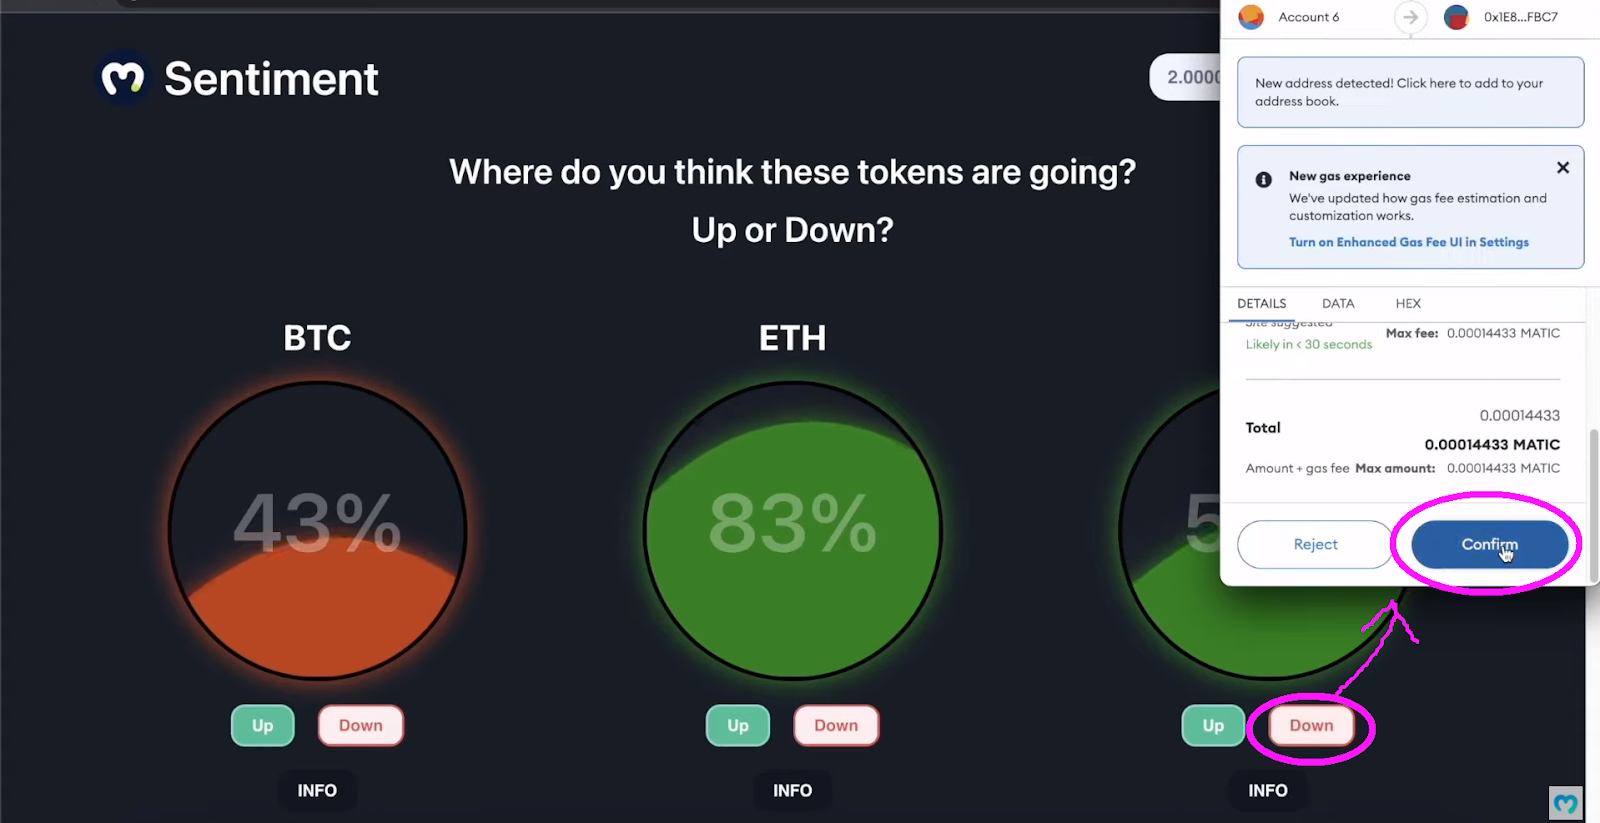
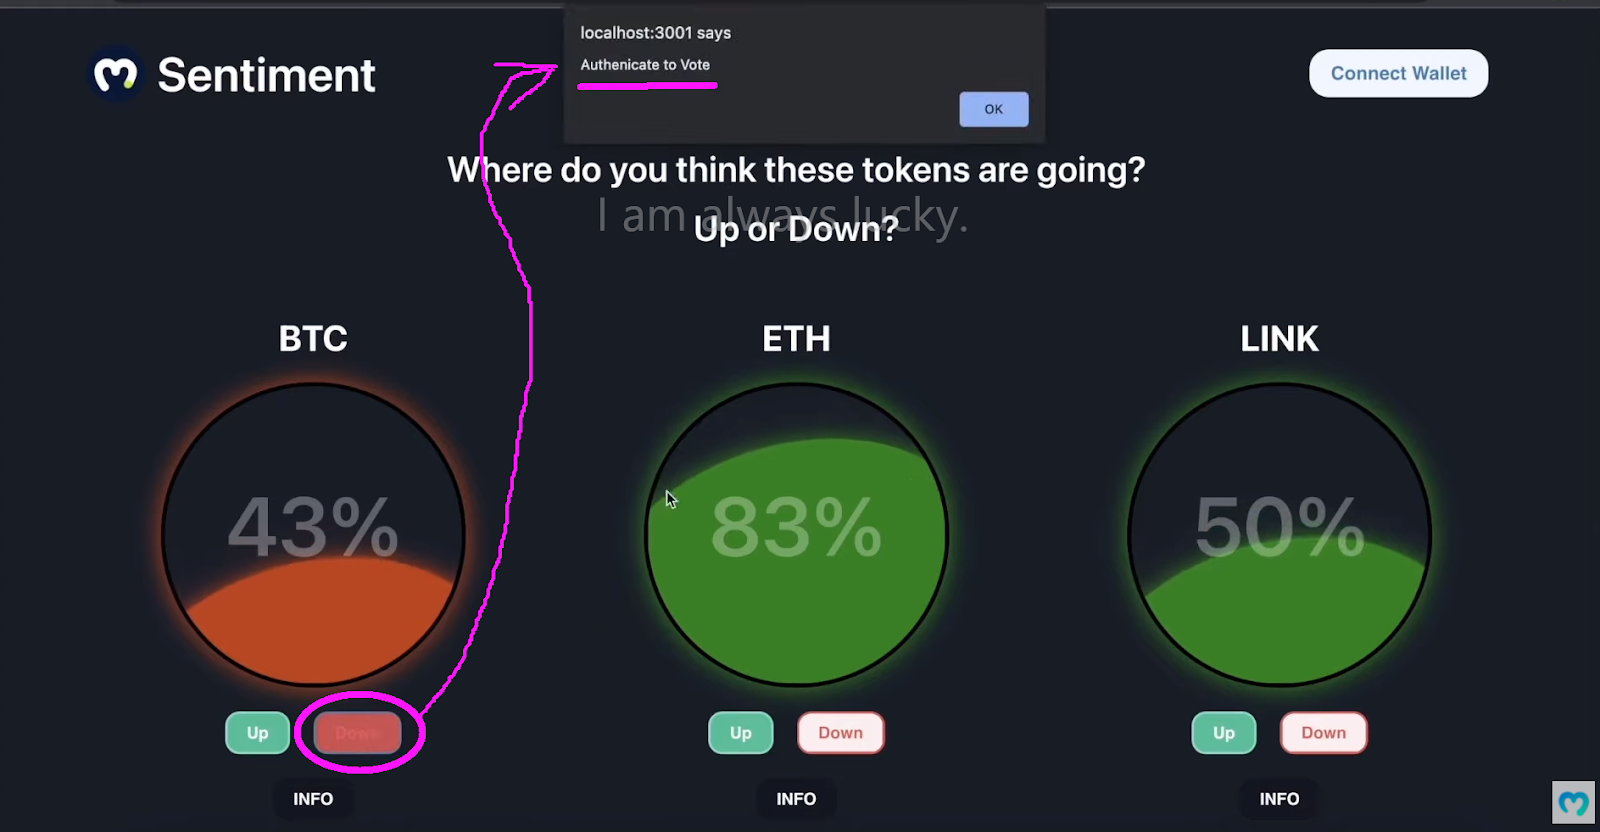
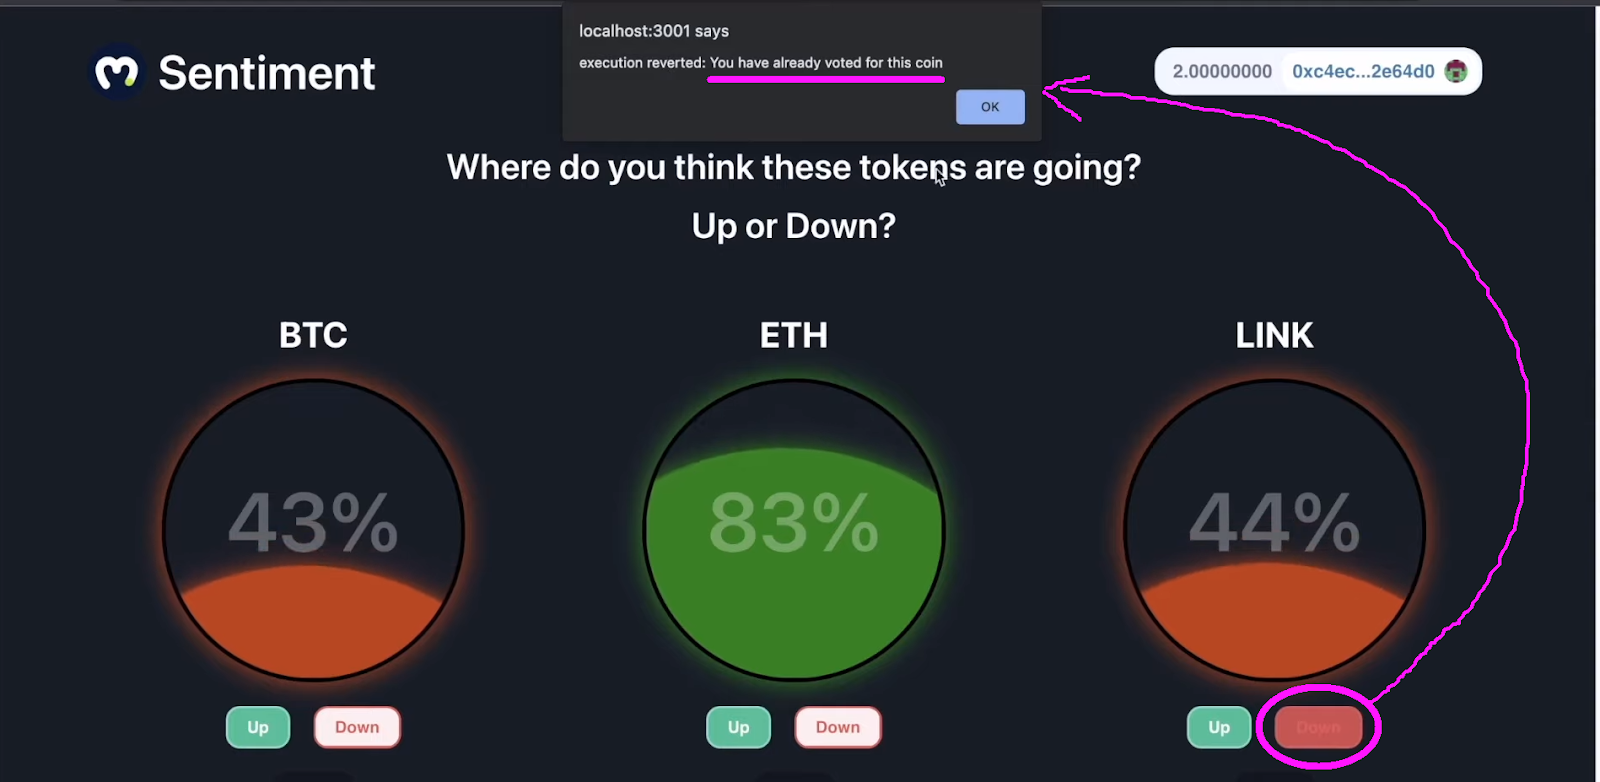
As soon as the user confirms the above transaction, his vote is accounted for. This is where the Moralis dashboard comes into the picture, as it enables us to index the blockchain easily. Moreover, we’ve set proper rules in place to allow users to vote only once per cryptocurrency. As such, if the same user tries to vote for LINK again, he gets the following notification:
As far as the UI demonstration of our example crypto sentiment dapp goes, the above wraps it up. However, to show you that the above transactions are actual on-chain events, let’s use PolygonScan (testnet).
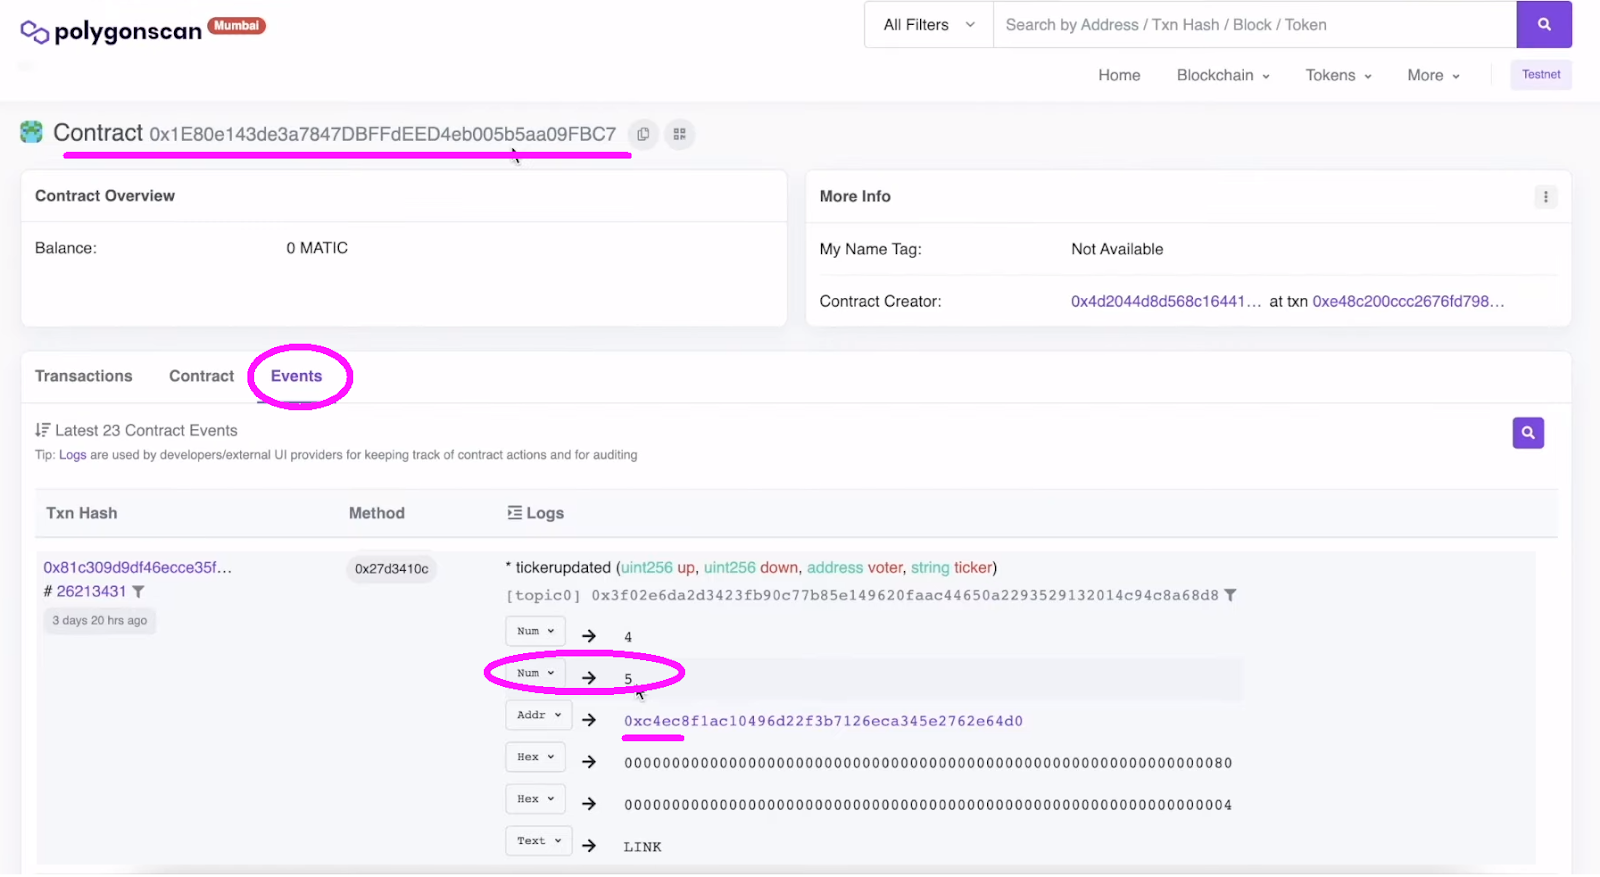
The above screenshot clearly shows our smart contract’s event related to the LINK downvote. Since these events play a vital role in our dapp, moving forward, you will learn how to sync and index smart contract events.
Create a Crypto Sentiment Dapp with Hardhat, React, and Moralis
Now that you’ve seen what an incredible dapp we’re about to build, you must be eager to get your hands dirty. Without further ado, let’s get started and create a crypto sentiment dapp!
Note: The following instructions, including the video below that we will be referencing moving forward, presume that you start with our starter code. However, use our final code if you are in a rush and would like to create your own instance of the above-presented crypto sentiment dapp in minutes.
Once you clone our starter code, you’ll be looking at the following project layout:
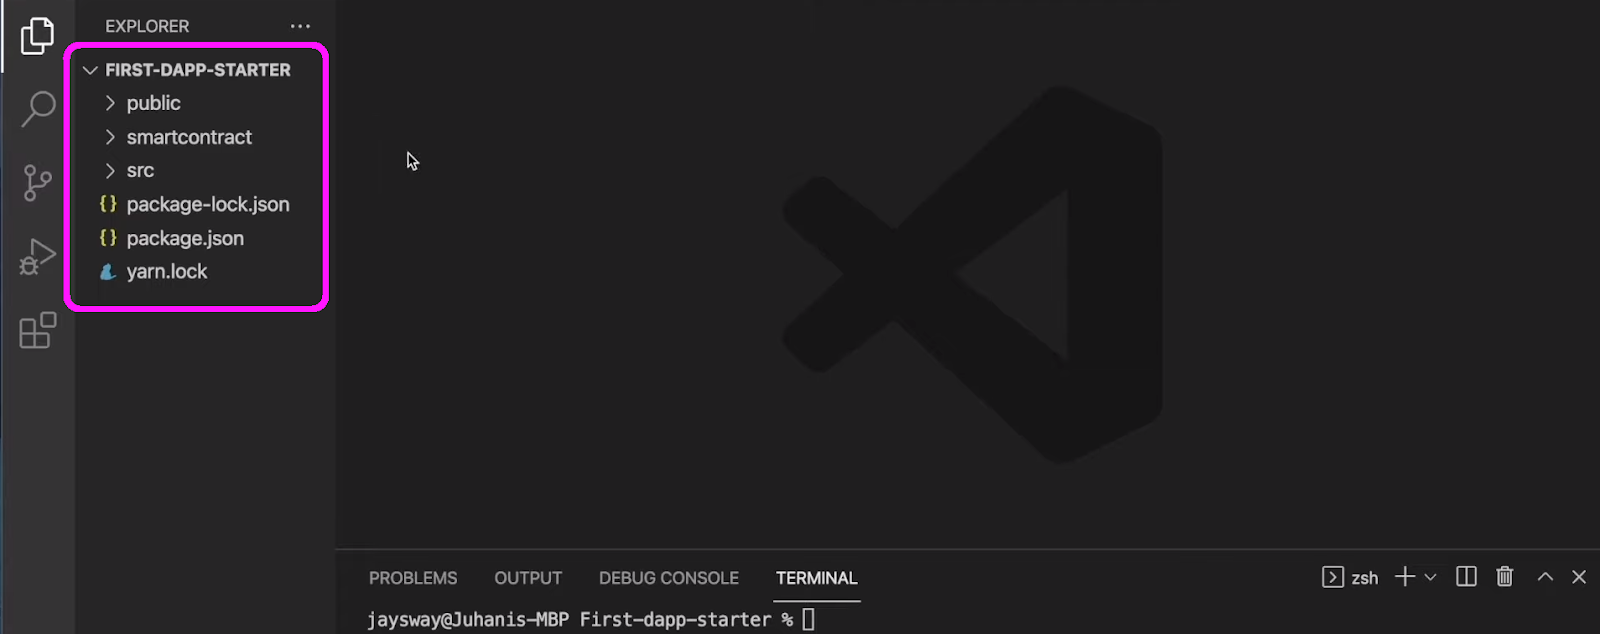
Moreover, you already know that we will use Hardhat to manage our smart contract. Thus, we need to cover some Hardhat-related initial setups. We start by navigating to the “smartcontract” folder using the “cd smartcontract” command. Next, we install Hardhat with “npm i -D hardhat”:

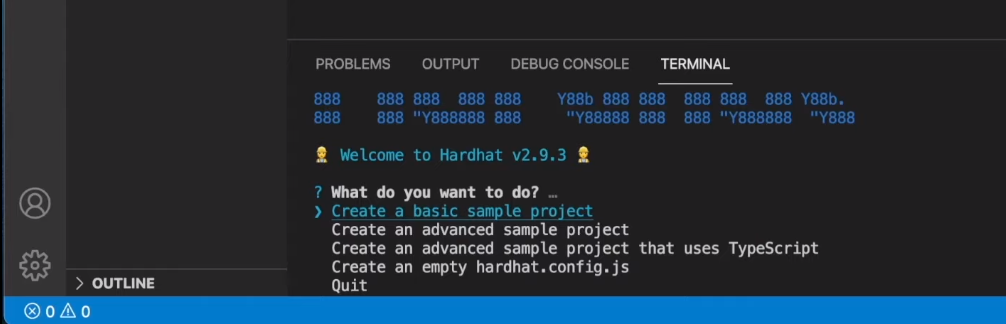
Then, we initiate a new Hardhat project using the “npx hardhat” command. Following this command, we need to select “Create a basic sample project” and hit “enter” a couple of times:
Once we create a new Hardhat project, we can also see that the “smartcontract” folder now contains new elements:
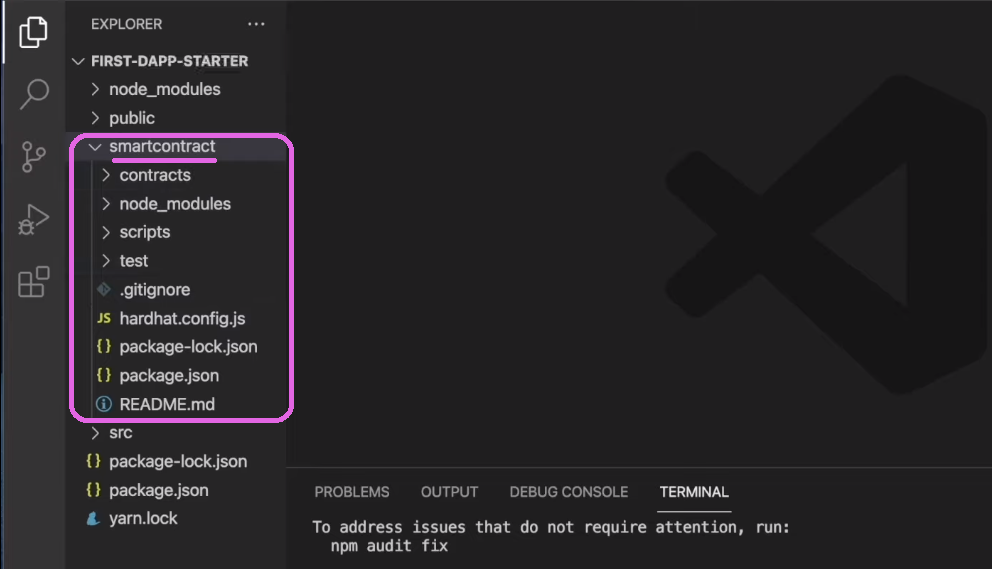
Nonetheless, there are some other dependencies we need to install. Hence, we use the terminal to enter “npm i -D dotenv” and “npm i -D @nomiclabs/hardhat-etherscan“. With the initial setup completed, we can focus on the smart contract that will power our dapp.
Smart Contract Behind Our Crypto Sentiment Dapp
First, we must open the “Greeter.sol” file, delete its content, and rename it to “MarketSentiment.sol”. If this is not your first rodeo with Solidity, you know that we must start with the “pragma” line.
Following this, we have “contract”, which marks the actual beginning of the smart contract (6:12). In case you want to write the contract yourself and truly understand its components, use the video tutorial below. However, you can also copy the entire code from GitHub (“MarketSentiment.sol“).
While each part of the code is vital, the “ticker” struct, the “tickerupdated” event, and the “vote” function will play the main role in our voting system. Among other details, this is where we determine that users can vote for each coin only once. The “addTicker” function will enable the owner of the smart contract to add tickers (to add coins or tokens to our crypto sentiment dapp). Nonetheless, we also add the “getVotes” function, enabling anyone to get the number of up and down votes for any particular ticker.
Next, we need to use Hardhat to compile our smart contract and then deploy it to a network of our choice. As indicated above, we will focus on Polygon’s testnet (Mumbai).

Compile and Deploy Smart Contract
Inside the “scripts” folder, we have the “sample-script.js” file, which we need to rename to “deployMarketSentiment.js” (16:58). Next, we must replace all “Greeter” and “greeter” with “MarketSentiment” and “marketsentiment”. All that’s left is to remove the “Hello, Hardhat!” parameter from “MarketSentiment.deploy”.
Our next stop is the “hardhar.config.js” file (18:05). For starters, we add the “require(“@nomiclabs/hardhat-etherscan”);”, “const dotenv=require(“dotenv”);”, and “dotenv.config();” lines. This is also our cue to go and create the “.env” file, where we will create a couple of environment variables. Among others, we will use PolygonScan’s API key, which will allow us to verify our smart contract. Use the video starting at 19:08 for details.
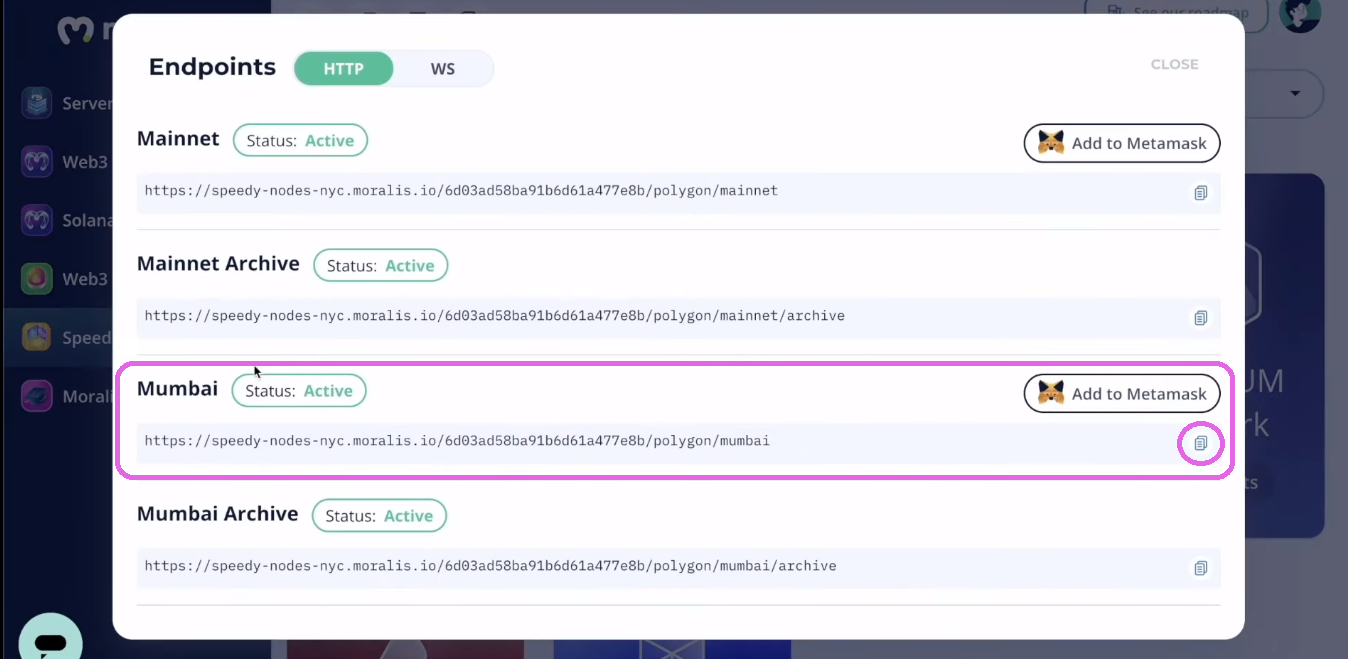
Next, we’ll need the Mumbai testnet’s endpoint. Fortunately, Moralis Speedy Nodes cover this (19:54). So, in case you haven’t done so yet, create your free Moralis account to access this feature:
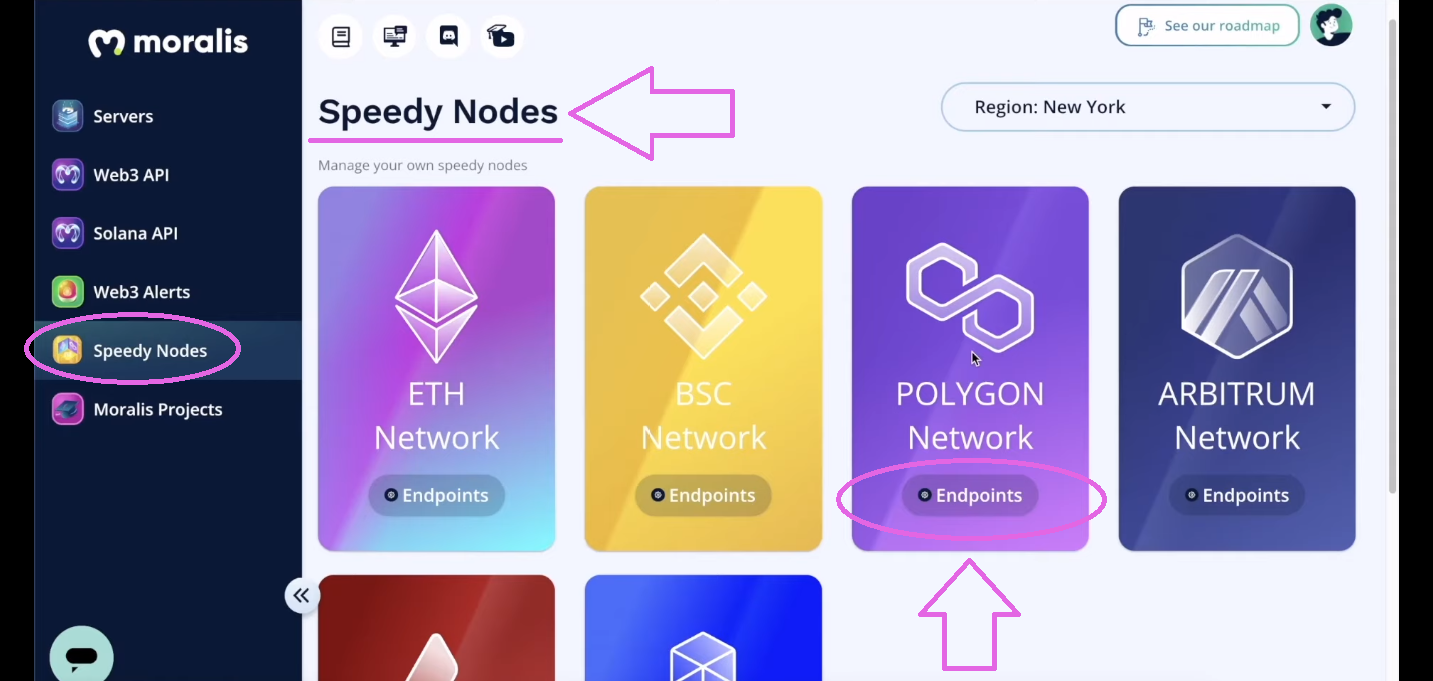
This is where we copy the Mumbai testnet’s endpoint:
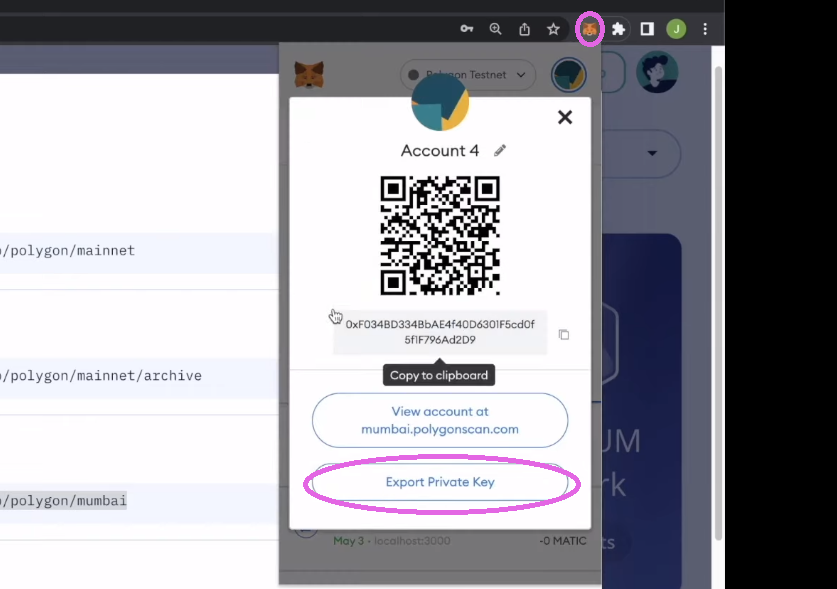
Finally, we also need to enter our crypto wallet’s private key, which we can get using our MetaMask extension (20:40). We go to our MetaMask browser extension, click on the three vertical dots, followed by “Account details”, and finally “Export Private Key”:
Finally, we have all of our environment variables in our “.env” file:

Now, we return to the “hardhat.config.js” file (21:10), where we first make sure to correct the Solidity version to “0.8.7”. Then, we create another object inside “module.exports” called “networks”, which we use to define our network:
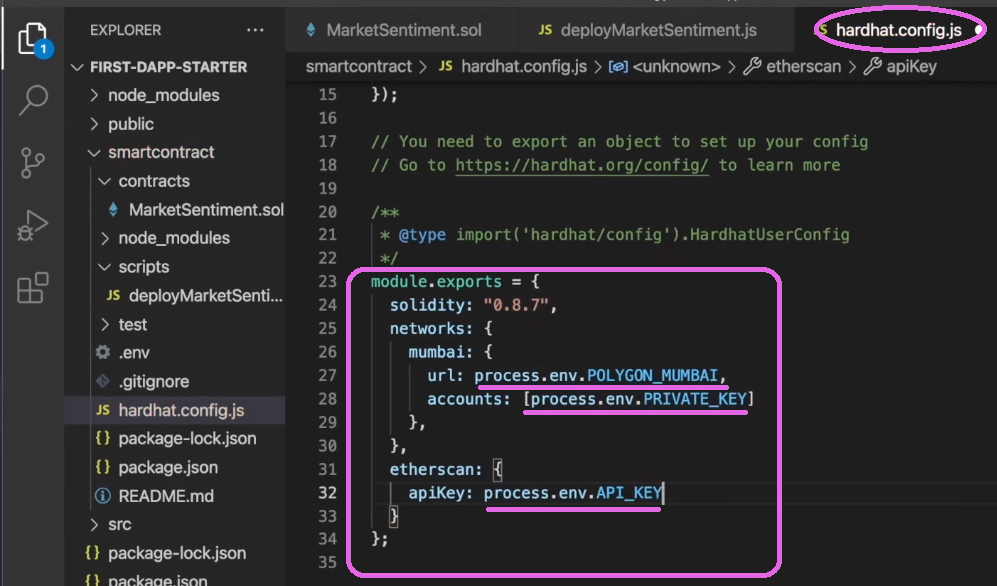
As you can see in the image above, this is also where we use our environment variables. That way, we complete the last piece of the puzzle. Hence, we have everything in place to compile, deploy and verify our smart contract (22:38).
Using PolygonScan to Read and Write Contract
Once we have successfully compiled, deployed, and verified our smart contract, we can use PolygonScan to interact with it. The latter also enables us to access our contract’s read and write functionality:
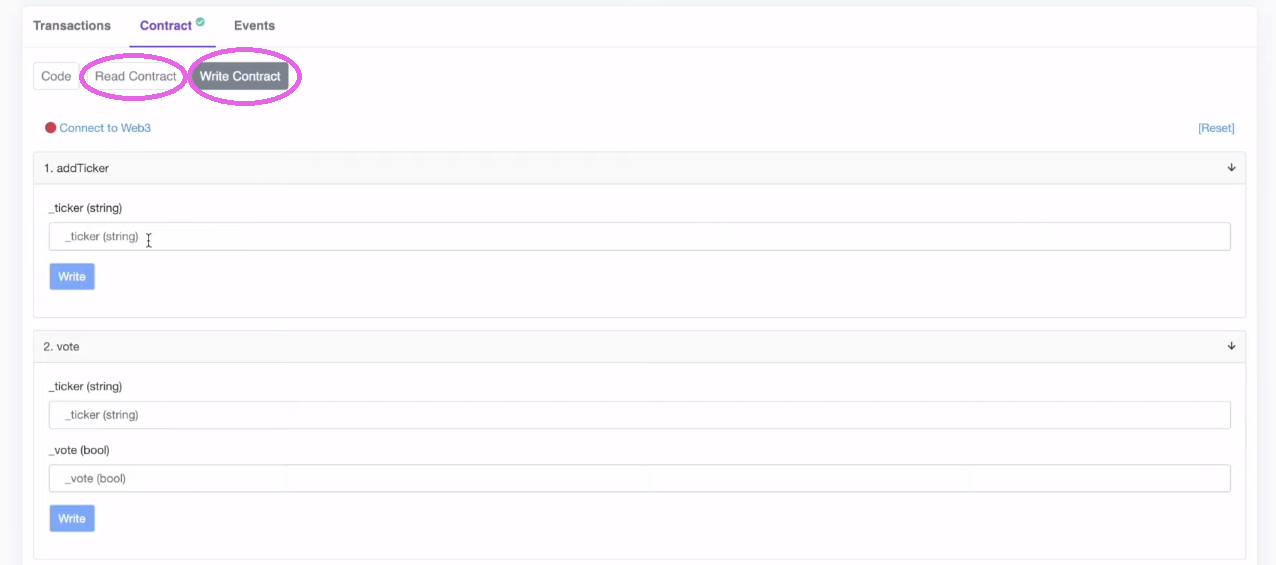
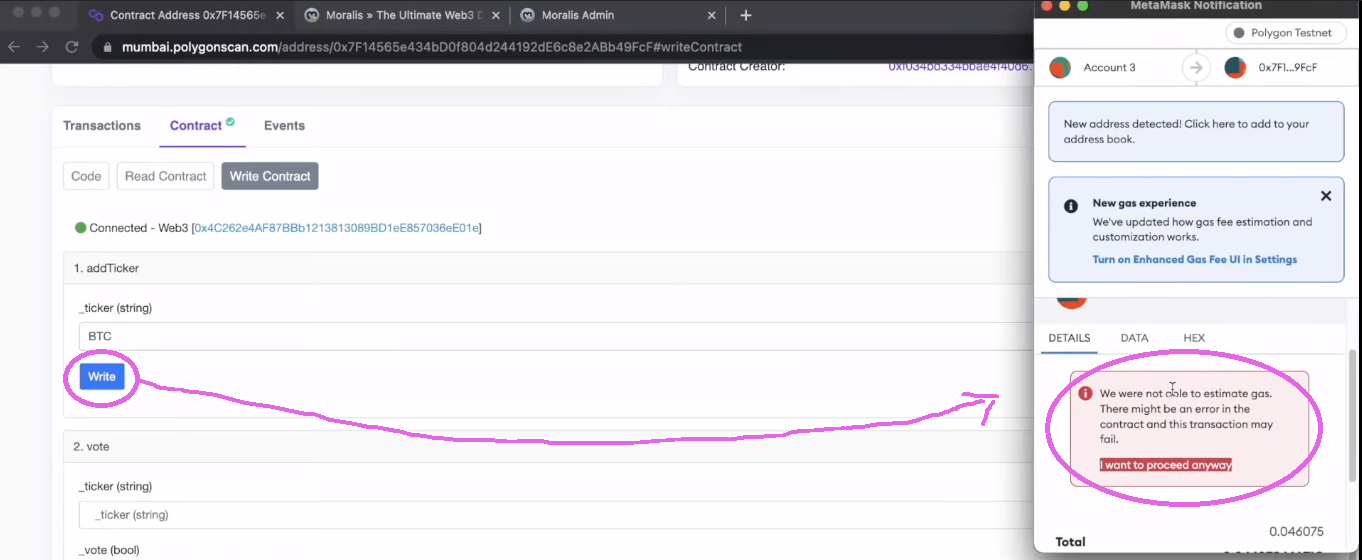
We can use the write functionality to add tickers to our dapp. Moreover, we can also check if the write functionality is actually limited to the contract’s owner. As such, we switch to another account and try to add a new ticker. As you can see in the following screenshot – since the address is not the owner, it can’t be used to write:
Crypto Sentiment Dapp – Frontend
Now that you’ve set the core of our example dapp in place, it’s time to create our crypto sentiment dapp. However, since many of you are not new to frontend development, we are handing you over to the capable hands of a Moralis expert. At 29:01 of the video below, you will start by initializing the React app. Then, you’ll get to create your crypto sentiment dapp’s header (30:03), the coin component (32:26), and the vote buttons (38:23).
However, in order to make the buttons and the entire application interactive, you must create a Moralis server (40:12). Next, you will implement the info modal (41:26). Finally, starting at 47:27, you’ll learn how to use the Moralis Web3 API to easily include tokens’ prices inside the “info” modal. Thanks to the power of Moralis, you can use the “getTokenPrice” snippet of code to get real-time prices.
Crypto Sentiment Dapp – Backend
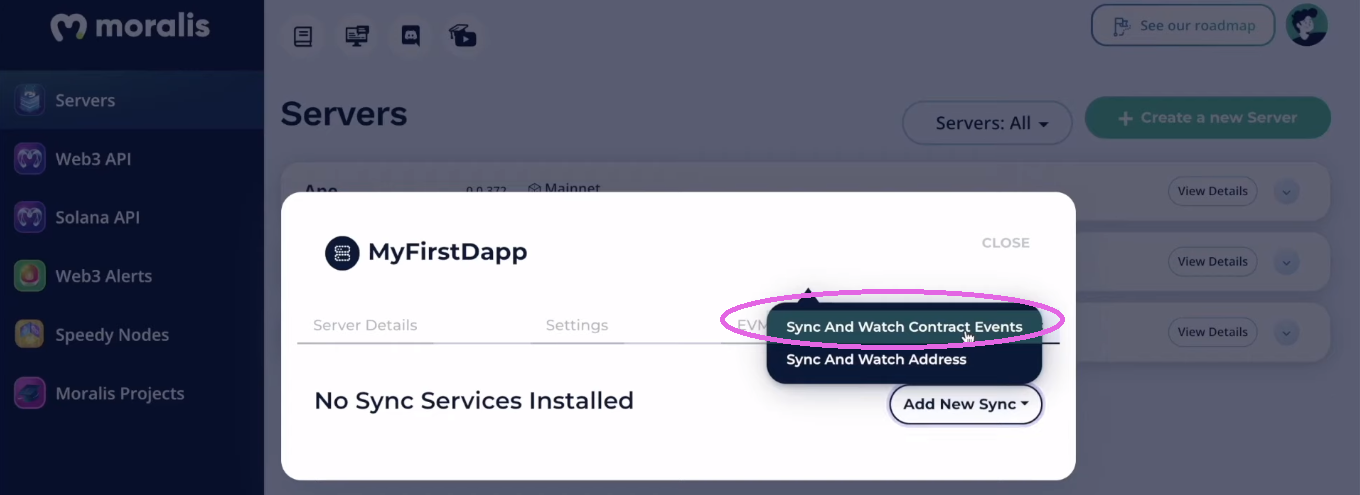
Starting at 50:30, you will get to connect your smart contract and your React app. This is where the Moralis dashboard will simplify things. It will enable you to easily listen to and index your smart contract events. As such, you will start by creating a new sync event using Moralis’ “Sync” feature (50:45):
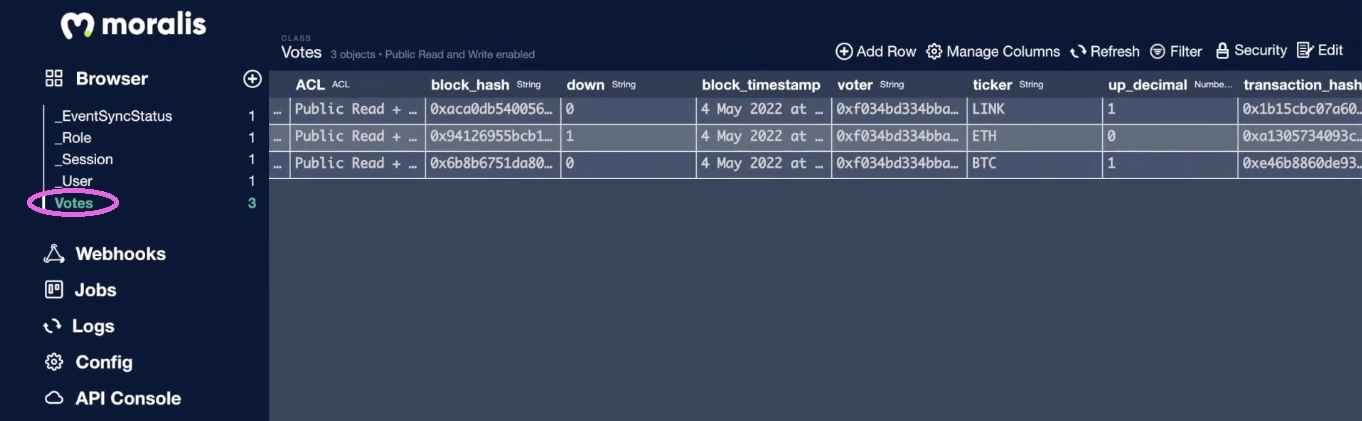
With your new “sync” in place, your Moralis dashboard will automatically index the votes. It will be easy to calculate the ratio to display the percentage values inside the bubbles for each ticker. Further, this is how you access your Moralis dashboard:
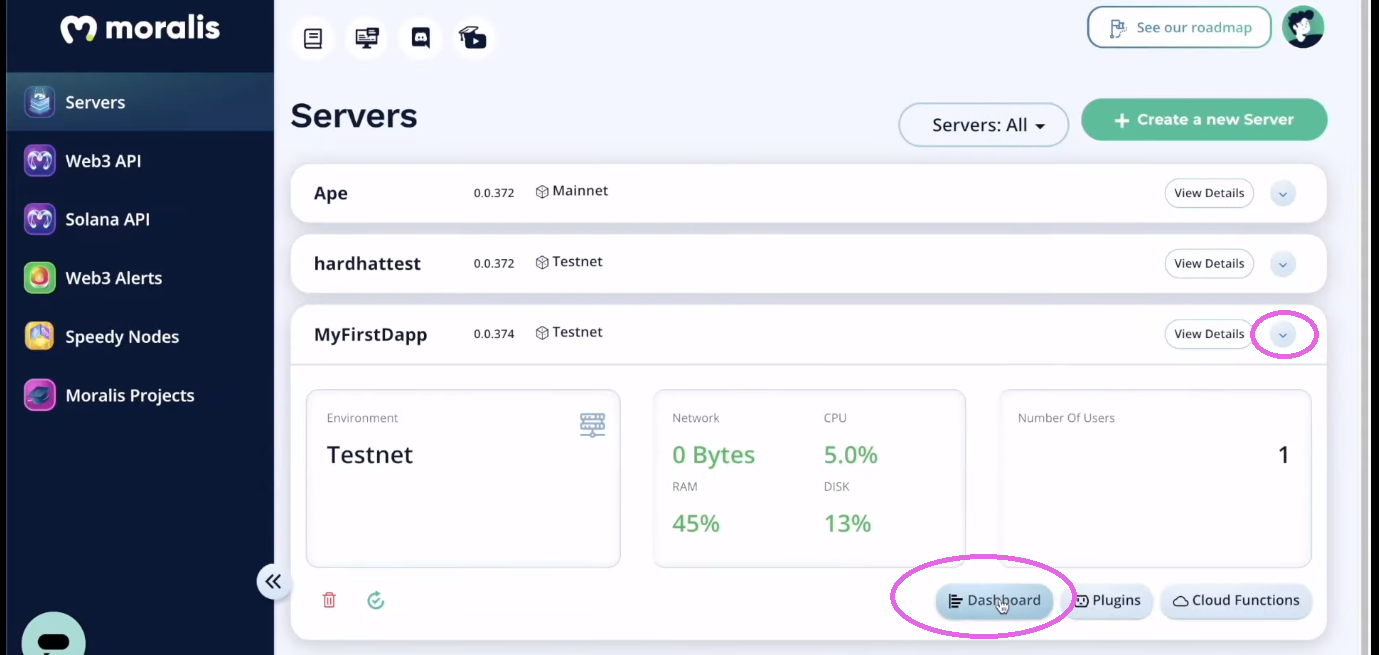
Here’s also a sneak peek into the Moralis dashboard:
Finally, here’s the video we’ve been referencing throughout the article:
How to Create a Crypto Sentiment Dapp – Summary
We covered quite a lot of ground in this tutorial. Following our detailed guidance, you had a chance to create your own crypto sentiment dapp in less than 70 minutes. If you followed our recommendation and started with the starter code, you learned much about blockchain development. First, you now know how to use Hardhat to work with smart contracts. Second, you’ve had a chance to refresh your React skills and create a neat frontend. In addition, you were introduced to web3uikit and the Moralis SDK. As a result, you now have a chance to become a blockchain developer using these tools.
Since “practice makes perfect”, we encourage you to take on more example projects. You can find them on the Moralis YouTube channel and the Moralis blog. Some of the latest topics illustrate how to authenticate Solana users with the Phantom wallet, how to create an NFT on-chain inventory system, how to build a decentralized Twitter, and how to build a marketplace to buy NFTs in-game. Also, topics teach you about Solidity smart contracts, an EIP 1559 example, decentralized finance (DeFi), etc. In addition, make sure to sign up for weekly Moralis Projects. However, some of us progress most efficiently when we take professional approaches. If that applies to you, enrolling in Moralis Academy might be the right path for you.