Augmented reality (AR) offers a way to make entertainment, business, and even education much more interesting. Also, if we add blockchain into the picture, then AR metaverse NFT applications can reach a completely new level of interaction. Furthermore, thanks to AR, where users can enter an exciting and immersive metaverse experience, mainstream adoption of Web3 and blockchain are almost here. Moreover, since we are still in the early stages of Web3, now is the best time to learn more about the metaverse and NFTs (non-fungible tokens). By doing so, we can use the acquired knowledge to build killer dapps (decentralized applications) and include elements such as an AR metaverse NFT mystery box. While this may sound like a long and tedious process, it’s much simpler than you might think. Thanks to Moralis, your JavaScript or Unity skills are all you need!
In this article, you’ll have a chance to learn how this “Firebase for crypto” platform covers all your Web3-related backend needs. Aside from Moralis, you’ll also learn how to use Hardhat to deploy smart contracts effortlessly. Furthermore, Unity, Hardhat, and Moralis are the tools you need to create an AR metaverse NFT dapp in less than 70 minutes. In short, here are the six stages that we will cover moving forward:
- Completing the project’s initial setups and meeting the requirements to use Unity to build a Web3 augmented reality dapp.
- Covering the initial Moralis setup process – your gateway to Unity Web3 programming.
- Performing our example project overview.
- Creating a metaverse item by loading data from IPFS (a decentralized storing solution).
- Deploying our example Web3 contract with Hardhat.
- Enabling users to mint game assets from an AR metaverse NFT mystery box.
Now, make sure to create your free Moralis account and join us as we tackle this article’s challenge!

Demo of Our AR Metaverse NFT Mystery Box – Part 1
We don’t want you to follow us blindly and build something you can’t fully envision. Thus, before we give you a chance to get your hands dirty, we’ll do a quick demo of our example AR metaverse NFT dapp.
The initial screen of our dapp presents the “connect” button:
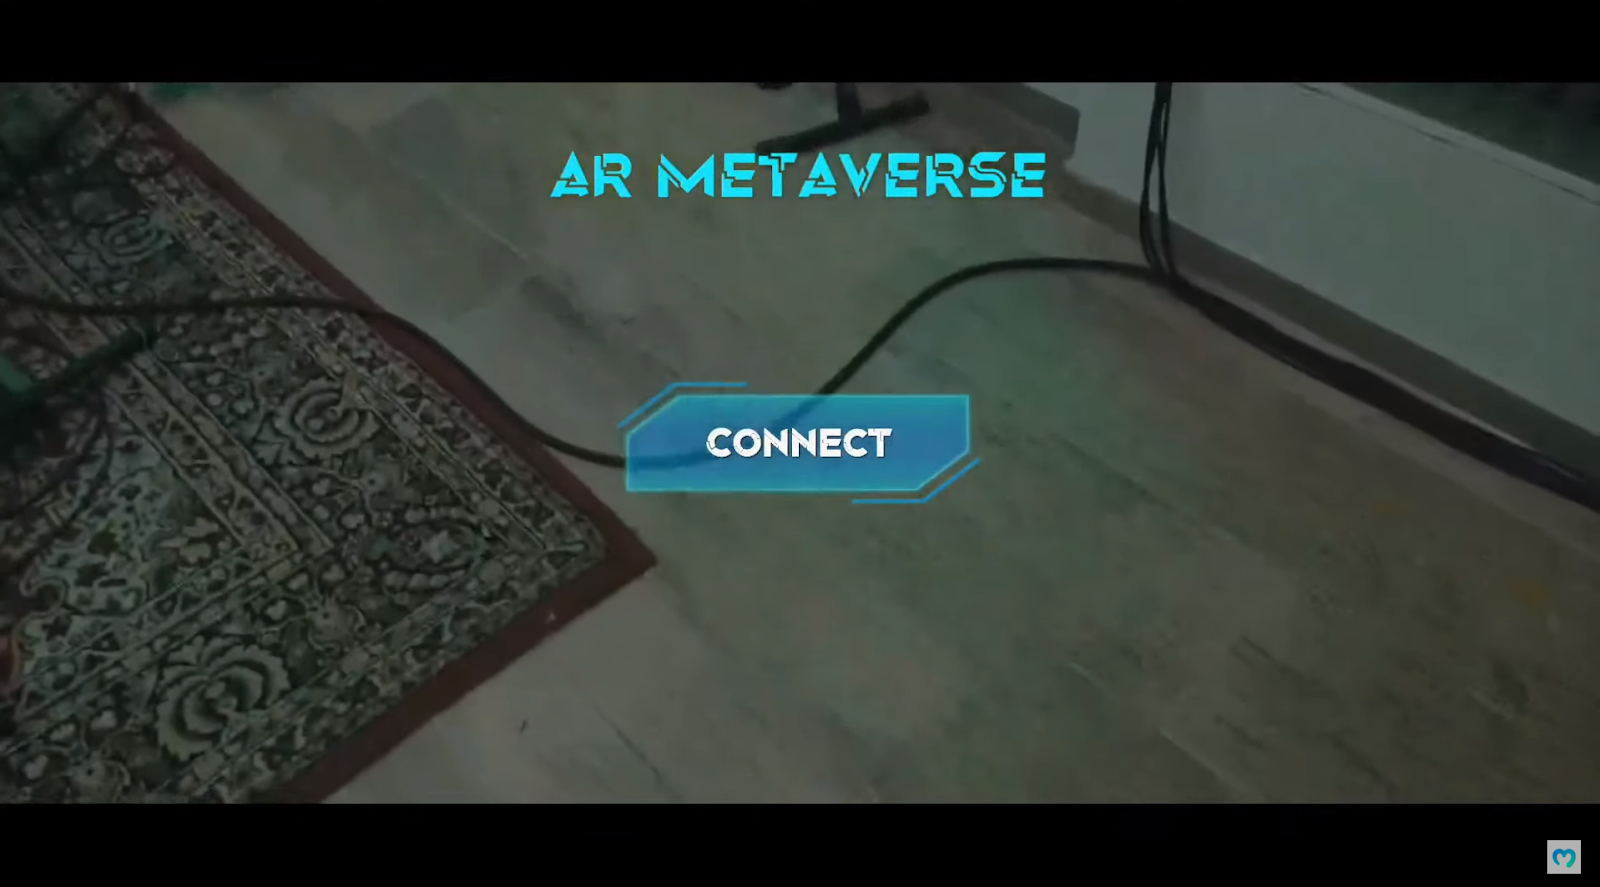
If users want to proceed, they need to tap the above button. Doing so will initiate Web3 authentication. Hence, our example dapp automatically connects users to their Web3 wallets. The user in our example wants to authenticate with MetaMask. As such, the user confirms the connection inside MetaMask:
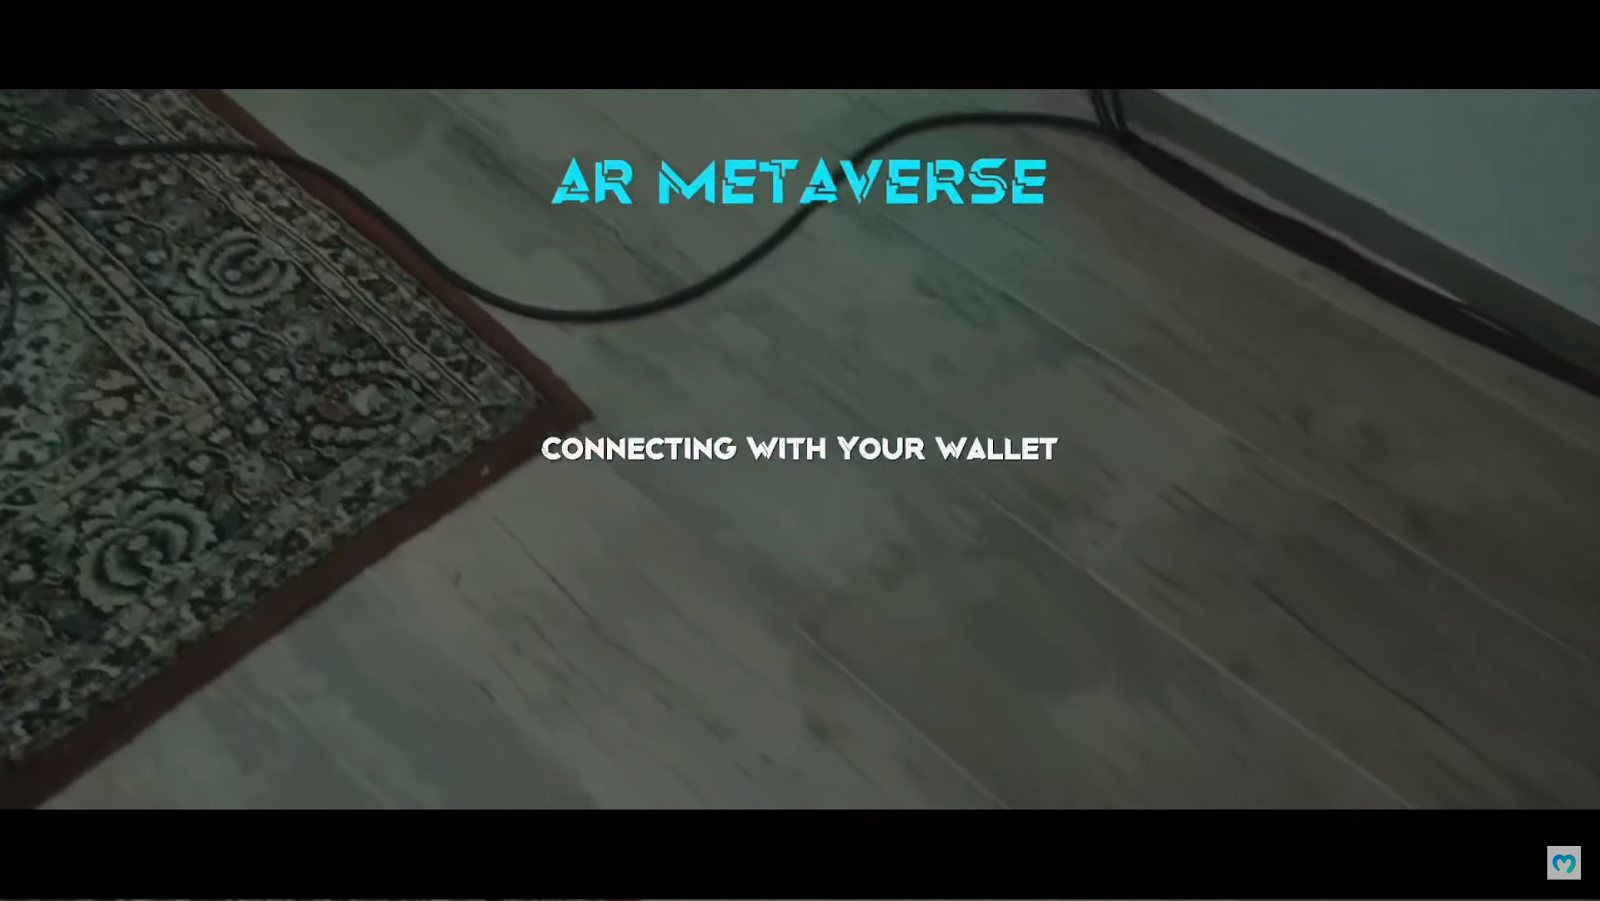
As soon as users complete their Web3 login, our app starts scanning the environment via our users’ smartphone cameras:
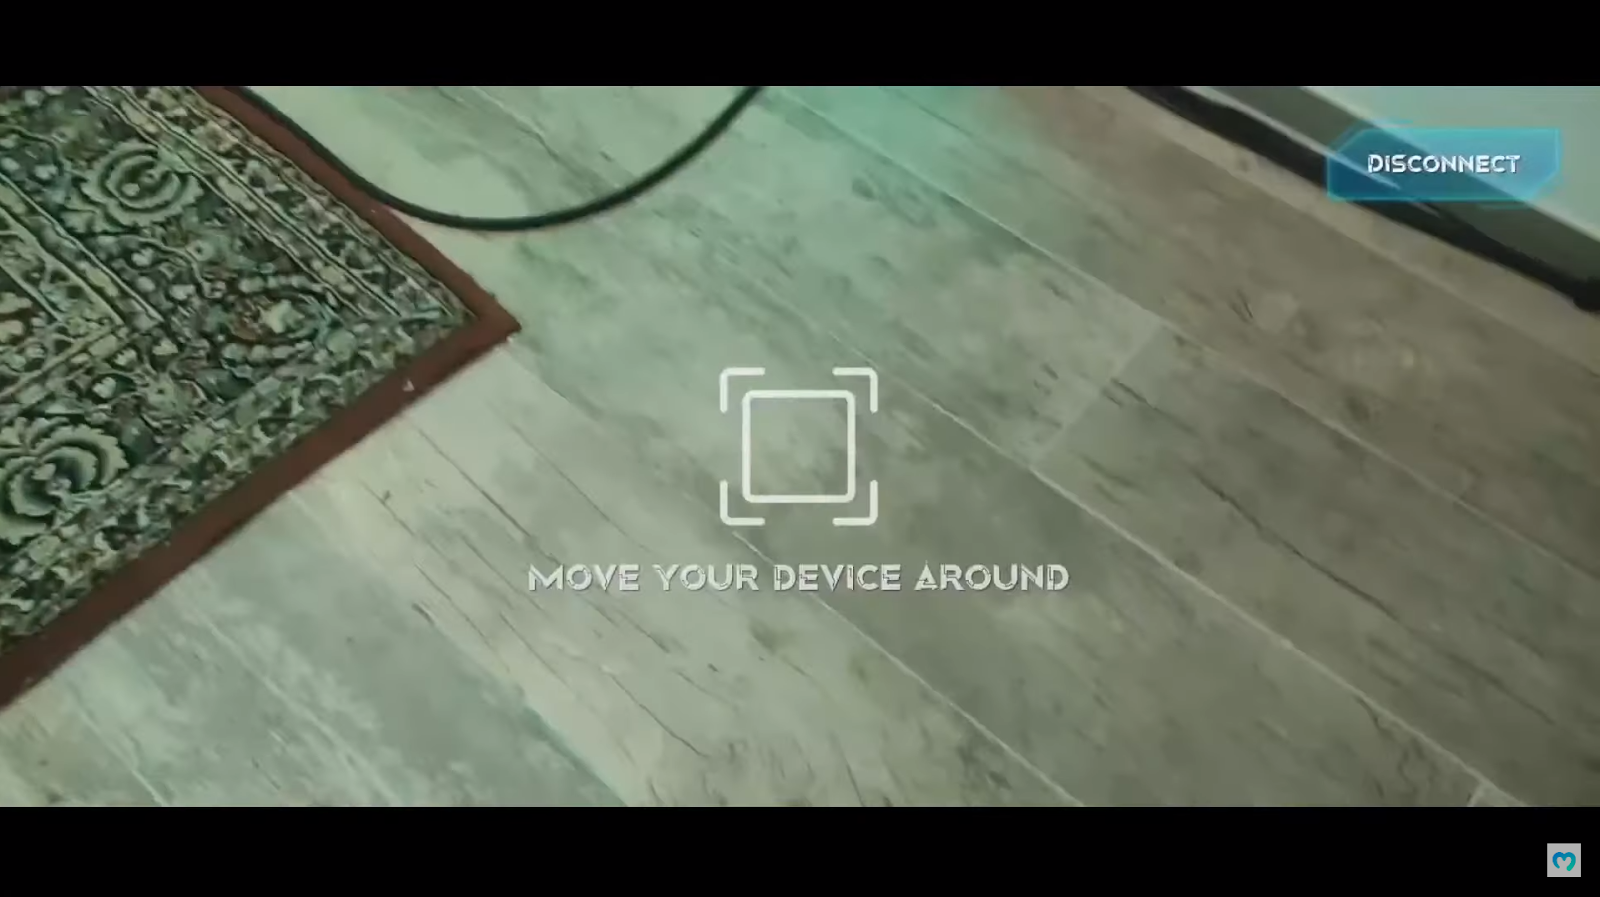
Looking at the screenshot above, the “move your device around” message informs users to scan the surroundings for surfaces. As soon as our AR metaverse NFT dapp detects a plain surface, the “tap to place object” message appears:

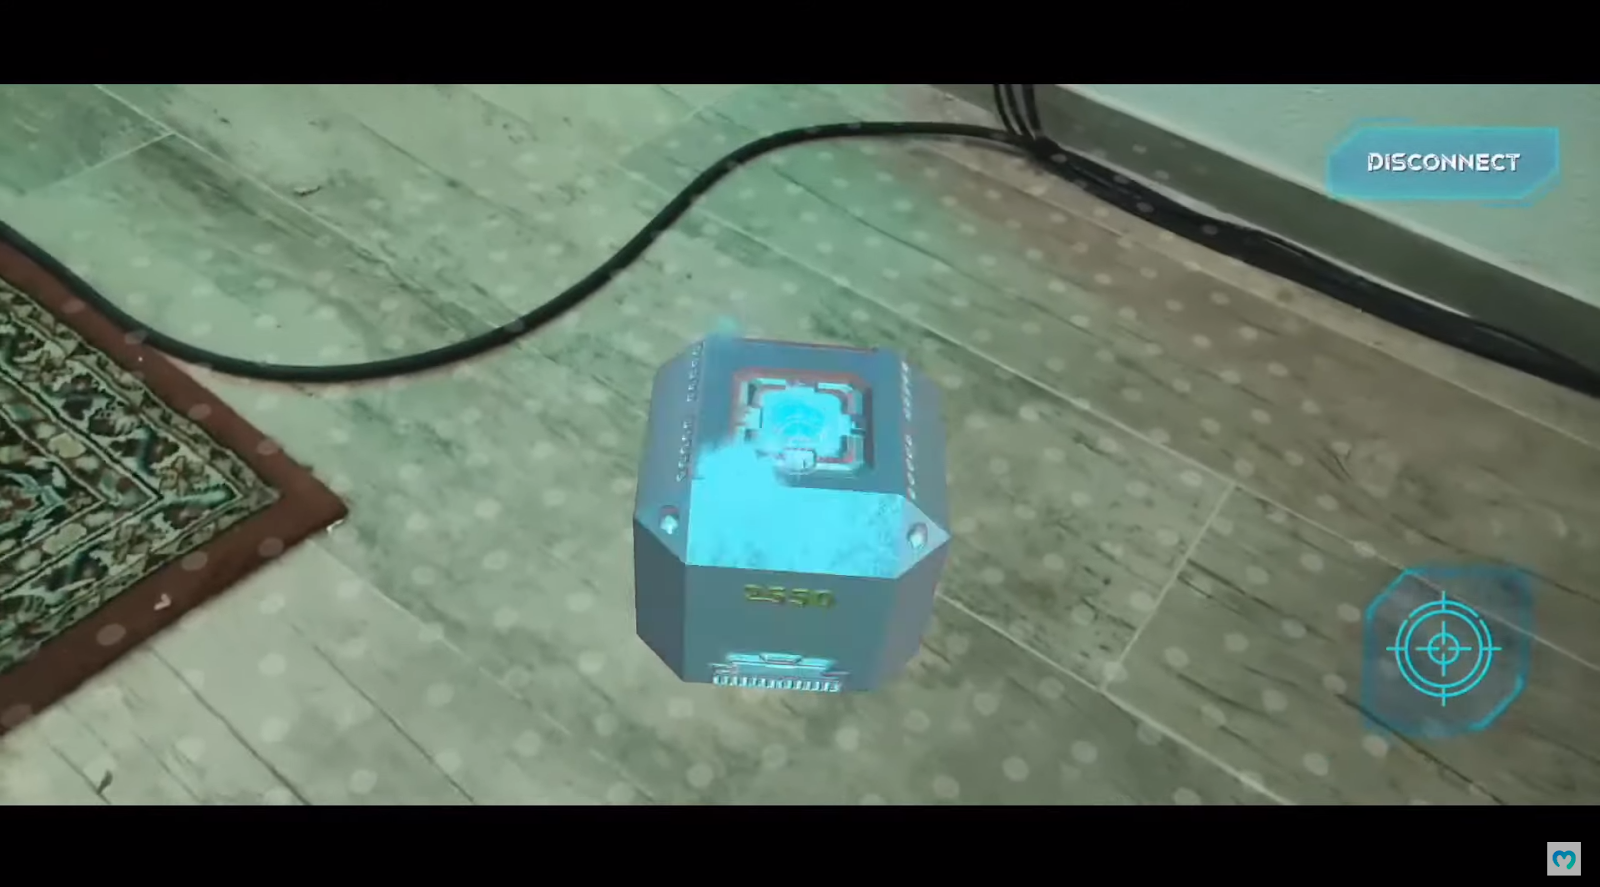
Hence, users can tap their smartphones’ screens to place an AR metaverse NFT mystery box on the detected surface. Once the users tap the screen, the mystery box appears:
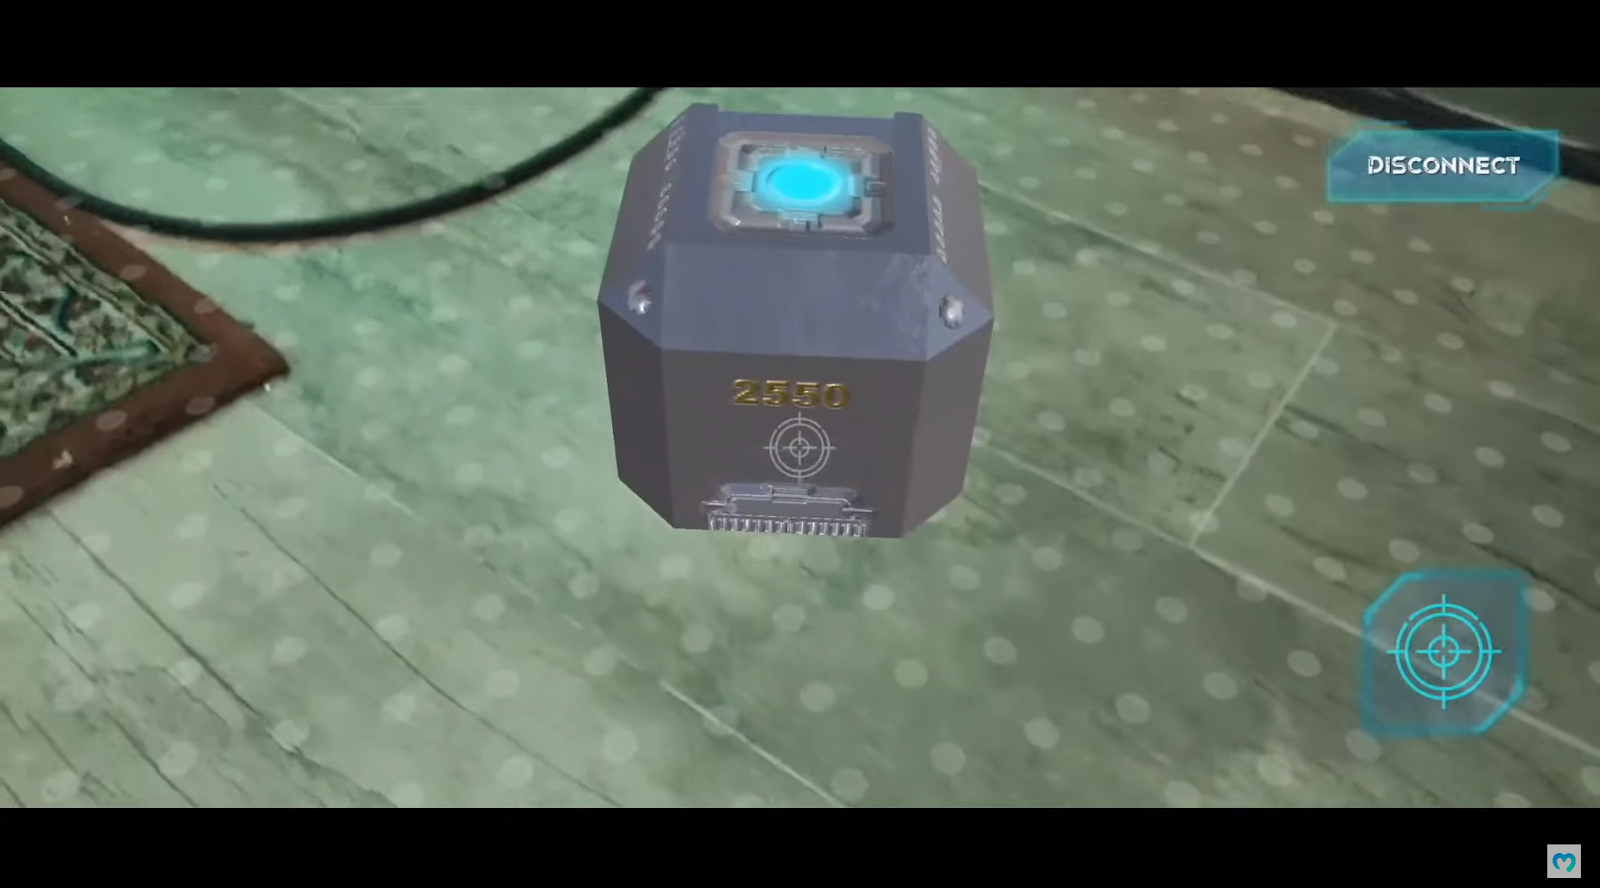
As you can see in the above screenshot, the box has a blue light on top of it. This light indicates the target that users need to hit it in order to open the mystery box:
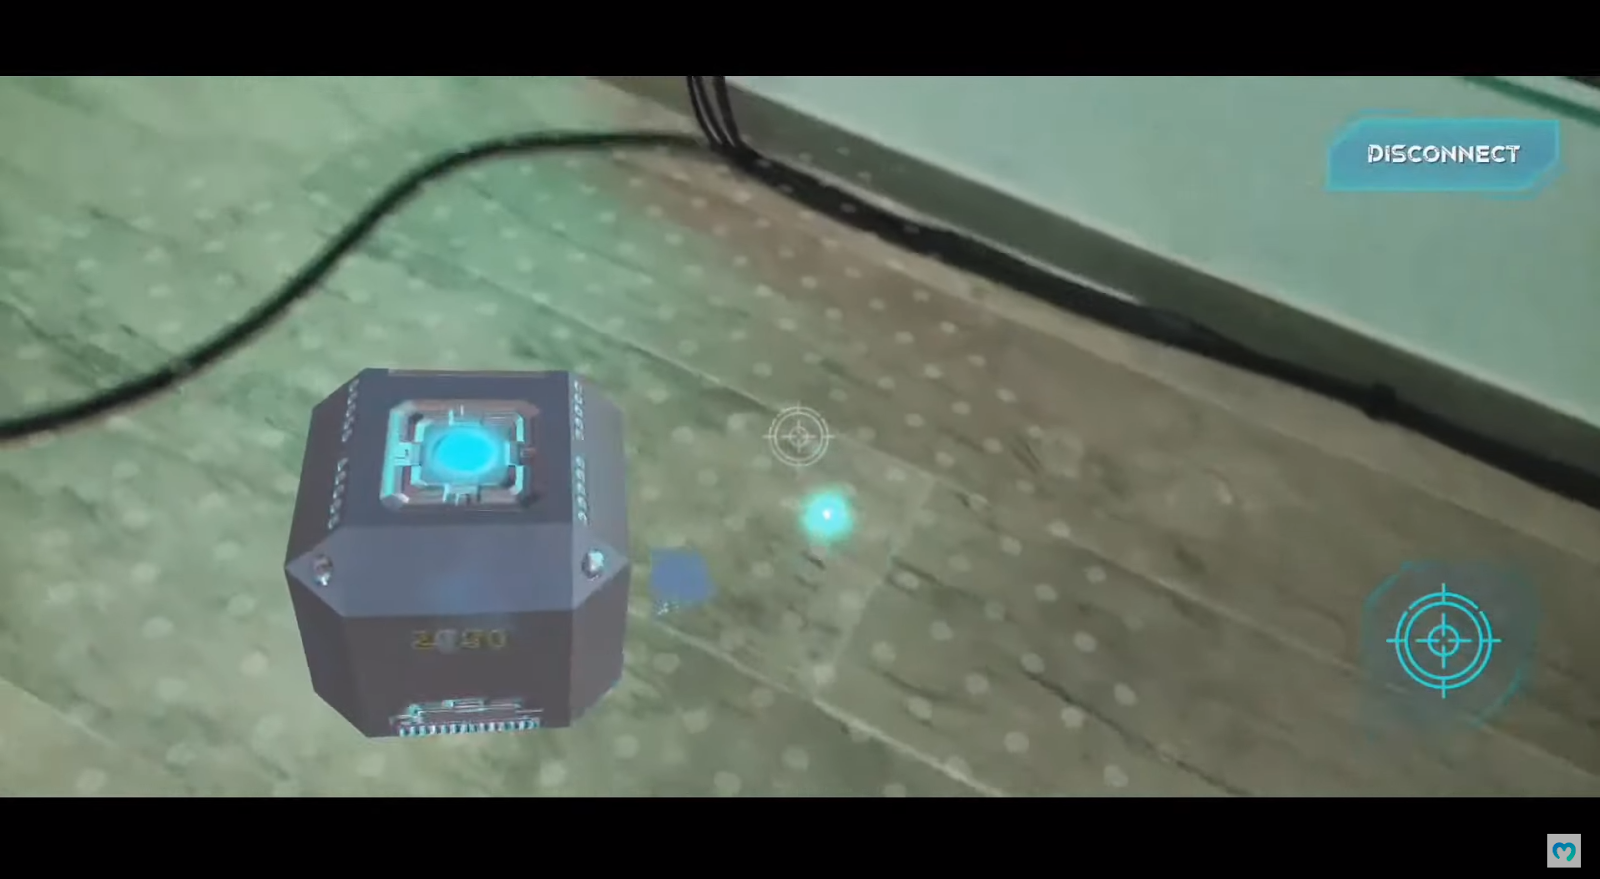
In addition, there’s also a crosshair icon in the bottom-right corner, which indicates that users are in “shooting mode”. Accordingly, this is where users need to tap to shoot. Furthermore, as the above image shows, the crosshair is fixed in the center of the screen. As such, users get to aim at the target by moving their device:
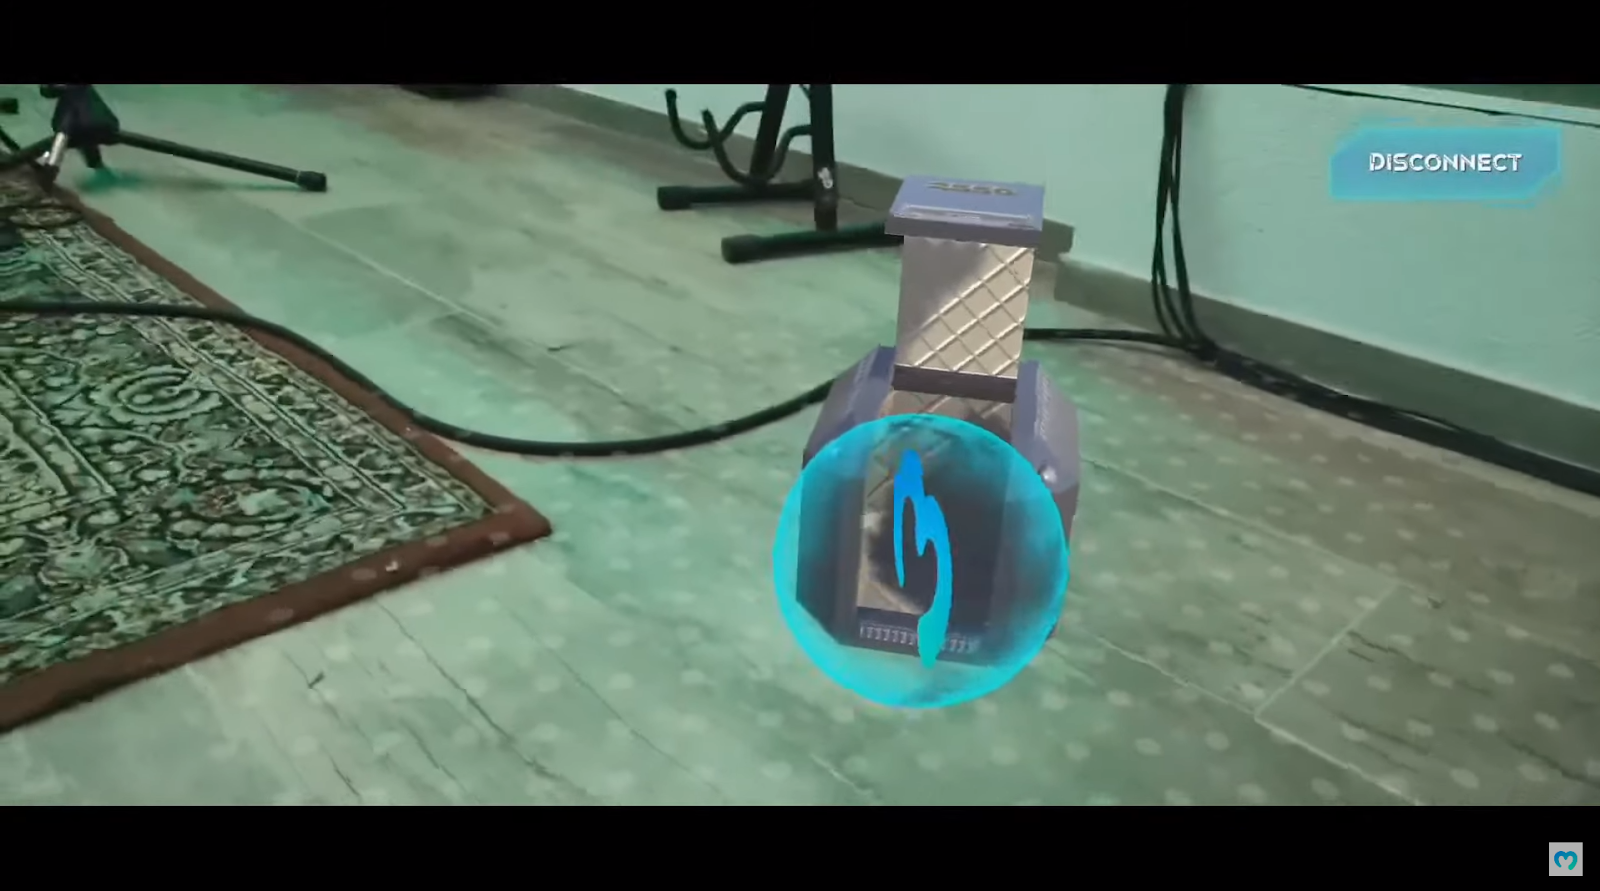
Once users hit the blue light on top of the mystery box, it opens, and an AR metaverse NFT appears:
Demo: How to Mint an AR Metaverse NFT – Part 2
Aside from Web3 login, thus far, users haven’t really interacted with the blockchain. However, if they want to collect the AR metaverse NFT that came out of the box, they will need to mint it. To do this, players have to tap the glowing item. By doing so, the following option appears:
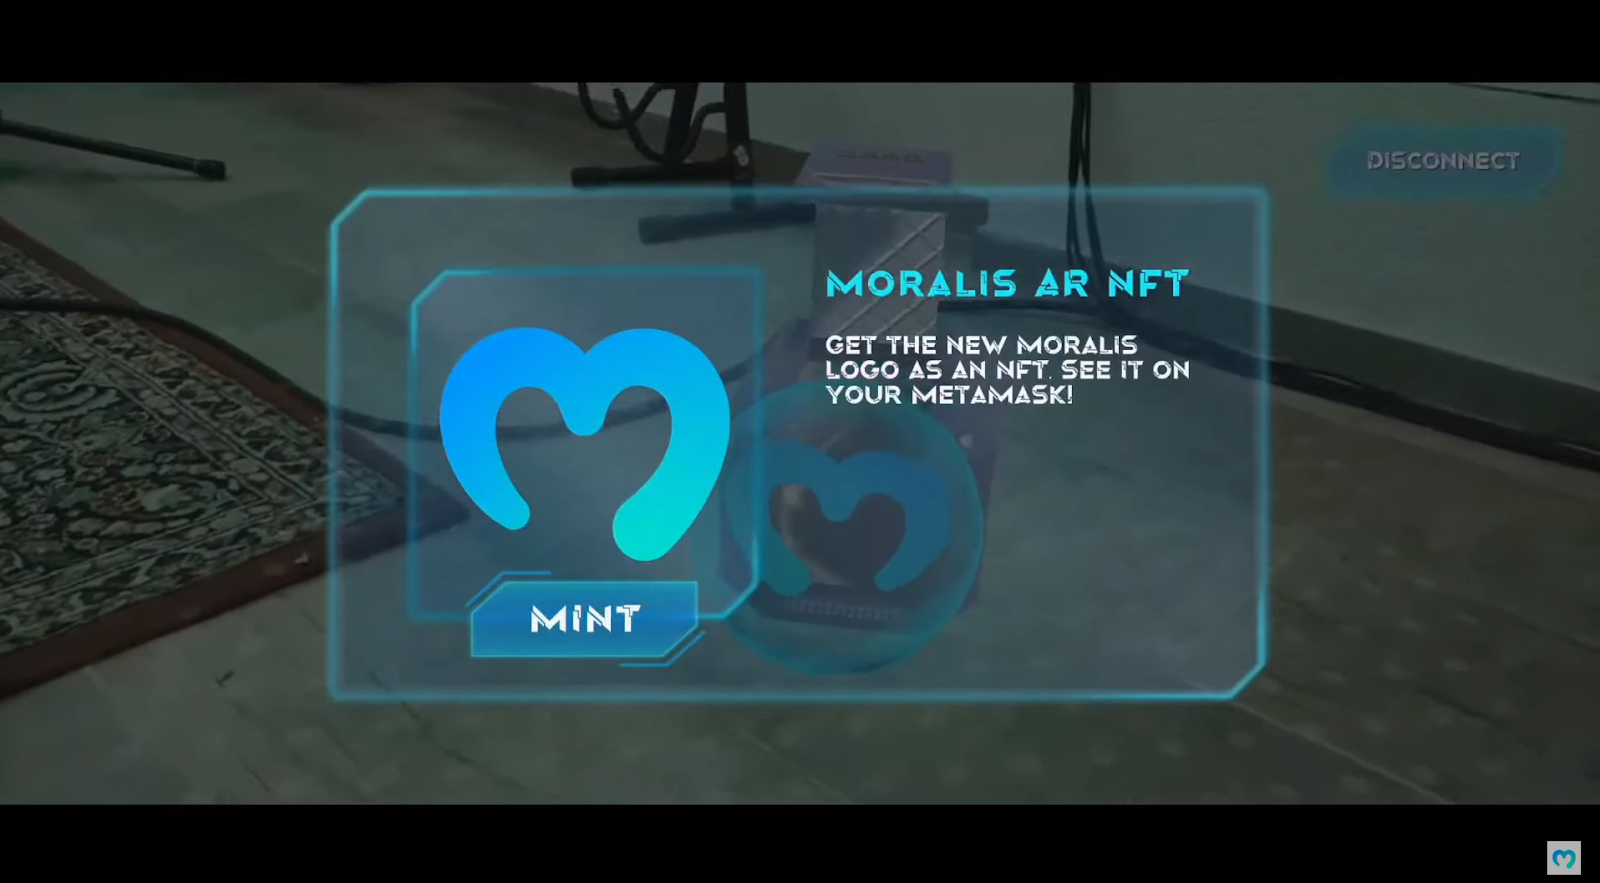
The above menu offers only one option: to mint the AR metaverse NFT by tapping the “mint” button. Next, our dapp informs them to confirm the transactions:
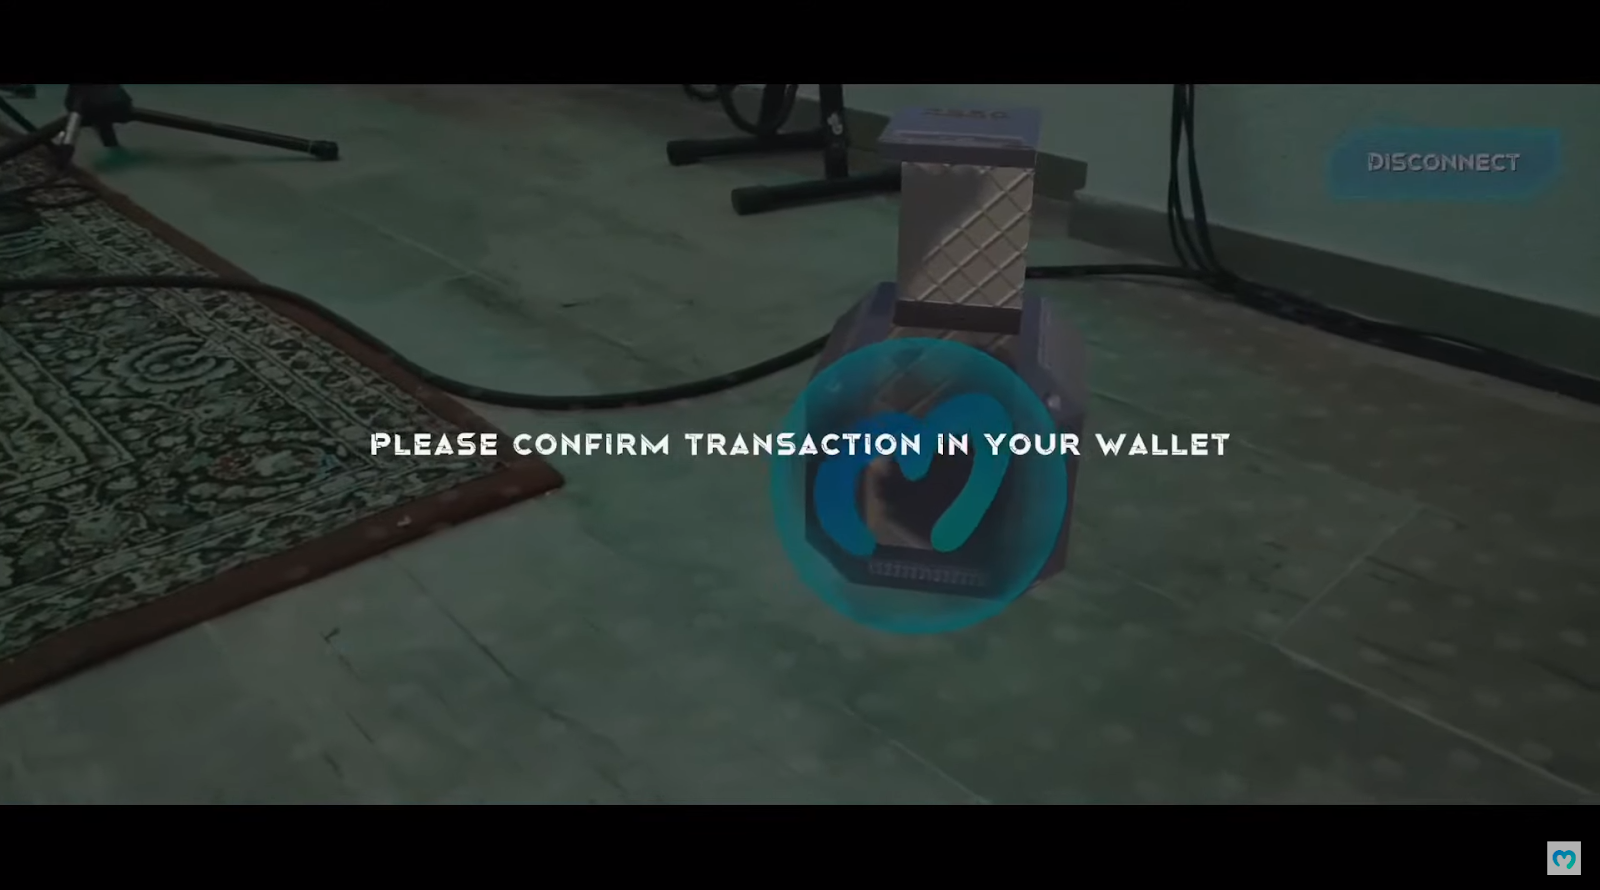
Actually, the dapp prompts users’ wallets:
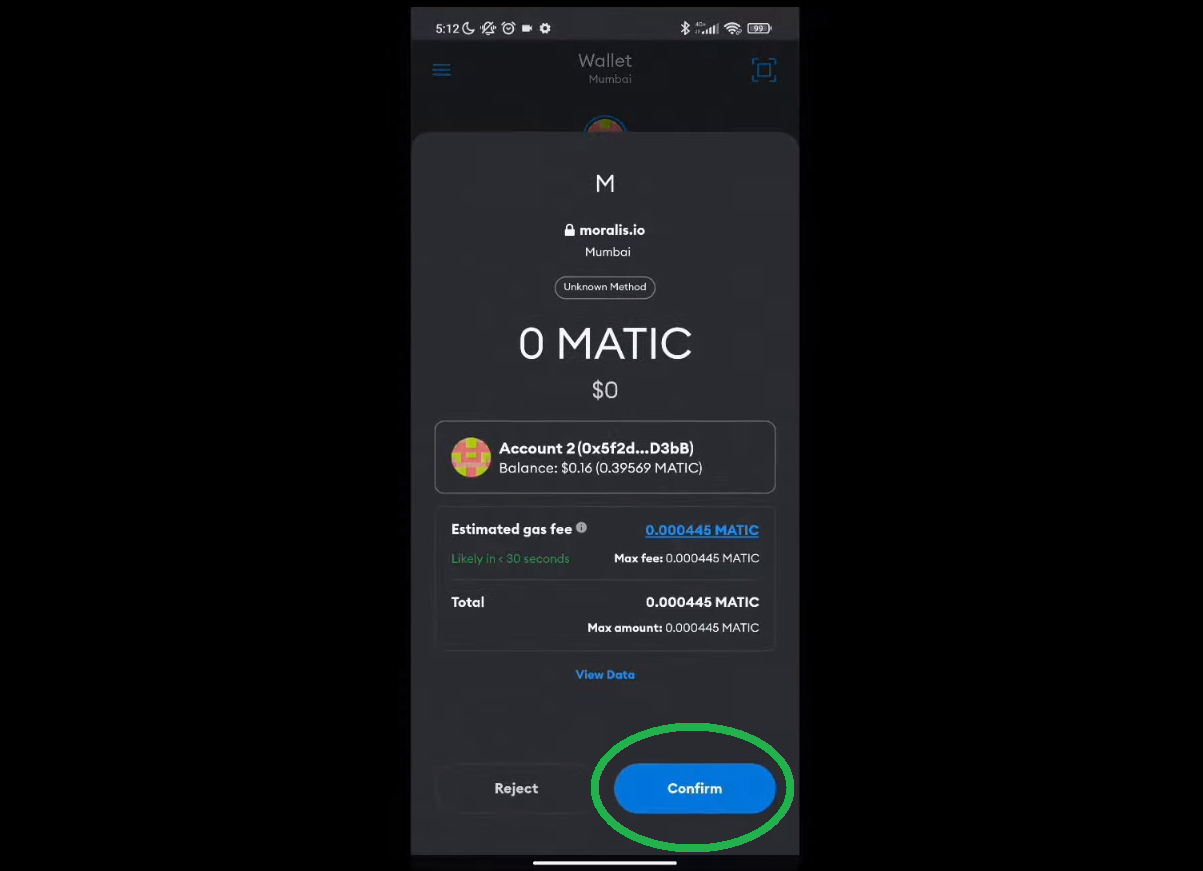
To proceed, users need to tap “confirm”, which initiates the minting transaction. Once a transaction completes, users also get to import minted NFTs into their Web3 wallets. To do this, they need to tap the glowing item again:
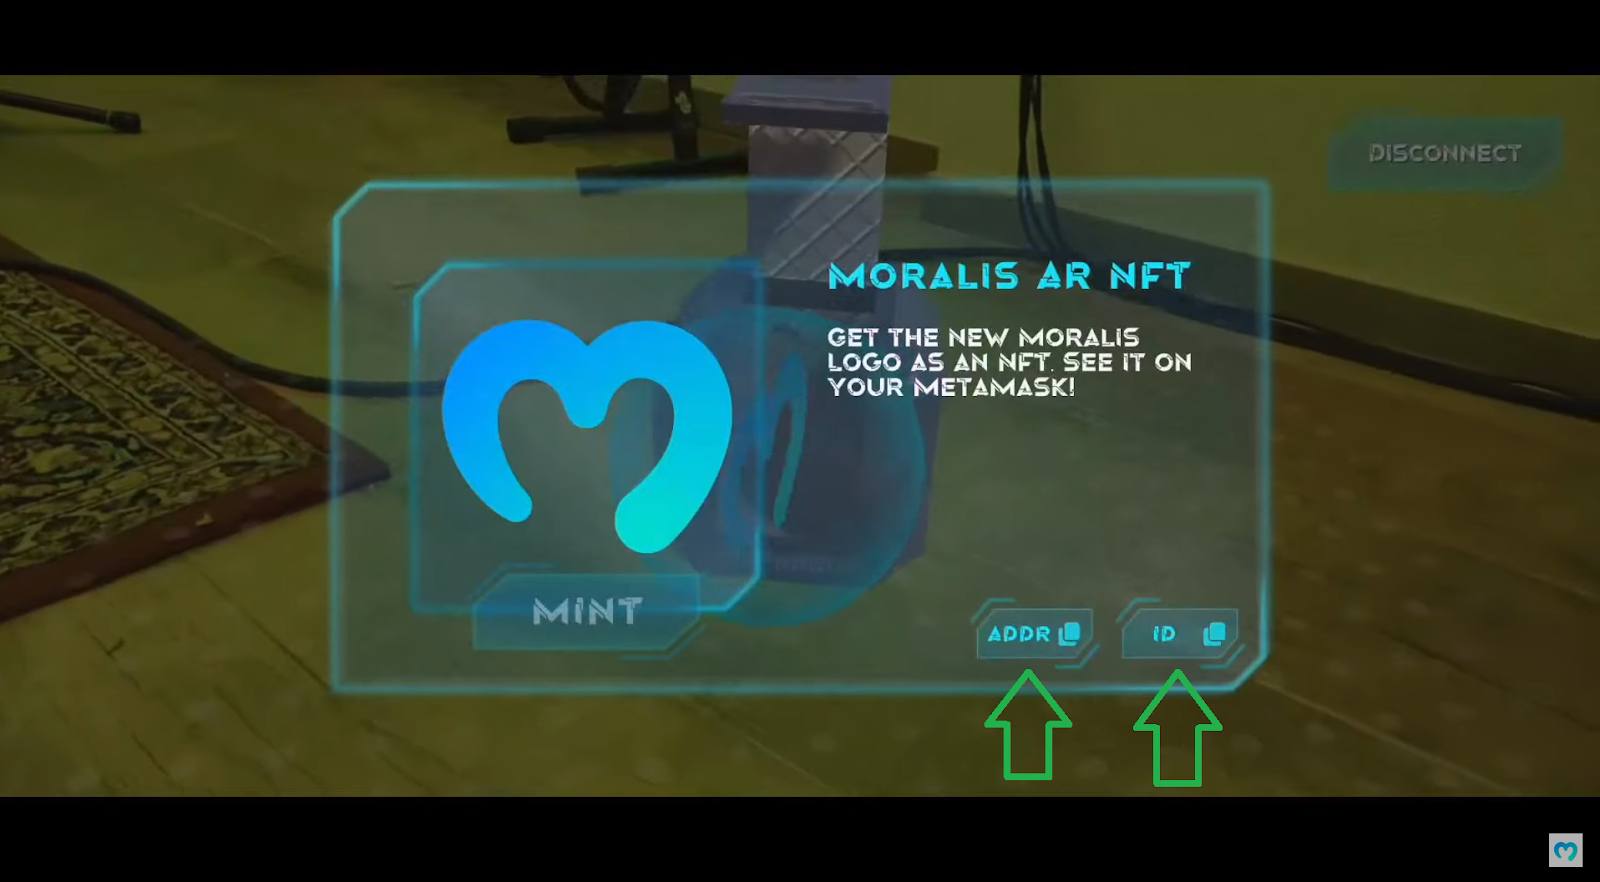
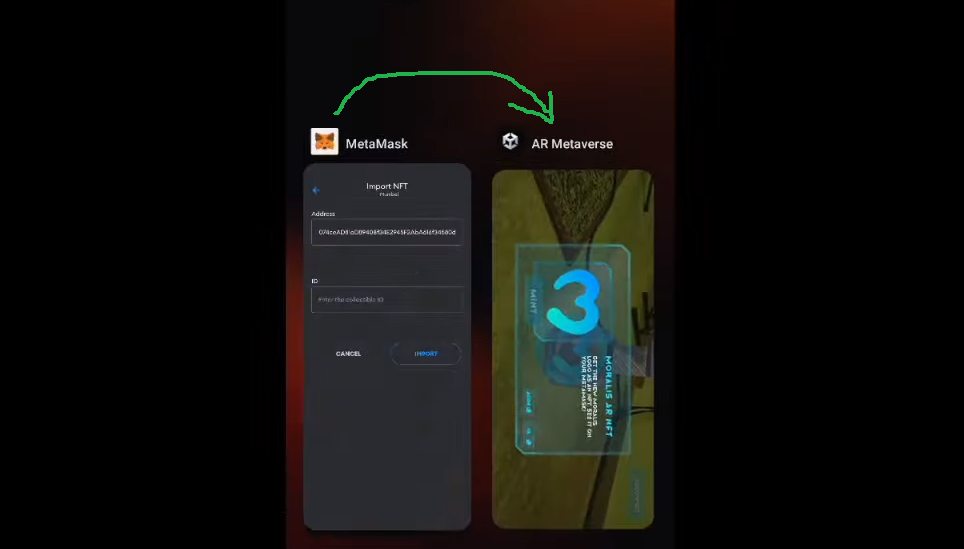
This time, instead of tapping “mint”, users must tap the “addr” button. This copies the NFT address and prompts their MetaMask wallets. There, they’ll have a chance to paste the copied address:
To complete the AR metaverse NFT import, users must return to the dapp’s screen:
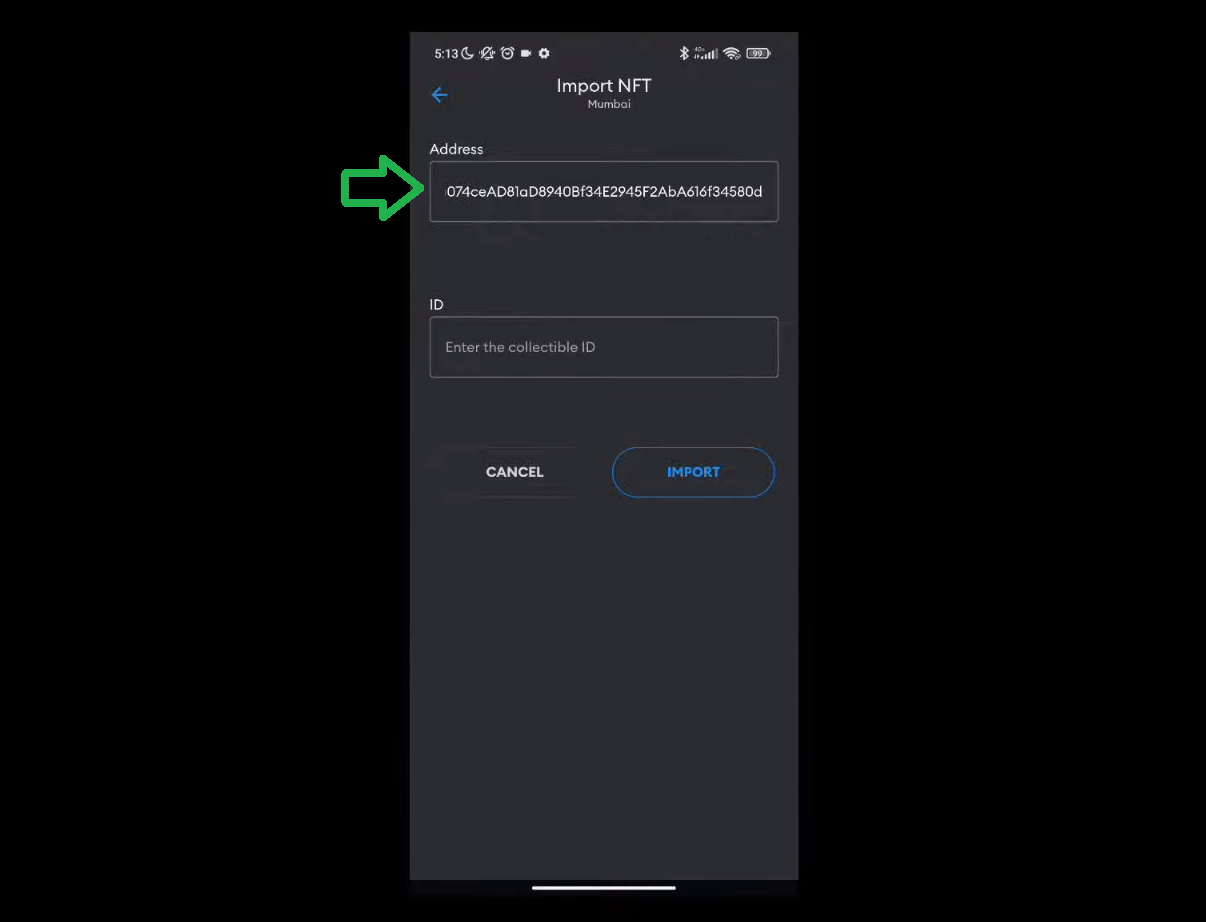
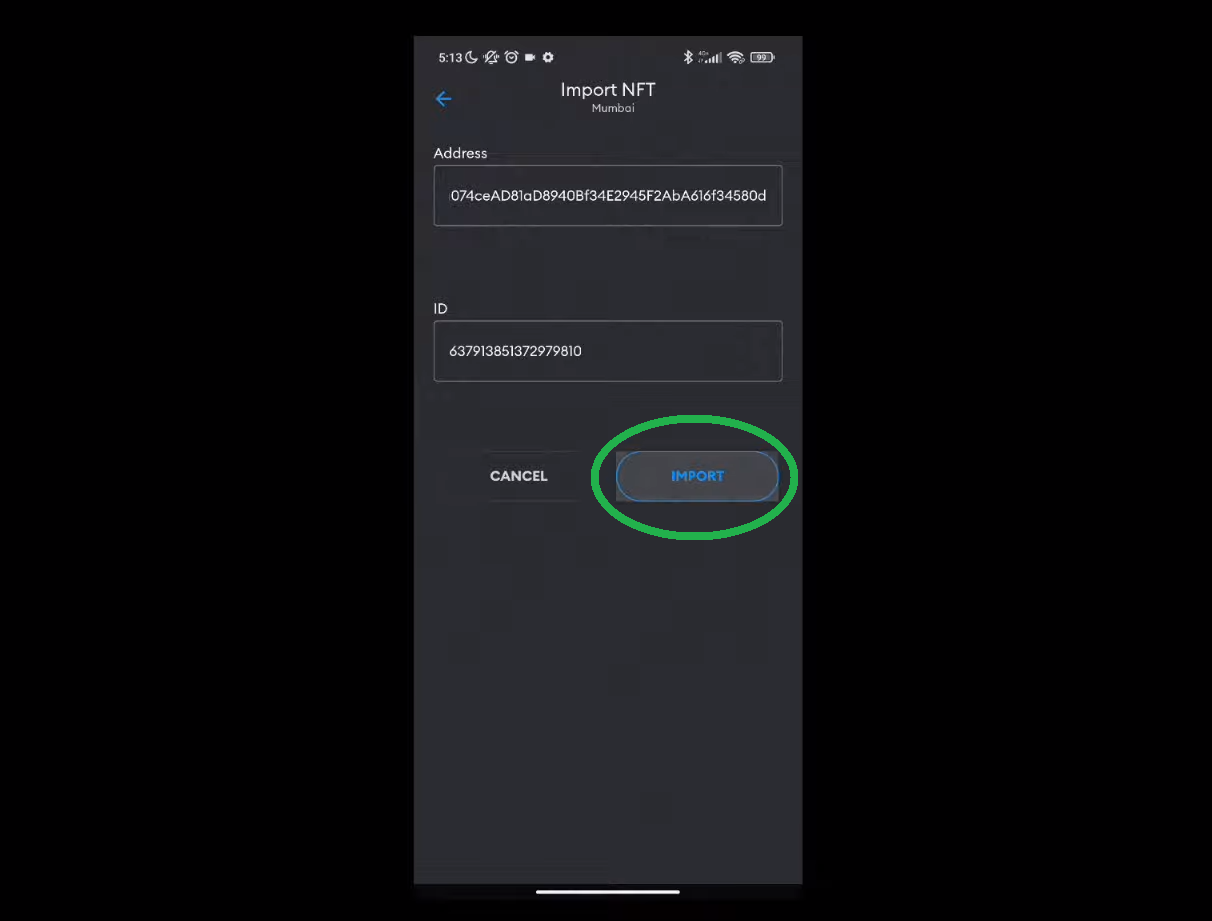
Back in the AR dapp, users must repeat the above steps for token IDs, starting with a tap on the “id” button. Moreover, with the “address” and the “ID” fields populated, users just need to tap “import”:
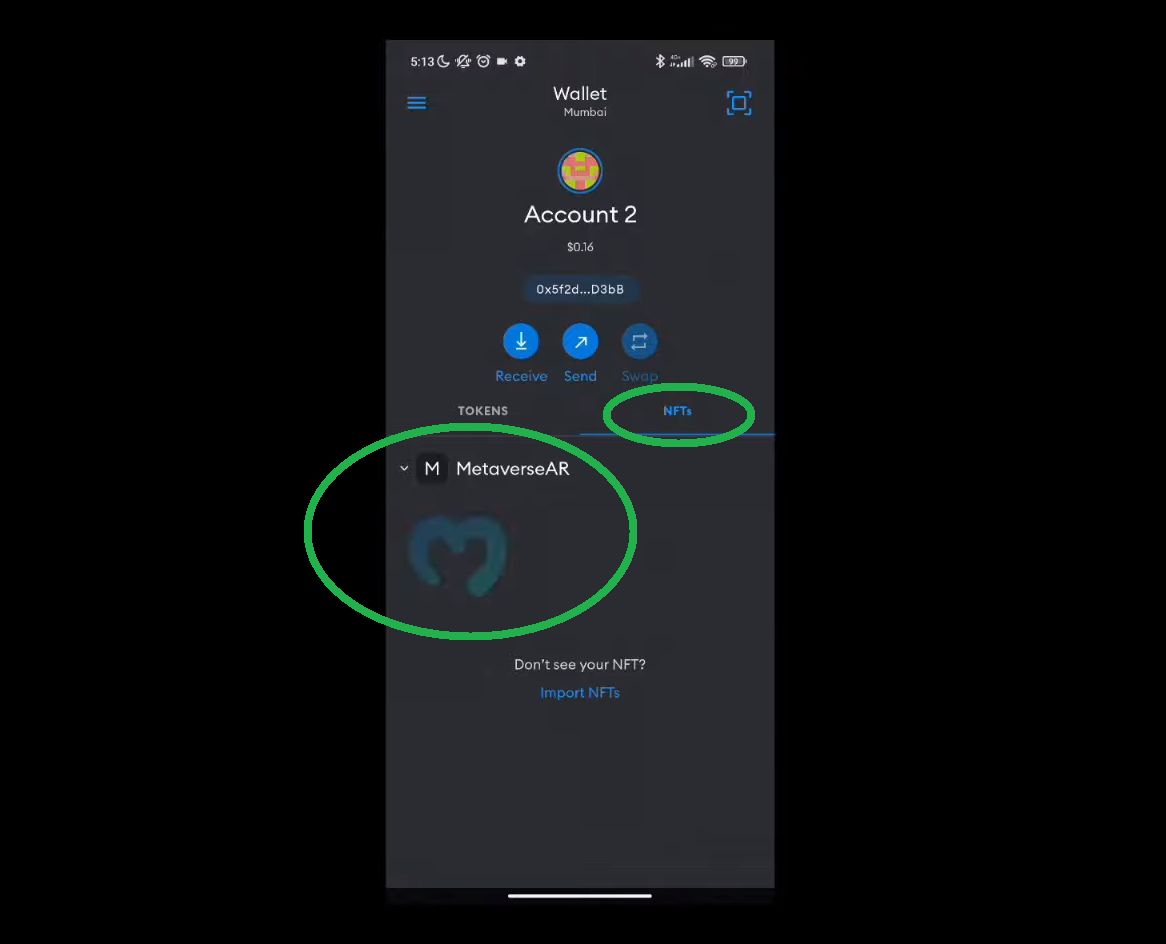
By completing the steps above, users are able to view their new AR metaverse NFT inside their MetaMask:
Note: For a more dynamic demonstration of our AR dapp, watch the video at the end of this article.
Create an AR Metaverse NFT Mystery Box with Unity, Hardhat, and Moralis
After seeing the above demo, you are probably eager to roll up your sleeves and create your own instance of our AR metaverse NFT mystery box. Fortunately, you don’t need to start from scratch. As we usually do, we made the entire code, including all the assets, available on GitHub. If you haven’t done so, now would be a great time to create your free Moralis account. After all, Moralis is the ultimate Web3 backend platform enabling you to have your AR dapp ready in about an hour.

Furthermore, let’s remind you of the six stages we will cover in the following sections:
- Project settings and requirements to build an AR dapp with Unity
- Initial Moralis setup
- Project structure overview
- Creating a metaverse item
- Deploying an ERC-721 contract
- Enabling users to mint an AR metaverse NFT
Before moving on, we must also point out that we will focus our example project on the Polygon testnet (Mumbai). However, since Moralis is all about cross-chain interoperability, you could easily use the same code (with minor tweaks) for other supported blockchains. Furthermore, we will create an Android dapp, though you’ll also learn how you can create an iOS dapp. Nonetheless, make sure to use the video at the end of this article for a deeper dive into the code and specific steps.
Project Settings and Requirements to Build an AR Dapp with Unity
To use Unity to create AR applications, you need Unity’s AR Foundation framework. The latter includes Unity’s AR Core and AR Kit, which allow you to build for Android and iOS devices. As such, our example project includes all the required packages. Though, you should still use your Unity Hub to check your installs (video below at 7:38):
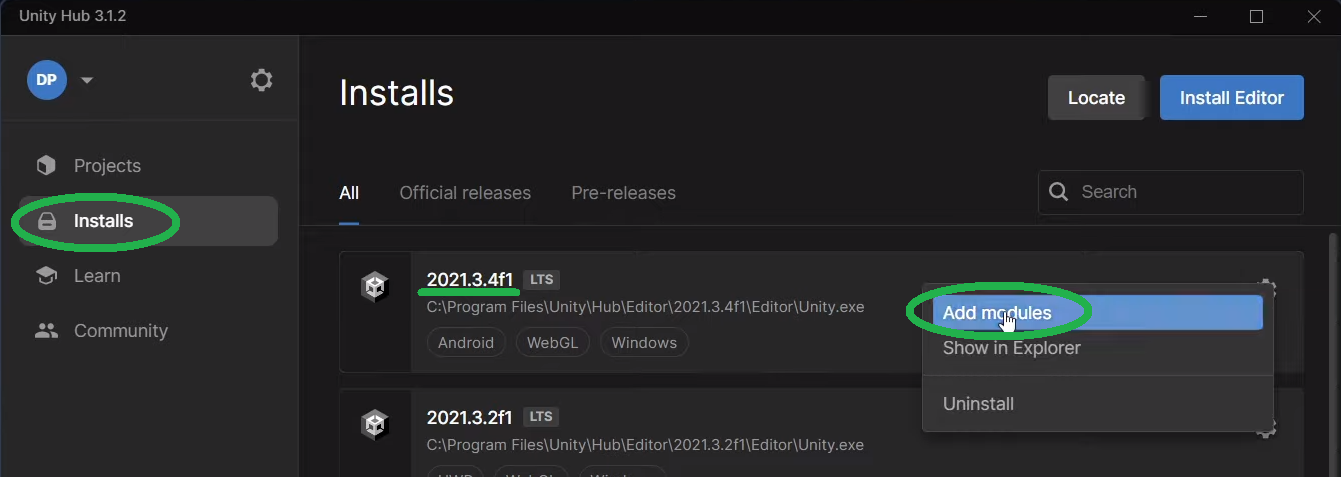
Note: We recommend installing the same version as indicated in the image above to avoid any potential compatibility issues.
After clicking on “Add modules”, make sure you have “Android Build Support” installed:
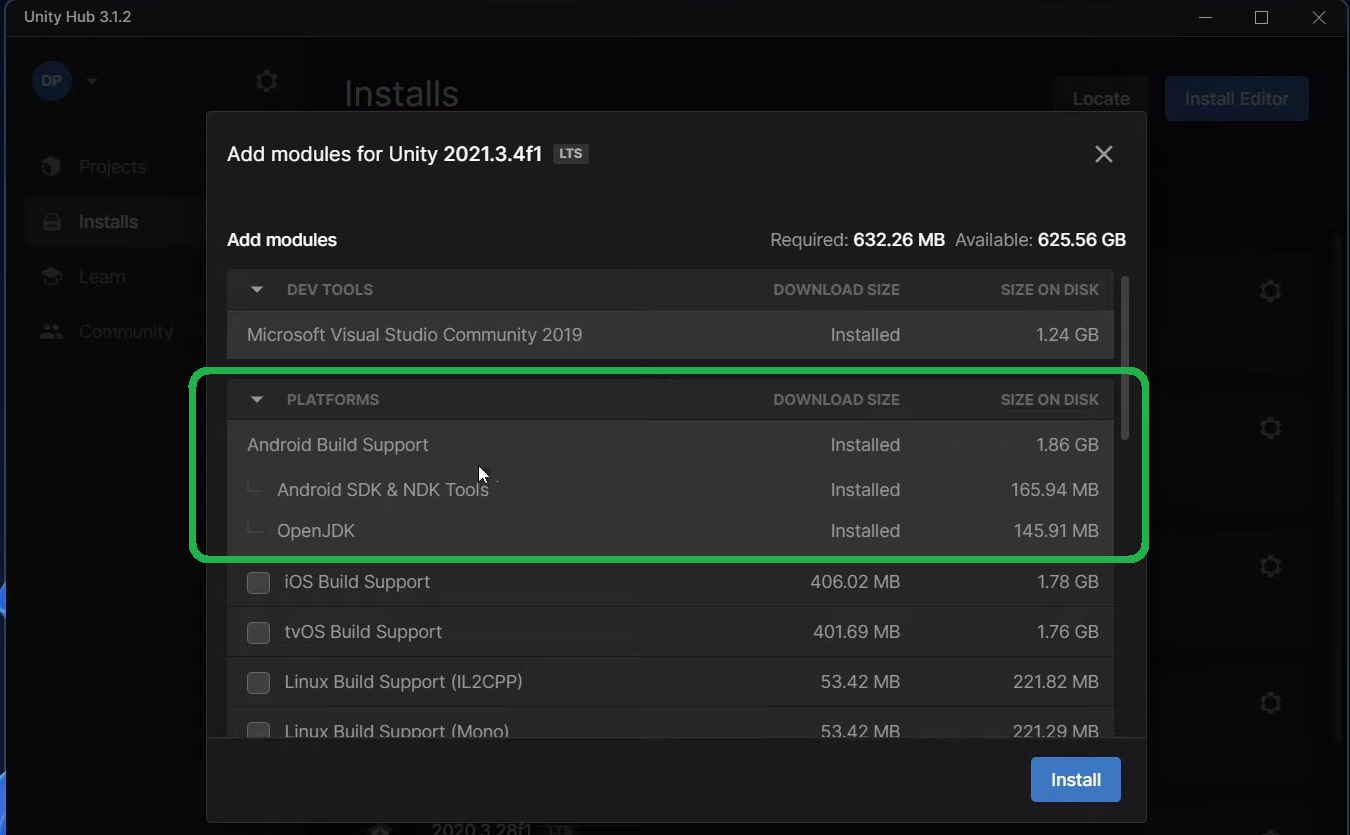
Note: In case iOS AR applications were your priority, you’d need to install iOS Build Support.
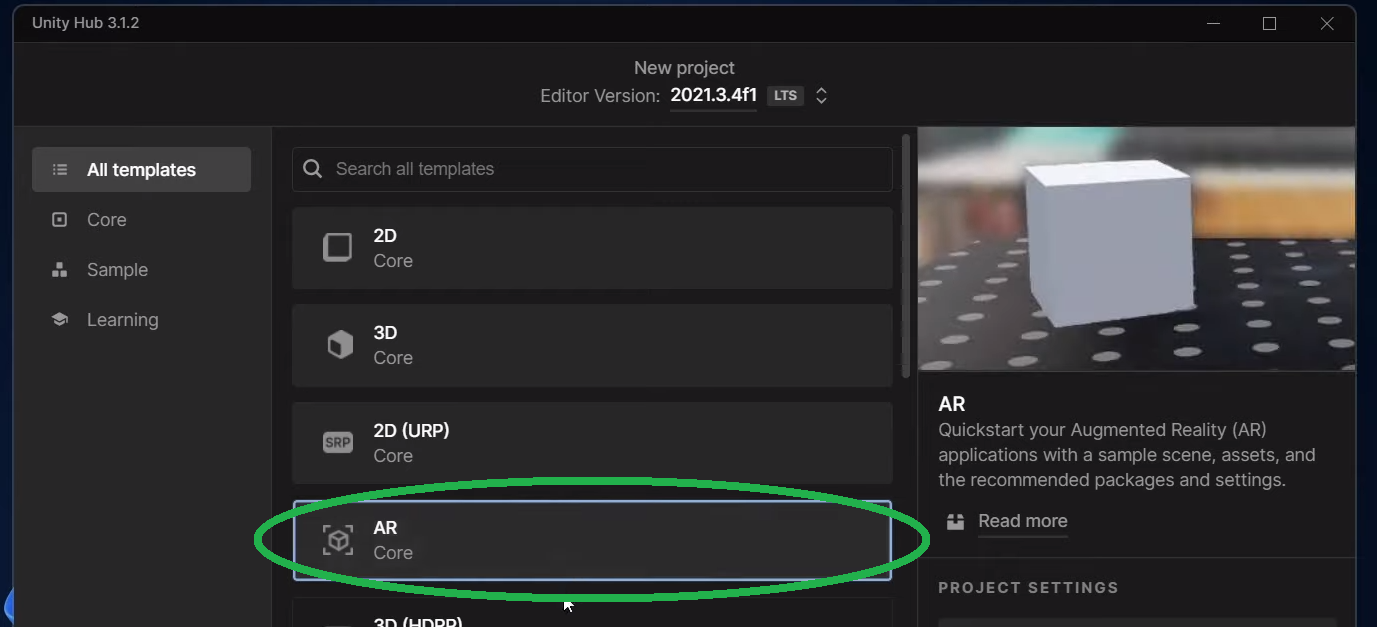
Furthermore, note that we started with Unity’s AR template to build our AR metaverse NFT dapp:
The “AR” template includes all the required packages and dependencies:
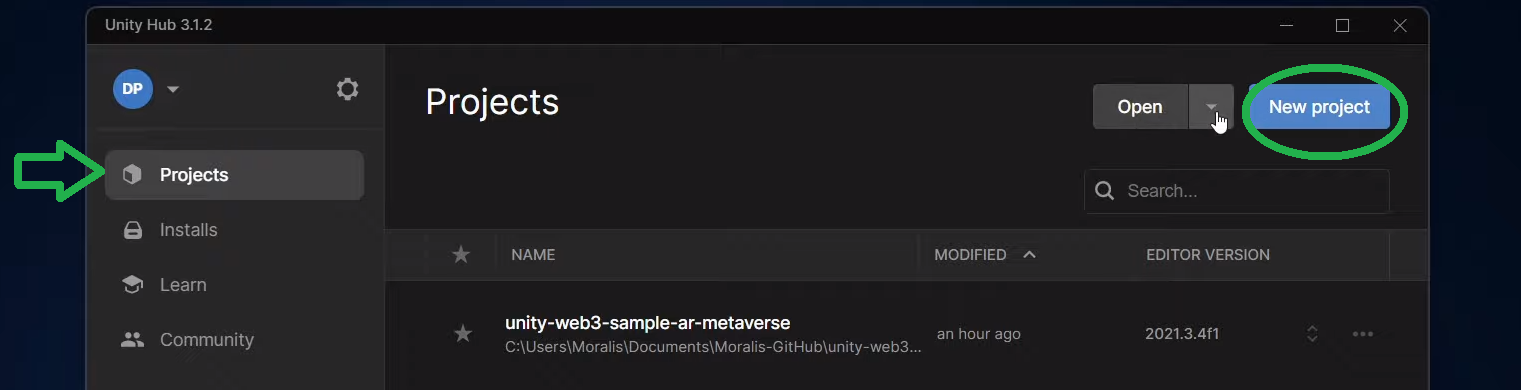
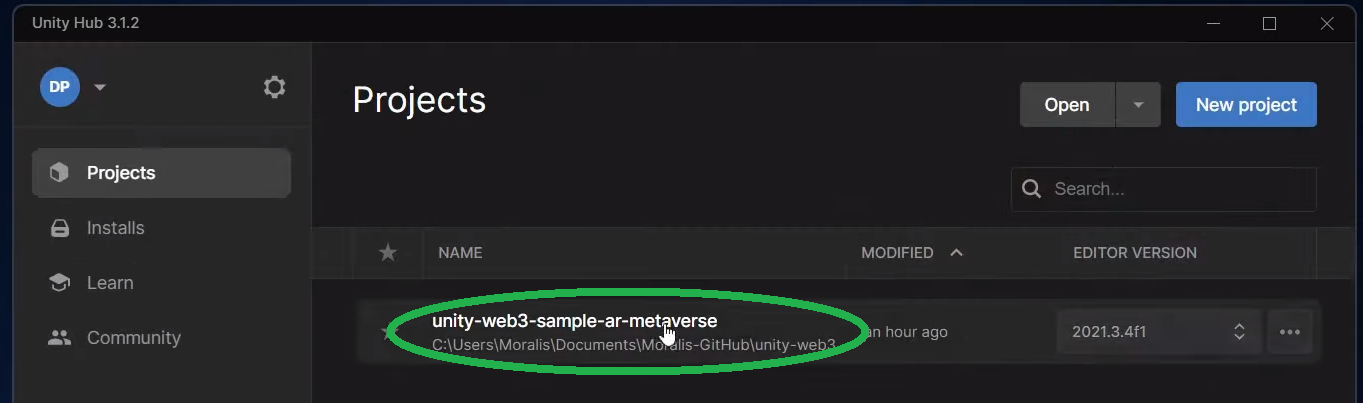
Now that you’ve ensured that your settings match the above-presented ones, you may open the “unity-web3-sample-ar-metaverse” project:
Initial Moralis Setup
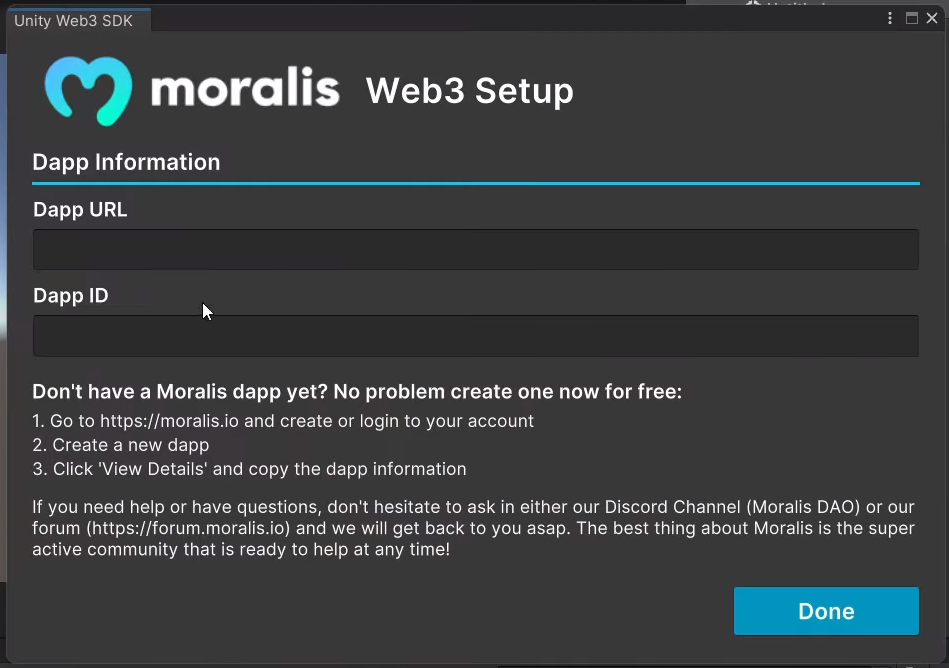
If you followed the video tutorial, you must first reopen the “Moralis Web3 Setup” window:

Your task in this stage is to obtain your dapp URL and ID:
The above screenshot includes simplified instructions. However, if this is your first rodeo with Moralis, the following screenshots will help you greatly. Of course, you can also use the video below, starting at 9:17:
- At this point, you most likely have your Moralis account ready. As such, just log in. If not, create your free account now:

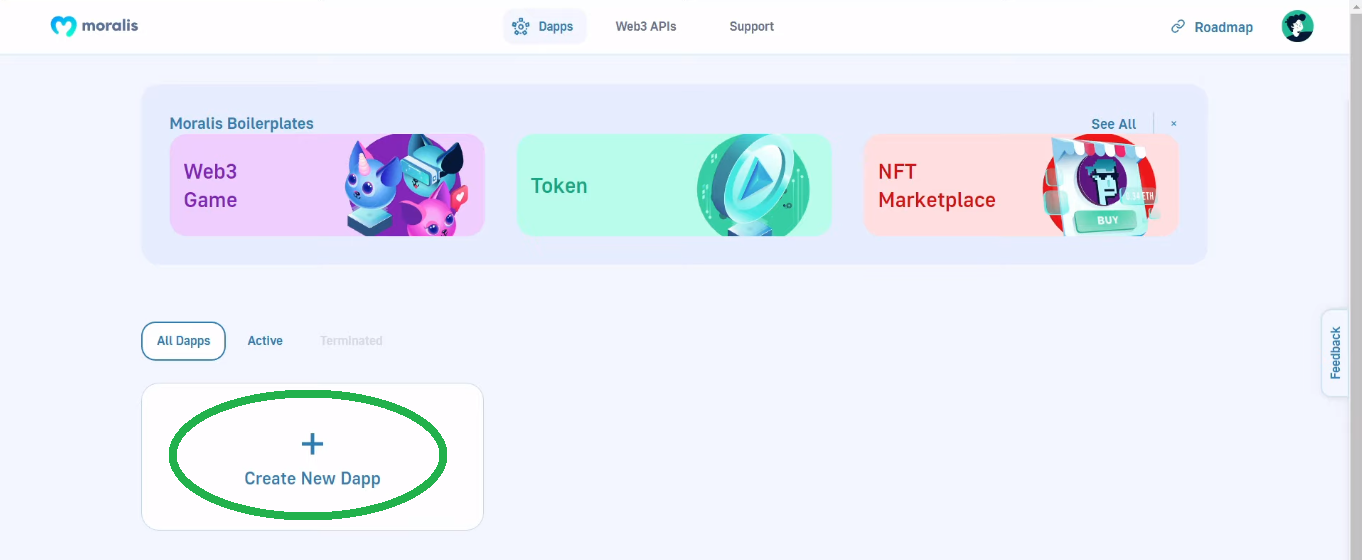
- Use the “Create New Dapp” button:
- Choose the “Testnet” environment:
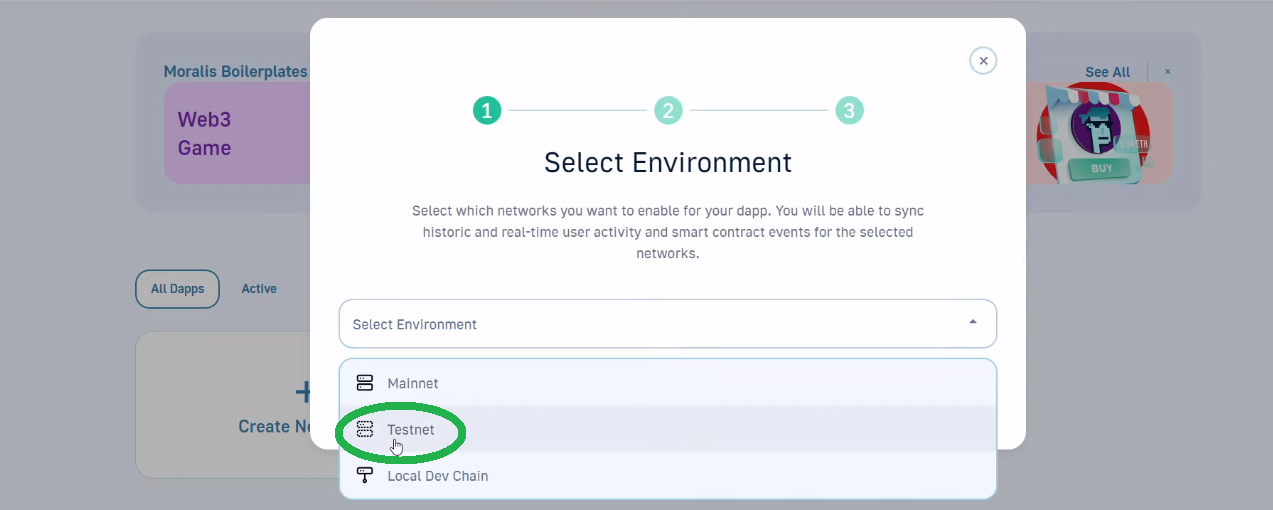
- Select “Polygon Mumbai” and click on “Proceed”:

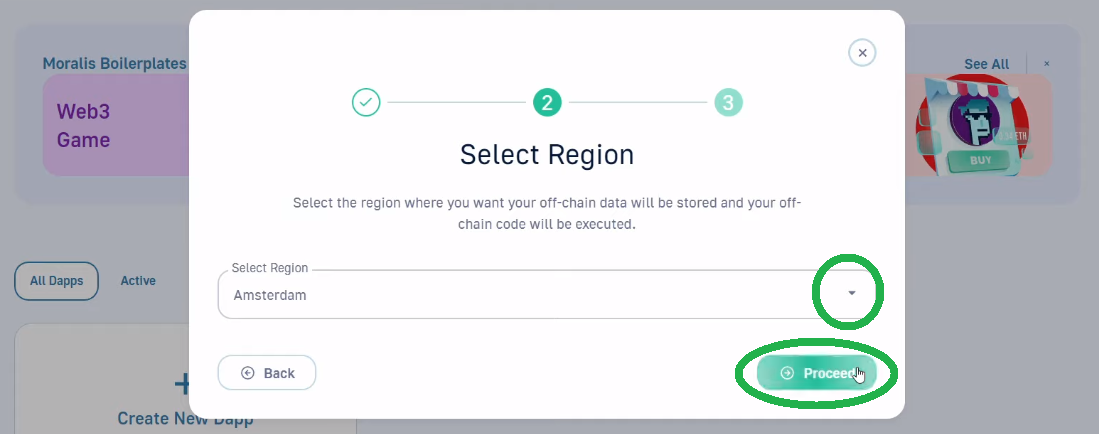
- Choose the city closest to you, followed by a click on the “Proceed” button:
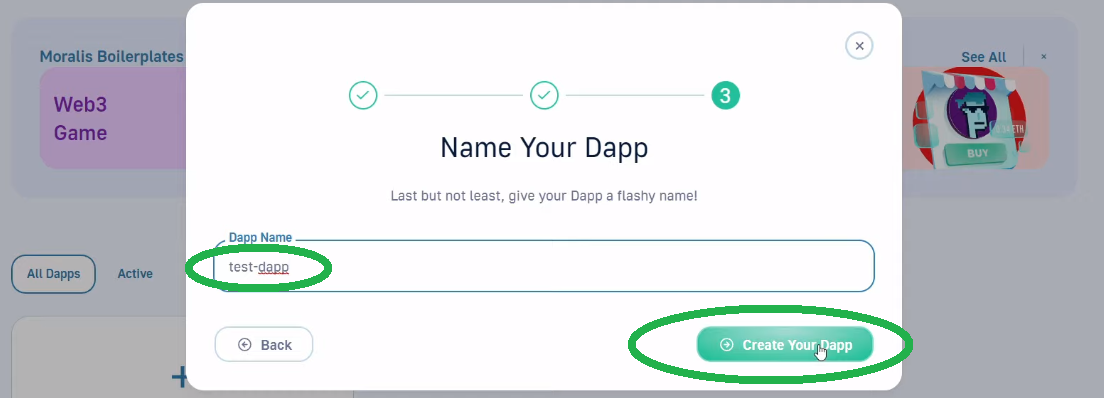
- Name your dapp and run it by clicking on the “Create Your Dapp” button:
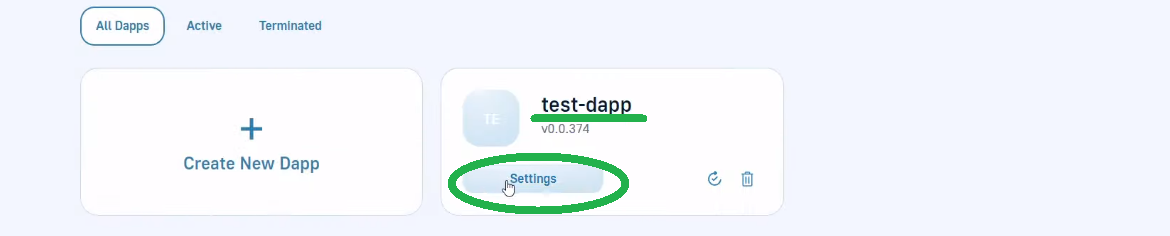
- Click on the “Settings” button on your new dapp:
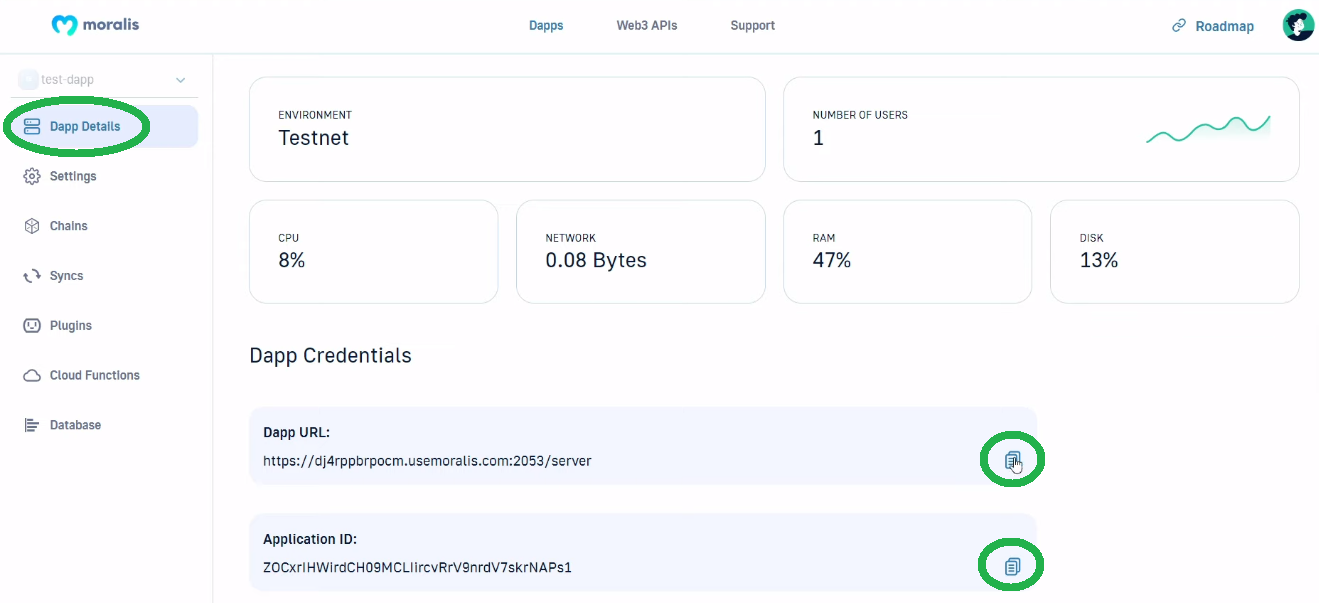
- Copy the dapp URL and application ID:
- Paste the above-copied credentials into Unity and click on the “Done button”:

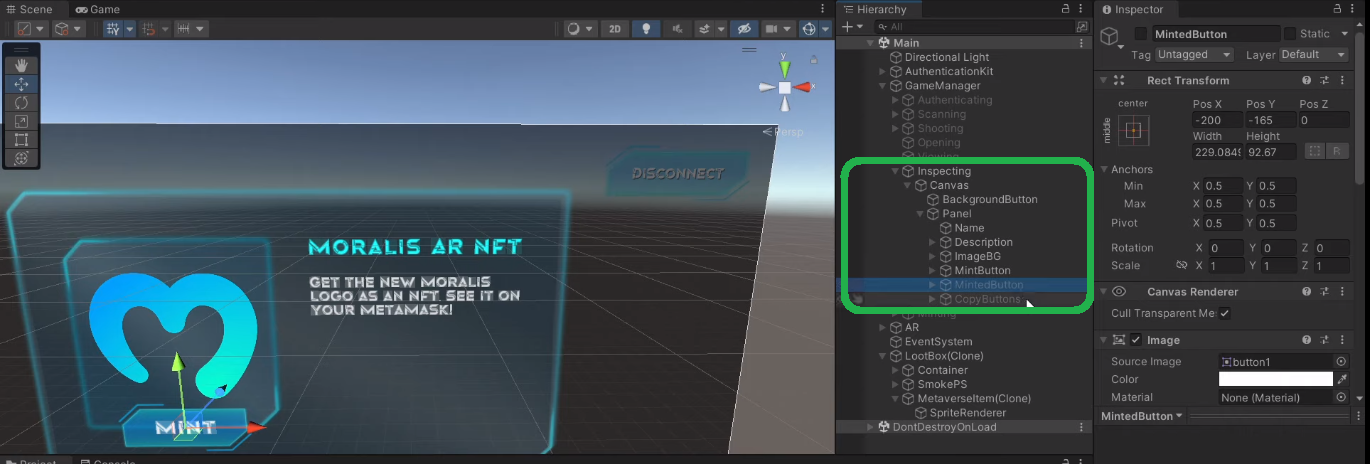
Project Structure Overview – Our AR Metaverse NFT Mystery Box Dapp
Open the “Main” scene of our AR dapp:
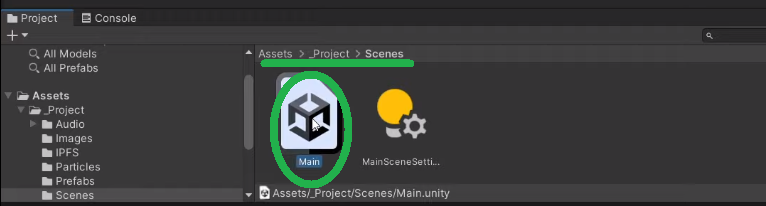
This means that you should see the “Main” scene in the “Hierarchy” window:

The scene already includes everything you need to run the application. For instance, the “AuthenticationKit” takes care of Web3 login. However, the “GameManager” state machine is what we will focus on. The latter uses multiple states to ensure that our AR dapp functions as demonstrated previously:
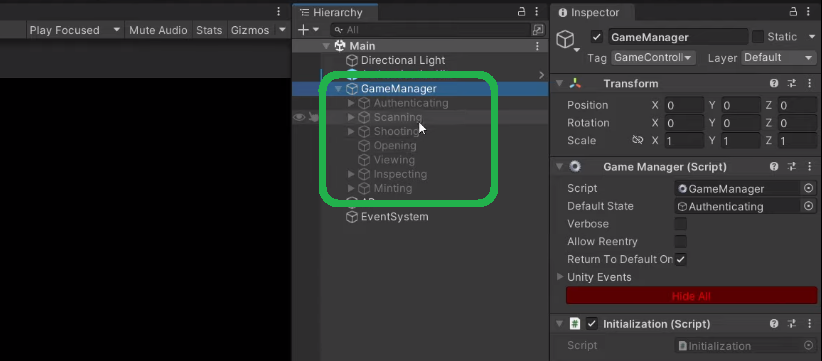
As you can see from the screenshot above, we named the states to indicate their purposes clearly. As such, each state uses the code (scripts), which executes the appropriate actions. Using the video below (12:25), you can take a closer look at each state.
Creating a Metaverse Item
Creating a metaverse item includes multiple moving parts. Accordingly, using a video tutorial for that purpose simplifies things. As such, make sure to jump to 18:47, where you will first focus on the “Opening” script. The latter covers the gist of creating a metaverse item. However, it is quite helpful to understand how the dapp gets to that state. Therefore, the video will show you the details of the “Scanning” and “Shooting” scripts, which lead to the “Opening” state. Next, you’ll take a closer look at the “MetaverseItem” prefab (24:40):
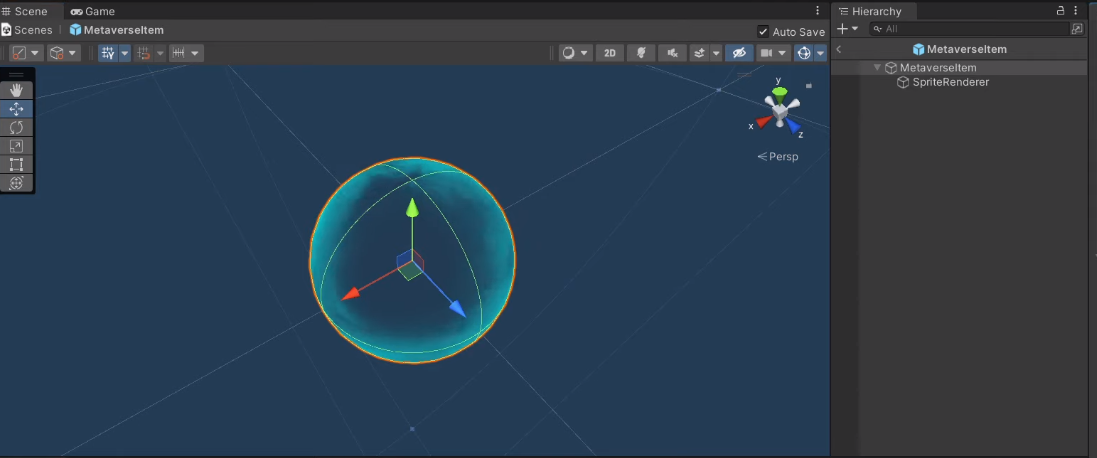
The “MetaverseItem” script is critical as it uses the IPFS URL to extract the image URL. Using the latter, the “MetaverseItem” script creates the sprite. Then, starting at 31:40, you will focus on the “Viewing” script. The latter is in charge of reacting when users tap the glowing item that comes out of our AR metaverse NFT mystery box. Once it detects that event, it activates the “Inspecting” state:
Deploying an ERC-721 Contract
To be able to actually mint an item that comes out of the mystery box as an NFT, you need to deploy your own smart contract. Of course, you can copy our smart contract’s code. By doing so, you will get access to your ERC-721 contract’s address and ABI. You need to paste these details inside the “GameManager” script:
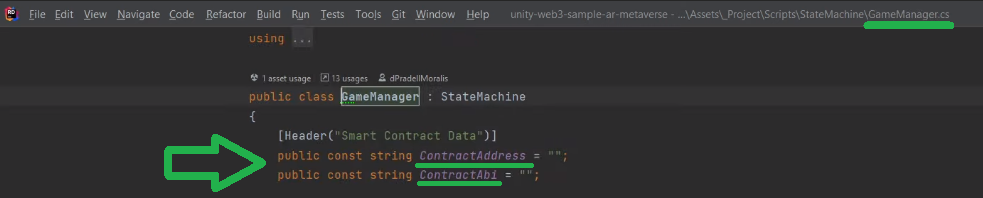
Moreover, this is where you will learn how to use Hardhat (36:39) to compile, deploy, and verify smart contracts. For additional support, make sure to use our detailed step-by-step Hardhat instructions.
Note: Instead of Hardhat, you can also use Remix to deploy your smart contract. In either case, you will need to add the Mumbai network to your MetaMask. Also, you must use the Mumbai faucet to obtain some “play” MATIC.
Enabling Users to Mint an AR Metaverse NFT
With your smart contract deployed and its details pasted into the “GameManager” script, you are ready for the final stage of this tutorial. So, starting at 57:00, our in-house expert will show the details of the “Minting” script. This is also where you’ll see the impressive power of Moralis. As indicated by the line of code below, the “ExecuteMinting” function does the trick. It takes in the metadata URL as a parameter:
string resp = await Moralis.ExecuteContractFunction(GameManager.ContractAddress, GameManager.ContractAbi, "mintItem", parameters, value, gas, gasPrice);
Finally, here’s also the video tutorial we’ve been referencing throughout the article:
How to Create an AR Metaverse NFT Mystery Box – Summary
By using this article in combination with the above video tutorial, you had a chance to create your own AR metaverse NFT dapp. Since we provided you with the entire code and all the required assets, you just needed to complete the initial Moralis setup to obtain the required credentials. Once you connected Unity with Web3 functionality, you also had to deploy your own instance of our smart contract. Of course, we provided you with additional context by taking a closer look at the important game states and the corresponding scripts. Ultimately, you now know how to use Unity to create interactive AR Web3 games and dapps.
If you want to expand your Unity Web3 skills further, we encourage you to focus on our other Unity tutorials. For example, you can learn about uploading Web3 Unity metadata, how to upload Unity assets to IPFS, store off-chain data, do blockchain game transactions with Unity, and build a Web3 MMORPG. On the other hand, you can use the Moralis YouTube channel and the Moralis blog to explore other aspects of blockchain development. Some of the latest articles cover an Ethereum dapp API, a Polygon dapp API, Binance dapp API, the Ethereum Merge, creating a Web3 blog dapp (a Web3 Medium clone), building a Web3 role-playing game, creating a social media dapp, and much more.
In addition, if you want to become a Web3 developer with confidence, you should consider enrolling in Moralis Academy. Aside from accessing professional blockchain development courses, you will also get a personalized study path and expert mentorship. However, probably the greatest value awaits you in becoming a member of one of the most amazing crypto communities!
