In this guide to creating a Web3 blog dapp (decentralized application), we show you how to get your own Web3 blog dapp up and running in record time. In fact, by following our instructions and the attached video tutorial at the end of this guide, you can have a blog dapp for Web3 up and running in less than 70 minutes. So, if this sounds interesting, these are the steps you’ll learn:
- Setup Hardhat
- Create, compile, and deploy an ERC-721 smart contract (Web3 contract)
- Initialize a project in React and connect to Moralis’ SDK
- Utilize web3uikit and enable Web3 authentication
- Use React to create your Web3 blog dapp’s frontend:
- Sidebars
- List of blogs (your homepage)
- Blog page
- Publishing page
- Store NFT’s metadata in a decentralized manner with IPFS
- Enable minting functionality for NFTs
- Master the ultimate Web3 API to query NFTs
Medium is one of the most popular blog platforms. As such, this guide to creating a Web3 blog dapp will effectively guide you through the process of creating a Web3 Medium clone. Along the way, you’ll learn to work with several excellent tools to help you become a blockchain developer. Since we decided to post our blog posts as non-fungible tokens (NFTs), we will also cover minting. Thus, we will show you how to work with an ERC-721 contract. As such, you’ll learn the basics of Solidity and how to utilize Hardhat. As far as the Web3 frontend goes, we will show you how your JavaScript skills combined with React can do the trick.
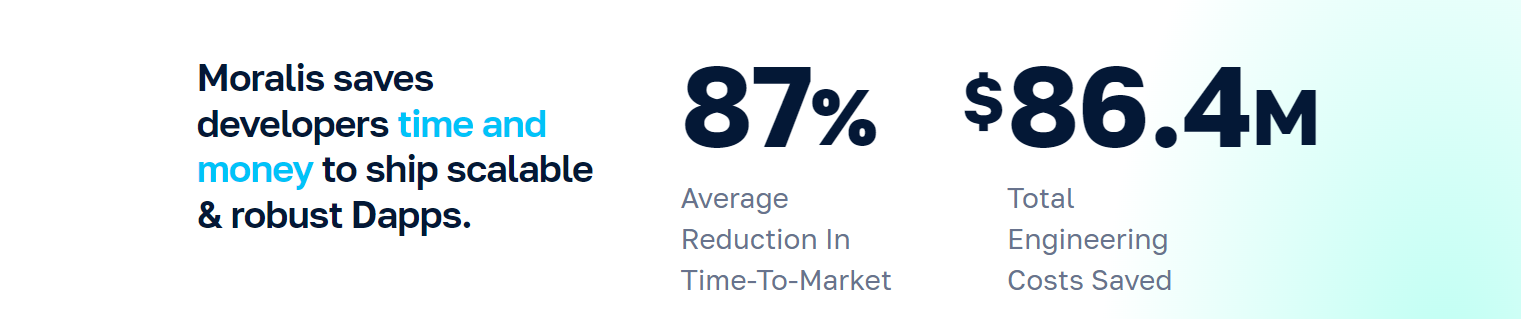
However, it is the ultimate Web3 development platform that will enable us to tie it all together. Hence, we’ll show you how to use Moralis. Further, you’ll see how Moralis’ SDK simplifies all blockchain-related backend needs. Also, with Moralis, you get to replace multiple lines of code with short snippets of code. Moreover, Moralis is not just the best Web3 backend platform; it also helps you create a great Web3 UI.

Demo of Our Web3 Blog Dapp
Like most decentralized applications, our Web3 blog dapp starts with Web3 authentication:
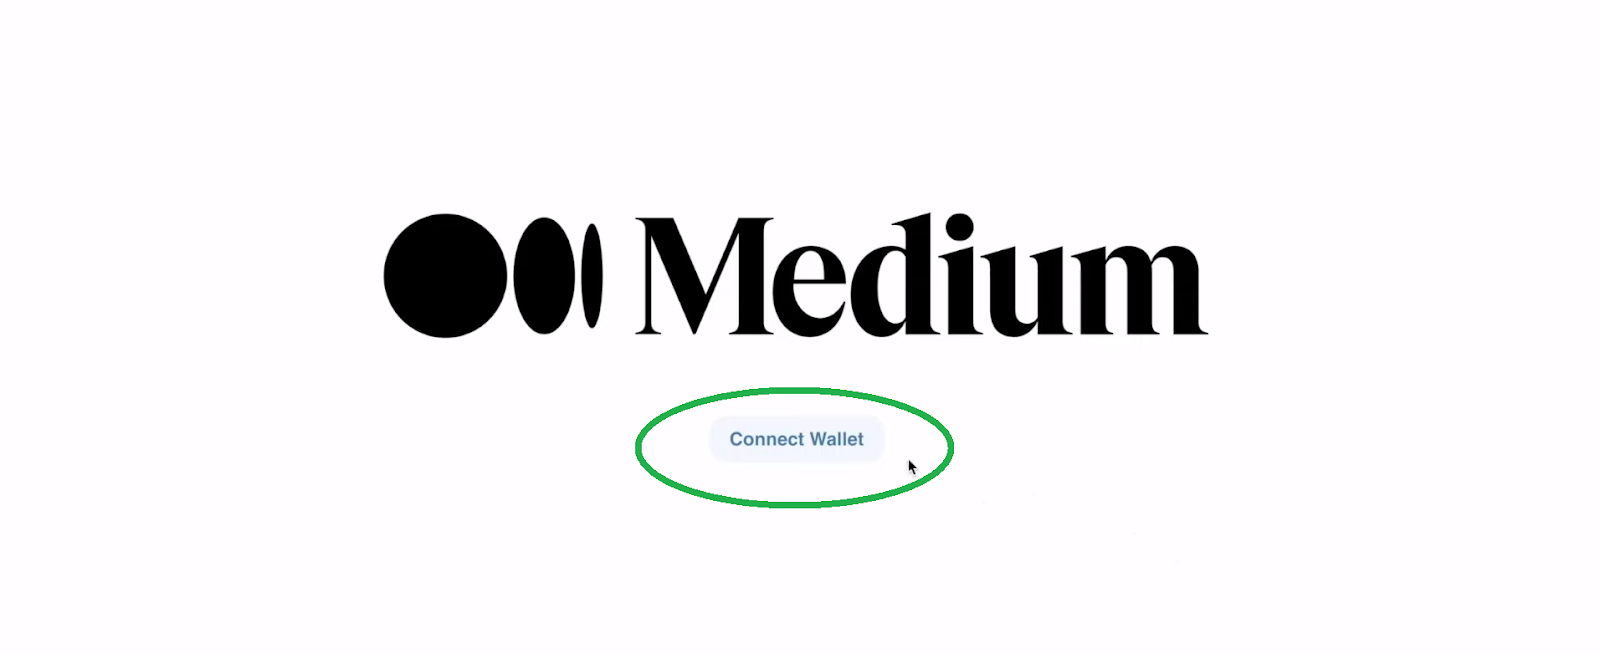
Users must click the “Connect Wallet” button to select their preferred Web3 wallet. Then, they use the latter to perform Web3 login. Despite many alternatives, MetaMask is still the go-to choice for most web users. Thus, for the sake of this demo, we focus on authenticating with MetaMask:

First, users need to select an account they wish to use. After they click on “Next”, they finally get to complete the authentication:
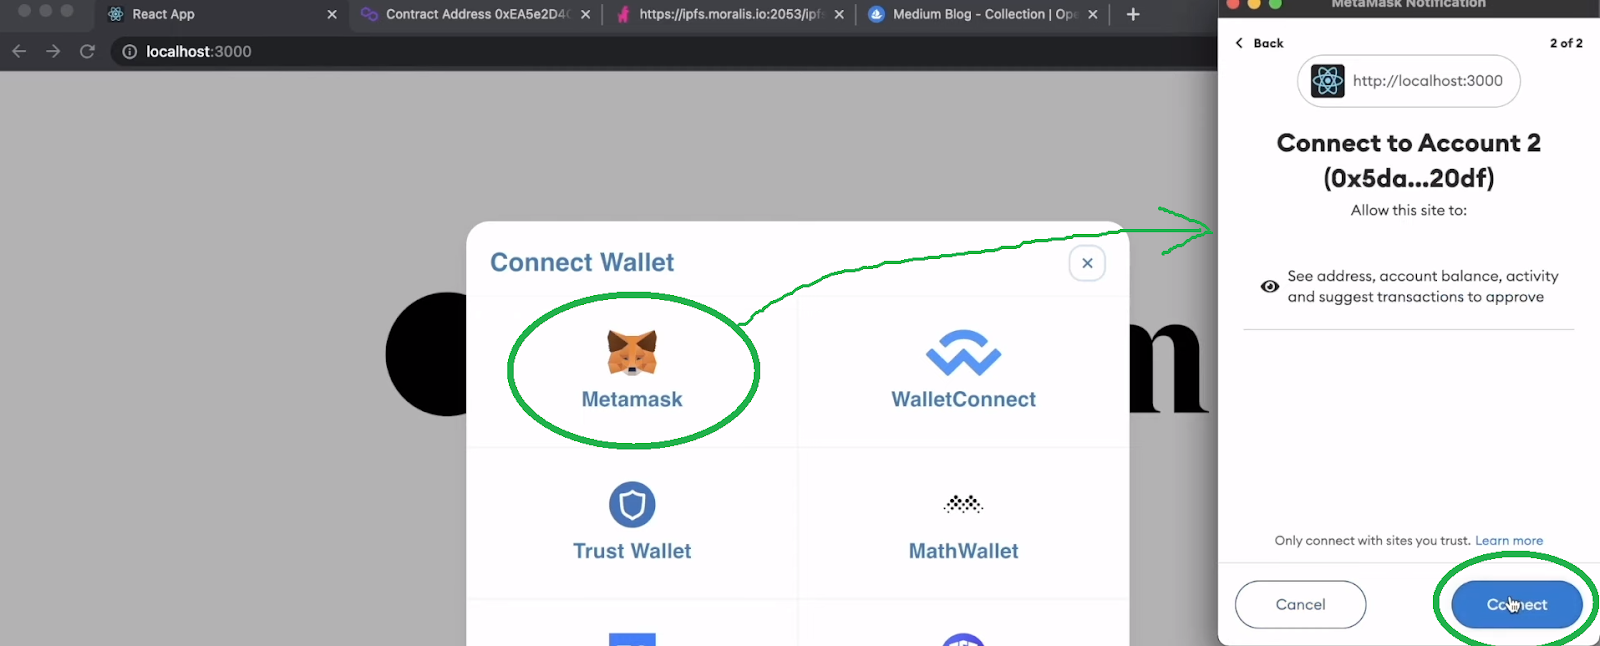
After clicking on the “Connect” button in their MetaMask extensions, users will enter our Web3 blog dapp. More specifically, they land on the homepage:

The above screenshot clearly indicates three sections: the left sidebar, the central section, and the right sidebar. The left sidebar is the navigation panel with the buttons linking to different pages of our Web3 blog dapp. The central section is where the current page is displayed. In the case of the homepage, you can see “Recommended Blogs”, which lists all the blog posts. Last but not least, the right sidebar offers the search bar and the latest news.
Furthermore, the blog posts in our Web3 blog dapp are NFTs stored on the Polygon testnet (Mumbai). Moreover, when users want to read the listed blogs, they need to click on them. This opens the selected blog in the central section:

We kept this simple; every blog post contains a title and content. When users want to access the page with all blog posts, they need to click on the “home” icon. In addition, our Web3 blog also comes with a page that displays their blog posts:

Nonetheless, when users want to create new blog posts, they need to click on the “write” icon:
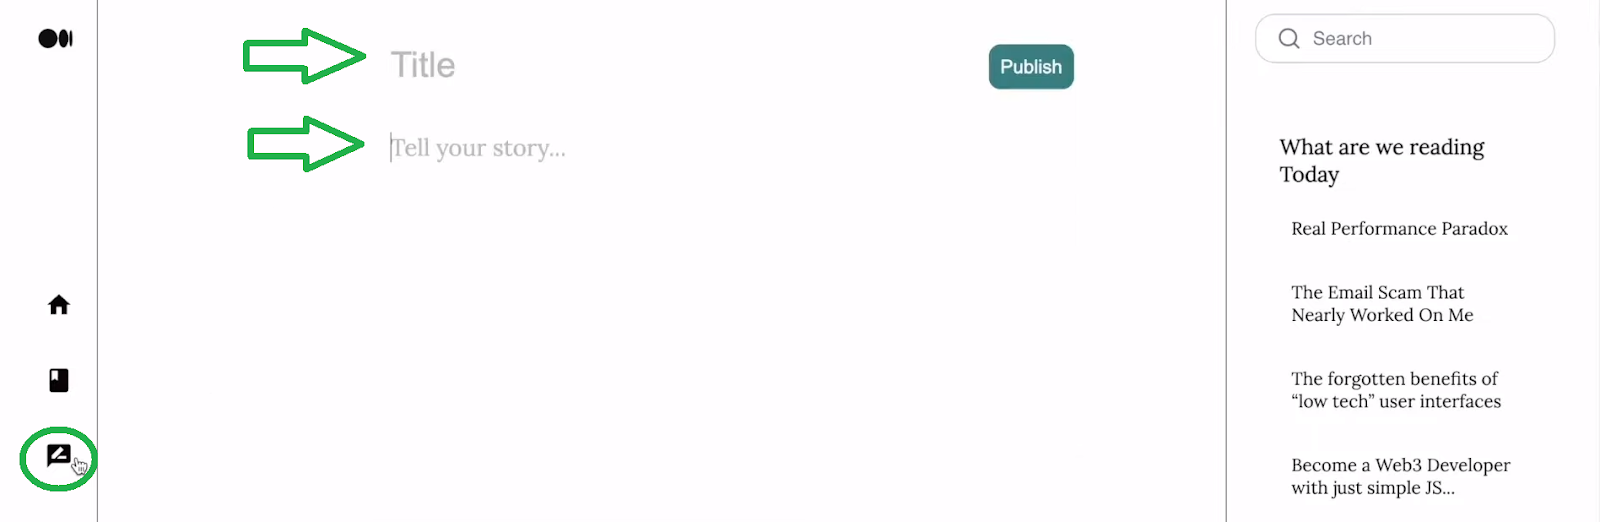
Publishing Posts with Our Web3 Blog Dapp
Publishing posts with our dapp is easy. First, users need to access the “write post” page. On that page, they need to enter their post’s title and type the content. With that done, they need to click on the “Publish” button:

This is where the Web3 magic happens. You probably remember that our dapp needs to convert the post into an ERC-721 token. Hence, the users need to confirm the minting transaction, which will cost them one MATIC plus the gas fee:

Our Web3 blog dapp also lets users know that their transaction was successful:

Thanks to the transparency of the blockchain, users can further confirm that their blog posts came through. For example, MetaMask shows the latest transactions:

Moreover, their post should also be listed under the “Recommended Blogs” section:

In addition, users can also use blockchain scanners to confirm the details of their on-chain transactions. Since our dapp is on the Mumbai testnet, they need to use PolygonScan (Mumbai):

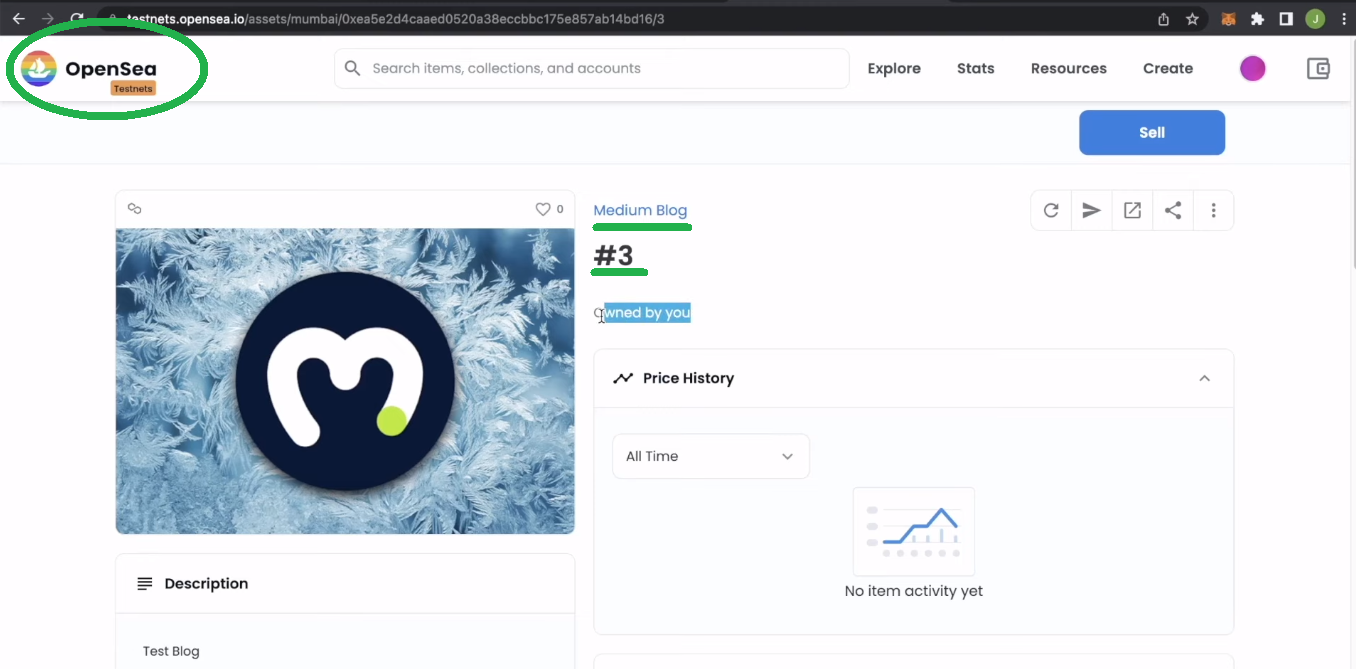
Nonetheless, users can also view their posts (NFTs) on an NFT marketplace, such as OpenSea:
Create a Web3 Blog Dapp in Less Than 70 Minutes
After seeing what a neat blog dapp we created, you must be eager to jump in on this example project. Fortunately, you can have your own Web3 blog dapp up and running in less than 70 minutes. Thanks to our instructions, screenshots, and a detailed video tutorial, there’ll be no guesswork. Hence, you will effortlessly fly through the following stages:
- Setting up Hardhat
- Creating, compiling, and deploying your ERC-721 contract
- Initializing a React project and connecting to the Moralis SDK
- Utilizing web3uikit to set Web3 authentication in place
- Using React to build your Web3 blog dapp’s frontend:
- Sidebars
- The list of blogs (your homepage)
- A blog page
- The blog-publishing page
- Storing NFT’s metadata in a decentralized way (using IPFS)
- Setting the minting functionality in place
- Utilizing the ultimate Web3 API to query NFTs
The list above may seem quite extensive; however, remember that most steps can be done in a couple of minutes. Also, you will not start from scratch. Our “starter” and “final” codes are available on GitHub to simplify the process.
Note: We assume you’ll start with the “starter” code. Hence, this is the path the following instructions and the video tutorial we reference takes. Nonetheless, this is also the path you should take to get the most out of this guide.

Getting Started with Hardhat
Using Hardhat is just one of the options to compile, deploy, and verify smart contracts. For instance, Remix is another great tool to use for that purpose.
For starters, open a new folder in your favorite code editor. As you can see in the screenshot below, we use Visual Studio Code (VSC). Next, install Hardhat by typing “npm i -D hardhat” into VSC’s terminal:

Then, you want to create a new Hardhat project. Hence, enter the “npx hardhat” command. After entering this command, you’ll need to tap “enter” four times. Lastly, you also need to install the proper dependencies. Here are the commands that will help you with that:
- Accessing verified Web3 contracts from OpenZeppelin: “npm i @openzeppelin/contracts”
- The above will let you work with the “.env” file: “npm i -D dotenv”
- Verify your smart contract: “npm i -D @nomiclabs/hardhat-etherscan”
Smart Contract Behind Our Web3 Blog Dapp
With the Hardhat setup under your belt, you can create your Web3 blog’s smart contract. For detailed guidance, use the video below, starting at 4:17. This is where you will learn how to utilize Hardhat template files, starting with “Greeter.sol”:

You can follow the video and write the code manually if you’d like. However, you can also copy the code from GitHub (“Medium.sol“).
Compile, Deploy, and Verify Your Web3 Contract
With your smart contract code in place, you can use Hardhat to compile, deploy, and verify it. The details of this process are waiting for you in the video below, starting at 11:04. You will continue to use Hardhat template files to get the job done with as little effort as possible:

You’ll first rename the “sample-script.js” file into “deployMedium.js”. Then, you’ll replace “Greeter” and “greeter” with “Medium” and “medium”. Also, you will need to add some parameters inside “Medium.deploy”:

Next, starting at 12:31, you will begin tweaking the “hardhat.config.js” file. The latter will compile and verify your smart contract. This is also where you’ll use the “.env” parameters:
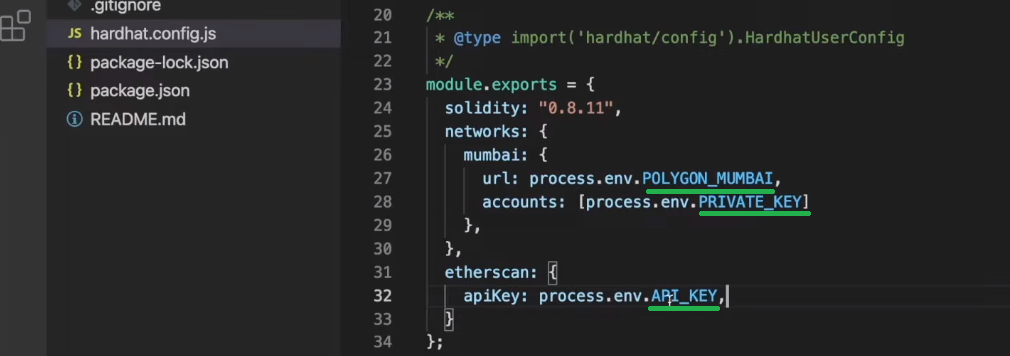
To make the above-market variables work, you will need to store them in your “.env” file:

Fortunately, getting the values of these variables is relatively easy. However, having proper guidance helps a lot (jump to 14:48). Regarding “Polygon_Mumbai”, we recommend using the “Working with Moralis’ New Admin UI” section below. Once you set these values in place, you finally get to compile, deploy, and verify your ERC-721 contract. For details, go to 16:40 in the video below.
The Frontend of Our Web3 Blog Dapp
As a Web3 developer, you want to ensure that the frontend is intuitive. As such, it should follow Web2 applications’ examples. Hence, we can utilize React. Starting at 22:04 of the video tutorial below, you will learn how to initialize a React project. This is also where you’ll need to populate the “index.js” file with your Moralis dapp’s details. Again, use the “Working with Moralis’ New Admin UI” section below for more guidance. Next, you’ll be ready to enter the “yarn start” command and see the empty application. However, if you’ve followed our guide properly, our Web3 blog dapp’s structure should already be there:

Next, you are going to implement Web3 authentication (23:39). This is where Moralis’ web3uikit will make things extremely simple. As a result, you’ll need less than two minutes to set the “Connect Wallet” button in place. Moving forward, you’ll complete all the pages you saw in the demo:
- 25:24 – The sidebars
- 29:36 – The list of blogs (homepage)
- 38:41 – A blog page
- 44:53 – The “publish blog” page
The Backend of Our Web3 Blog Dapp
At this point, you already have your smart contract up and running. The latter is an essential part of your Web3 blog dapp’s backend. Although, you still need to write the appropriate code, which will enable users to interact with your smart contract. Further, you need a link between your ERC-721 contract and your React application. On top of that, you also need a way to store your NFTs’ (blog posts) metadata in a decentralized manner.
As such, starting at 48:05, our in-house expert will show you how to upload to IPFS automatically. For that purpose, you’ll create the “NewStory.js” file. Moreover, since the Moralis’ SDK integrates IPFS, the “saveFile” snippet of code will do most of the work. Also, starting at 53:35, you’ll see how to use the “NewStory.js” to mint “blog post” NFTs. To implement this functionality, you’ll need to obtain your contract’s details:

Last but not least, starting at 58:57, you will exploit Moralis’ Web3 API to query NFTs. As such, you can populate your Web3 blog dapp’s homepage and the “Your Blogs” page. You’ll cover the NFT querying with the “homeAuth.js” and the “MyBlogs.js” files. In both of these files, you will create the “fetchAllNfts” function. The latter will use the “token.getNFTOwners” and the “account.getNFTsForContract” hooks. Hence, you will obtain all the on-chain data without breaking a sweat.
Working with Moralis’ New Admin UI
Moralis recently switched to a new admin UI. As such, you can still switch to the legacy UI if you’d like:

However, we encourage you to get used to the new UI. The following instructions will help you with that:
- Create your free Moralis account or log in to your existing one to access your Moralis admin area.
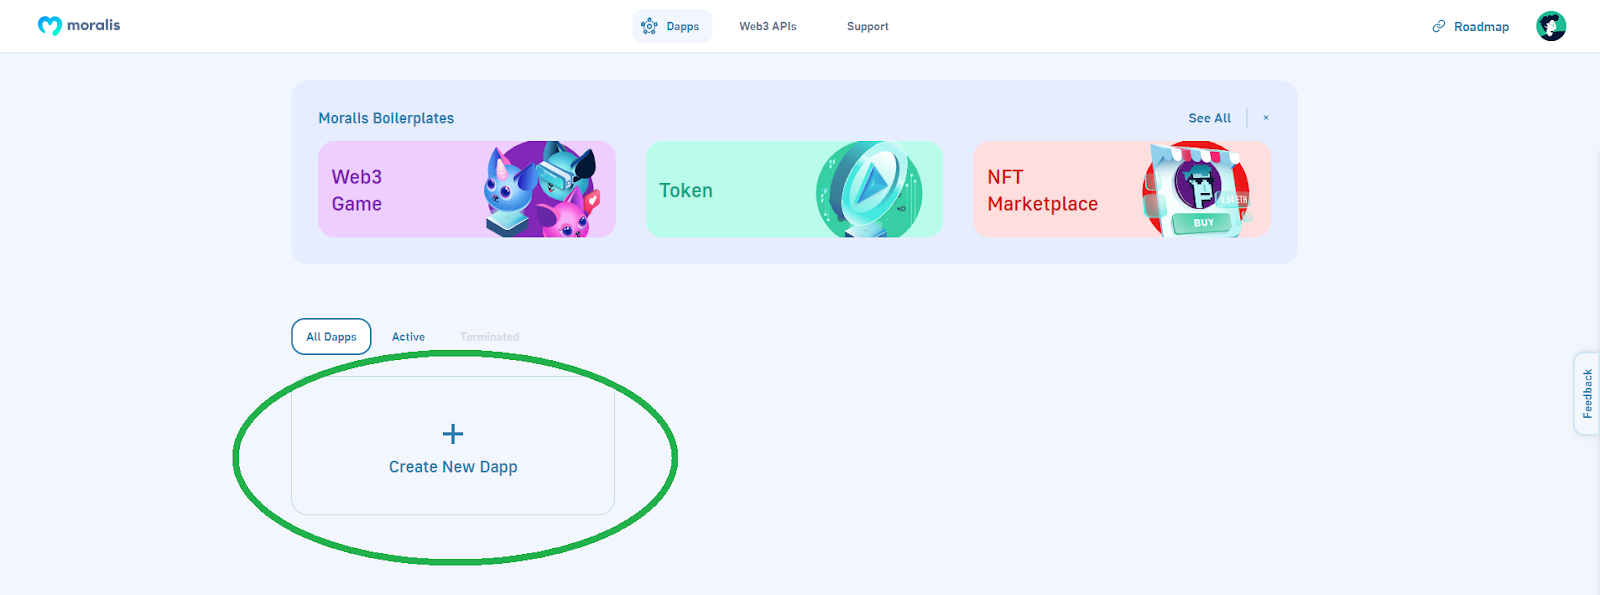
- Create a new dapp:
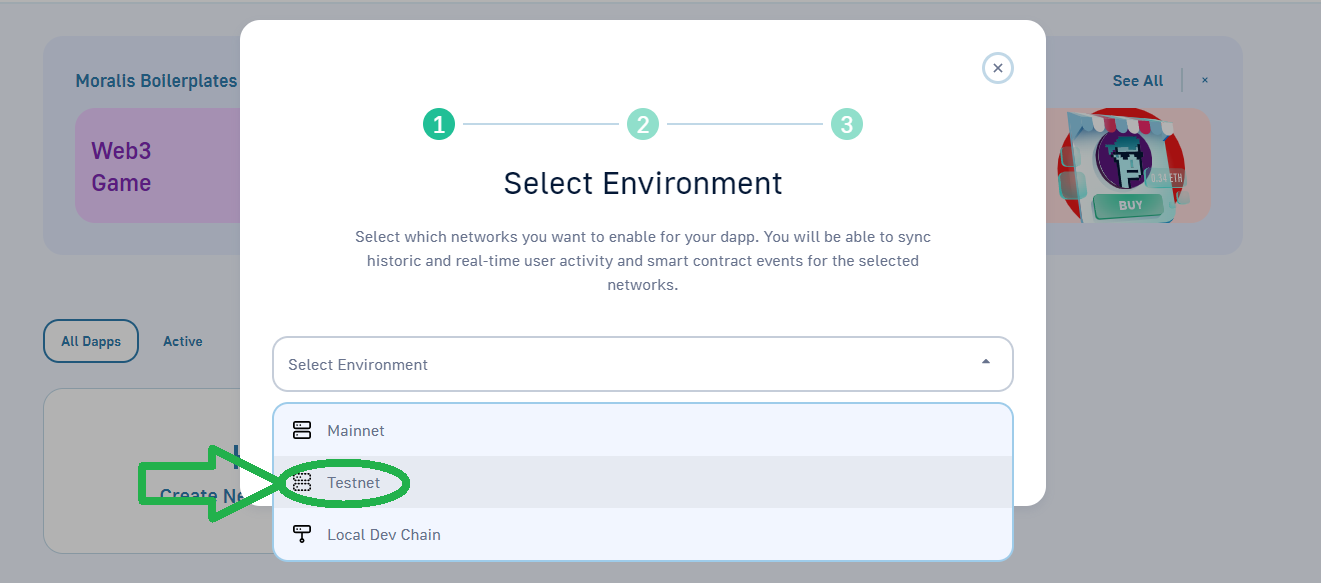
- Choose “Testnet”:
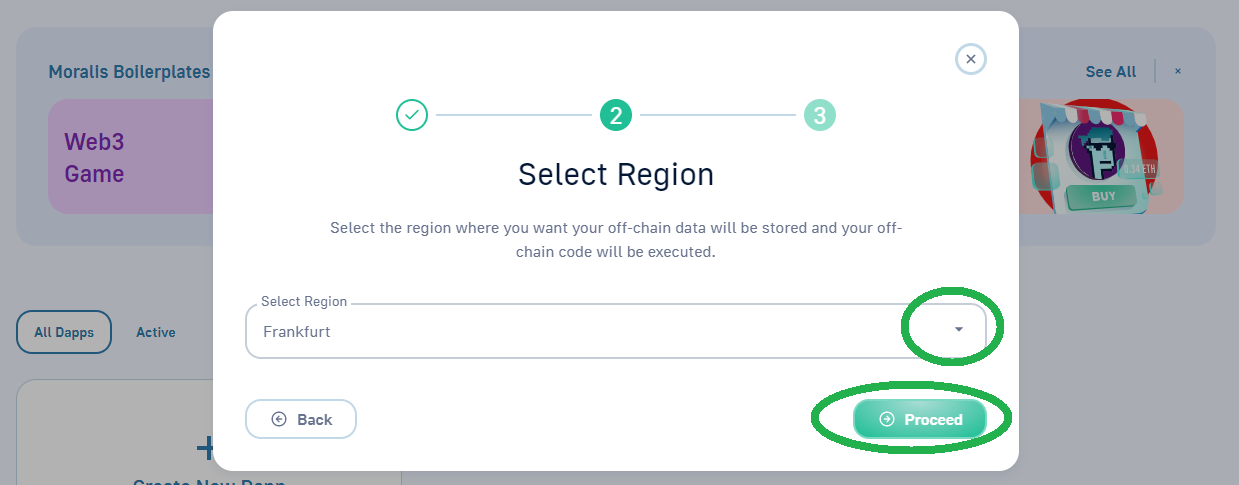
- Select “Polygon Mumbai” and click on the “Proceed” button:

- Pick the city closest to you:
- Give your dapp a name and click on “Create Your Dapp”:

Now that your dapp is up and running, you can obtain the Mumbai testnet’s endpoints (“Polygon_Mumbai” from “.env”) and your dapp’s details (URL and ID that you need to paste into “index.js”):
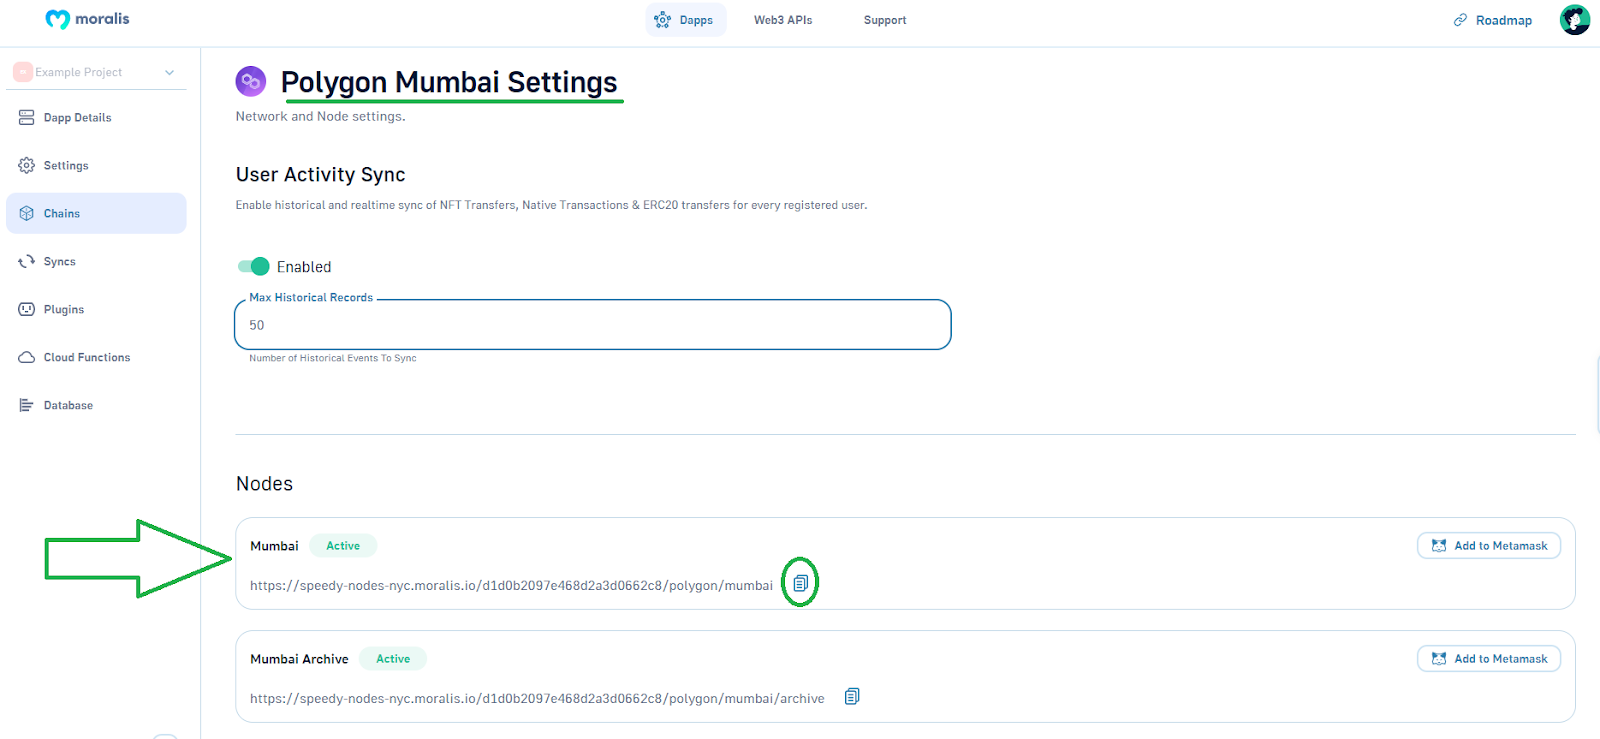
- How to Get Endpoints:
- Click on the “Settings” button under your newly created dapp:

- Navigate to the “Chains” tab in the right sidebar and click on “Settings” next to “Polygon Mumbai”:

- Copy the URL address under “Mumbai”:
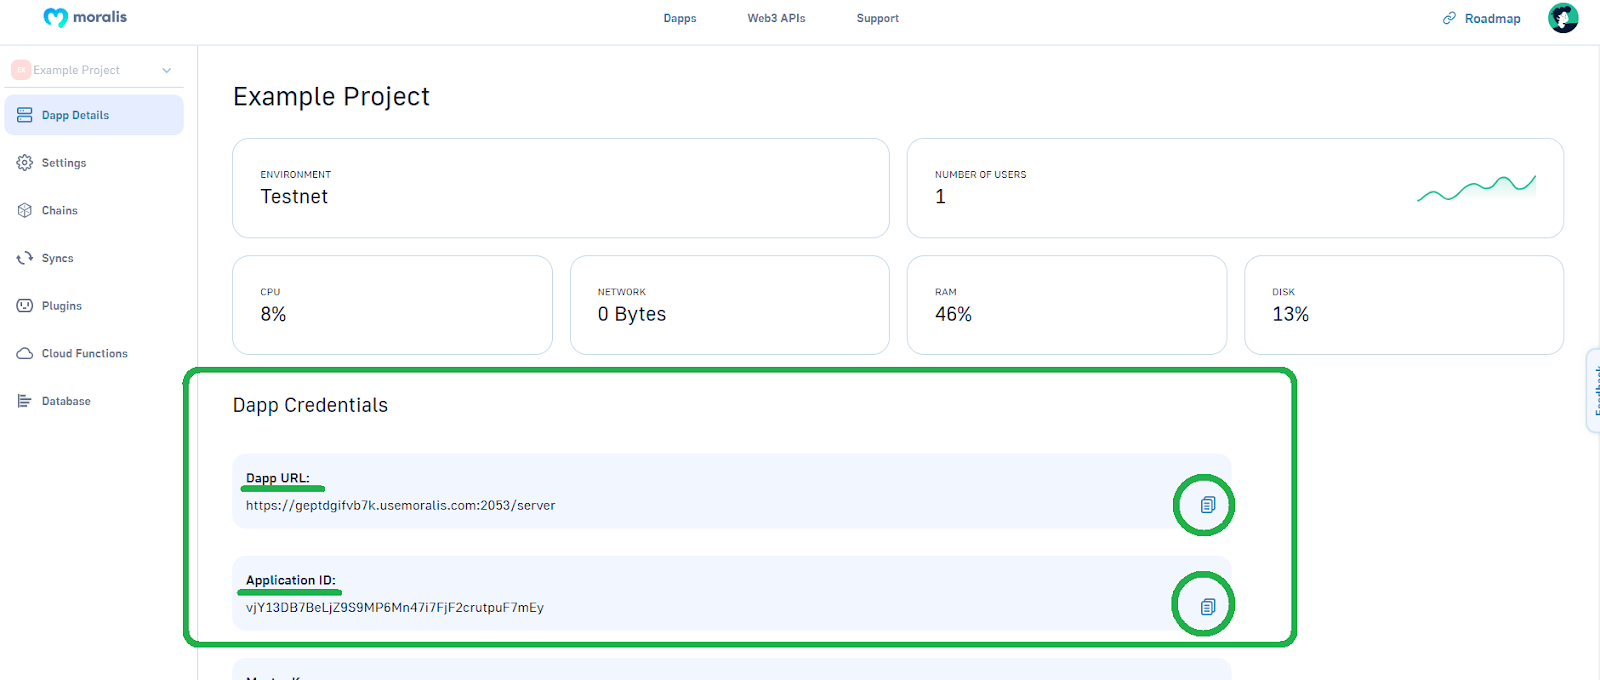
- How to Get Dapp ID and URL:
- Click on the “Settings” button under your newly created dapp:
- Copy your dapp’s URL and application ID:
Finally, here’s the video tutorial containing all the details you need to create your Web3 blog dapp:
Guide to Creating a Web3 Blog Dapp – Summary
In this guide to creating a Web3 blog dapp, you first learned how to create an ERC-721 smart contract. Next, you learned how to use Hardhat to compile, deploy, and verify smart contracts. Furthermore, you had a chance to see how React enables you to cover all your Web3 frontend needs using your JavaScript proficiency. Of course, Moralis’ web3uikit offers several additional shortcuts, which you also experienced firsthand. Finally, we tied it all together using Moralis, which enabled you to query NFTs with short snippets of code easily.
With all these new skills, you are ready to tackle other example projects to gain additional programming confidence. As such, visit the Moralis blog and the Moralis YouTube channel. Some of the latest topics there include a Polygon dapp API, how to build a Web3 role-playing game, how to create a social media dapp, exploring the best Binance dapp API, Ethereum NFT API, and Polygon NFT API. Also, you can dive deep into the Ethereum Merge, how to get Solana NFT metadata, and much more. Hence, you can use these two outlets for your free ongoing blockchain education.
However, if you want to become a Web3 developer fast and with confidence, you should consider taking a more professional approach. Thus, you might want to enroll in Moralis Academy. Aside from top-notch blockchain development courses, this is also where you’ll get a personalized study path, expert mentorship, and become a member of one of the most advancing communities in the crypto realm.