When building a Web3 role-playing game, developers have many Web3 game design factors to consider. How should NFT utility be implemented, and should the game focus on GameFi and play-to-earn (P2E) concepts? Either way, grabbing users’ attention is one of the most crucial aspects when creating a role-playing game for Web3. How can one build such an attractive game with Web3 functionality? By using Moralis! In this article, we guide you through an example project one of Moralis’ Unity experts developed. By following along, you’ll have a chance to use our code and develop your version of this killer dapp (decentralized application). So, are you ready to explore the process of how to build a Web3 action role-playing game? Let’s get started!
Moving forward, we will show you how to use your Unity skills to create a Web3 role-playing game. If you’re familiar with Web2, then the transition from Web2 to Web3 is completely effortless, thanks to Moralis. This “Firebase for crypto” operating system is the ultimate Web3 backend platform. However, Moralis’ SDK offers a lot more than just a Web3 API. For instance, with Moralis’ web3uikit, you can create a great Web3 UI. Also, with its “Sync” feature and database, you can sync and index smart contract events (index the blockchain). Further, thanks to Moralis, you only need a single line of code to implement various types of Web3 authentication. Herein, you will also learn how to use Hardhat to compile, deploy, and verify smart contracts. So, if you are eager to build your own instance of our Web3 role-playing game, make sure to create your free Moralis account now!
Demo of Our Web3 Role-Playing Game
Before we give you a chance to get your hands dirty, we want to ensure you know what to expect from our role-playing Web3 game project. Therefore, let’s first do a quick demo of our Web3 role-playing game. This will also help you decide whether or not you want to create your own instance of this dapp.
Our Web3 RPG game starts with the “connect” button:
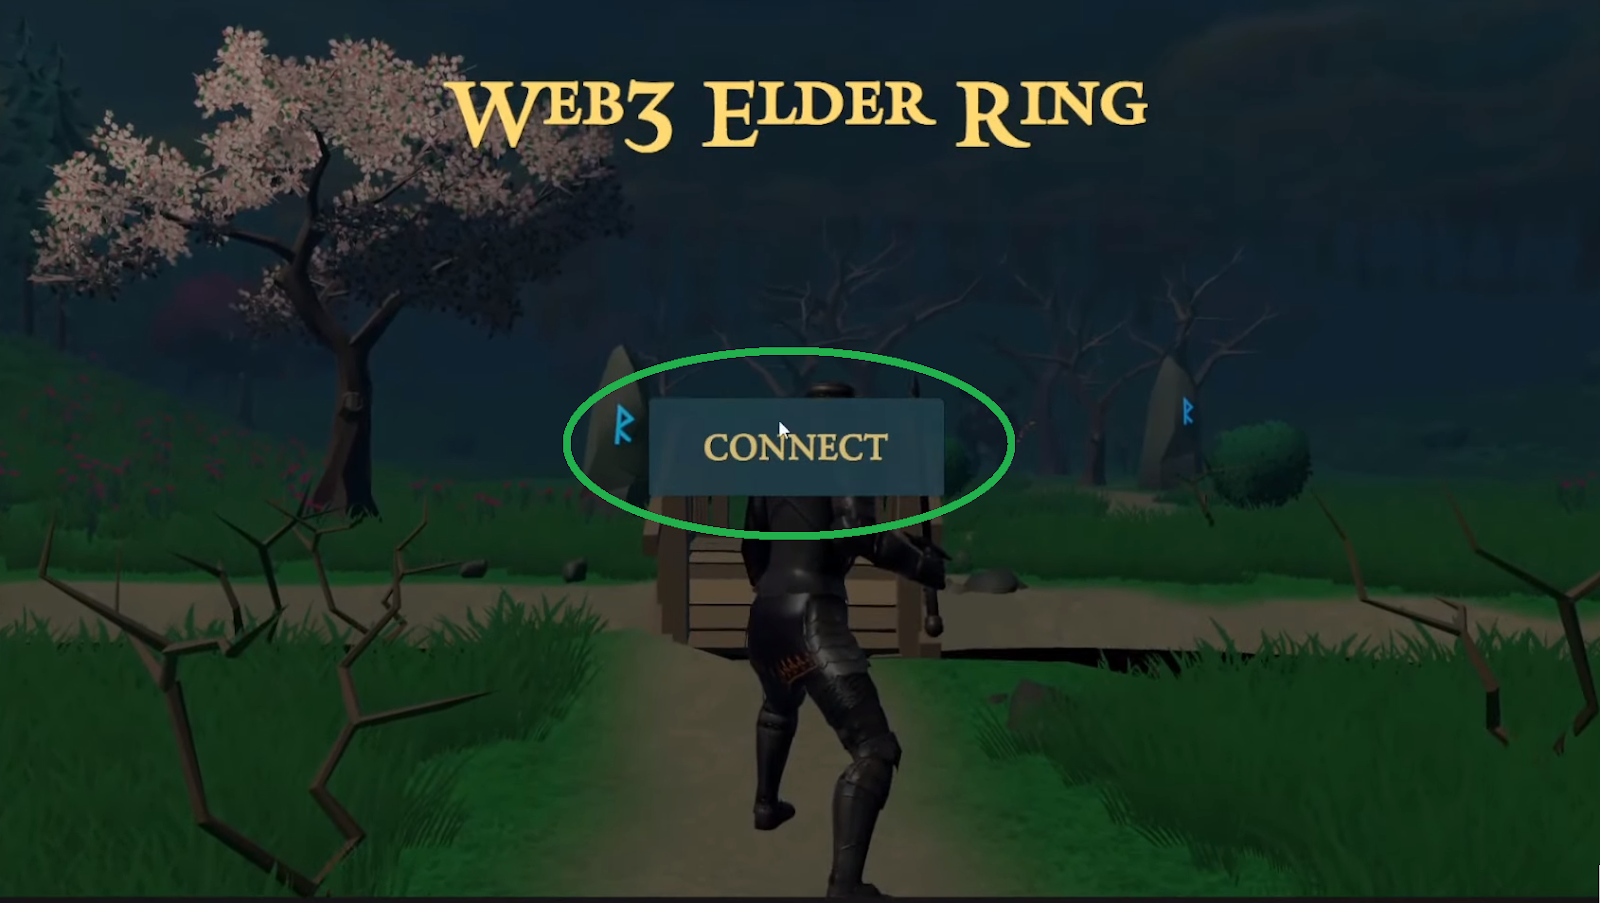
Once users click on the above button, a QR code will appear. Accordingly, users get to use their Web3 wallets to complete the Web3 login process:
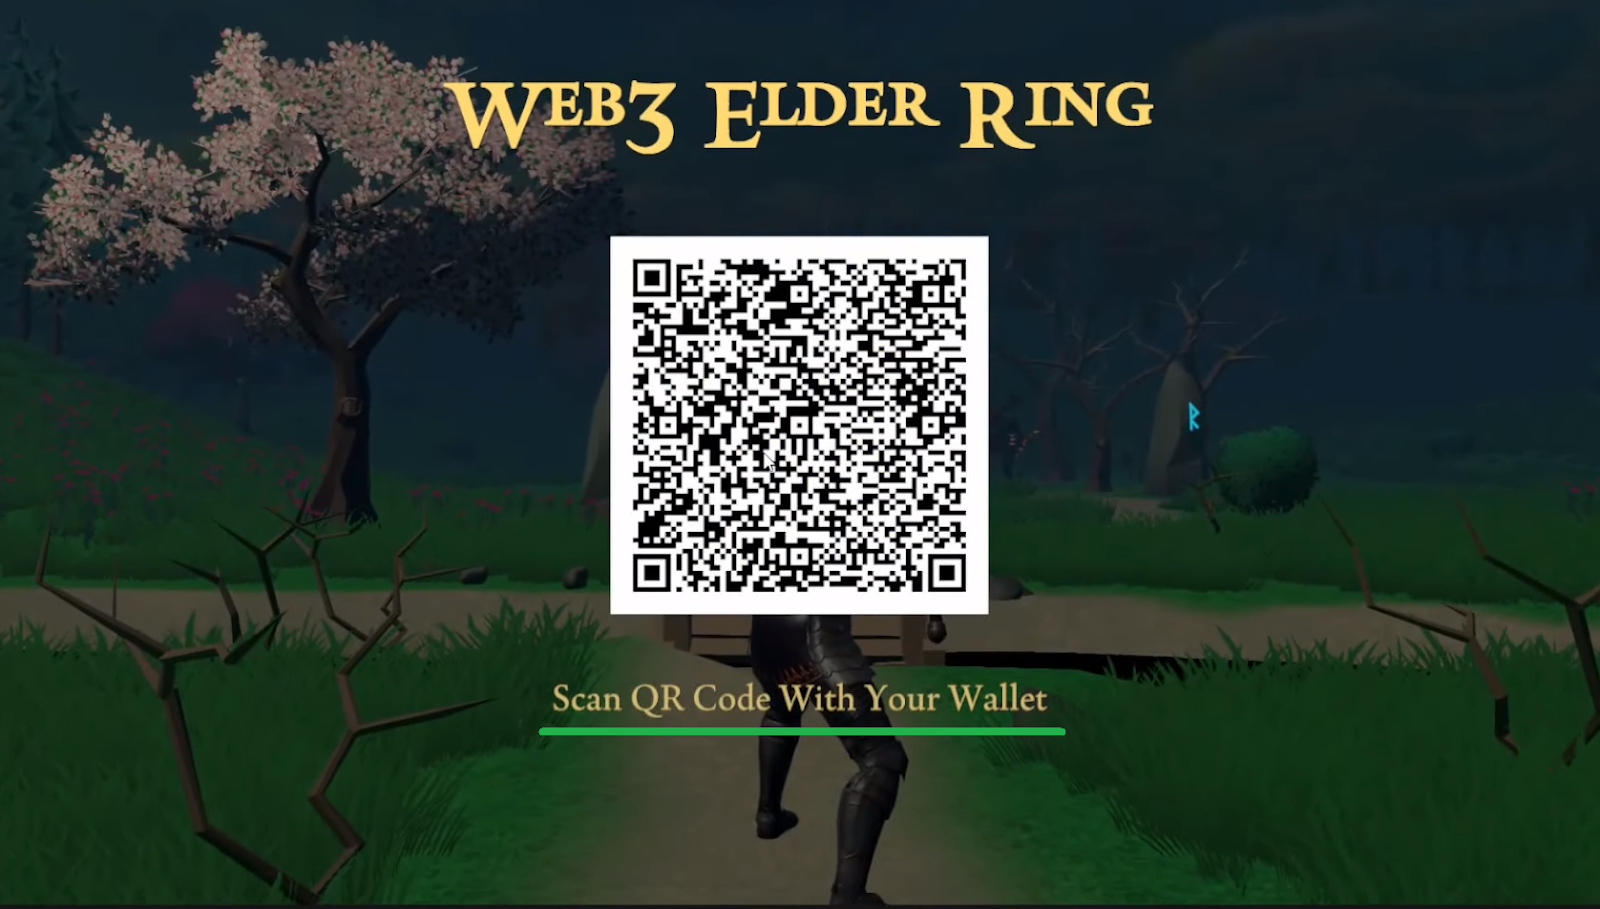
After users scan the QR code with their mobile crypto wallets (e.g., MetaMask), the game indicates that they need to sign the confirmation:
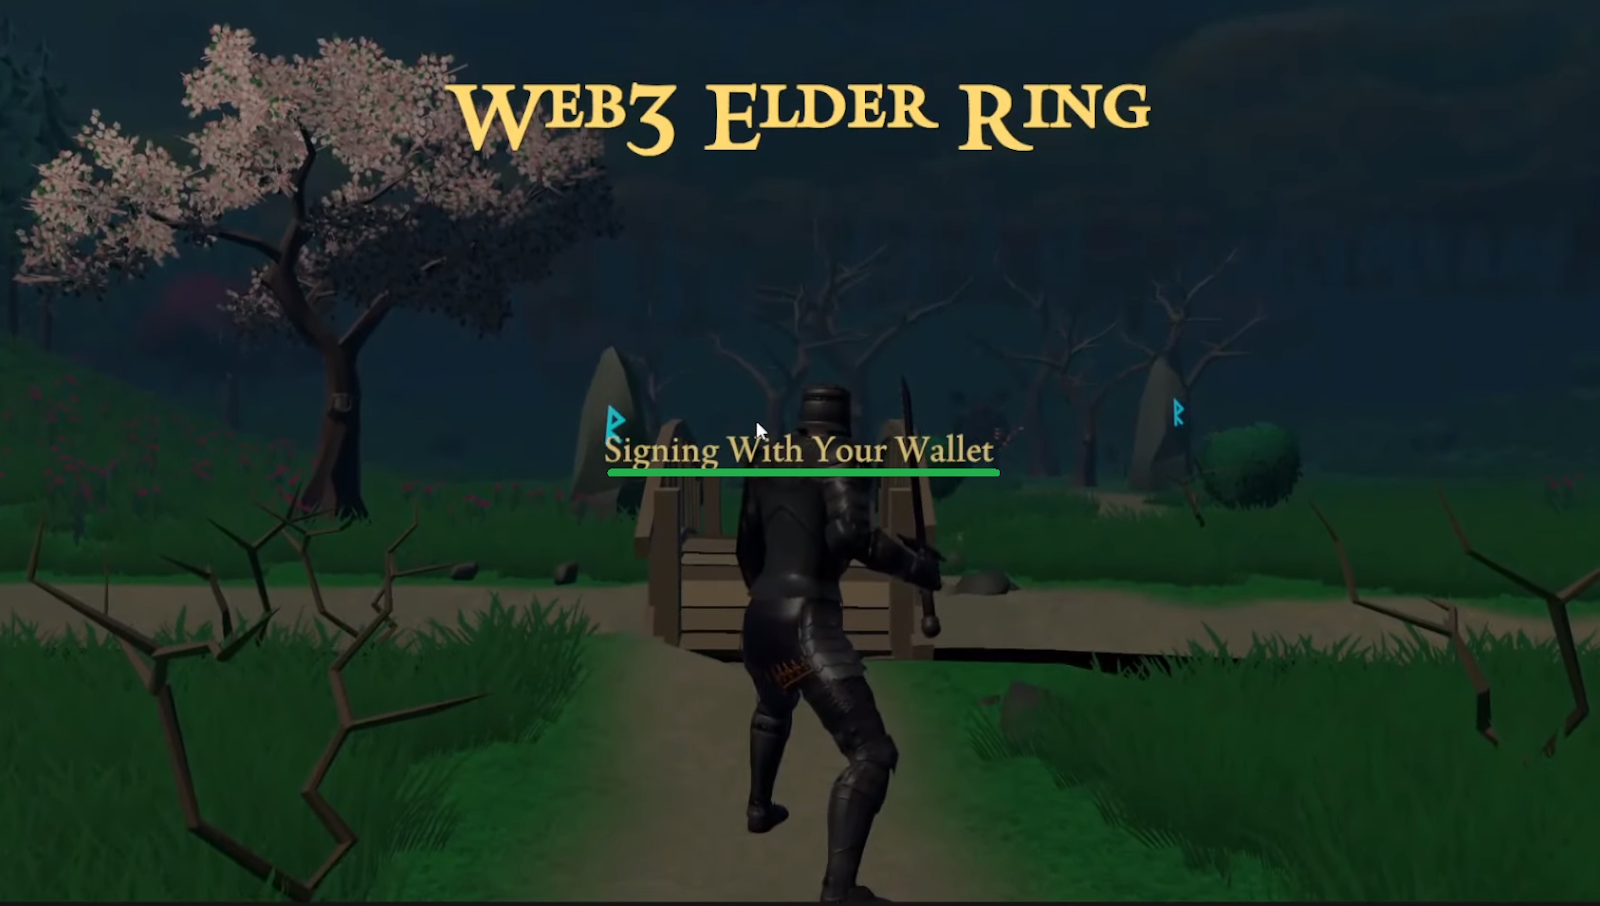
As soon as users authenticate with MetaMask or another Web3 wallet, they can control the character. For example, they can run toward the boss and initiate the battle:
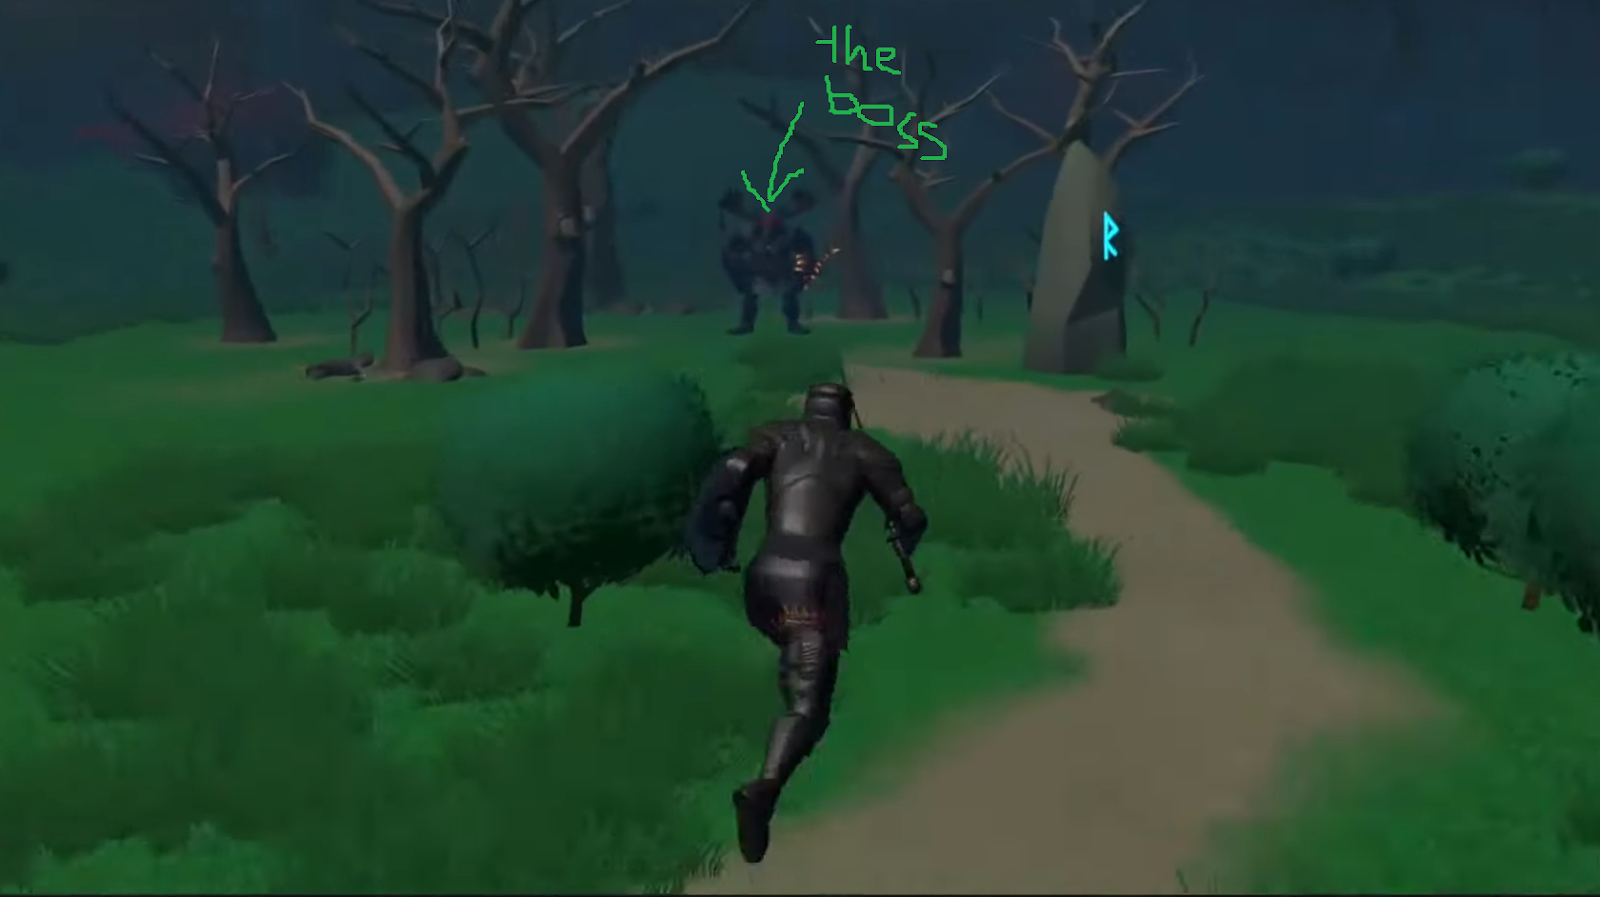
When the character enters the boss’ domain, the health bar for both the character and boss will appear on the screen:

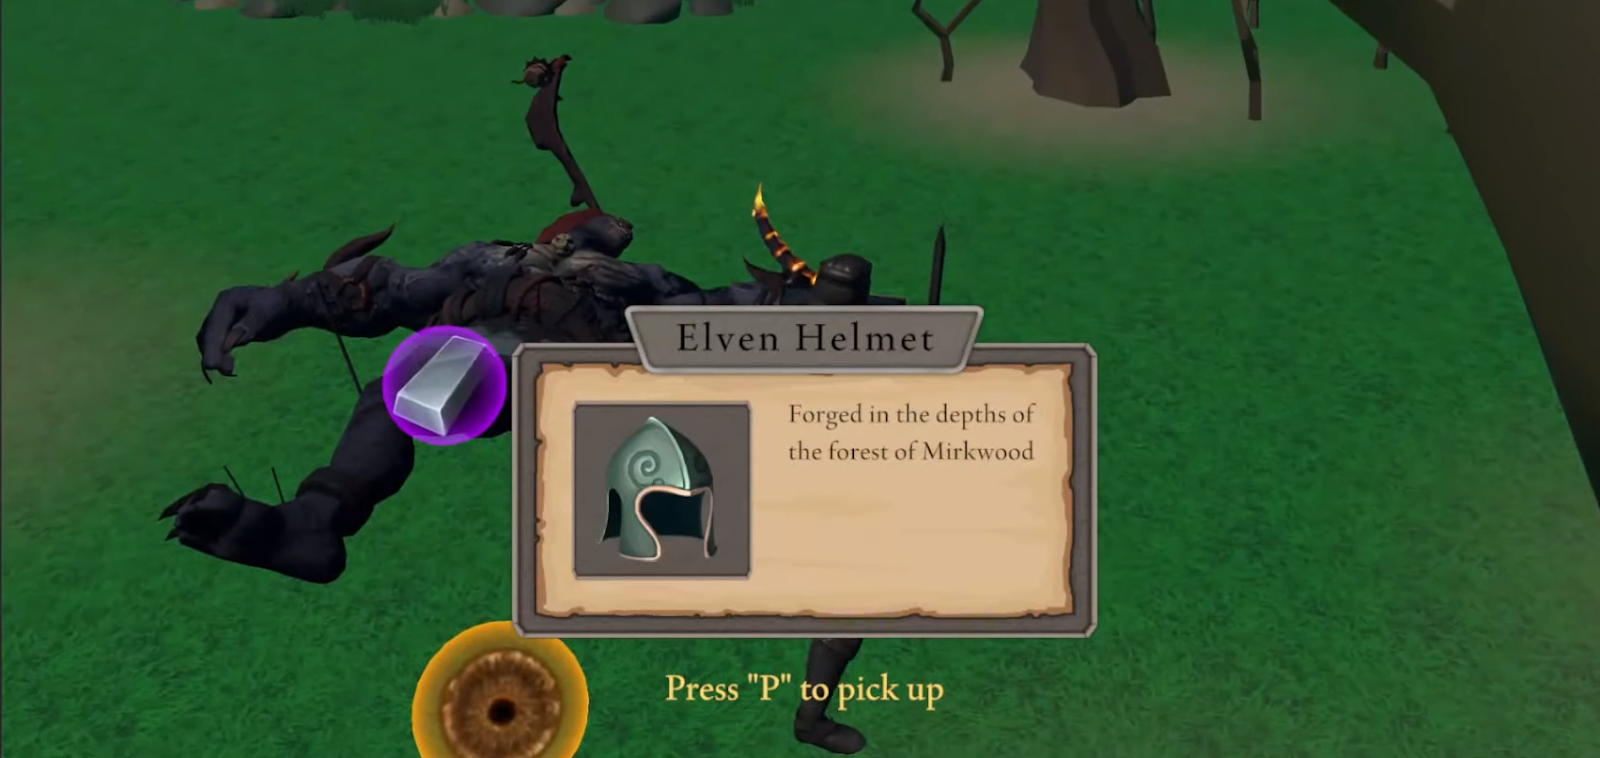
Once the player manages to kill the boss, the player can collect some of the items and receive experience points that will appear:

Moreover, the items have purple halos, while the experience points have a yellow halo. Furthermore, since this is a Web3 game, we’ve ensured that both the items and the experience points are on-chain assets. Thus, if players want to collect them, they must confirm on-chain transactions. If so, they first need to press “P”:
Next, they need to use their mobile wallet (the one used to log in) to confirm the transaction:

Of course, they can do the same for all other items and the experience points:

Nonetheless, once the players have collected the items and experience points, they get to see them in their inventory:

Build a Web3 Role-Playing Game with Unity, Moralis, and Hardhat
Here are the major steps that we will take a look at as we go about showing you how to create your own instance of our Web3 role-playing game:
- Free Assets Overview – There are many free assets used within our game. As such, we want to show you where you can get them yourself.
- Initial Moralis Setup – To obtain your credentials to login into Web3 and utilize the power of Moralis, you need to create a Moralis dapp. Then you need to copy your server URL and application ID into Unity.
- Loot System Setup – This is where you’ll learn how to drop game items and runes (experience points).
- Smart Contracts – You will learn how to deploy smart contracts using Hardhat. We will use one of the ERC-20 contracts to represent the experience points and an ERC-721 contract to represent in-game items.
- Minting Items and Runes – This is where you’ll learn how to implement ERC-20 and ERC-721 token standards into our Web3 role-playing game.
- Retrieving On-Chain Data – Finally, we’ll show you how to get the on-chain information about the minted tokens using the Moralis dashboard.
Of course, there’s much more to our Web3 role-playing game; however, we will focus on the Web3 functionality herein. Also, we will cover certain parts of the above-listed steps quickly and reference the video tutorial attached below, which you can use to dive deeper.
Free Assets Overview
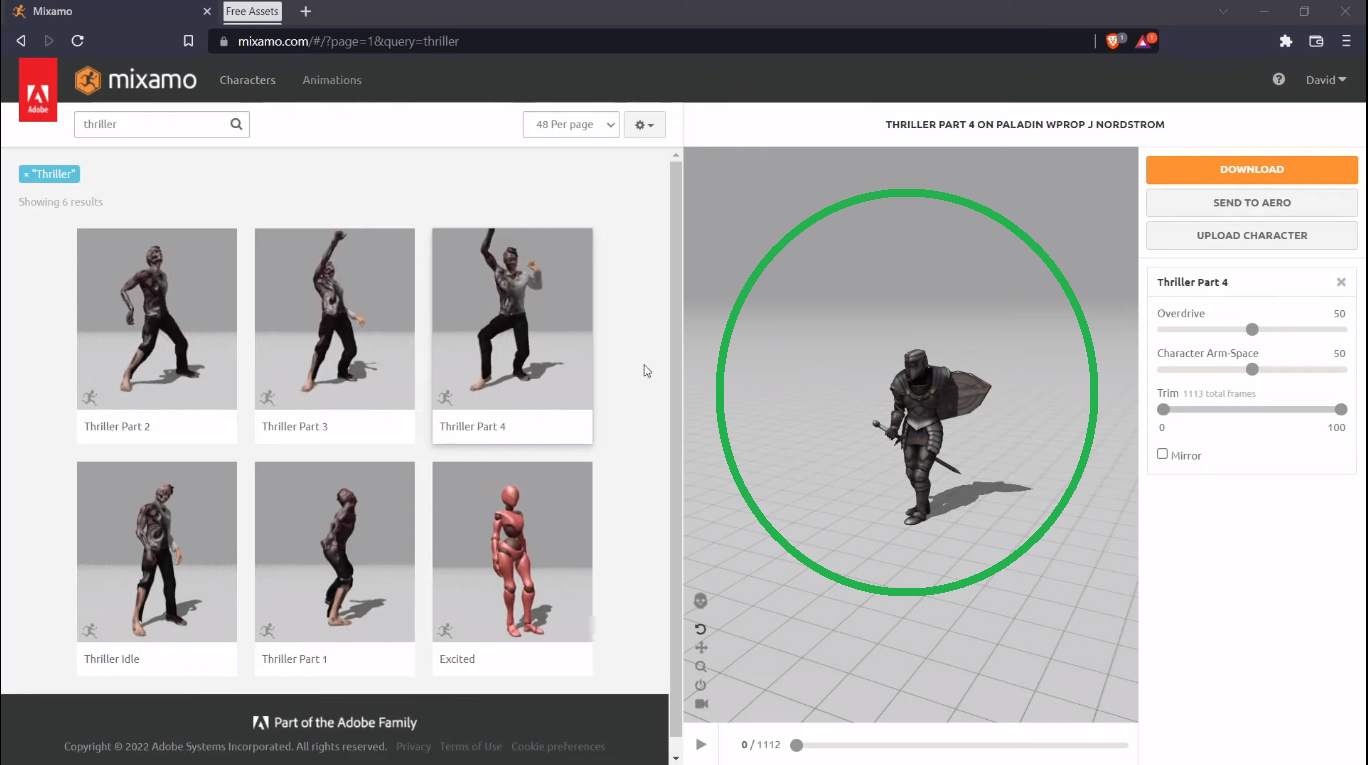
We’ve used “Mixamo” characters to create our in-game character:
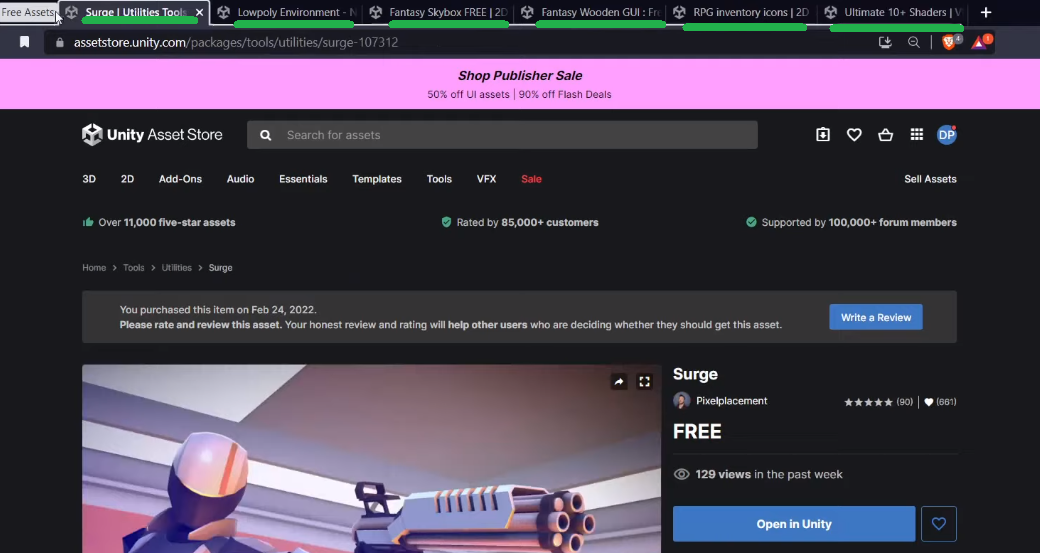
In addition, we’ve also used several free assets from Unity’s Asset Store:
Of course, you can find all the assets used in our Web3 role-playing game on this project’s GitHub page.
Initial Moralis Setup – Downloading Our Project and Getting Started
First, make sure to download our project. Use the above “GitHub” link and download the ZIP file:

On the other hand, you can also clone the code. Then, open the project with Unity, which will greet you with the “Moralis Web3 Setup” screen:
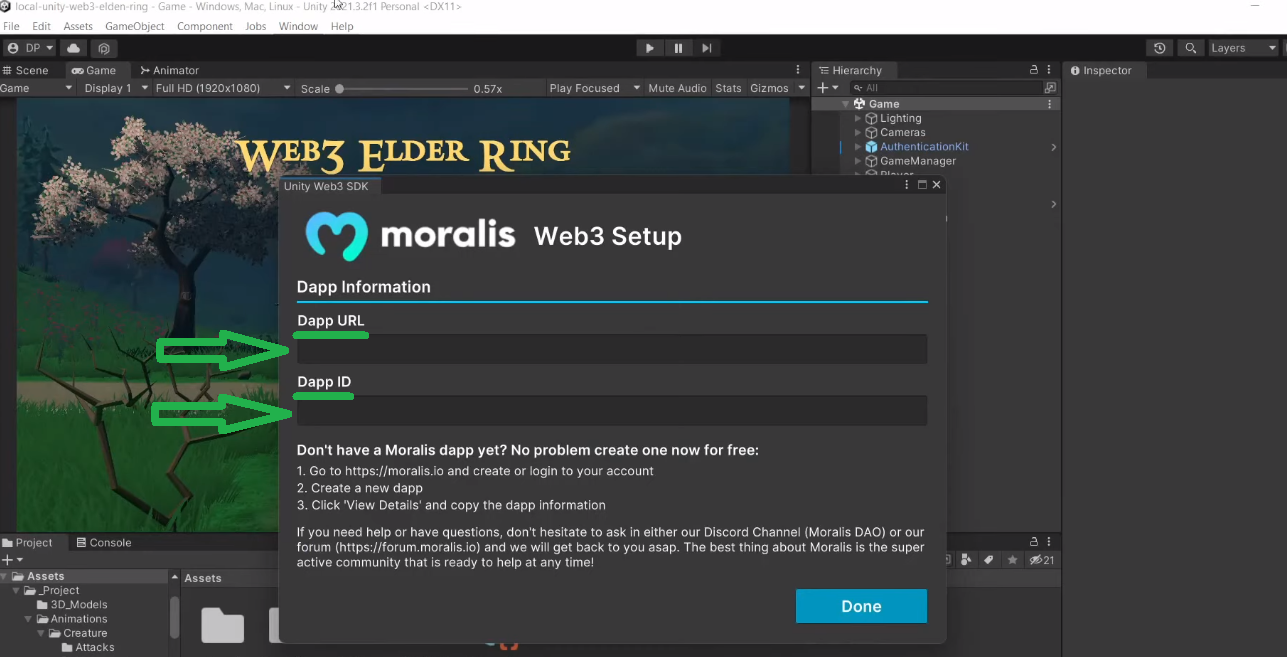
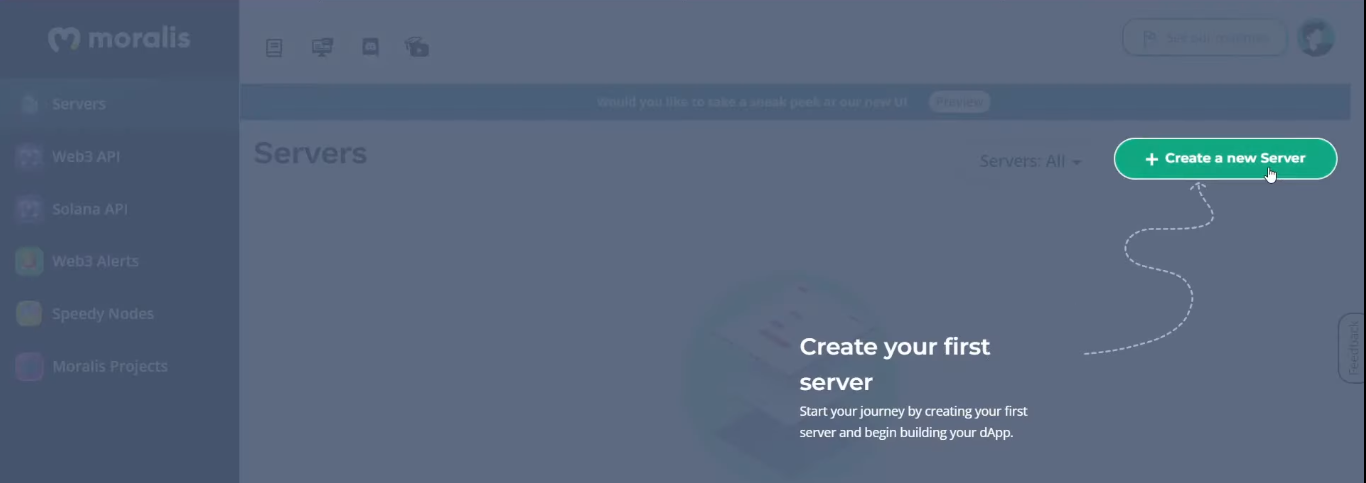
Moreover, the above screen provides you with instructions on how to get your dapp’s URL and ID. You must log in to your Moralis admin area (or sign in if you haven’t done so yet). Then, you’ll want to create a new server by clicking on the “Create a new Server” button:
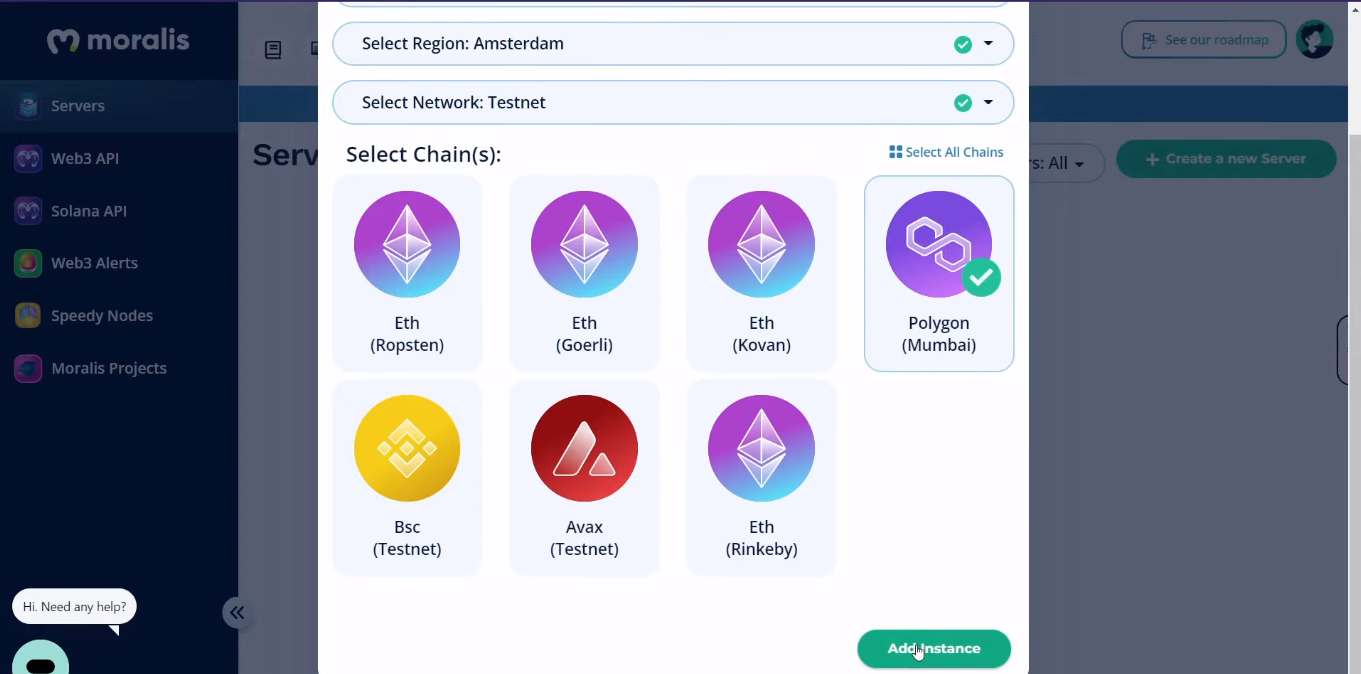
Furthermore, since this is an example project, make sure to go with the “Testnet Server” option:

Next, enter your server’s name, which can be anything you want. Then select the city closest to your location and the chains (testnets) you want to focus on. We recommend using the Polygon testnet (Mumbai). Finally, spin up your server by clicking on the “Add Instance” button:
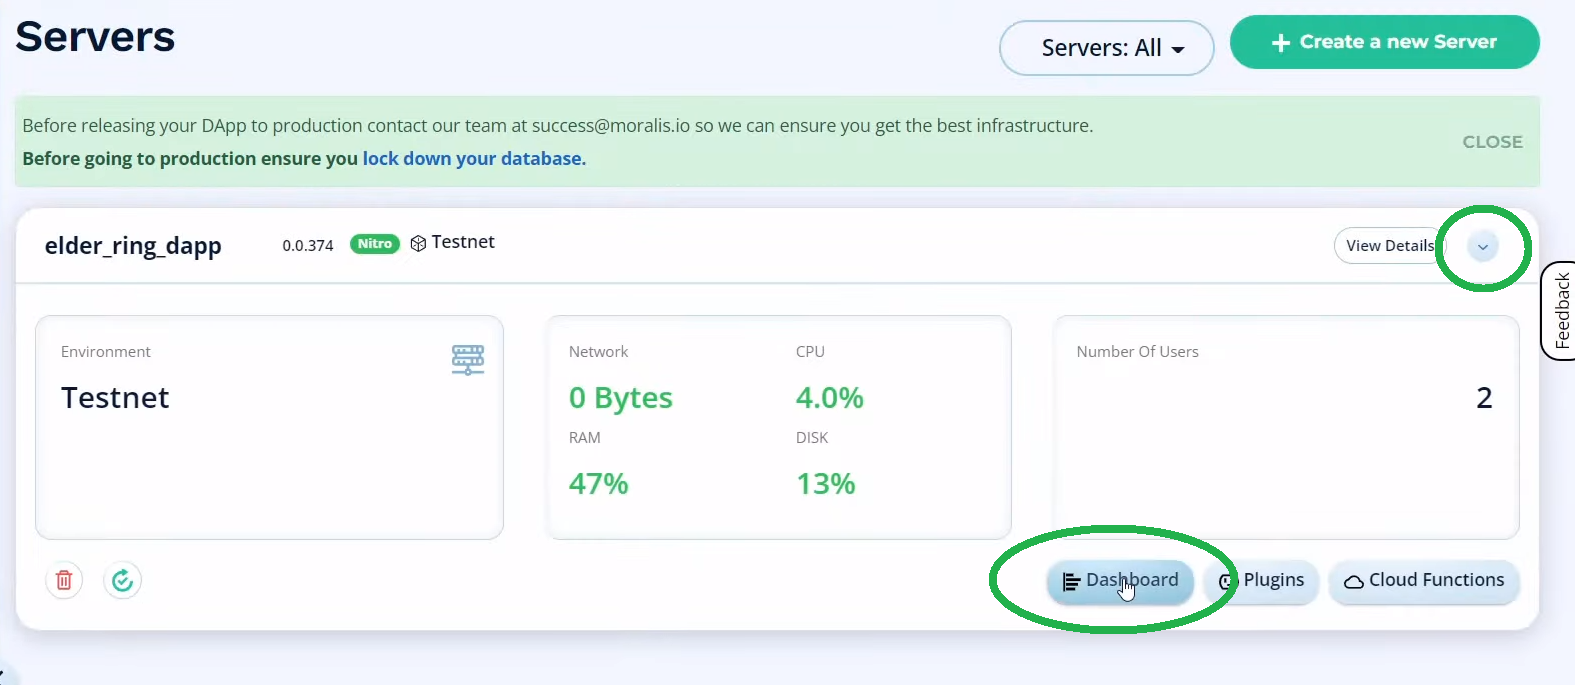
With your server up and running, you’ll be able to access the details you need to paste into Unity:

Then paste the above-copied details into Unity and click on “Done”:

Note: If you accidentally close the “Moralis Web3 Setup” window, you can access it via “Window > Moralis > Web3 Unity SDK > Open Web3 Setup”:

Loot System Setup
Start by navigating to the “Game” scene:

This is the only screen of our Web3 role-playing game, and it’s where all the action happens. For instance, “AuthenticationKit” takes care of the Web3 authentication as presented in the demo above. You can use the video below for more details, starting at 8:00. This is also where you’ll learn how to run your instance of our dapp in Unity. Since you haven’t deployed your instances of our smart contracts yet, certain functionalities of the game will not work. However, you can already log in using your mobile crypto wallet and then move the character.
You’ll learn more about “GameManager”, which listens to “AuthenticationKit”, in the video at 10:07. You’ll also learn that we used a third-party asset (Surge) to implement a state machine. Thus, we could convert our “GameManager” into a state machine. As such, the latter has multiple states that our Web3 role-playing game goes through:

This kind of approach makes things quite simple as you can add code to any of the included states. Using the “ChangeState” function makes shifting between states extremely straightforward. As far as the Web3 functionality goes, the “Victory” state comes to play. For a detailed code walkthrough of the “Victory” script, use the video below (14:35). This state is activated once the boss is defeated. After he is defeated, he will drop the items and the experience points, which we decided to put on the chain. Certainly, we need a way to populate these items and runes. Fortunately, we can use the Moralis dashboard (database) to store these assets. Then we use the “PopulateItemFromDB” and “PopulateRunes” functions, which contain Moralis’ methods that make querying pretty easy.
Your Web3 Role-Playing Game Database
By creating your Moralis server, you already have your database ready. This is how to access it:
Then, using the video below (16:15), you need to create a new class inside your Moralis dashboard:
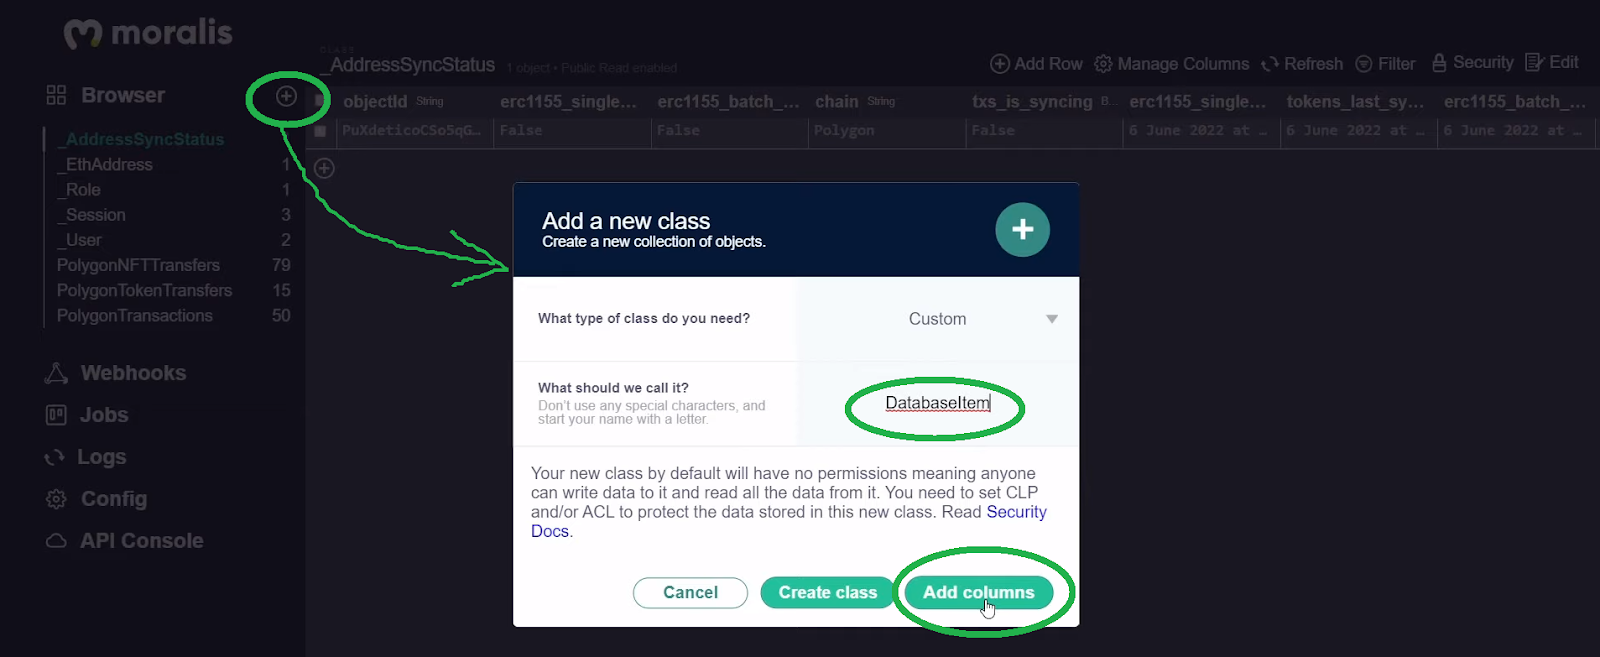
Next, you want to upload Unity assets to IPFS. However, you can take a shortcut by using the items we’ve already uploaded to IPFS. Accordingly, you can simply copy those URLs and paste them into your new class (17:45). By completing these steps, you will have “Elven Helmet”, “Carlin Sword”, and “Iron Ingot” ready. This means that if you run your instance of the Web3 role-playing game again and successfully defeat the boss, these items will appear:

Note: We decided to simplify things for you by making all the data related to runes local. As a result, you don’t need to use your database for that aspect of the game.
Smart Contracts to Get On-Chain Web3 Role-Playing Game Items
In order to get the “PickingUpItem” and “PickingUpRune” states to function, you need to deploy the proper smart contracts. Fortunately, you don’t need to be a Solidity expert to do this. Platforms such as OpenZeppelin provide you with verified smart contract templates. Then you can use Remix or Hardhat to deploy those contracts. Now, to simplify things more, you can just copy our smart contracts (“SmartContracts“). Also, as mentioned earlier, we will use Hardhat to do this. For detailed instructions, use the video below, starting at 23:11. In addition, all the commands you need are provided in the “instructions.txt” file.
Once you successfully install Hardhat and all dependencies, you can copy the code of the “GameItem” contract. Then, you’ll be able to use the “Greeter.sol” template file (26:28). Next, you will apply minor tweaks to the “sample-script.js” file. This is also where you’ll learn how to use Hardhat to verify smart contracts using PolygonScan API keys:

In addition, you will also use Moralis Speedy Nodes to obtain Mumbai endpoints:
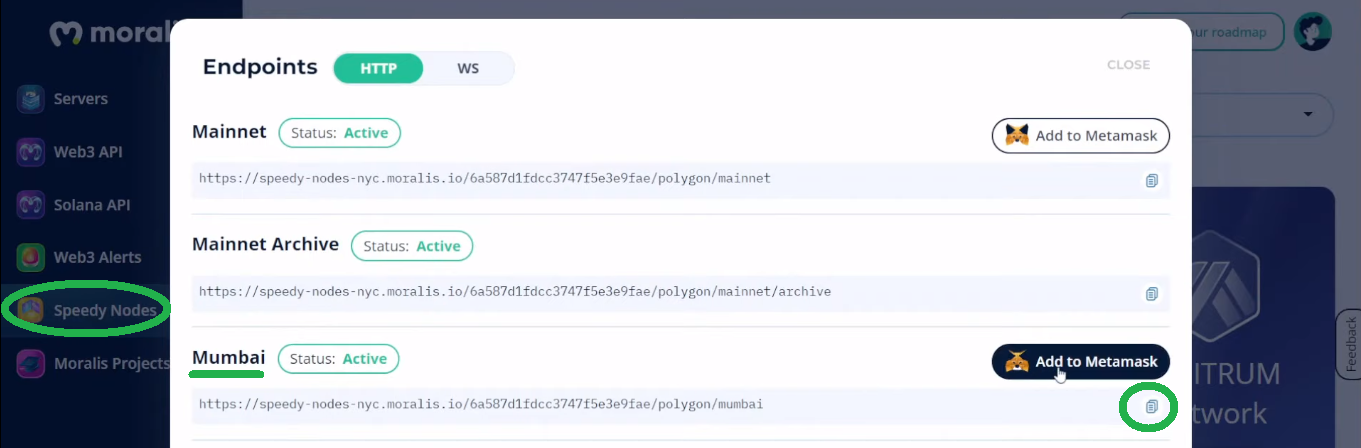
Note: To deploy your smart contracts, you’ll need some “play” MATIC. Fortunately, you can use the Mumbai testnet faucet for that purpose.
After successfully applying all the tweaks, you will be able to compile, deploy, and verify your instance of the “GameItem” contract. As such, you’ll be able to view its details on PolygonScan. Then, you’ll need to copy your contract’s address and ABI into the “GameManager” script in Unity (36:56):

Moving forward, you will repeat the above process for the second smart contract (“Rune“), which covers the transactions related to the experience points.
Minting Items and Runes as ERC Tokens
After successfully deploying both of your Web3 contracts, your instance of our Web3 role-playing game is fully functional. Now, it is beneficial to take a closer look at how the “PickingUpItem” and “PickingUpRune” scripts execute the minting process. Thus, make sure to watch the video below, starting at 42:00, for a detailed code walkthrough. Essentially, “Moralis.ExecuteContractFunction” does most of the heavy lifting in both scripts.
Retrieving On-Chain Data
If you remember the above demo, you know that once players collect the items and experience points, their inventory displays those elements. So, if you are interested in learning how our example Web3 role-playing game covers that aspect, jump to 45:51. There, you’ll see how the “Menu” script handles token balances. Again, thanks to Moralis, short lines of code get things done.
Finally, here’s the video we’ve been referencing throughout the article:
How to Build a Web3 Action Role-Playing Game – Summary
If you finished our journey herein, you know how to build a Web3 role-playing game. We started with a quick demonstration of our game example. Then, we focused on the Web3-related aspects. As such, you had a chance to follow our lead and create your own instance of an excellent Web3 action role-playing game. Along the way, you learned how to connect Unity with the Moralis SDK by creating your Moralis server and using its credentials. You also learned how to utilize your Moralis dashboard. Furthermore, you learned how to use Hardhat to work with smart contracts. Hopefully, you successfully deployed your instances of our smart contracts. If so, you got your contract addresses and ABIs, which you pasted in the “GameManager” script. The latter gave your new Web3 game full functionality. In addition, you had a chance to learn more about the code running behind the scenes.
If you enjoyed this tutorial, we encourage you to explore the Moralis YouTube channel and Moralis blog. There, you’ll find a ton of other tutorials. If Unity is your primary focus, you can learn to build an in-game Unity NFT shop, do blockchain game transactions, or build a Web3 MMORPG. However, there are many other topics you can dive into. For instance, some of our latest articles cover Ethereum NFT APIs, Polygon NFT APIs, a Binance NFT API, and a Solana NFT API. Also, we show you how to mint thousands of NFT game assets, get Solana NFT metadata, how to go about uploading Web3 Unity metadata, and everything you need to know about the Web3 frontend and blockend development. However, if you are eager to become a blockchain developer quickly and confidently, you may want to enroll in Moralis Academy.
