If you are interested in Web3 game design, you should know that NFTs play a vital role in blockchain gaming because of their many use cases. Furthermore, numerous play-to-earn (P2E) game examples prove that gamers favor the concept of truly owning in-game assets. Not only can these NFT game assets be utilized in games, but they can also generate hefty profits on NFT marketplaces. However, game studios find it challenging to manage the creation of in-game assets as NFTs on a large scale. As you can imagine, creating ten thousand or more unique tokens one at a time is neither cost-effective nor practical. Therefore, we created an asset factory script that easily lets you mint thousands of NFT game assets. Moreover, this script utilizes the Moralis API to help you save more than 85% on development time. As a result, integrating NFTs into games just became 100x easier.
A standard scenario for game studios is that they have design teams who produce all related visual assets. These include images, animation videos, 3D models, etc. All or some of these assets are what we want to mint as NFT game assets. Further, we want to use the files representing the in-game assets as metadata of in-game NFTs. A great example of this is in-game NFT characters. As such, we will focus on creating multiple characters based on different images and information. Herein, we illustrate how you can mint thousands of NFT game assets using our code. Also, we look under the hood of our script to provide you with as much context as possible. Nonetheless, to use our code, you’ll need a way to access the Moralis SDK. So, make sure to create your free Moralis account before moving forward.

Mint Thousands of NFT Game Assets Using Our Asset Factory Script
The entire code for our asset factory script awaits you on GitHub. Make sure to clone the code and open it in your favorite code editor; however, we prefer using Visual Studio Code (VSC). With the cloned code ready, you can follow along as we move forward in our “how to mint thousands of NFT game assets” journey!
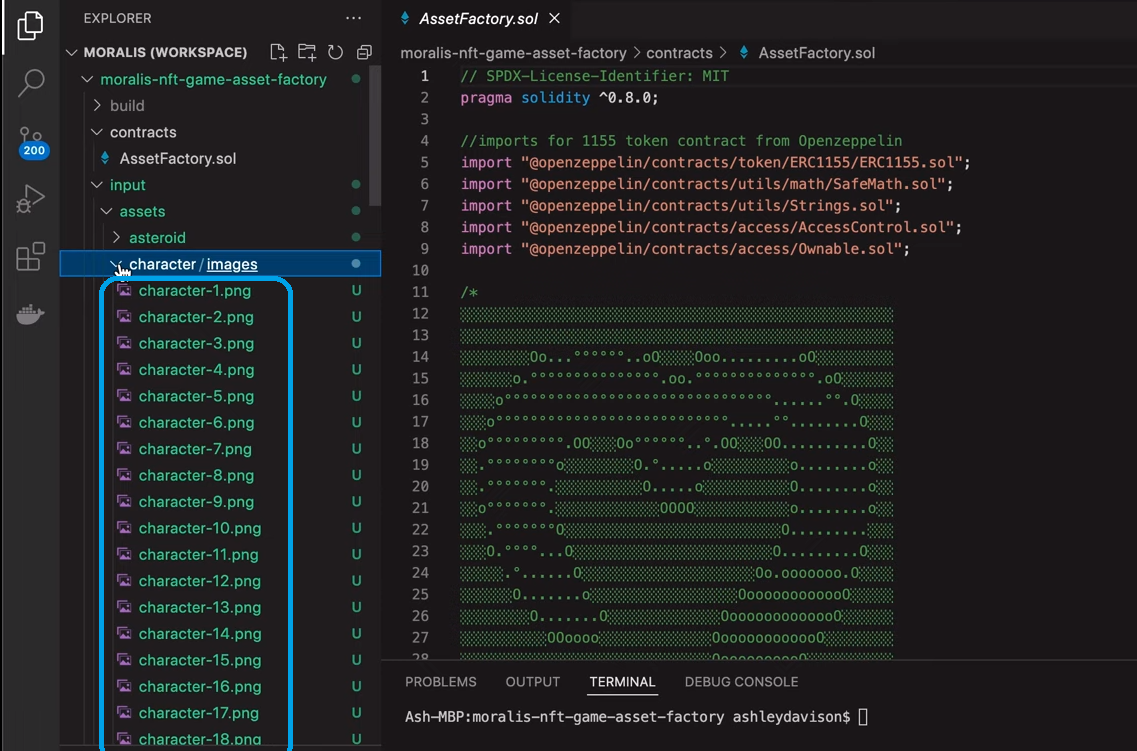
So, here is the structure of the “moralis-nft-game-asset-factory” project:

Inside the “character” folder, we have all the PNG image files, which are the visual aspect of our in-game NFTs:
In order to mint those files into NFTs, we also need to host these files somewhere. Fortunately, Moralis includes IPFS (InterPlanetary File System) integration. As such, we can upload to IPFS effortlessly. Moreover, we have created the “upload.js” file for that purpose:

Using the above-marked Moralis credentials, which are defined inside “.env”, we get to associate our media files with metadata. Then, we have that metadata associated with an NFT that corresponds to a particular character. Without using Moralis, this association would be extremely challenging and time-consuming. However, when using the infrastructure from Moralis, this “Firebase for crypto” platform makes things extremely straightforward. Our code enables you to simply dump all your media files into the “input” folder. Then, you run the “upload” script, which takes care of creating metadata linked to the on-chain NFTs. Although, prior to running the script, you need to use your Moralis account to create a Moralis dapp. That will enable you to obtain the environment variables, which you need to paste into the “.env” file:

Now, before we run the script, let’s take a closer look at the code that will ensure we randomly generate metadata for our characters.
Mint Thousands of NFT Game Assets with Automation of Information
The automation of information regarding the NFT game assets (characters in our case) is an essential aspect, especially when we want to mint thousands of NFT game assets. Hence, in order to create the metadata file (“.JSON”), we need proper code – “metadata.js“. The latter ensures that details regarding our assets, such as names or attributes, are automatically generated. We also use the “generator.js” file to plug those fields into an appropriate third-party API name generator. This approach enables us to generate thousands of pieces of unique asset data easily:
const nameGenerator = async (_type) => {
  try {
    if (_type == "asteroid") {
      const response = await Promise.all([
        fetchData(
          "https://story-shack-cdn-v2.glitch.me/generators/meteor-name-generator?count=12"
        ),
      ]);
      const name = pickRandom(response, _type);

      return `${name.name}`;
    } else {
      const response = await Promise.all([
        fetchData("https://www.randomlists.com/data/names-female.json"),
        fetchData("https://www.randomlists.com/data/names-surnames.json"),
      ]);

      const [firstNames, lastNames] = response;

      const firstName = pickRandom(firstNames.data.data, _type);
      const lastName = pickRandom(lastNames.data.data, _type);

      return `${firstName} ${lastName}`;
    }
  } catch (error) {
    console.error("Unable to generate name:", error);
  }
};
Uploading Files and Metadata to IPFS
With this information, we are able to get all the required parts (file and metadata) ready. As such, our “upload.js” file can do its trick. It first uploads the media files from the “input” folder to a single directory on IPFS via Moralis’ API:
const { compileMetadata } = require("../src/metadata");

Then the code inside the “metadata.js” returns a CID string using “tempMetadata.model_url”, “tempMetadata.animation_url”, “tempMetadata.badge_url”, “tempMetadata.evac_url”, and “tempMetadata.external_url”. Once the “metadata” script generates the metadata, it uploads it to IPFS. Hence, it returns a unique CID string for that as well:
].path = `https://gateway.moralisipfs.com/ipfs/${imageCID}/${imageDataArray[i].type}/images/${paddedHex}.png`;
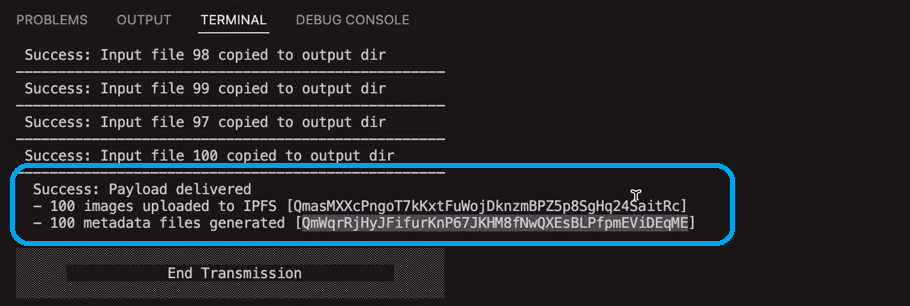
The result of all this is an immutable chain of files perfectly linked to being referenced on-chain as the core data behind our NFT game assets. So, when you have your media files ready inside your “input” folder, use the terminal in VSC to run the “upload” script:

The above short command line triggers the script, which, in return, takes care of all the hard work. In our example, we now have all one hundred images uploaded to IPFS. We also have one hundred metadata files corresponding to those images:
From Uploading to Minting Thousands of NFT Game Assets
Before we use our smart contract to mint thousands of NFT game assets (100 in our example), let’s take a look at the “assetfactory_migration.js” file:

Note: When you decide to use this asset factory, make sure to use your own details, not the details displayed in the screenshots in this tutorial.
This is the file you use to enter the details regarding your NFT game assets. These include admin or owner contract address, name of the assets, their symbols, and IPFS URIs for assets’ metadata. The form of our URIs follows the ERC-1155 standard, which usually is more suitable for batch minting NFTs. Furthermore, metadata URIs contain the CID for the previously uploaded metadata:
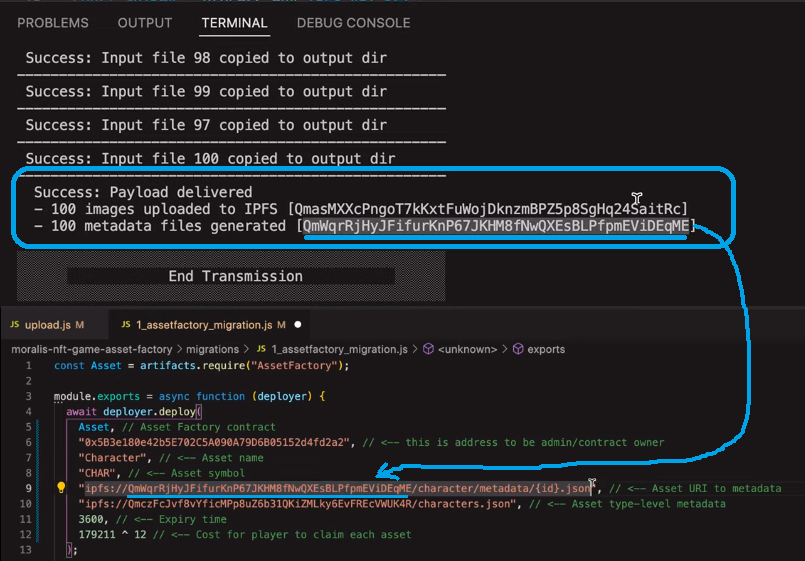
In addition, “assetfactory_migration.js” also contains the contract-level metadata. The latter contains useful information about the asset type – about characters in our case. You can upload this metadata separately to the bulk upload. Let’s also mention “expiry time”, which is the time it takes for a “whitelisting” of a particular asset to run out. Essentially, this is just a buffer to ensure a fair mint distribution on launch. Last but not least, we have the default cost that needs to be transferred when a player claims their NFT game assets (characters in our case). Ultimately, the “assetfactory_migration.js” file is set to build our Web3 contract, which is our next step.
Build the “AssetFactory” Smart Contract
Note: Before we move any further, we should let you know that we have a separate tutorial explaining how to develop smart contracts like a pro. This is also where we guide you through the process of installing Truffle for VSC. If you want to build the “AssetFactory” with a click of a button (see below), make sure to complete the required setup.
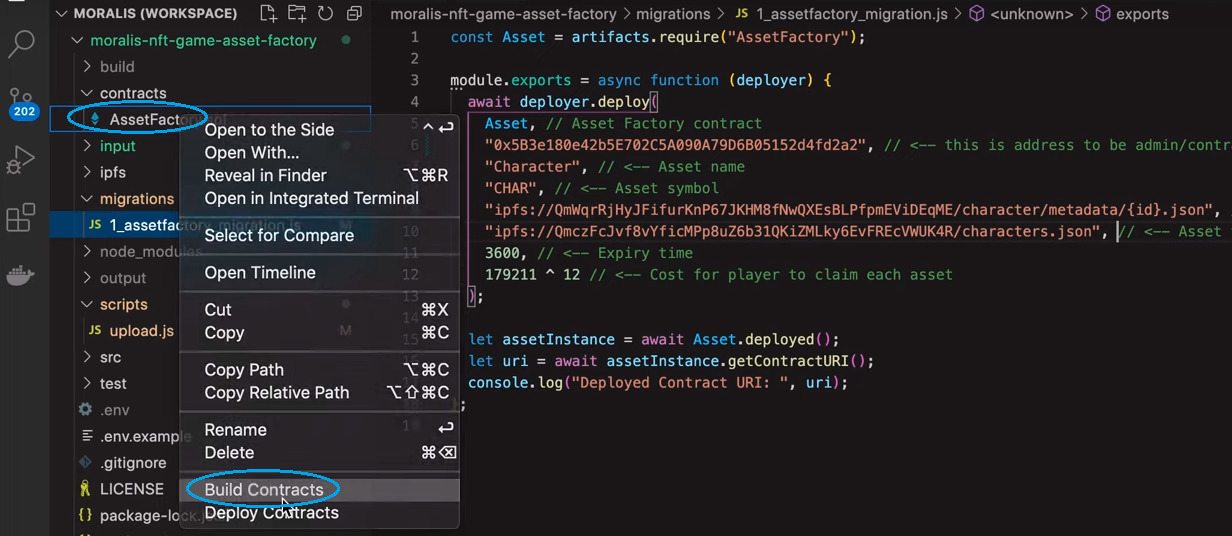
If you have Truffle for VSC set in place, you only need to hover over “AssetFactory.sol”, right-click, and select “Build Contracts”:
Once the contract is built, we need to deploy it. For that purpose, we use the Moralis Speedy Nodes service for the Polygon testnet (Mumbai). This is where “truffle-config.js” enters the scene:

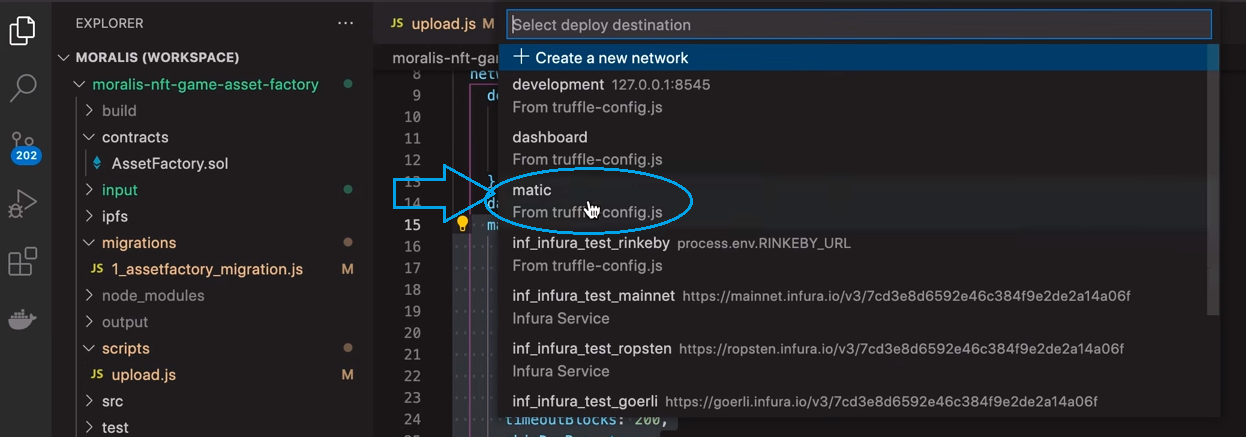
Inside that file, you can see the MATIC network (Polygon) already configured. As such, we can exploit the shortcut offered by “Truffle for VSC”. Hence, we right-click on “AssetFactory.sol”, but this time, we go with the “Deploy Contracts” option:

Next, you’ll see a pop-up window where you need to select the network. As mentioned above, we are going with the Mumbai testnet. Accordingly, we select MATIC:
Once the smart contract is deployed, you are ready to mint thousands of NFT game assets. As part of the batch minting of our characters, we’d be assigning our hosted metadata to token IDs. The latter can then be owned and transferred by players.
Below is a video tutorial showing you how to mint thousands of NFT game assets. It covers the same steps as presented above but in more detail:
Getting Started with Moralis
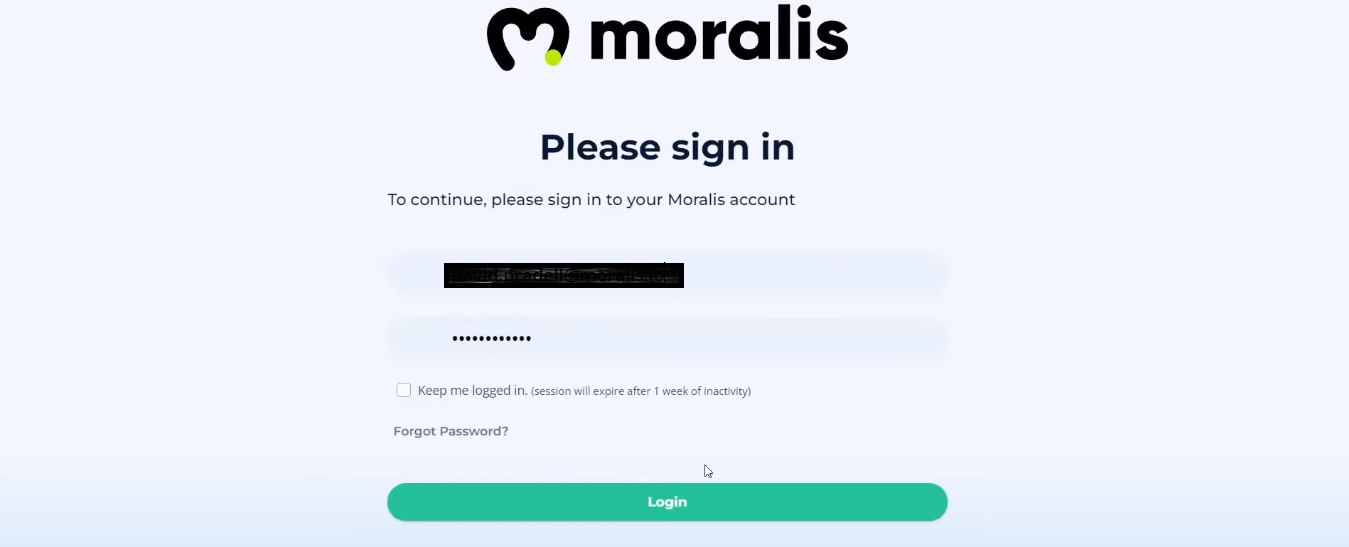
As mentioned in the introduction and pointed out during the above tutorial, you need your own Moralis account to mint thousands of NFT game assets using our asset factory. As such, we are adding this section to help you get started with Moralis – the ultimate Web3 backend platform. To get started, create your free Moralis account. If you already have your account ready, use your credentials to log in:
As far as the above tutorial goes, you will need a server and access to Moralis Speedy Nodes. Fortunately, the latter is automatically granted to you once you’ve created your account:

However, as far as your Moralis server goes, you need to create it. As such, navigate to the “Servers” section of your Moralis admin area. If this is your first time using Moralis, the on-screen guide will tell you what to do:
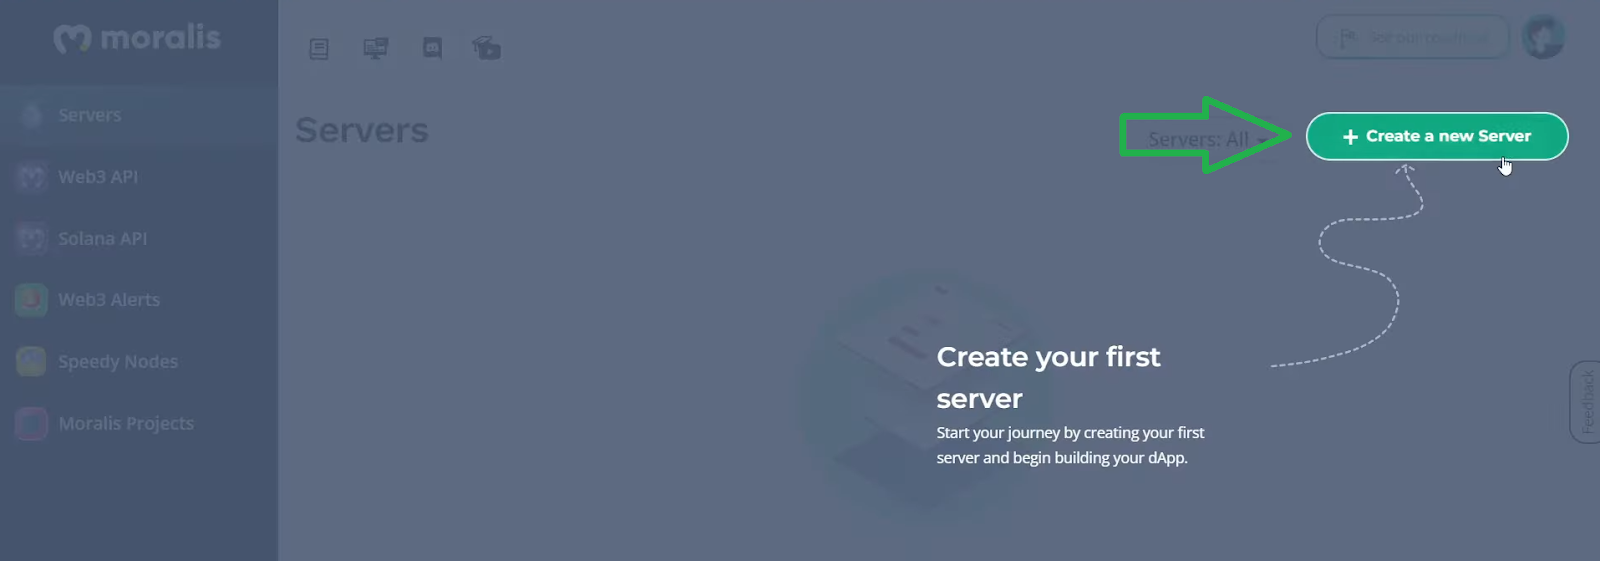
After clicking on the “+ Create a new Server” button, you need to choose a proper server type:
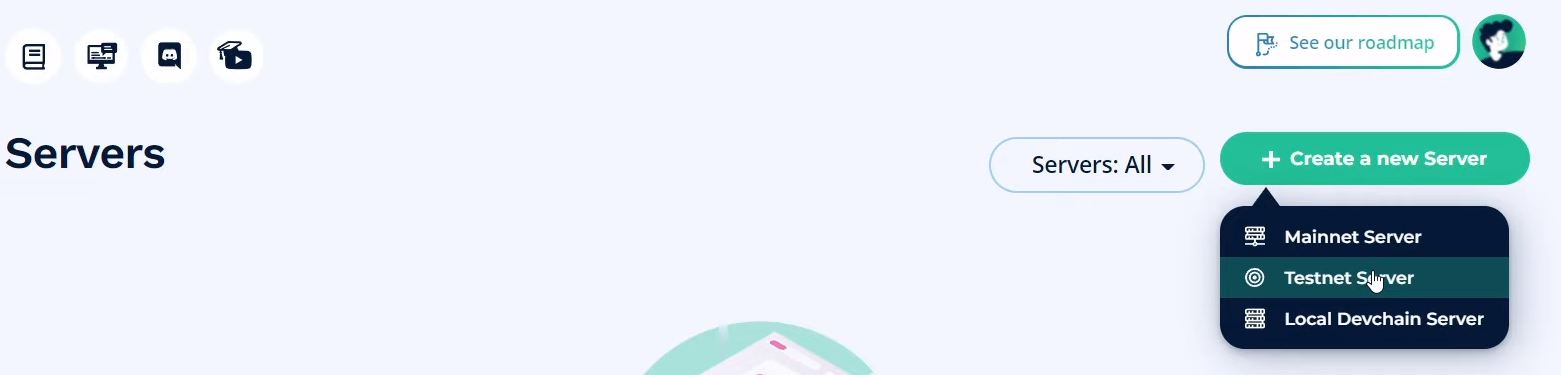
Here, we suggest you follow the practice of using testnet servers when developing example projects and testing phases of your dapps. Hence, select “Testnet Server”. Next, a new pop-up window will ask you to enter some details:
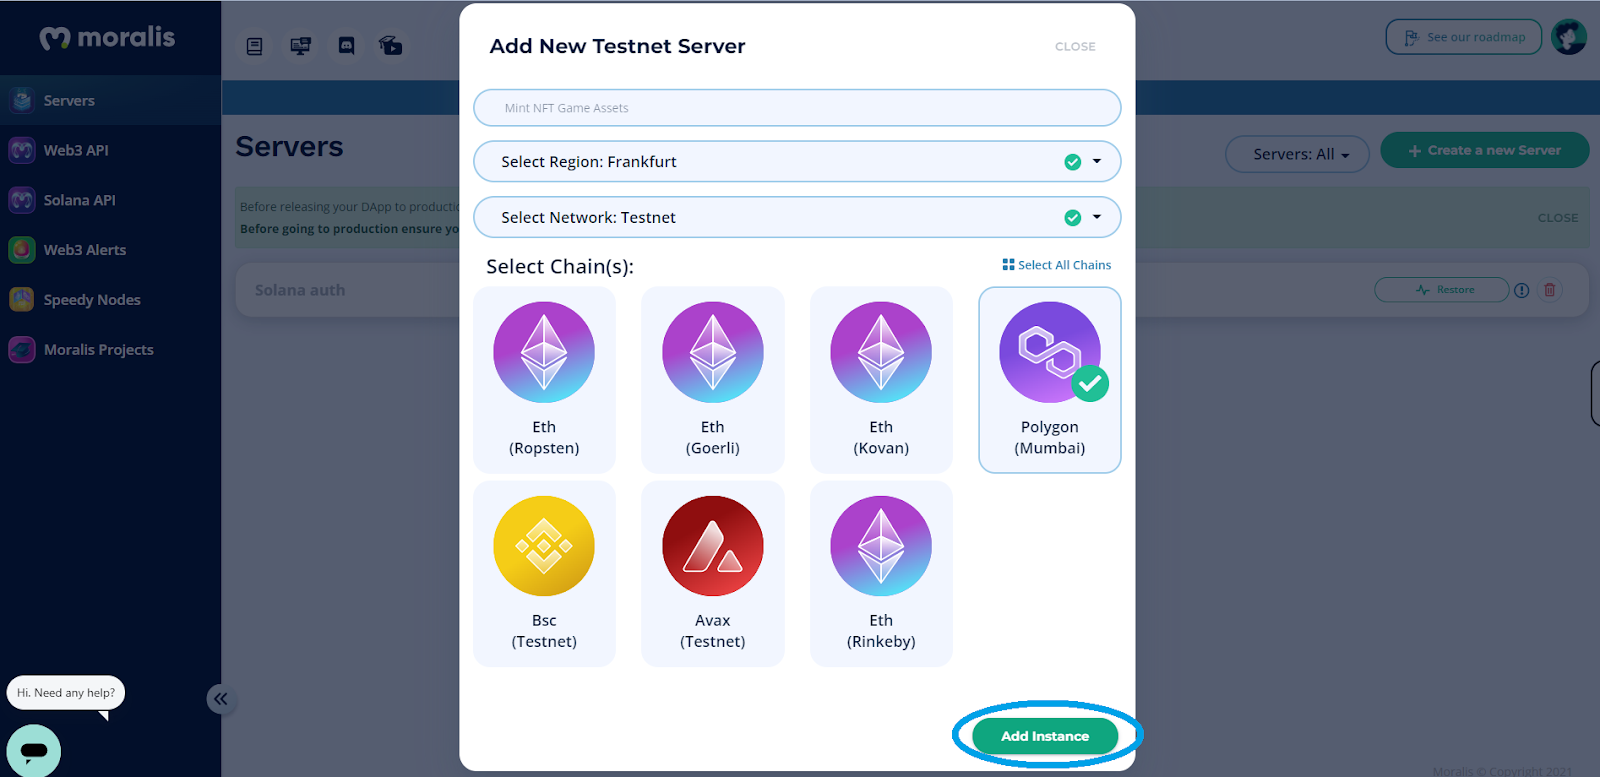
At the top, you need to enter your server’s name (it can be anything you want). Also, you need to select the city closest to your location. Next, select one of the available chains. Choose between Ethereum testnets and several other EVM-compatible networks. Nonetheless, spin up your server by clicking on the “Add Instance” button. Once your server is up and running, use the “View Details” button to access all the details:

Finally, you’ll be able to copy the server URL, application ID, and other details:

How to Mint Thousands of NFT Game Assets – Summary
Did you pay close attention to the above sections? If so, you now know how to mint thousands of NFT game assets. You can accomplish this without breaking a sweat with the right tools, namely Moralis and Truffle for VSC. Of course, you need to thank one of Moralis’ experts for creating the “asset factory” project, which awaits you on GitHub. You get to clone the code, enter your details, and deploy your instance of our smart contract. Moreover, now you are ready to focus on the frontend aspect of the “mint thousands of NFT game assets” quest. Hence, you ought to explore Unity Web3 programming. For instance, you can start by connecting a Unity game with Web3 login, doing blockchain game transactions, or even creating your own instance of a Web3 MMORPG. However, if you prefer to utilize your JavaScript skills, you can build a 2D Web3 game.
If you are serious about becoming a Web3 developer, you need to practice. This is where our tutorials and example projects can help you level up your programming skills. Make sure to visit the Moralis YouTube channel and the Moralis blog. Aside from follow-along tutorials, these outlets also provide explanations of various blockchain development topics. As such, they may serve as your free and ongoing crypto education. For instance, some of the latest topics focus on Web3 frontend aspects, how to upload Unity assets to IPFS, dapp development, creating a crypto sentiment dapp, blockend development, and how to authenticate Solana users with Phantom wallet, just to name a few. However, if you want to become a blockchain developer sooner rather than later, you need to consider taking a more professional approach. This is where Moralis Academy can be your game-changer!
