Would you like to know how next-gen Unity developers are uploading Web3 Unity metadata? If so, you’ve come to the right place. Although we are now in a “Web2 and Web3” hybrid era, the trend is clearly towards increased adoption of Web3. This includes incorporating decentralized elements and features in every way possible to create truly decentralized apps. This includes assets and how we, as developers, handle them in our Web3 game design. Also, when creating games via Unity Web3 programming, we must utilize non-centralized tools when uploading Web3 Unity metadata. We can accomplish this if we upload Unity assets to IPFS (a decentralized storing protocol). If your answer is “yes” to the question stated at the outset of this article, read on!
Herein, we will focus on our “Unity IPFS uploader” dapp (decentralized application). First, you’ll get to see a quick demo of the dapp. Then, we’ll show you what you need to do to use our dapp for your Web3 Unity metadata uploading purposes. We will also guide you through the initial Moralis setup process. The latter will be your gateway to the “upload to IPFS” feature. In addition, for a deeper understanding, we will walk you through the code powering our “uploader” dapp. Now, if this is your first time hearing about Moralis, you’ll get to learn more about its platform as we move on. You’ll learn what makes it the ultimate Web3 backend platform and how it can help you save up to 87% of development time. Nonetheless, create your free Moralis account now, as you’ll need it to upload Web3 Unity metadata.

Uploading Web3 Unity Metadata and Assets to IPFS – Demo
Knowing how our dapp works will help you decide whether or not you want to use it yourself. Hence, we are starting the “Web3 Unity metadata” topic with a quick and simple demonstration:
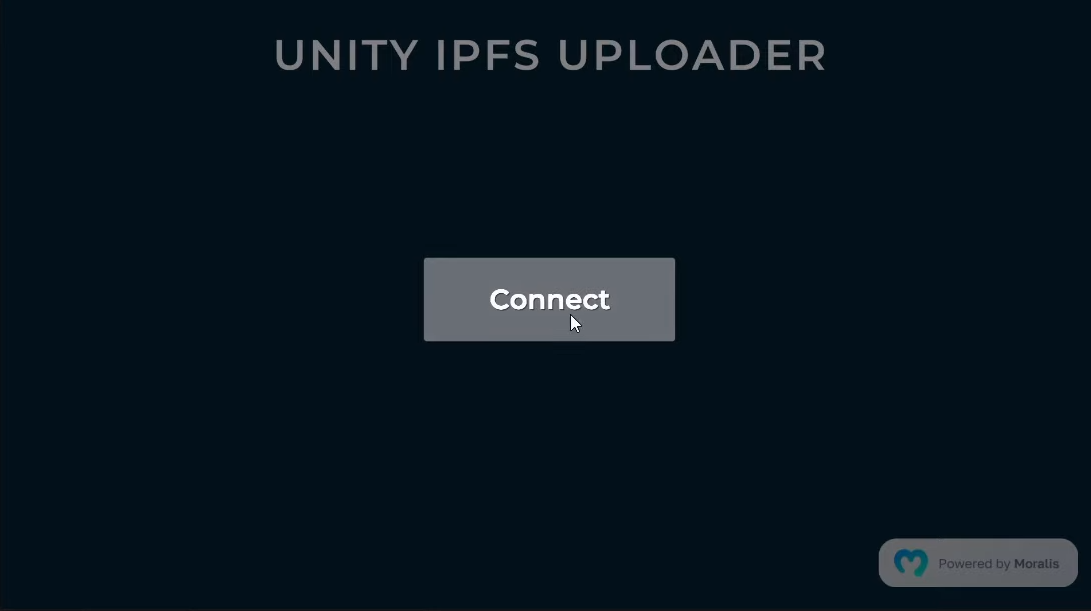
The above is a screenshot of our “Unity IPFS uploader” dapp’s initial screen. As clearly indicated, users must first connect their Web3 wallets by clicking on the “Connect” button. After doing so, the dapp displays a QR code that users need to scan using their crypto wallets:
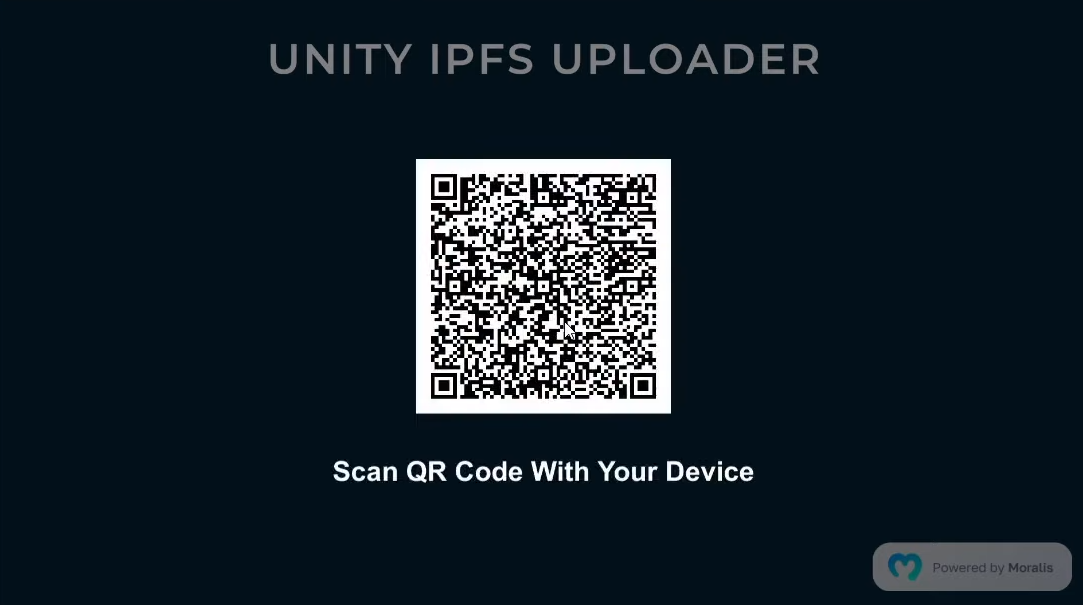
Since most users still prefer to authenticate with MetaMask, our demo focuses on using MetaMask. However, this is done with a mobile device, which you can’t see in the screenshots. After scanning the code, the “Signing With Your Wallet” message appears on the screen, which indicates the Web3 login process:

Next, users must confirm their Web3 authentication inside their wallets by “signing” the confirmation message. As soon as they click on the “Sign” button on their mobile devices, they see the core of our dapp:

The above screenshot shows the interface designed to upload Web3 Unity metadata and assets to IPFS. As such, let’s see how to do just that on an image example file.
Uploading Files and Their Metadata
Looking at the screenshot above, you can see the “Disconnect” button in the top-right corner. This is where users need to click once they want to sign (disconnect their crypto wallet). On the other hand, if we focus on uploading a file to IPFS, two buttons do the trick: “select” and “upload”. Obviously, before users can upload a file, they need to select it. As such, they need to click on the “select” button, which brings up a pop-up window:

Note: We built our example dapp with a focus on image files (PNG). However, you can use the same dapp to upload other types of files and their metadata to IPFS.
As the above screenshot demonstrates, users need to click on an image to select it and then use the “Open” button. Once the file has been selected, our dapp collects its details. Moreover, it also generates a preview of the file (sprite) under the “select” button:

Nonetheless, the upload button is locked until users enter the file’s name and description. However, as soon as users enter the file’s details, they can use the “upload” button. By doing so, the mechanism of our dapp uploads the file to IPFS. It also creates that file’s web Unity metadata, which comes in the form of a “.JSON” file. Furthermore, the dapp also stores that metadata to IPFS and provides users with assets’ URLs. Hence, users can view the upload file and its metadata in a browser:
- Web3 Unity metadata:

- Image file:

Note: Those of you who prefer demonstrations in the form of videos can view the clip below in this article.

Uploading Web3 Unity Metadata with Moralis
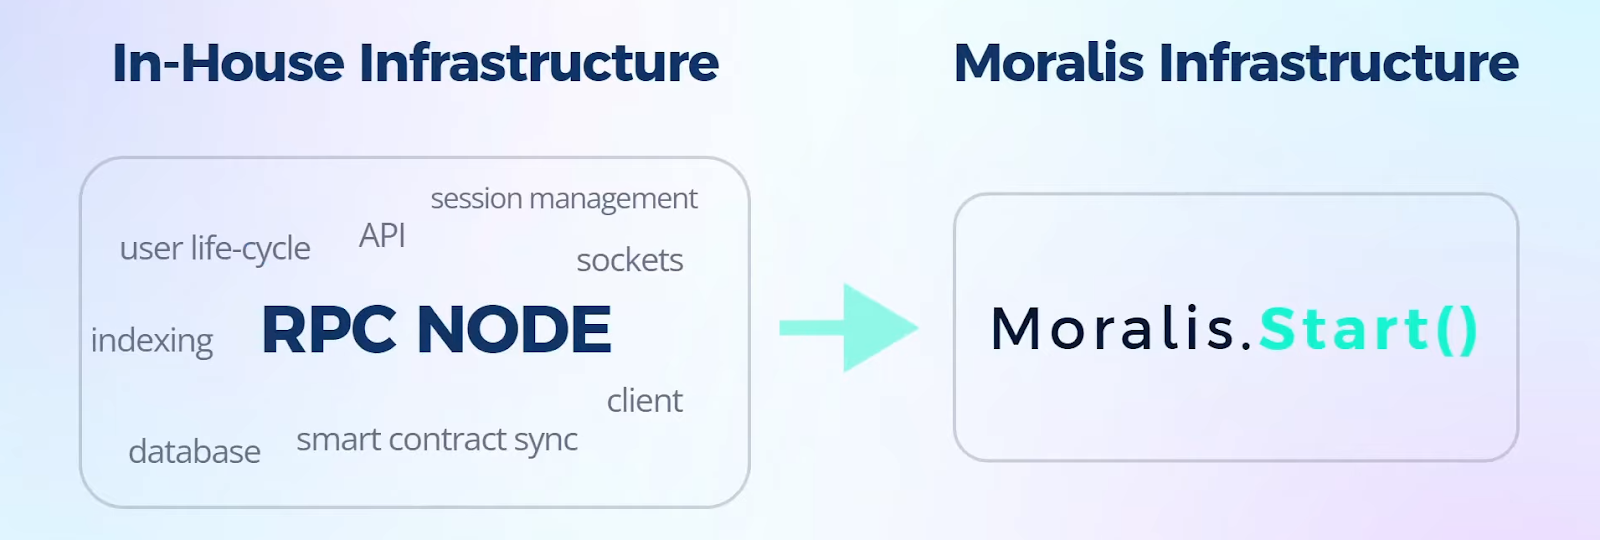
As we move forward, we will show you how to set things up to use the above-presented dapp and upload Web3 Unity metadata to IPFS. Also, this is where we will use Moralis. This pinnacle of the current Web3 tech stack is what enables frontend developers to create killer dapps with ease. Moreover, this “Firebase for crypto” platform takes all the limitations of RPC nodes out of the picture.
Moralis offers a single workflow that makes blockchain programming as simple as possible. The process normally starts with Web3 authentication, and this is where Moralis offers several options. Using short snippets of code, you can even do Web3 authentication via email or implement Web3 social login. As a result, you can boost your Web3 user onboarding and even start to explore Web3 without MetaMask. In addition, Moralis establishes sessions and creates identity profiles for authenticated users. It stores these pieces of information in a real-time on-chain database (Moralis dashboard). With the help of this database, you get to index the blockchain effortlessly. At the same time, you may use the Moralis dashboard to store off-chain data as well.

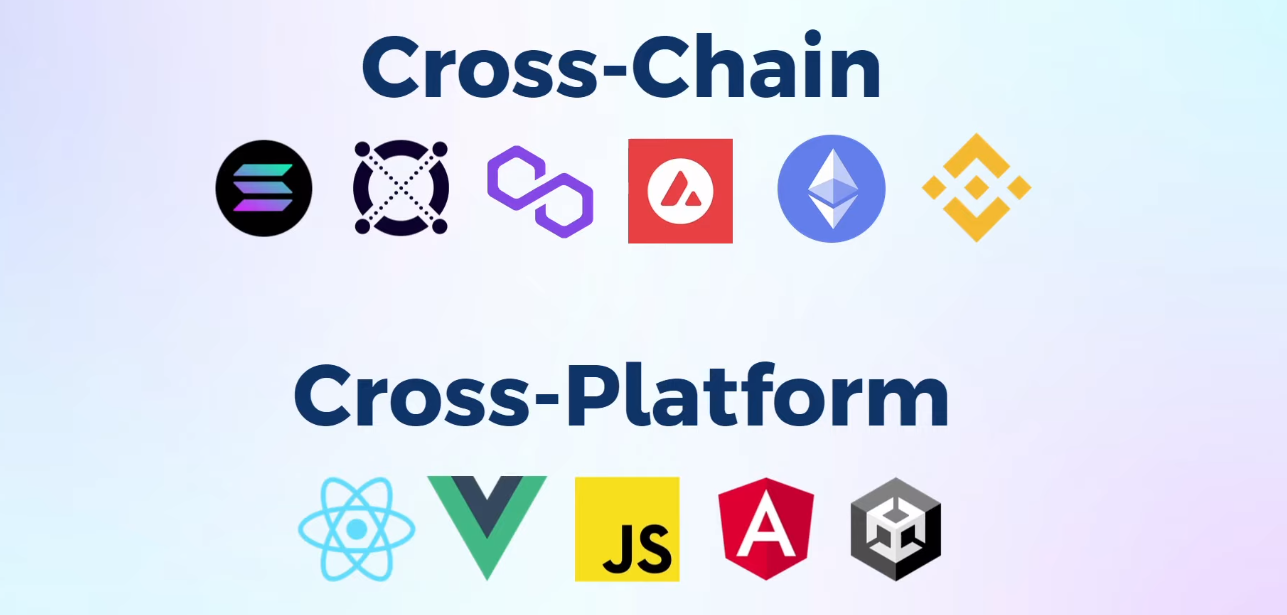
On top of that, you also get to sync and index smart contract events using Moralis’ “Sync” feature. In addition, Moralis provides you with the ultimate Web3 SDK and powerful APIs, including the Ethereum API and NFT API. As such, you get to communicate with that database easily. You should also note that Moralis offers cross-chain and cross-platform interoperability. This gives you a chance to use your favorite platforms and expand your reach across multiple networks. The latter also future-proofs your work since you are not limited to any single blockchain.
Web3 Unity Metadata Uploading Solution – Use Our Example Dapp
Our example dapp awaits you on GitHub. So, start by downloading the project and open it with Unity. As soon as you do this, you’ll see the “Moralis Web3 Setup” panel:
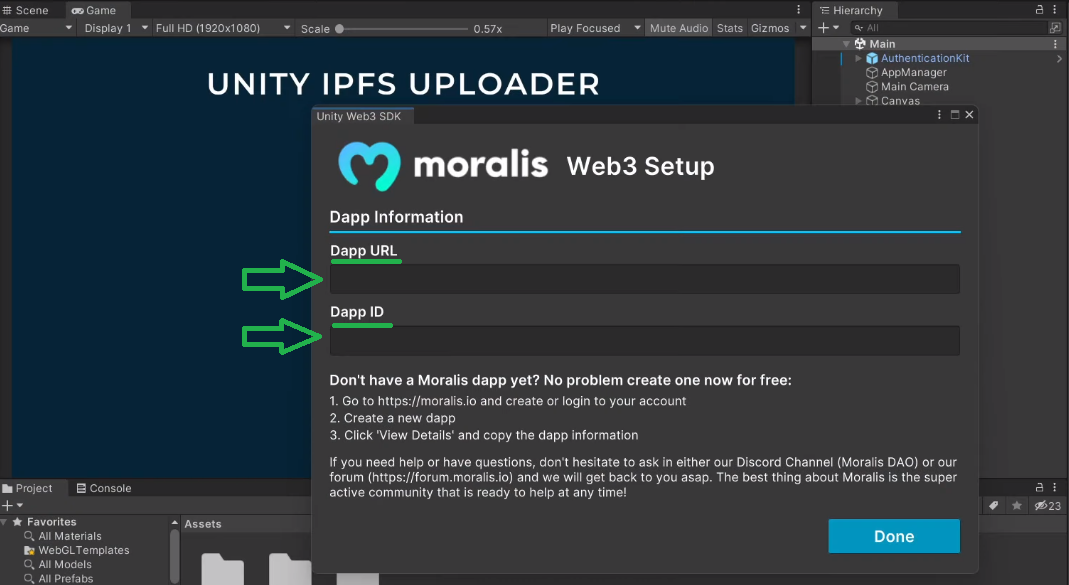
The above screenshot shows you that the panel comes with instructions. These include the following core steps:
- Creating your new Moralis account or logging in to your existing account.
- Creating a Moralis dapp. This is where you create a Moralis server.
- Copying your active server’s details (server URL and app ID) into the above panel.
We decided to “take you by the hand” and walk you through the above steps to make things as straightforward as possible.
Getting Started with Moralis
In case you haven’t done so yet, create your free Moralis account or use your credentials to log in to your account:

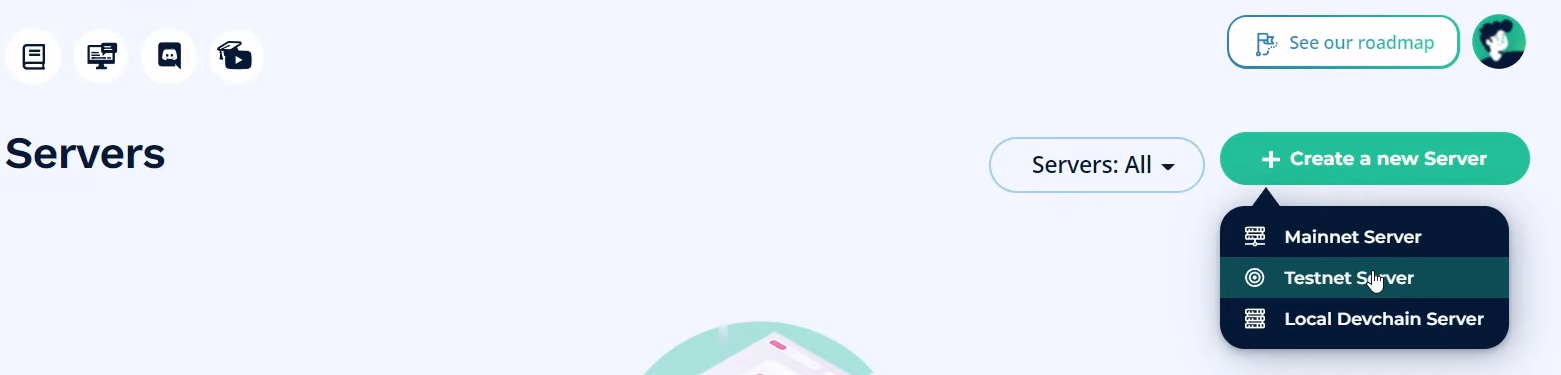
The “Servers” section of your Moralis admin area will enable you to create a new server. In case this is not your first rodeo with Moralis, the on-screen guide will point you in the right direction:

Next, you’ll need to choose your server type:
When working on example projects or testing dapps, the “Testnet Server” option should be your focus. Then, you’ll need to enter your server’s details:

Start by entering a name (this can be anything you want). Next, select the region closest to your location. Then, select a chain you want to focus on. Among the testnets, you have Ethereum testnets and several other EVM-compatible networks (see the image above). Finally, start your server by clicking on “Add Instance”. Once your server is live, you get to access its details via the “View Details” button:

From a new pop-up window, copy the server URL and app ID:

Then paste the above-copied details into the “Moralis Web3 Setup” panel and click on “Done”:

Initiate Your Instance of the Unity IPFS Uploader Dapp
If you’ve completed the above initial setup as instructed, you can now use our dapp. Hence, click on the play icon:
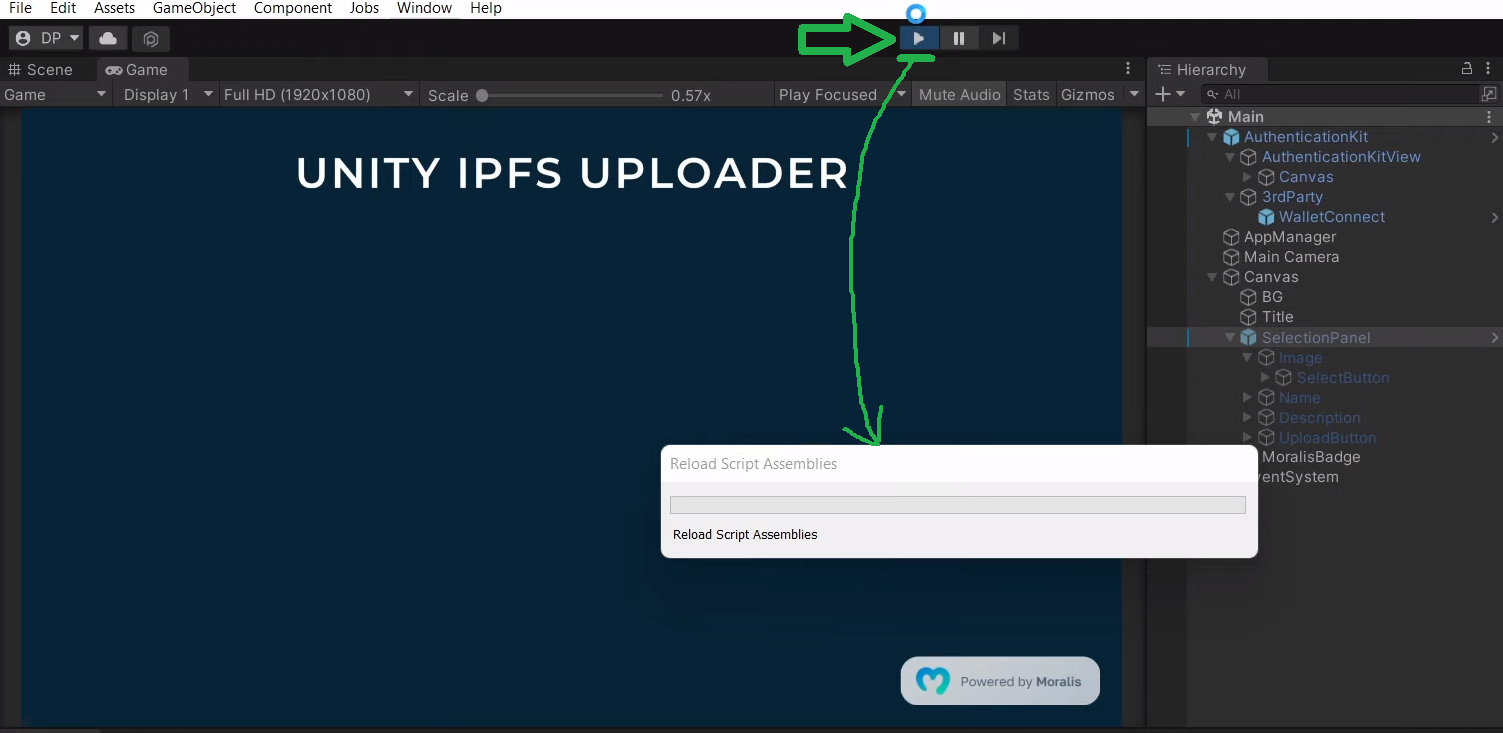
Once the reloading is done, you will see the “Connect” button. If you remember our demo, this is where it all started. Thus, you already know how to use the “Unity IPFS uploader” dapp to upload Web3 Unity metadata and files to IPFS.

Uploading Web3 Unity Metadata – Code Walkthrough
There are two core aspects to our dapp’s functionality: selecting a file and uploading the selected file to IPFS. We will take a look at the scripts that power each of these two functions. By doing so, you’ll have a chance to learn how our dapp selects PNG files via the native Windows file browser. Furthermore, you get to see the beauty of using the Moralis SDK. After all, it is the power of Moralis that makes uploading Web3 Unity metadata as straightforward as possible.
“SelectionPanel” Script
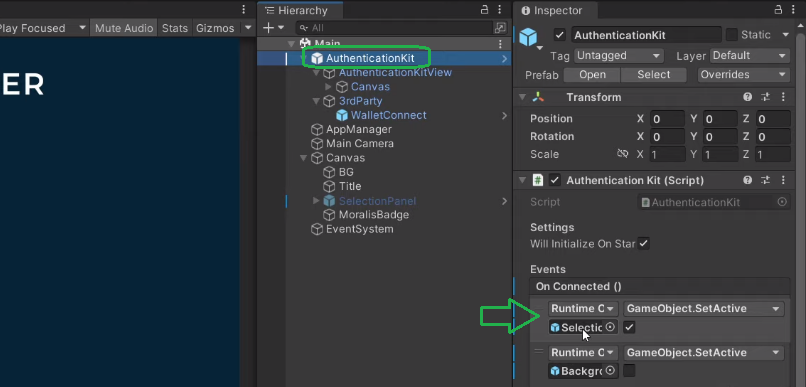
Looking at our project’s hierarchy, you can see the “SelectPanel” object inside “Canvas”:
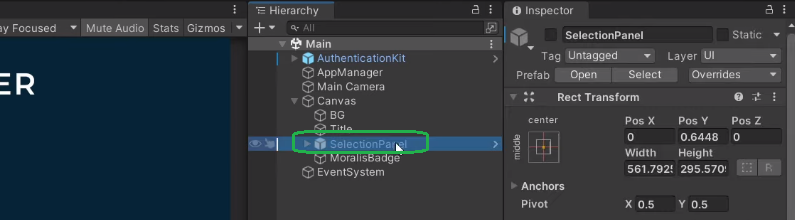
It is this object that takes care of selecting images. Moreover, “SelectionPanel” is automatically activated when users log in successfully. The latter is set within “AuthenticationKit”:
If we now focus our attention on the “SelectionPanel” script, we must point out the “SelectImage()” function. Once users click on the “select” button, this function carries the most significant role. Essential, the “SelectImage()” function opens the native Windows file browser via the “OpenFilePanel” method:
_imagePath = EditorUtility.OpenFilePanel(“Select a PNG”, “”, “png”);
Note: The above line of code is where you’d need to apply the necessary change to use our dapp for other types of files.
Once users select a file, the “SelectImage” function uses the file’s path, reads all its bytes, and returns the image data. Then, it creates a sprite from that image data by using “LoadImage”.
“AppManager” Script
The next step is uploading the sprite, entering “OnUploadButtonPressed()” (within the “SelectionPanel” script):
        public void OnUploadButtonPressed()
        {
            if (image.sprite == null || nameInput.text == string.Empty || descriptionInput.text == string.Empty)
            {
                Debug.Log("All fields (image, name and description) need to be filled");
                return;
            }

            UploadButtonPressed?.Invoke(nameInput.text, descriptionInput.text, _imagePath, _imageData);
            uploadButton.interactable = false;
        }
The above lines of code show that the “Upload” button only works when all three conditions have been met. It becomes active only after users select an image (created a sprite) and enter their file’s name and description. The “AppManager” script takes things over only if all the conditions are met. The script includes the “UploadToIpfs” function, which does most of the heavy lifting. This function takes the file’s details and saves the file to IPFS. It first uses “SaveImageToIpfs” to upload the image file:
List<IpfsFile> resp = await Moralis.GetClient().Web3Api.Storage.UploadFolder(requests);
Looking at the line of code above, you can see the power of Moralis. Thanks to its “UploadFolder” method, a single line of code uploads the image to IPFS. Finally, “AppManager” also ensures that the uploaded file’s metadata is created (“BuildMetadata”). Then, it leaves it up to “SaveToIpfs” to upload the Web3 Unity metadata file (“.JSON”) to IPFS. Last but not least, “AppManager” also resets the upload button via the “ResetUploadButton” function. This prevents users from uploading the same files multiple times.
If you are more of a video person, make sure to watch this tutorial of our “uploader” dapp:
Uploading Web3 Unity Metadata – Summary
By making your way through this article, you had a chance to learn how to easily upload Web3 Unity metadata to IPFS. Also, if you followed the above instructions, you now have your own instance of our “Unity IPFS uploader” dapp. If so, you must have completed the initial Moralis setup, which means you are all set to tackle some example projects. If creating Web3 games is your cup of tea, we recommend using our Unity tutorials. As such, you may go about connecting a Unity game with Web3 login, learn how to connect a Unity app to a Web3 wallet, or even build a Web3 MMORPG. On the other hand, you may prefer to use your JavaScript (JS) proficiency. In that case, you may want to build an excellent 2D Web3 game or focus on other dapps using React.
You can access our full scope of tutorials and articles on the Moralis YouTube channel and the Moralis blog. Some of the latest topics include a dapp development tutorial, a crypto sentiment dapp, blockend development, how to authenticate Solana users with Phantom wallet, and creating an on-chain inventory system. Moreover, these two outlets may also serve as your free and continuous crypto education. However, if you are eager to become a Web3 developer markedly quicker and with confidence, you should consider a more professional approach. That is exactly what Moralis Academy offers. Aside from top-notch blockchain development courses, you’ll get a personalized study path and expert mentorship. Last but not least, you will also become a part of one of the most advancing and welcoming communities in the industry.

