Did you know that augmented reality was invented already in 1968? However, it wasn’t until 1990 that the term “augmented reality” was coined. Though, this exciting technology really started to be more widely used in the past couple of years. Despite this, most augmented reality applications are still running on centralized Web2 technologies. And, since we believe in a decentralized future, we’ve decided to show you how to easily create a Web3 augmented reality dapp (decentralized application). With the right Web3 tech stack, you can use Unity for your Web3 augmented reality feats. That’s possible thanks to Moralis, the ultimate Web3 development platform Moralis. This Firebase for crypto offers a highly straightforward way to equip your Unity applications with Web3 functionalities. As such, you get to implement Web3 authentication in minutes. Furthermore, the Moralis’ SDK also enables you to easily handle on-chain events and create an on-chain inventory system.
In our opinion, Web3 augmented reality has a lot to offer. There’s something pretty cool about implementing virtual objects into the real world. And, of course, the true ownership that Web3 introduces, adds a lot of value to users. The latter can be quite easily done by incorporating non-fungible tokens (NFTs). Sure, if you are new to dapp development, creating your own Web3 augmented reality (AR) dapp may sound super tricky. However, herein you’ll have a chance to build your own AR NFT loot box in about one hour. Moreover, even if you are relatively new to Unity, you should have no problem completing this example project. Furthermore, along the way, you’ll learn how to utilize the best Web3 backend platform. In addition, you will also get familiar with the Solidity basics and Hardhat. So, just make sure to create your free Moralis account and follow our lead.

Web3 Augmented Reality Unity Dapp – Demo
Before we invite you to roll up your sleeves and build your own instance of our Web3 augmented reality dapp, we want to make sure you know what to expect moving forward. As such, let’s start with a quick demo of our example AR dapp. So, here’s the initial screen of our Android dapp:
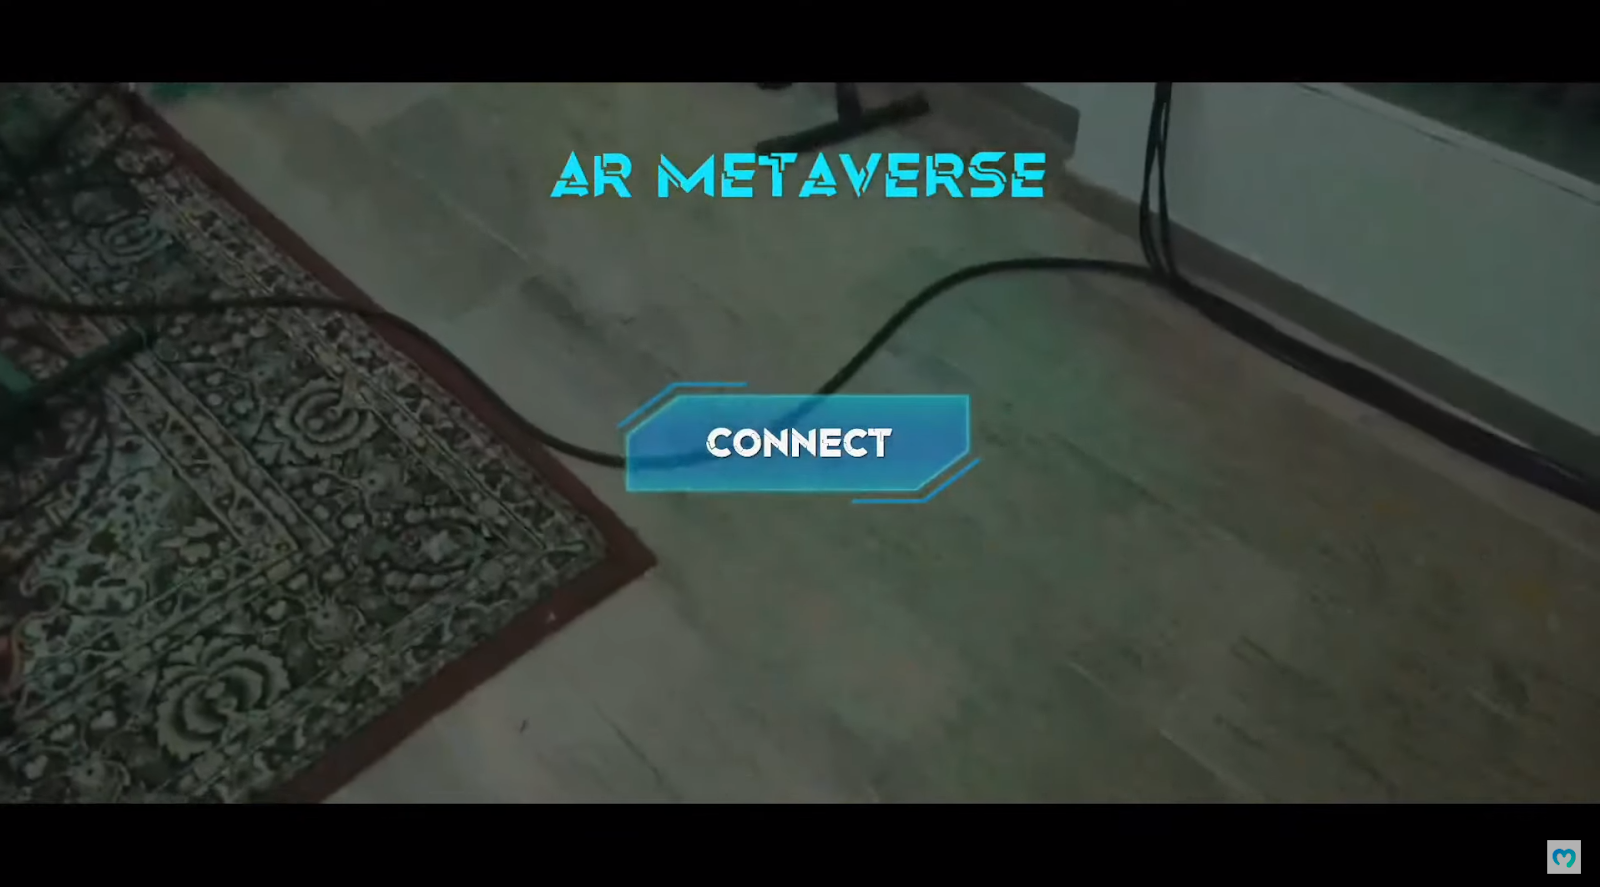
As you can see in the screenshot above, the users need to tap the “connect” button to start. By doing so, our example dapp automatically connects with users’ Web3 wallets:
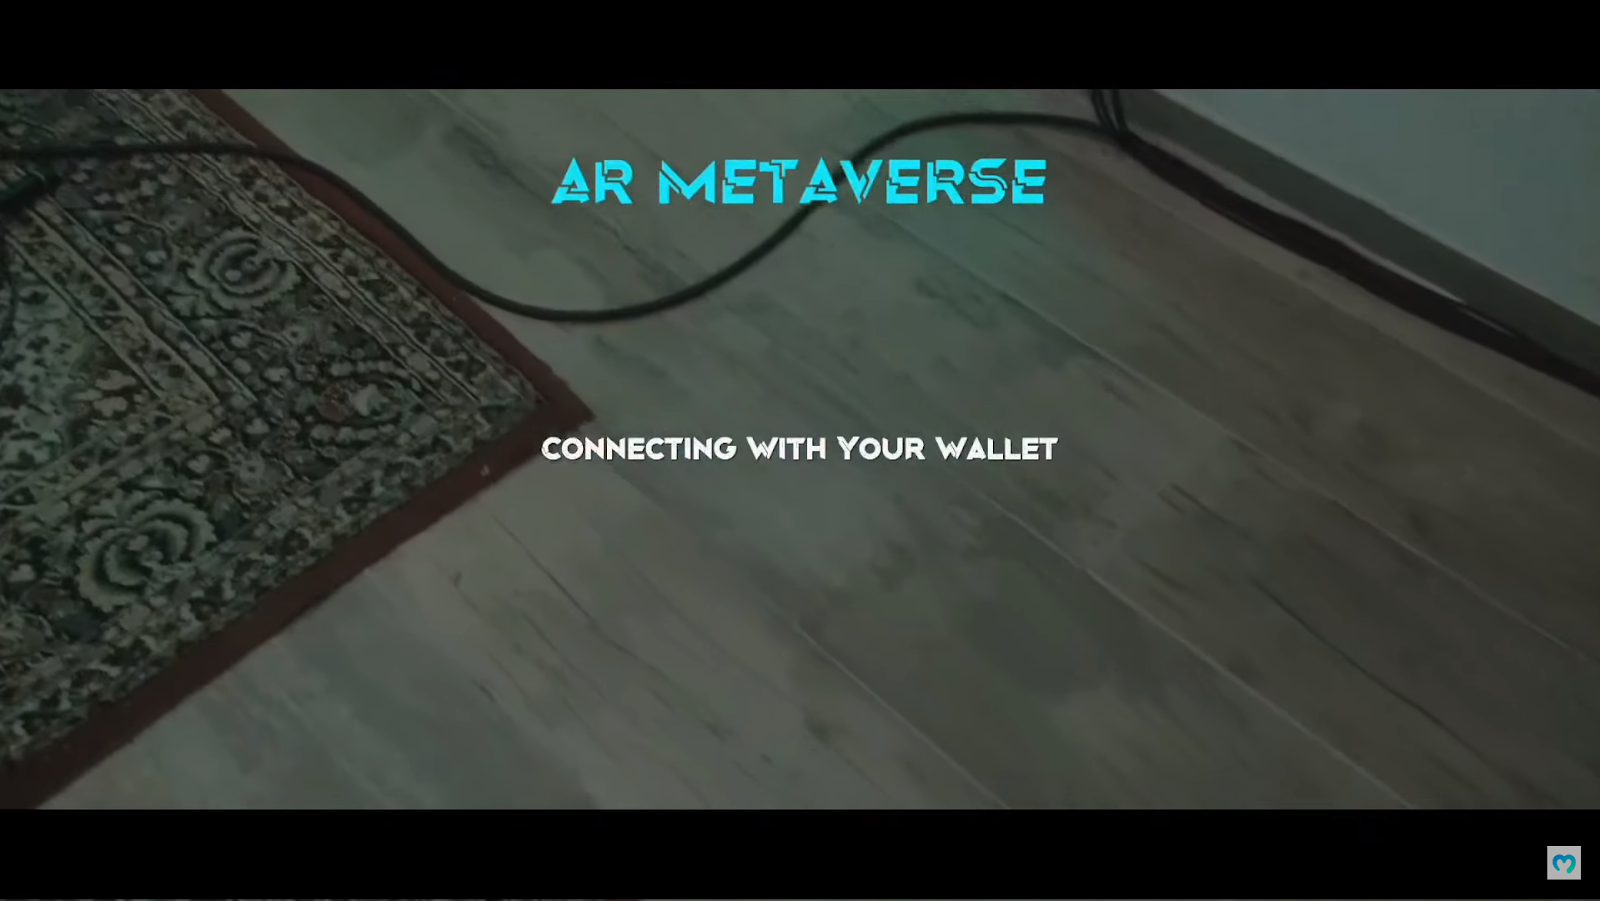
Of course, users need to confirm the connection inside their crypto wallets to proceed. Once users complete their Web3 login, they see the real world on their screens via their smartphones’ cameras:
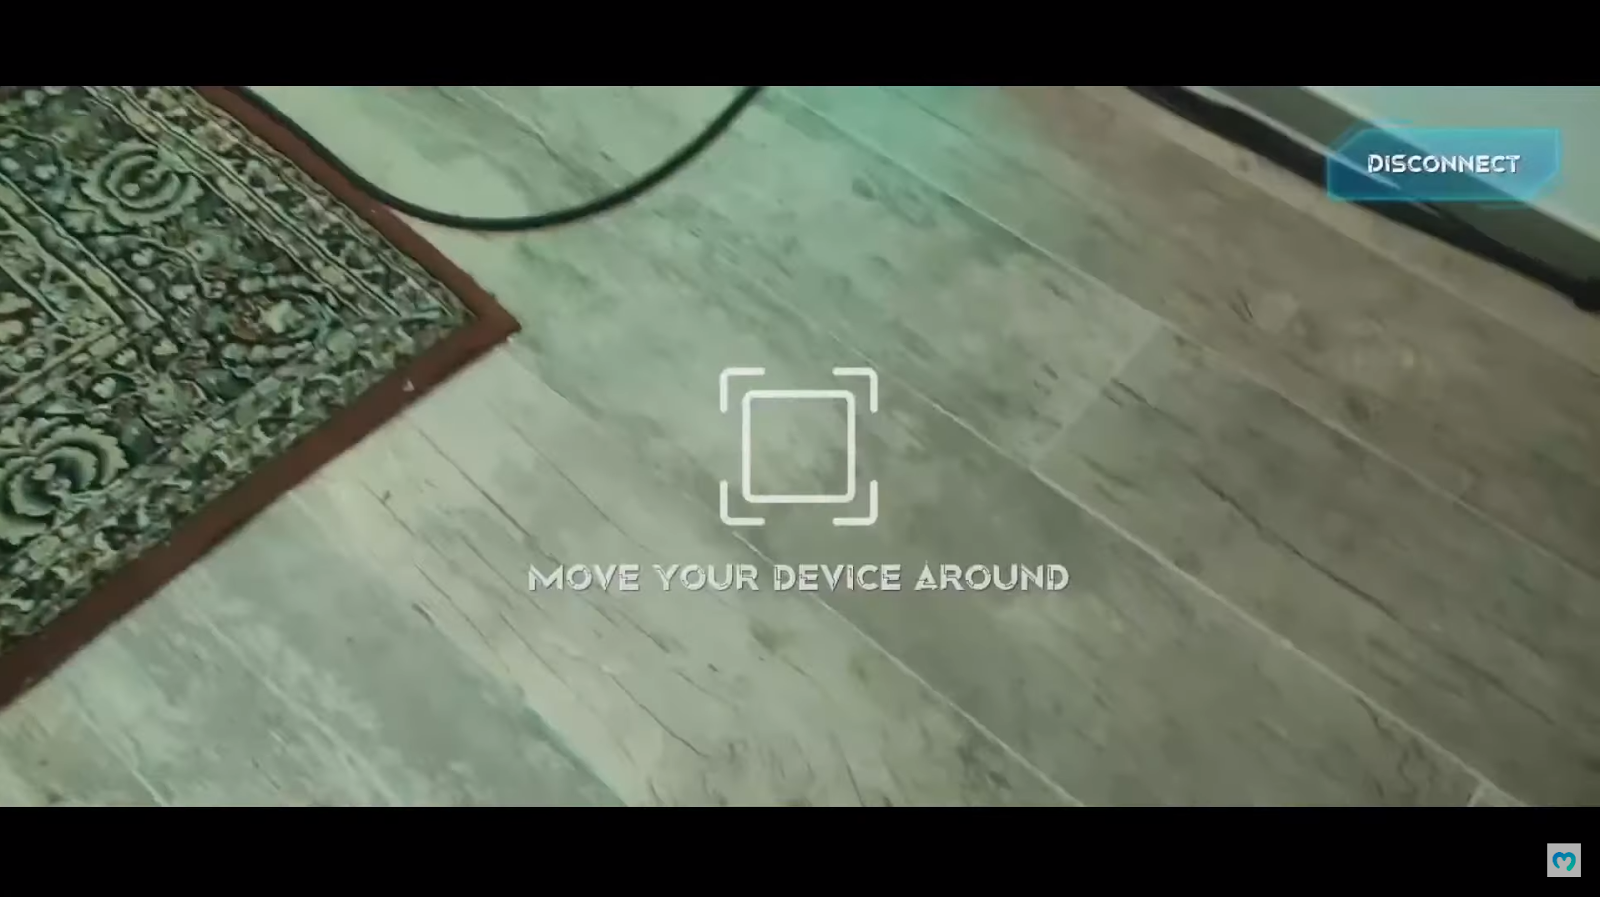
Moreover, as the on-screen instructions suggest, users can freely move their smartphones around. Next, users need to tap on the screen to place the object in the selected spot:
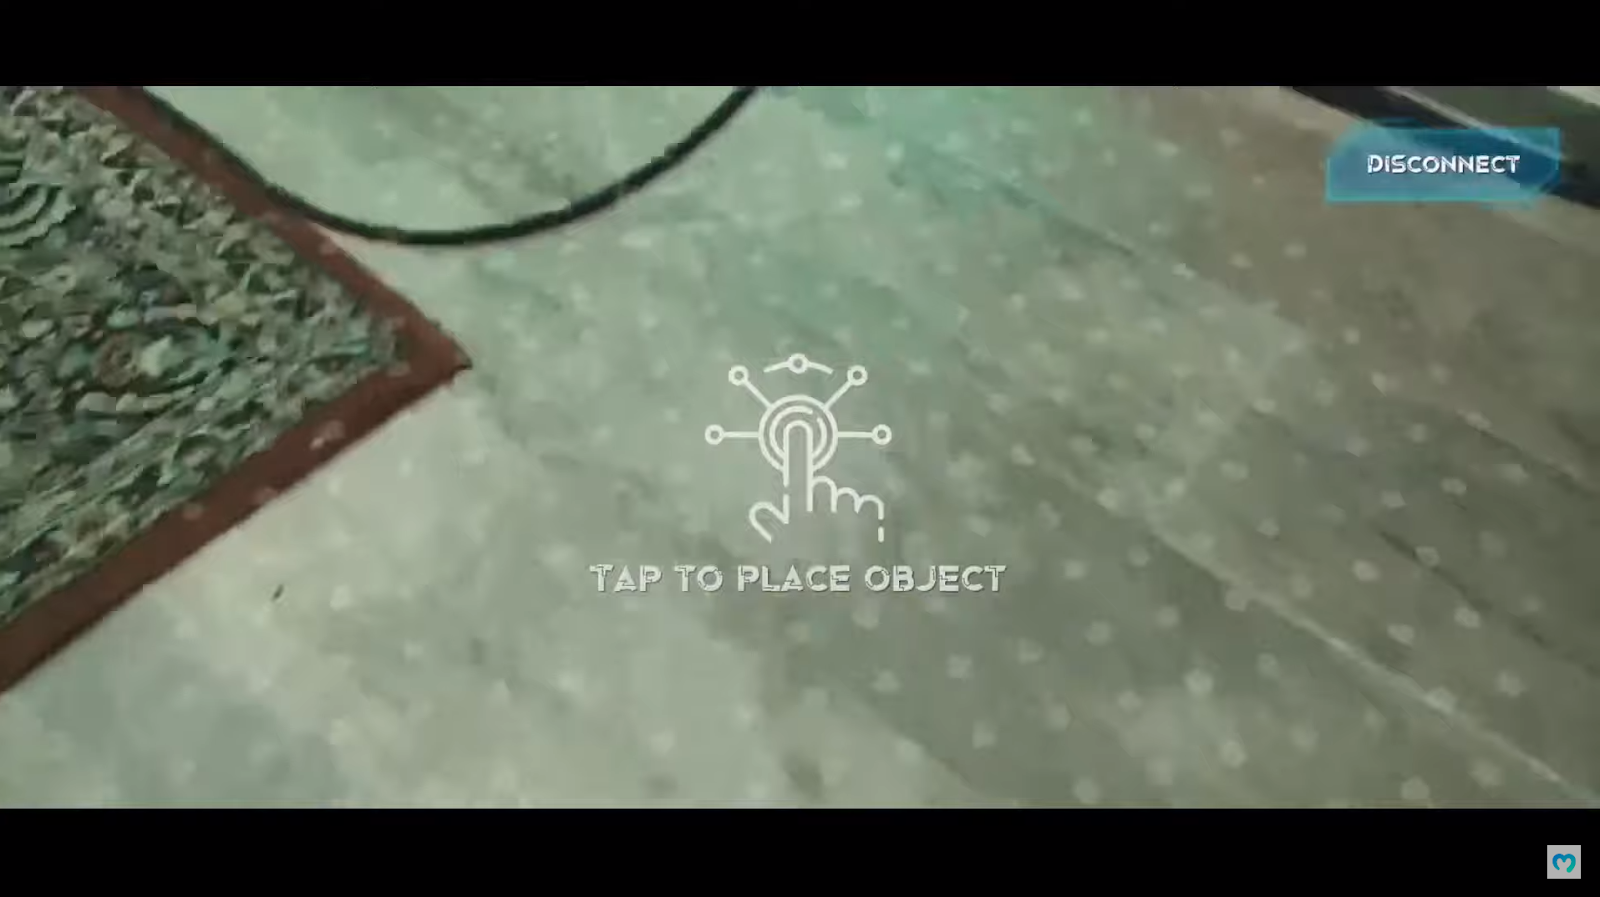
In our example Web3 augmented reality dapp, the object is an NFT loot box. The latter appears on the screen after tapping it:
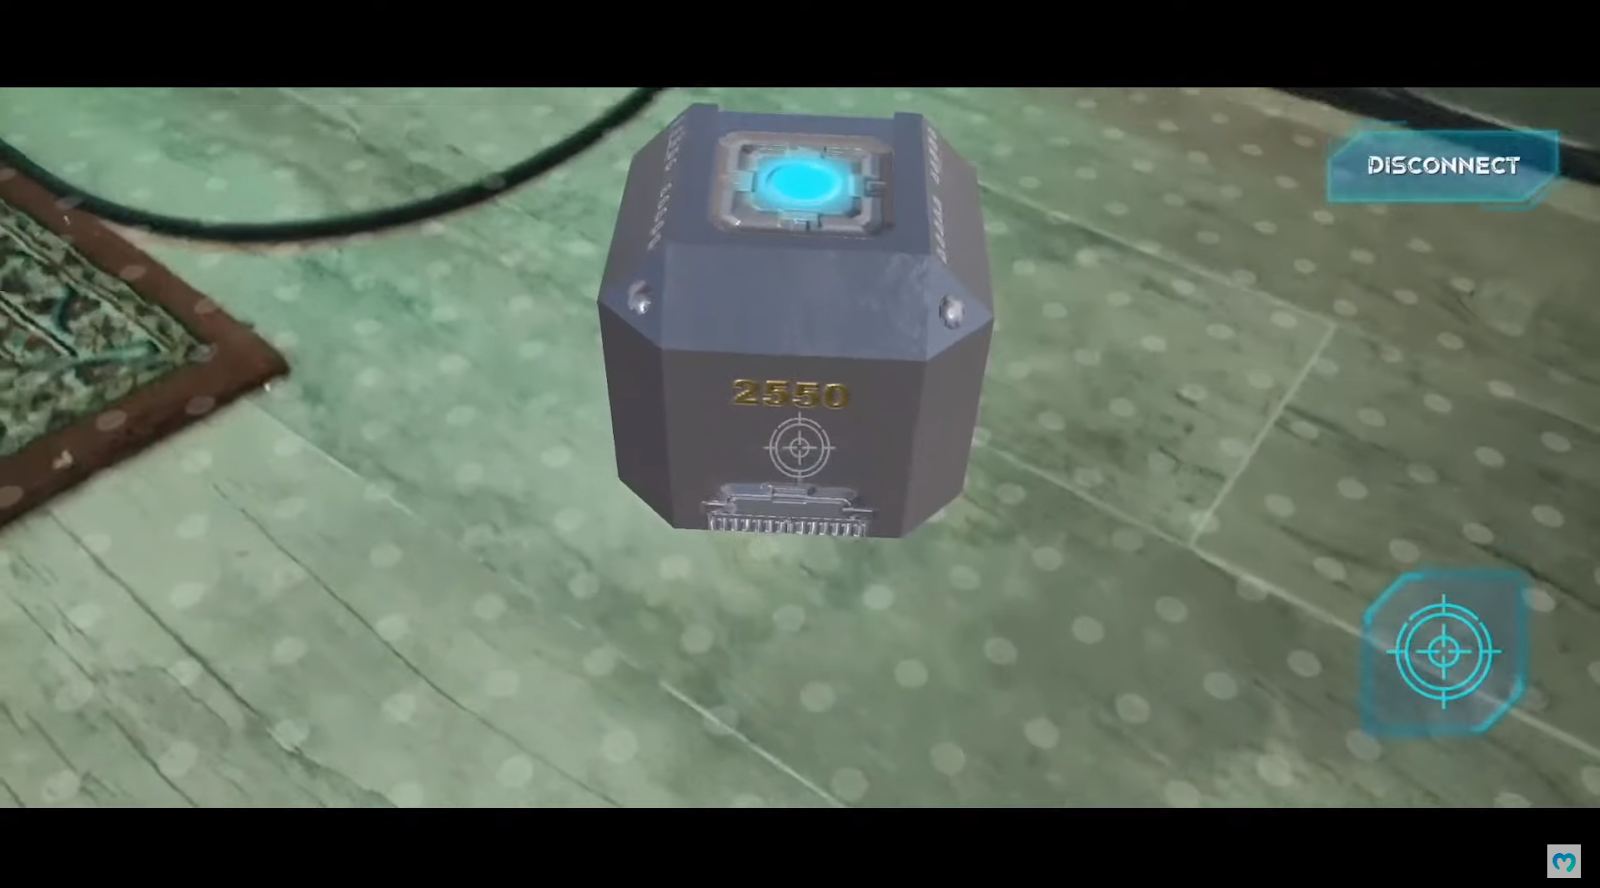
Looking at the screenshot above, you can see the blue light on top of the NFT loot box. This is the spot that users need to hit to open the box:
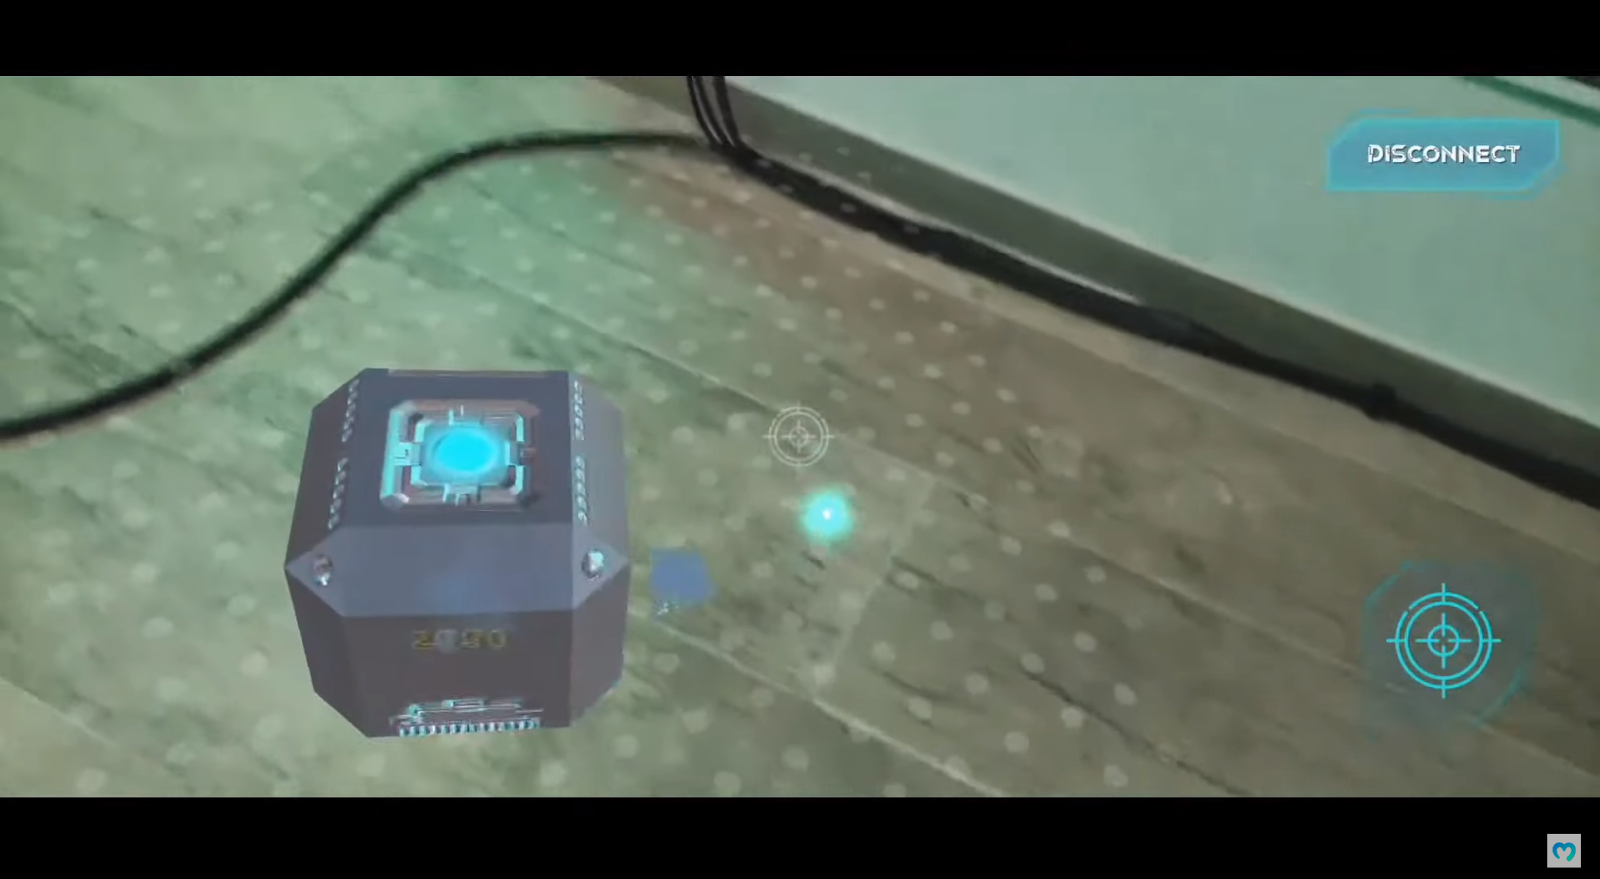
Furthermore, as you can see in the above screenshot, the crosshair is fixed in the middle of the screen. Hence, it moves together with the device:
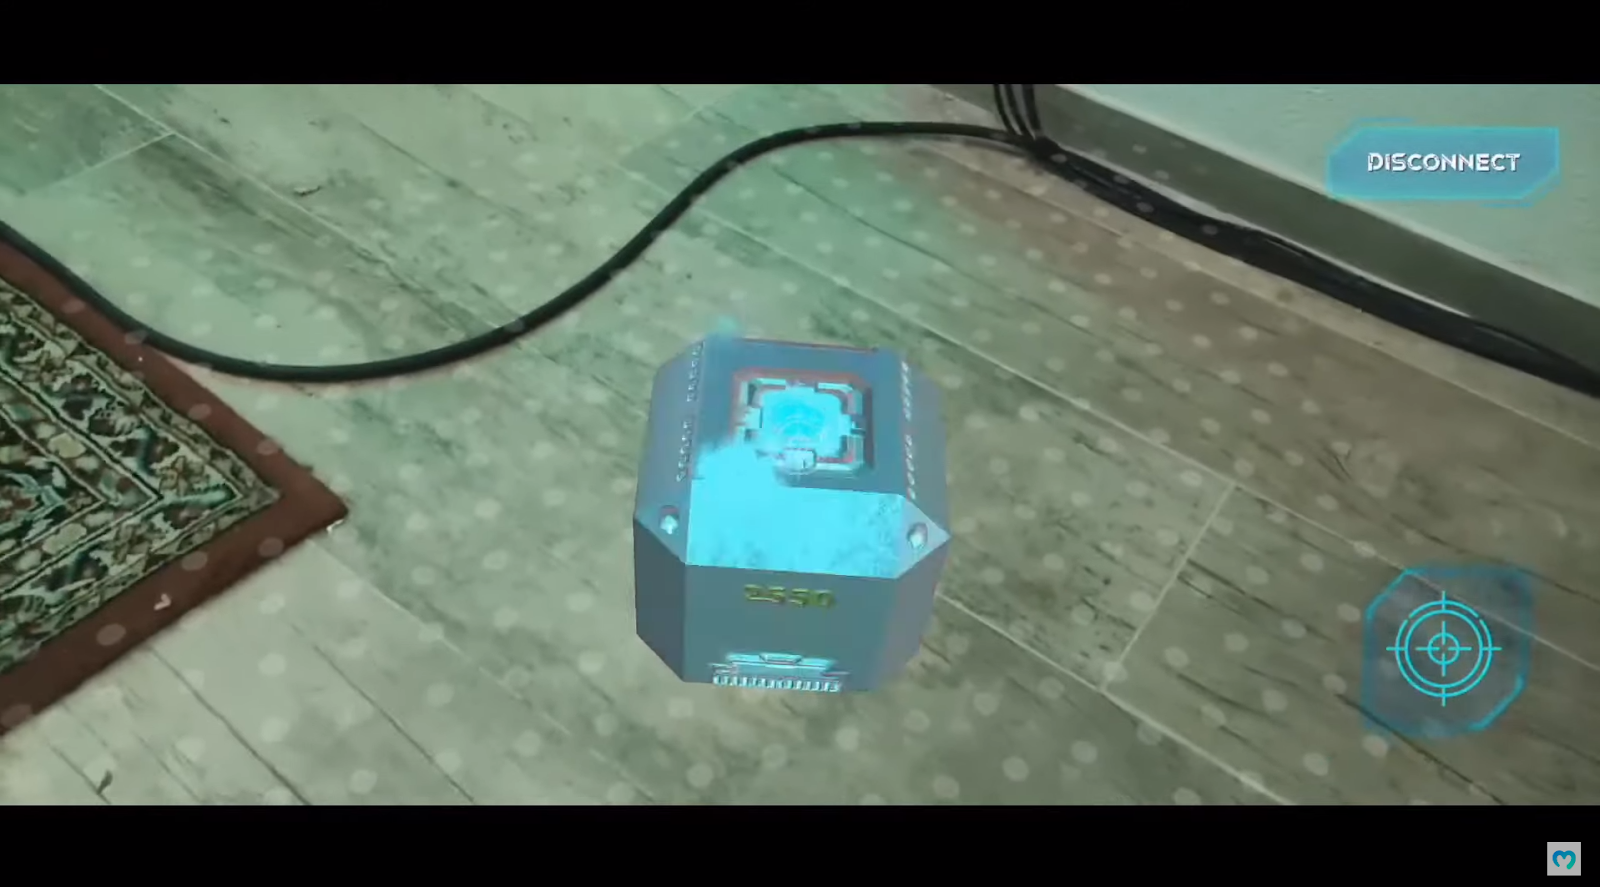
In addition, there’s a crosshair icon in the bottom-right corner indicating the “shooting” stage. Moreover, when the users finally hit the blue light at the top of the box, the box opens:
Minting in Our Web3 Augmented Reality Dapp – Demo
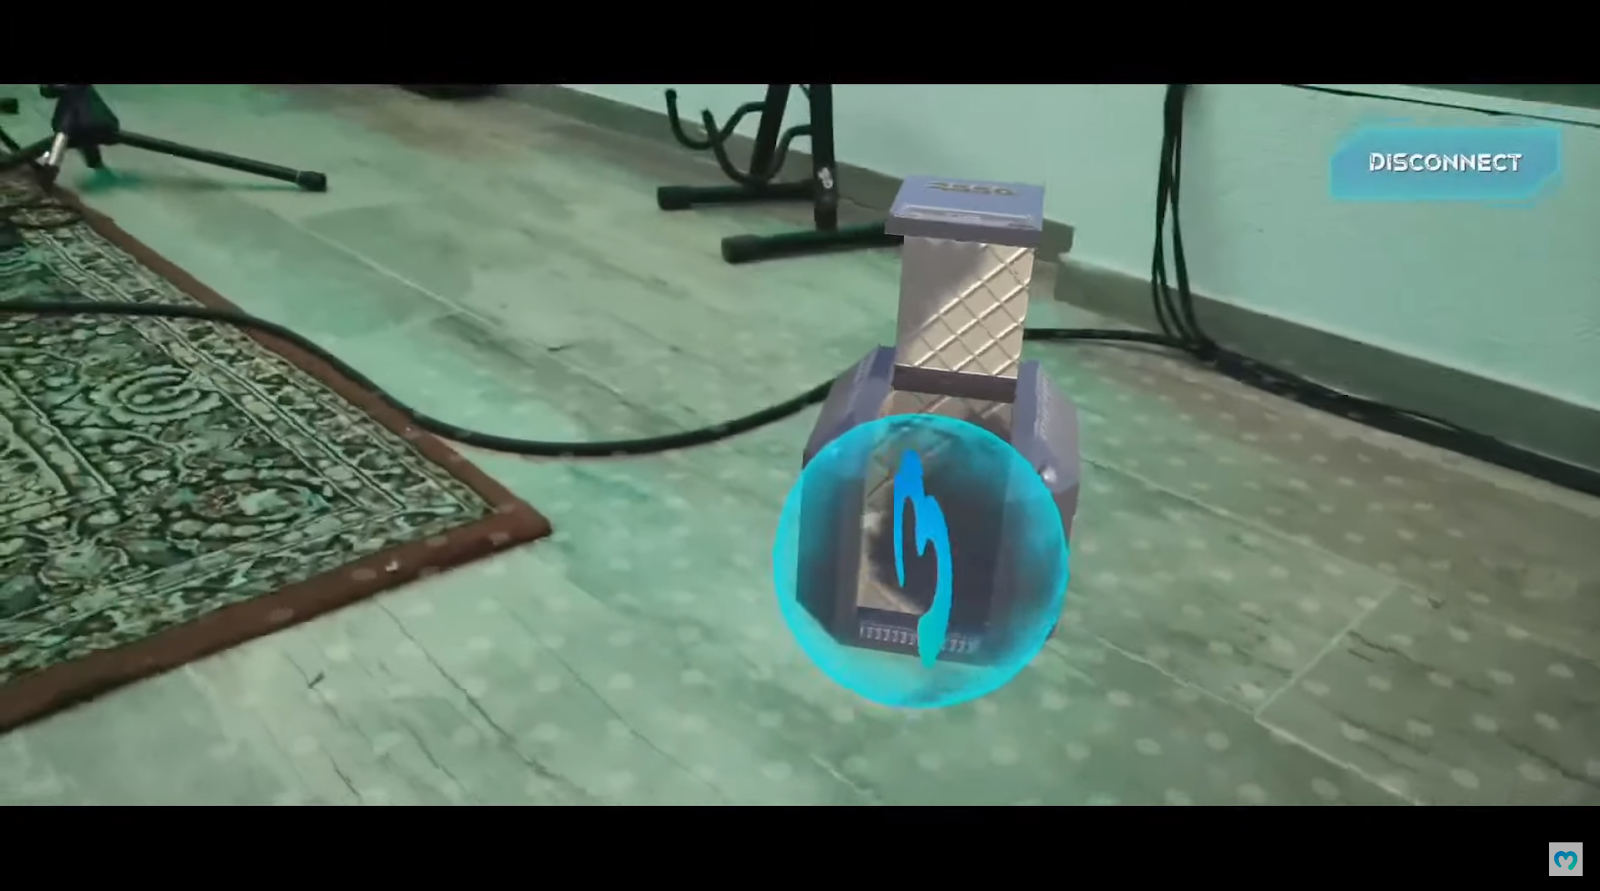
Next, the players need to tap on the glowing item that came out of the box. This gives them a chance to mint this item as an NFT:
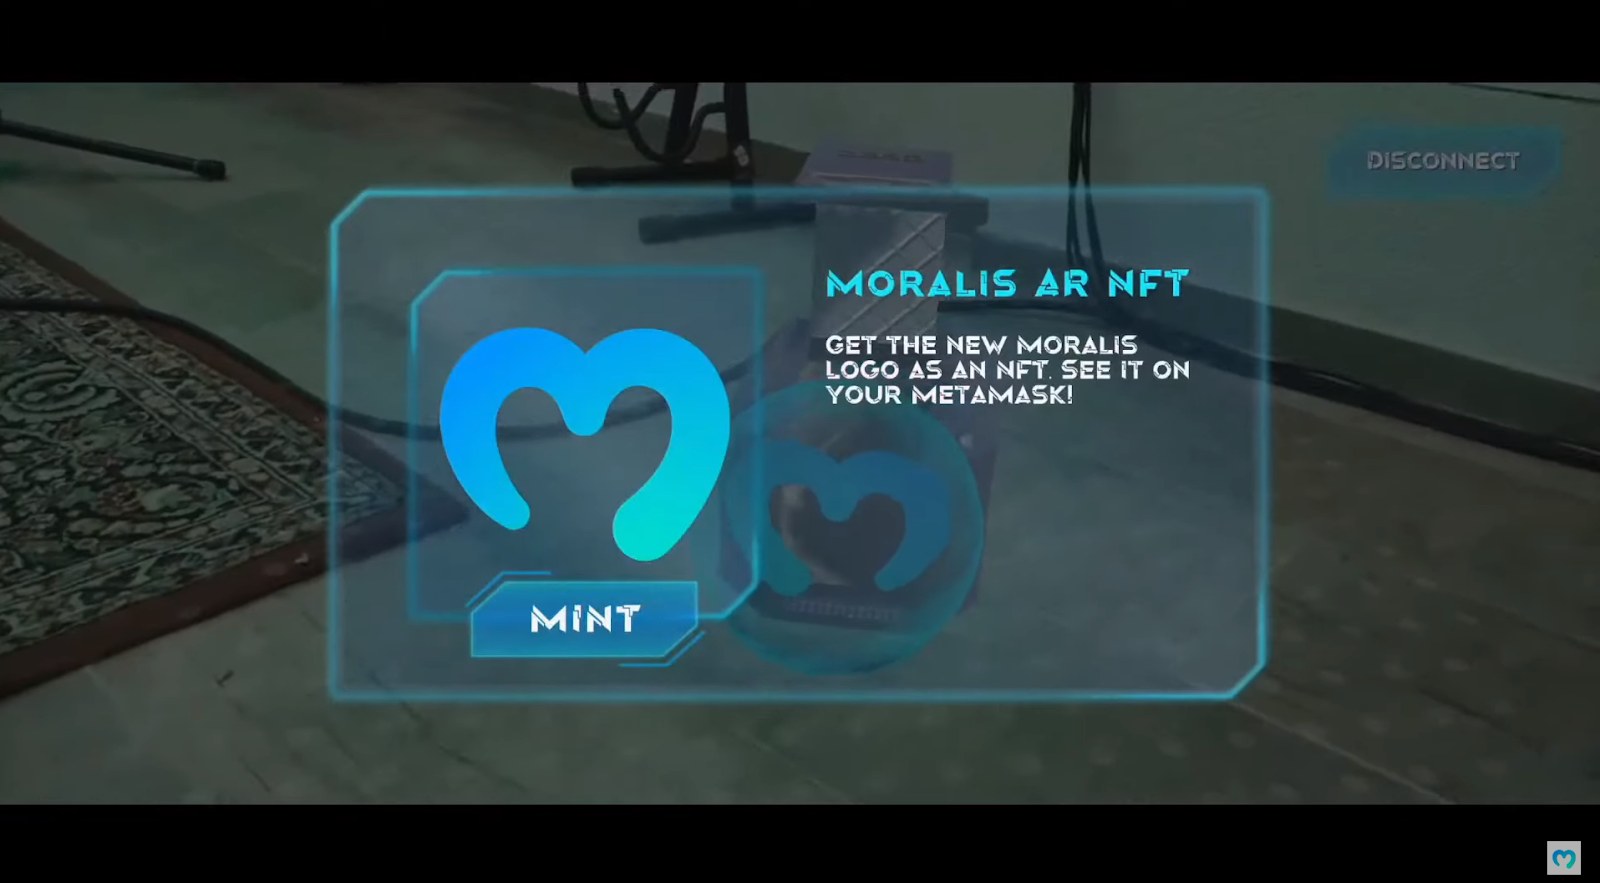
When the users see the above screen, they need to tap the “mint” button. Furthermore, the on-screen message tells them to use their Web3 wallets to confirm the transactions:
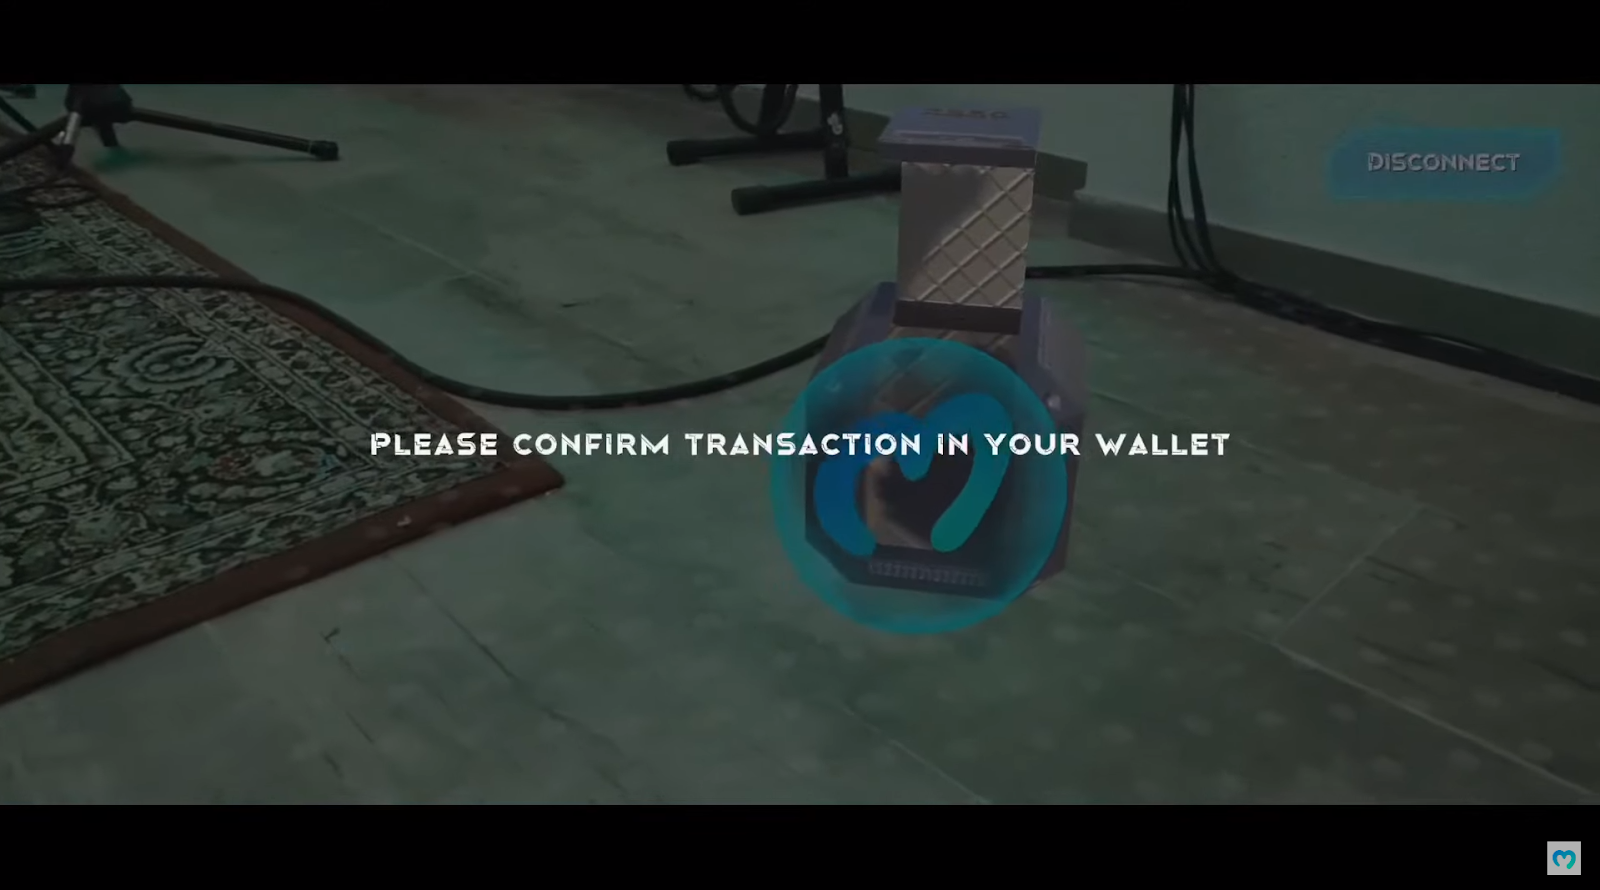
Moreover, their wallets pop up automatically and users need to tap the “confirm” button:
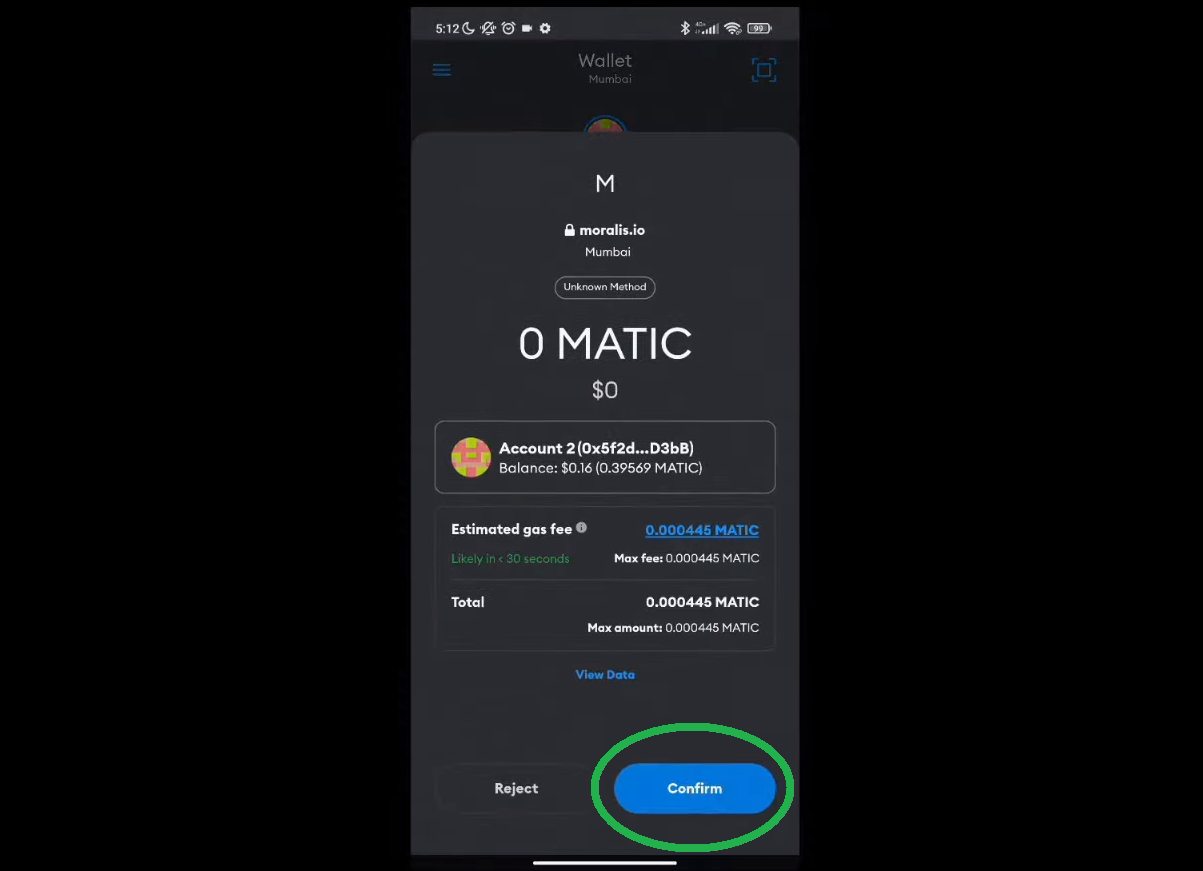
After confirming the minting transaction, the users get to tap the NFT again to import it into their MetaMask wallets:
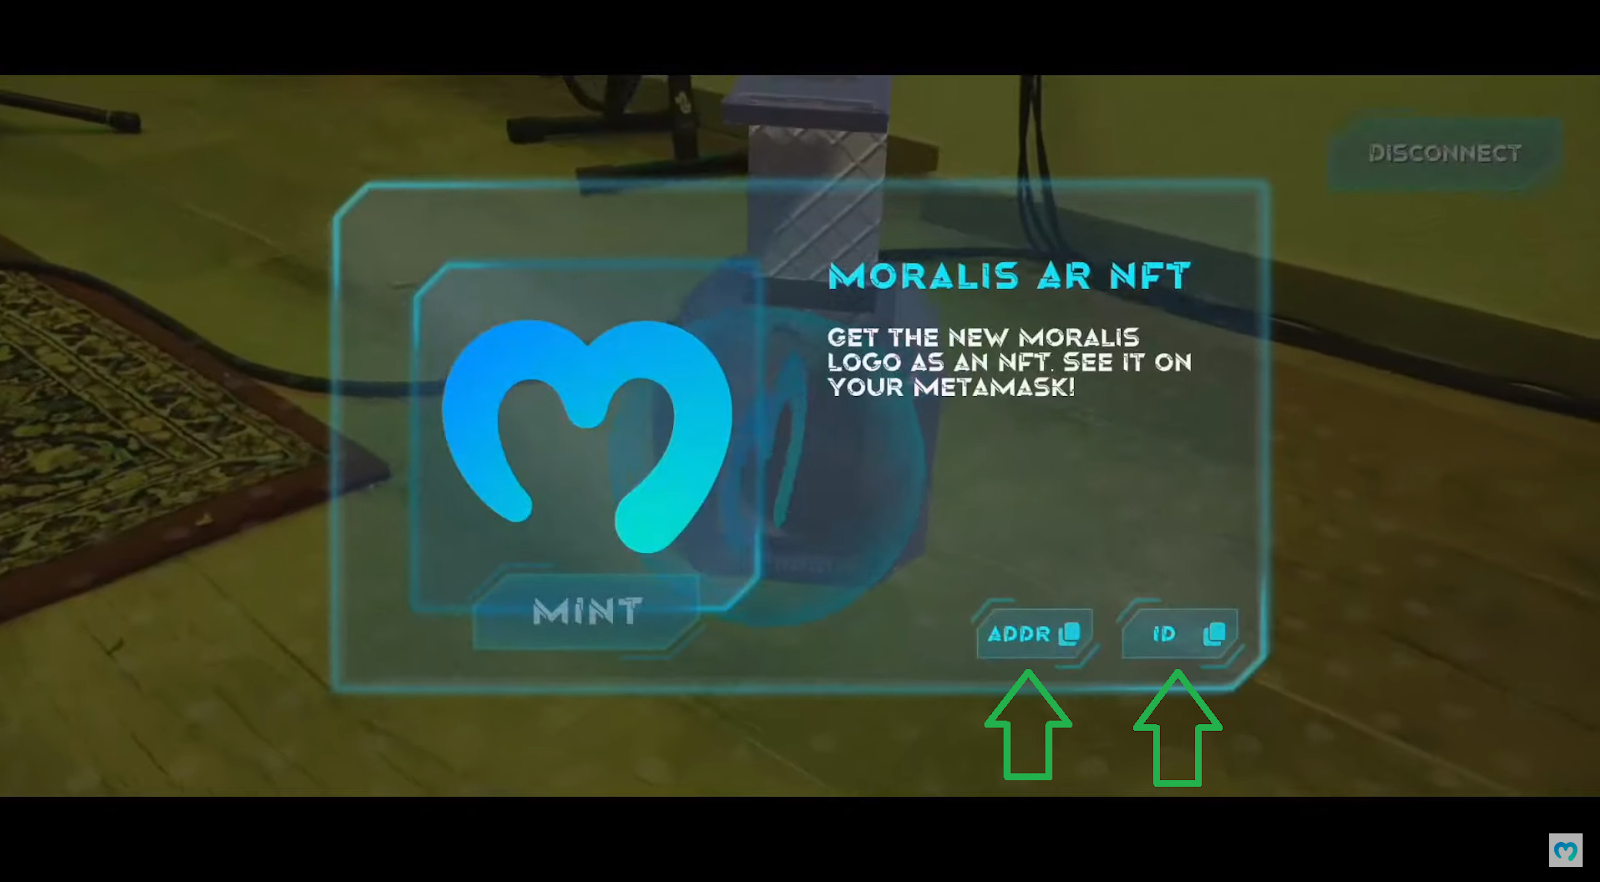
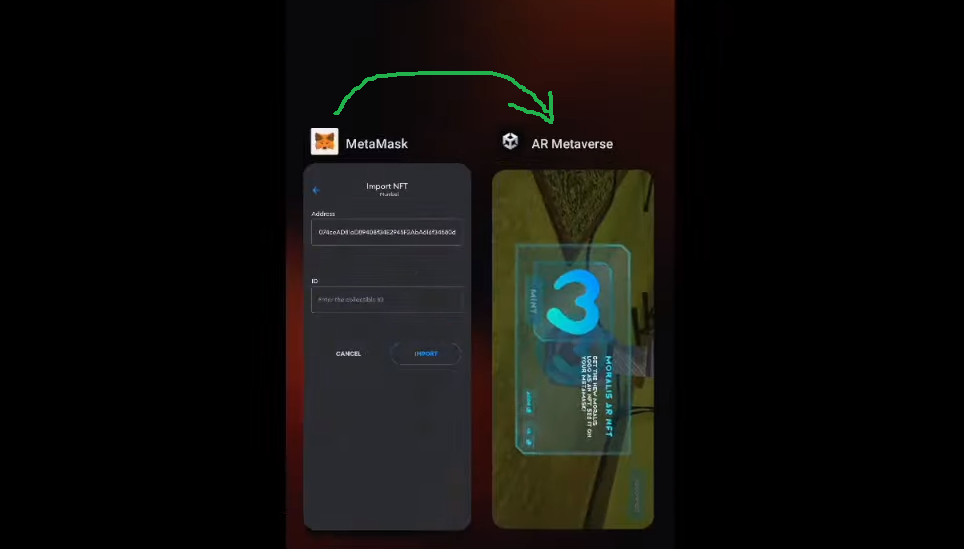
By tapping the “addr” button, their MetaMask wallets pop up again, where they need to paste the copied address:
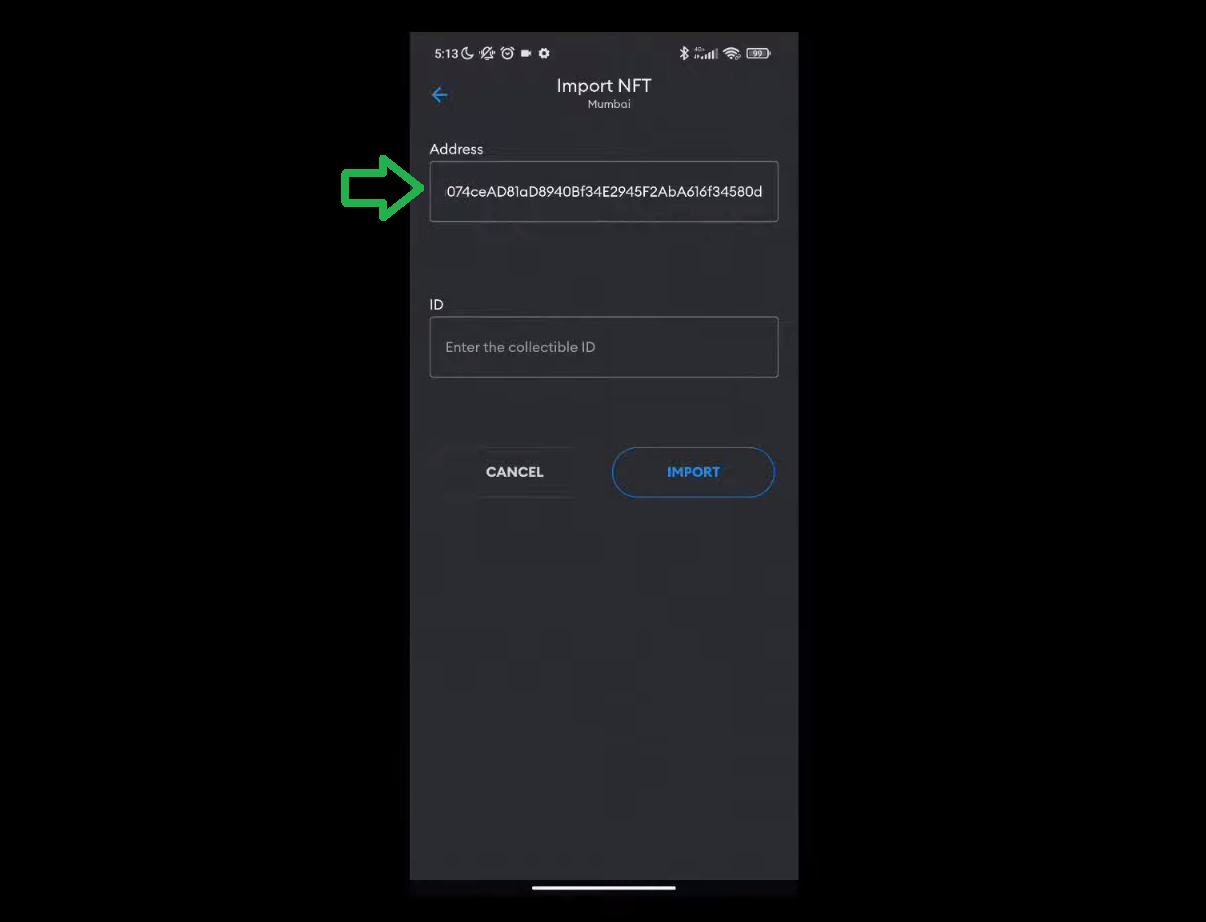
Then, users need to go back to our dapp’s screen and tap the “ID” button to repeat the above steps for ID:
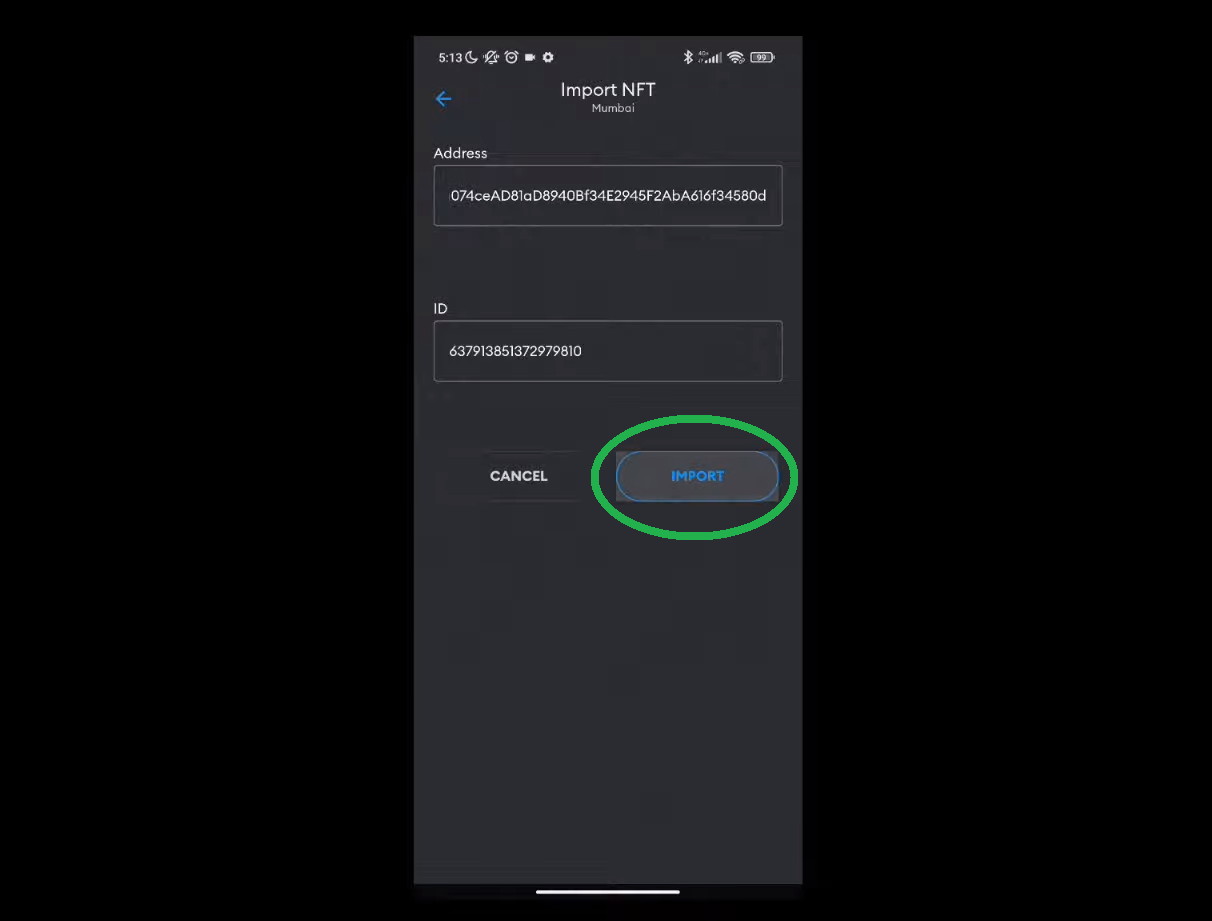
Once users have the “address” and the “ID” fields populated, they get to tap the “import” button:
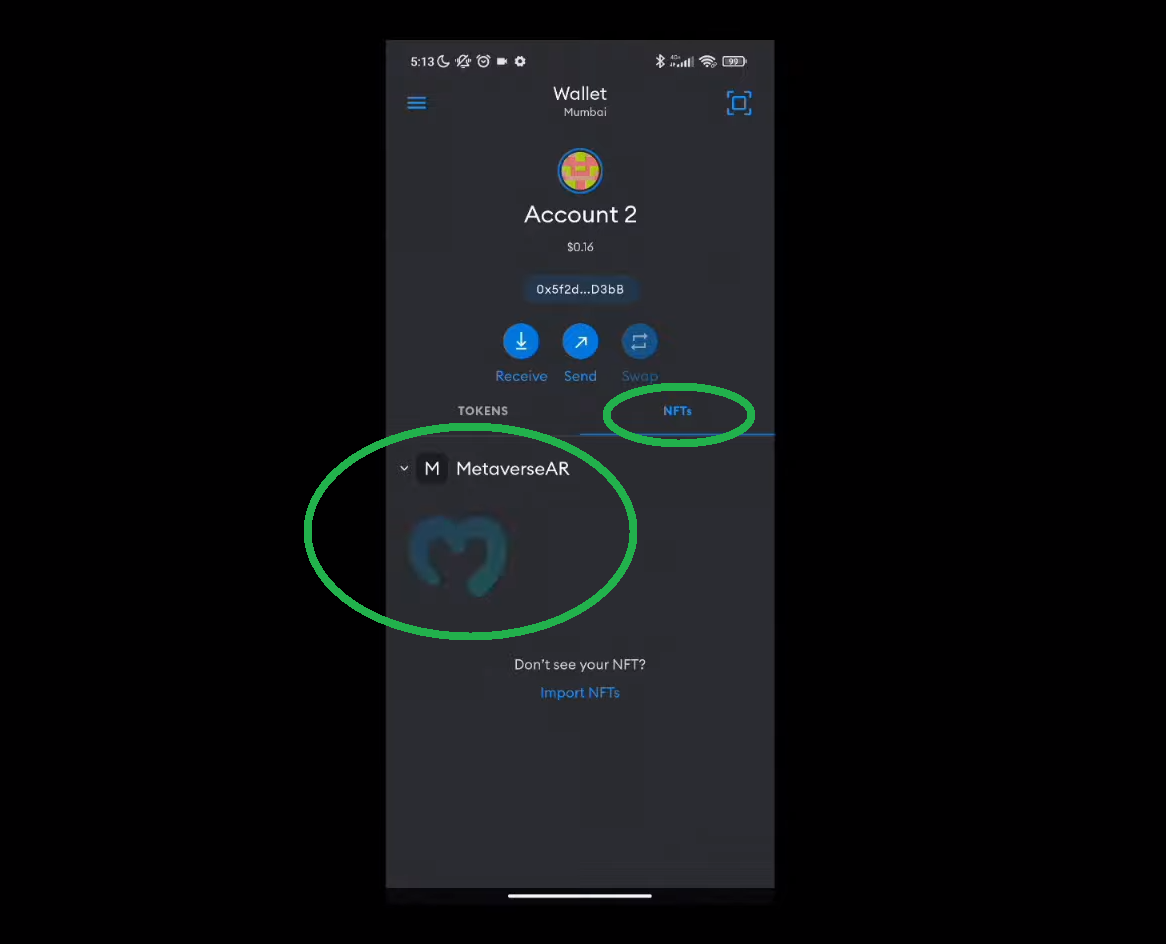
By importing the NFT that came out of the NFT loot box, users can now see it in their wallets:
Note: If you prefer to watch our dapp’s demo in a video format, you can do so at the bottom of the article
Build a Web3 Augmented Reality NFT Loot Box With Unity, Hardhat, and Moralis
Now it’s time to get your hands dirty and build your own Web3 augmented reality dapp. Of course, you don’t have to start from scratch – instead, you can use our sample project that awaits you on GitHub. Moreover, as mentioned in the introduction, Moralis is the powerhouse that will enable you to effortlessly do all the Unity Web3 integration effortlessly. As such, make sure to create your free Moralis account if you haven’t done so yet.

Moving forward, we will tackle today’s example project in six main stages:
- First, we will focus on project settings and requirements that you need for AR development with Unity.
- Second, we will help you complete the initial Moralis setup. This is where you’ll obtain your dapp’s credentials to connect Unity with Web3.
- Third, we will do our project overview. In combination with the above demo, this will ensure that you know what features you will need to implement.
- Fourth, We will show you how to create a metaverse item. This is where you will get acquainted with loading data from IPFS to create the item from a loot box.
- Fifth, you will get to use our smart contract and deploy it using Hardhat. This stage will also cover some initial Hardhat setup.
- Sixth, you will learn how to enable users to mint the items from the loot box as NFTs.
Here are also some additional details about our example project:
- Which blockchain will we focus on? Polygon testnet (Mumbai). Keep in mind that Moralis is cross-chain interoperable, which means you can use the same code (with minor tweaks) for other blockchains.
- What system will we focus on? Android. Note that you can use this tutorial to also create an iOS dapp.
Note: All time references refer to the video tutorial below.
Stage 1: Project Settings
For this project, we will use Unity’s AR foundation framework, which combines AR Core and AR Kit. These tools enable you to build Unity applications for both Android and iOS. Hence, we installed all the required packages. However, before opening the project, make sure you have proper build support installed. To do this, use your Unity Hub:

Note: In order to avoid any compatibility issues, make sure to install the same version as indicated above.
Inside the “Add modules” window, make sure that you have Android Build Support installed:
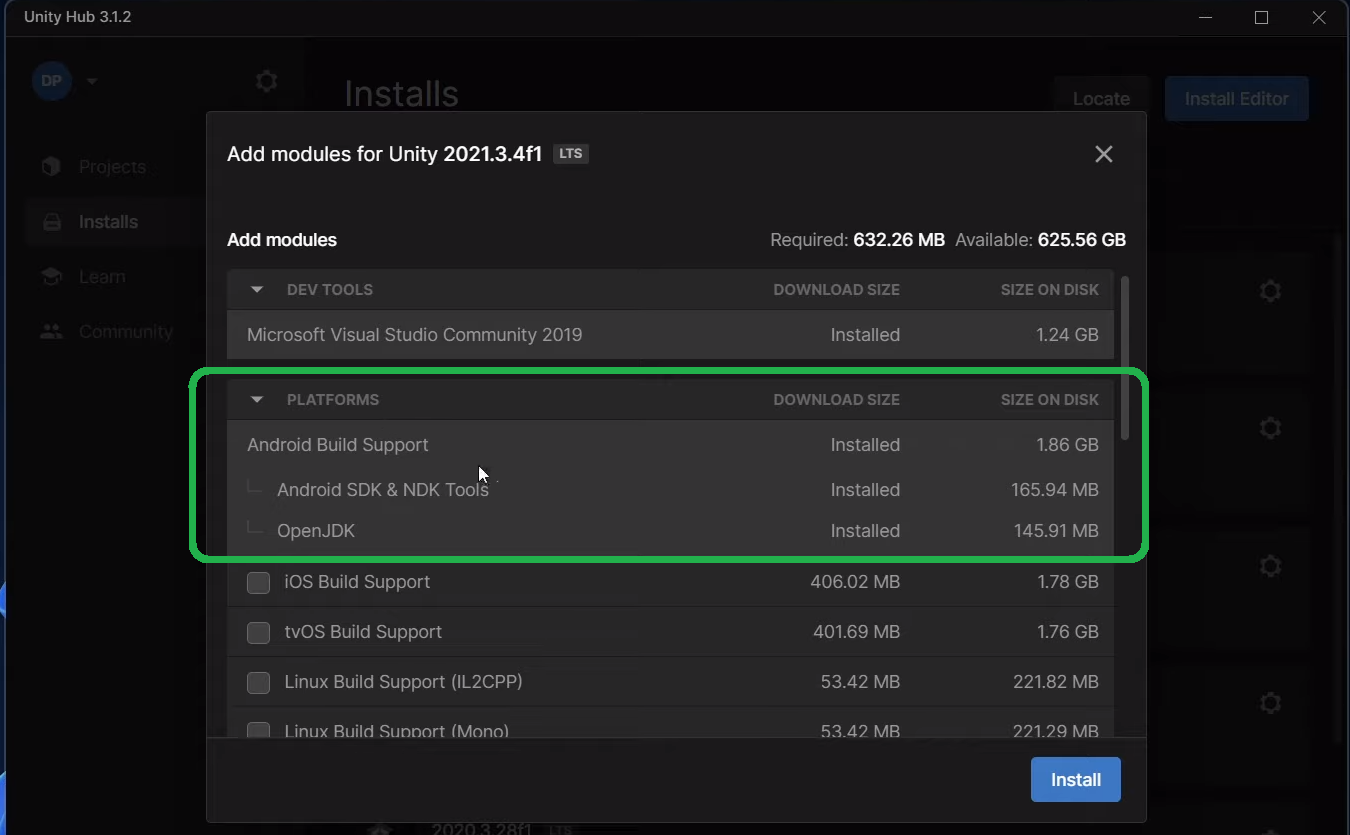
Note: If you wanted to focus on iOS, you’d need to install iOs Build Support.
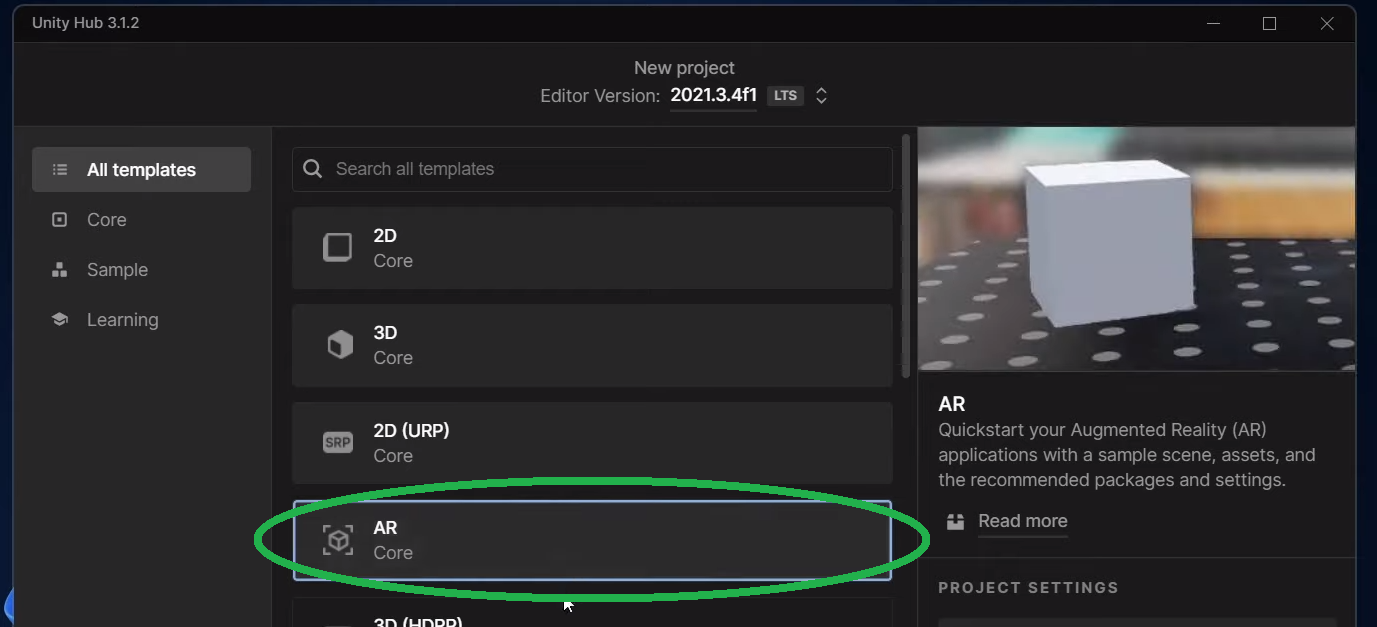
Moreover, also keep in mind that we used Unity’s AR template to build this project. You access this option by clicking “New project” on the “Projects” tab:
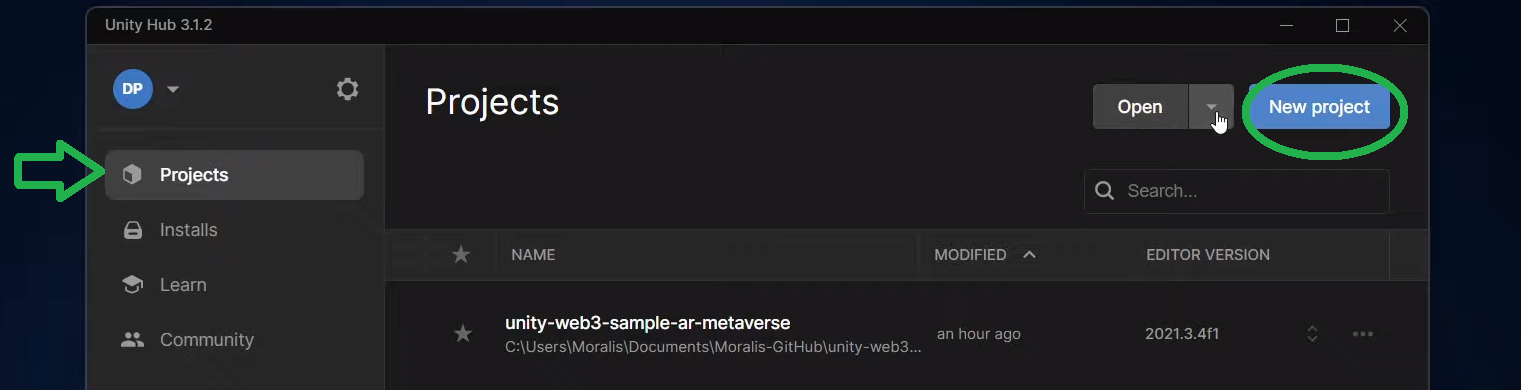
The “AR” template comes with all the required packages and dependencies installed:
With this in mind, it’s time to use the above “GitHub” link and open today’s project:
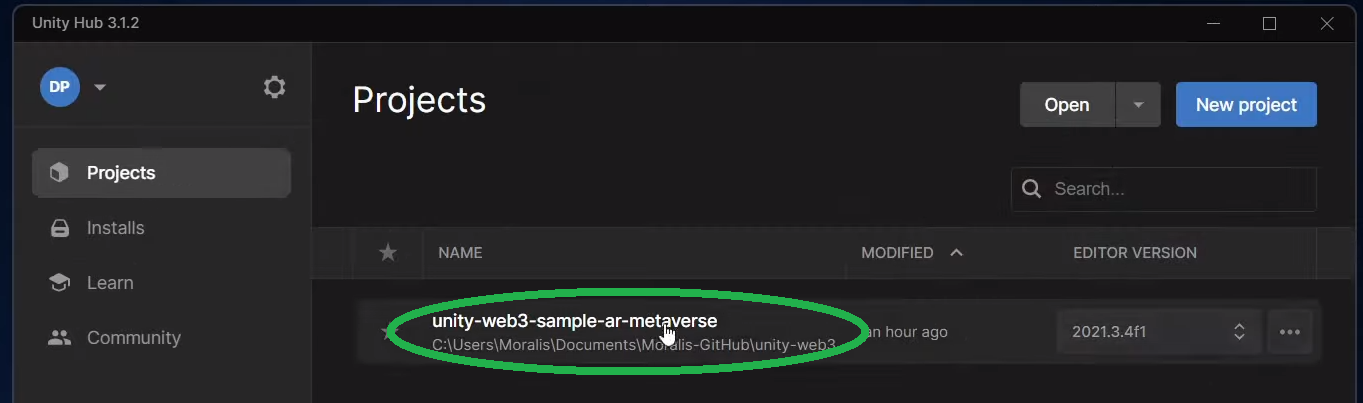
All the settings should match ours; however, we encourage you to check that manually by using the video below (7:38).
Stage 2: Setup Your Moralis Dapp
If you’ve performed the above settings check, you will first need to reopen the “Moralis Web3 Setup” window:

Once you open the “Moralis Web3 Setup” window, you’ll see two entry fields – “Dapp URL” and “Dapp ID”:
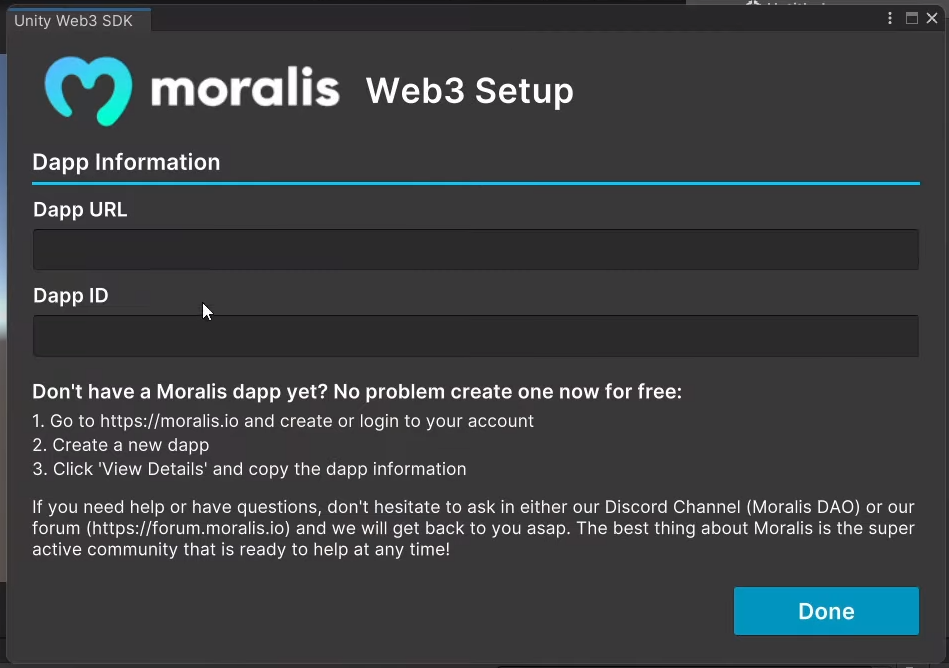
Moreover, as you can see in the screenshot above, the window provides you with simple instructions on how to obtain the required credentials. However, to assist you further, follow these steps (9:17):
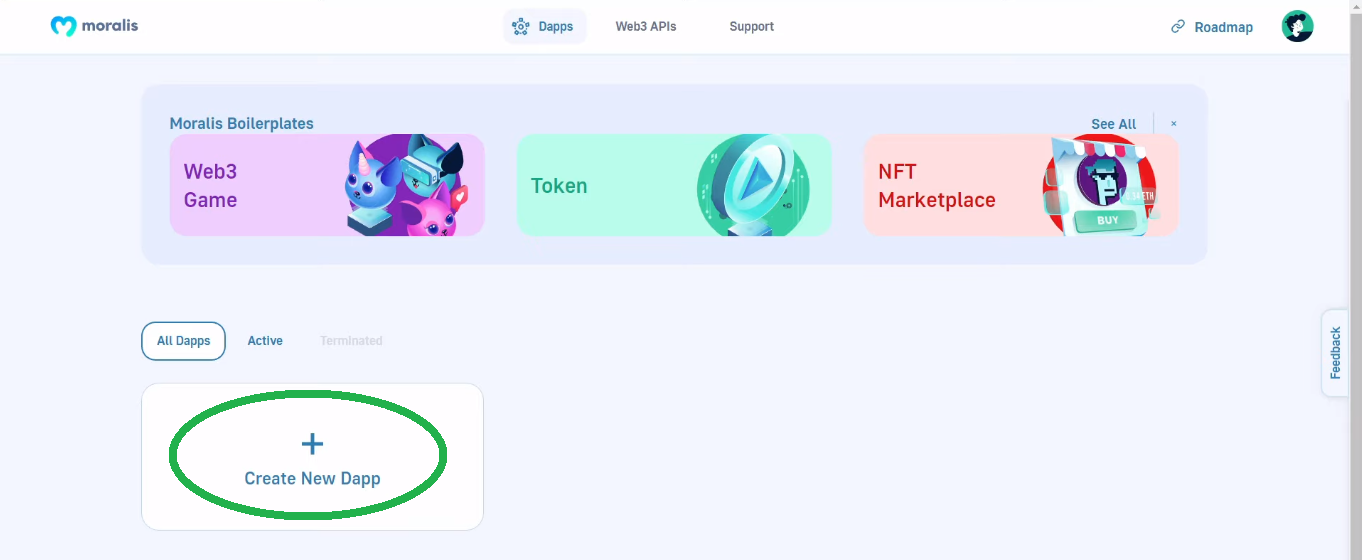
- Create your Moralis account or log in to your existing account:

- Click the “Create New Dapp” button:
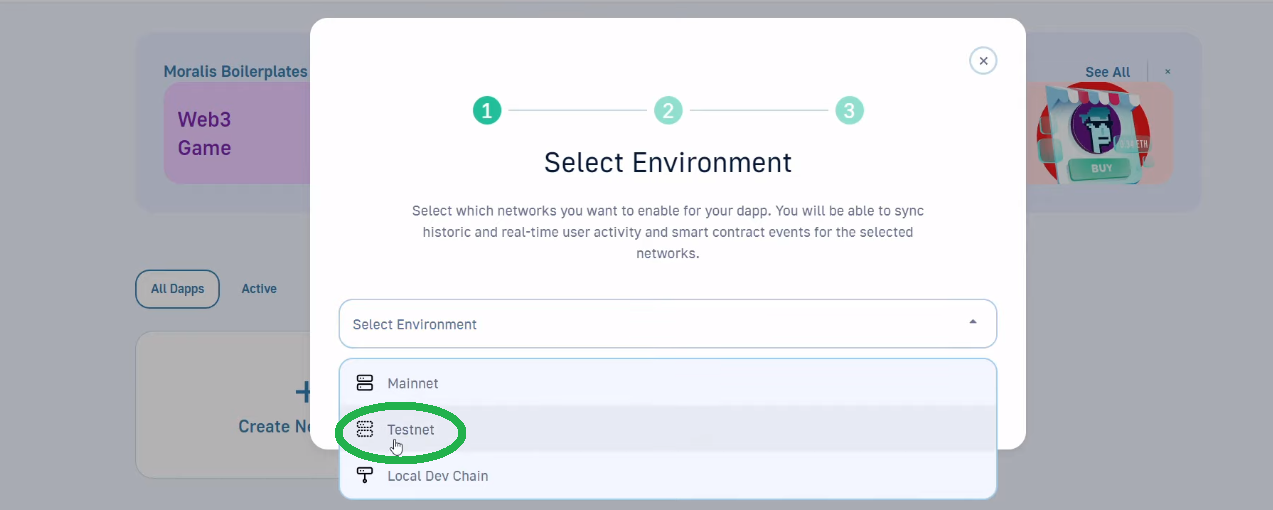
- Select “Testnet” environment:
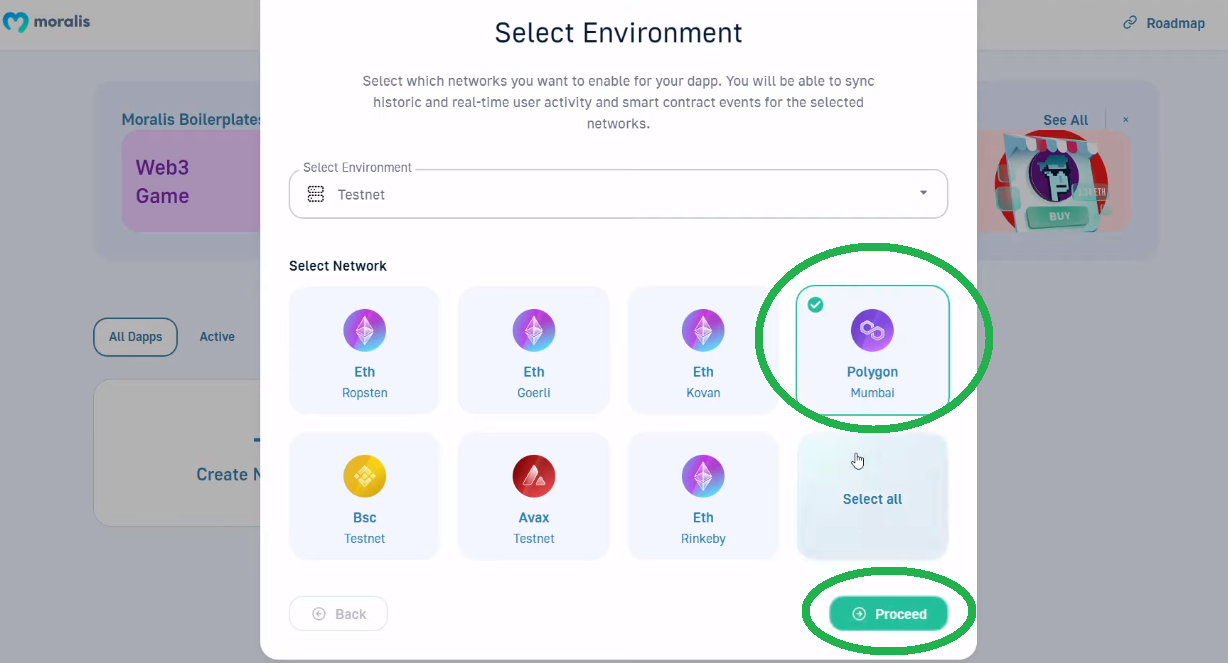
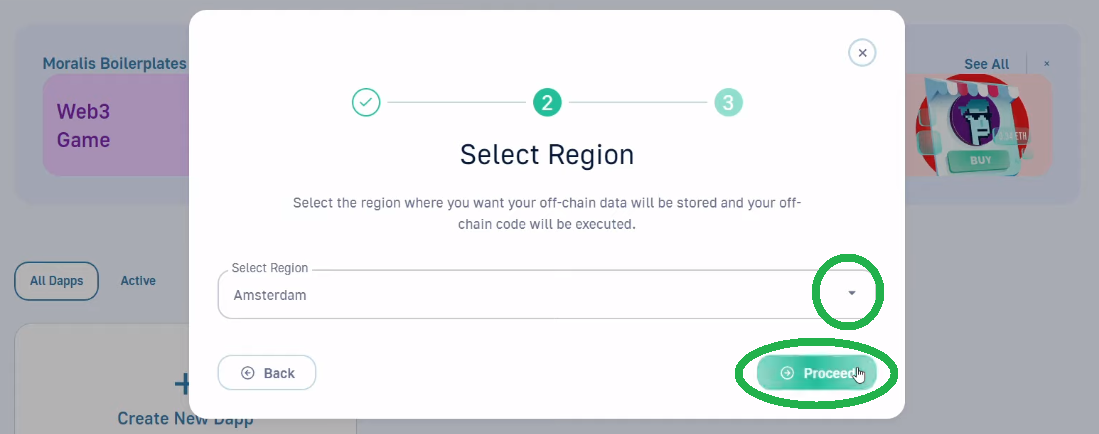
- Choose “Polygon Mumbai” and click the “Proceed” button:
- Select the city closest to you and proceed:
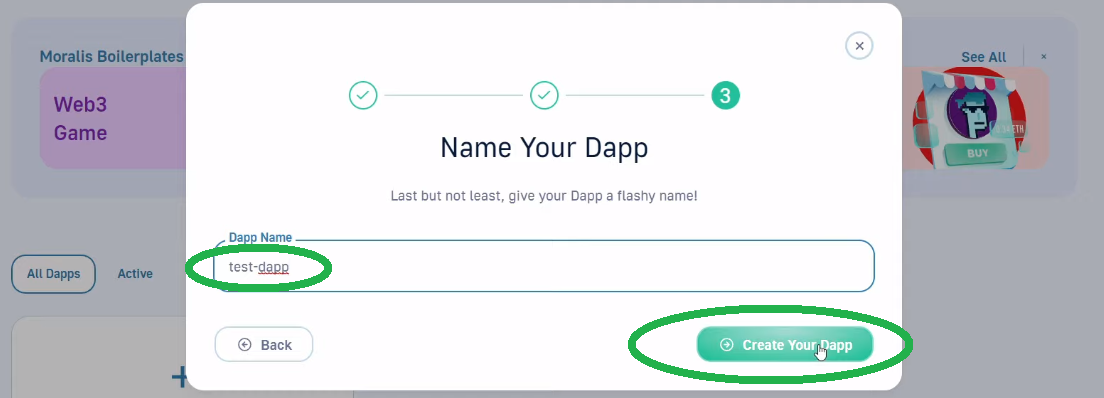
- Enter your dapp’s name and click the “Create Your Dapp” button:
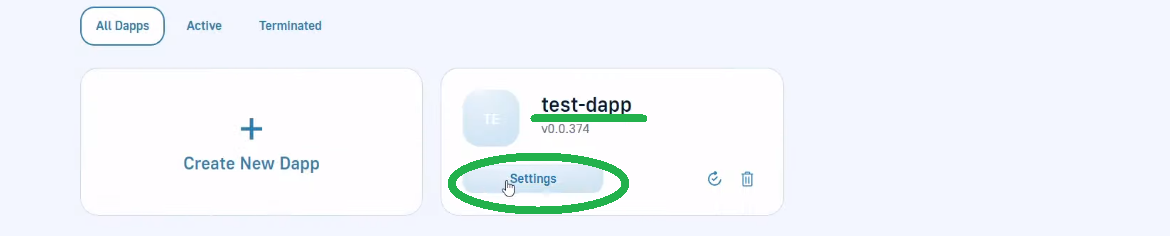
- Once your dapp is up and running, click “Setting” to access its credentials:
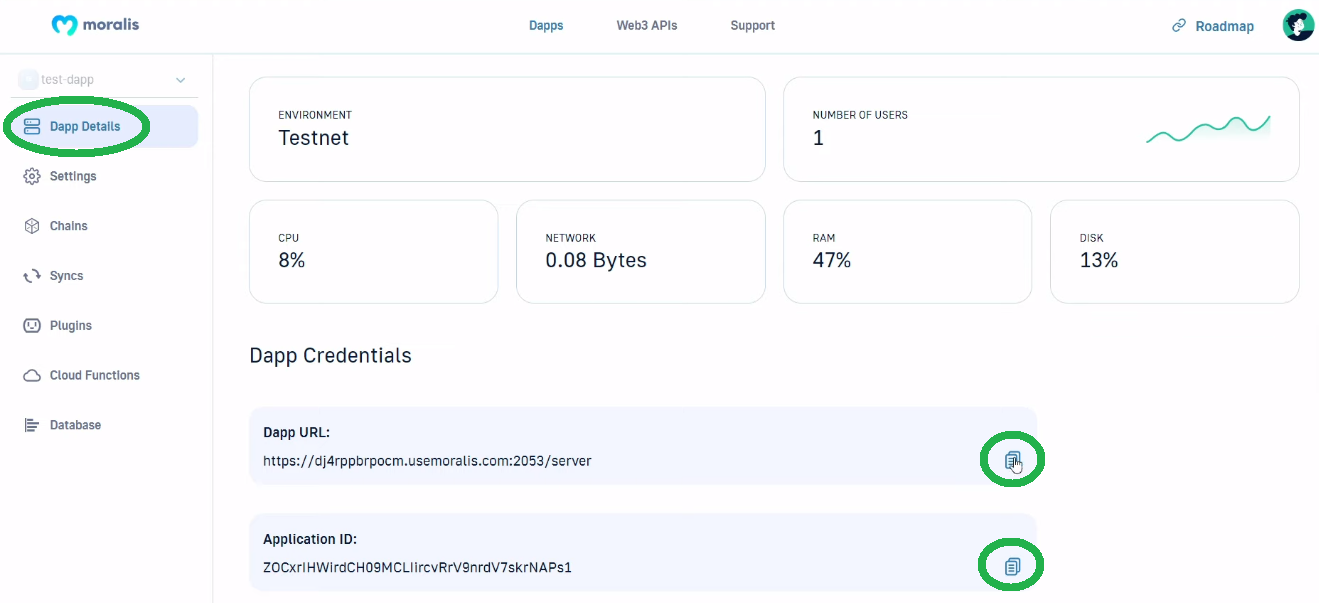
- Copy your dapp URL and ID:
- Paste the above-copied details into the “Moralis Web3 Setup” window in Unity and click “Done”:
Stage 3: Unity Project Structure Overview – Our Web3 Augmented Reality Dapp
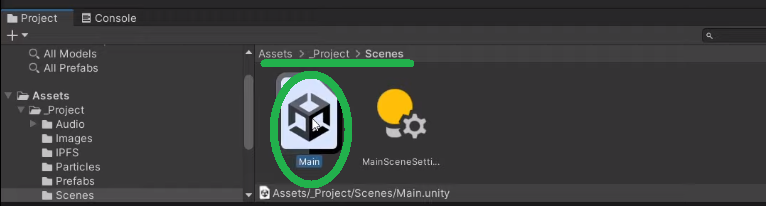
In order to open the “Main” scene, navigate to the “Scenes” folder:
As such, you should have the “Main” scene in the “Hierarchy” window:

Hence, you can see that the scene already includes the “AuthenticationKit”, which takes care of Web3 authentication. However, your main focus should be on “GameManager”, which is the state machine. It is the “GameManager” that will ensure your Web3 augmented reality dapp functions as presented in the above demo. Furthermore, “GameManage” does so via its multiple states (game objects):
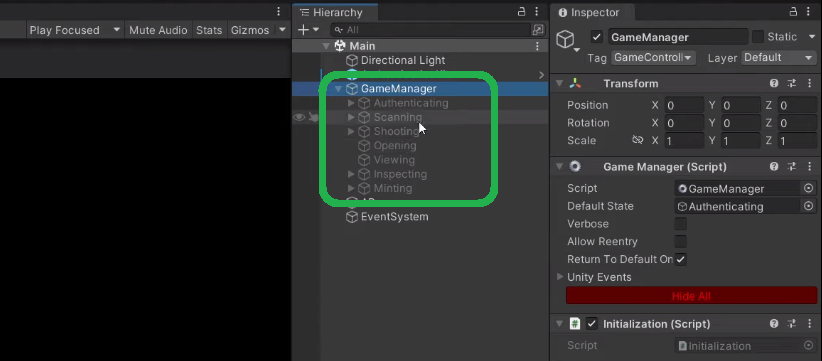
Each state contains the appropriate code that does the necessary actions according to each state’s purpose. The names of the above states clearly indicate what are their purposes. For a more detailed overview of each game state, use the video below, starting at 12:25.
Stage 4: Creating a Metaverse Item
Starting at 18:47 of the video below, our in-house expert will show you how to create a metaverse item. The “Opening” script takes care of the gist of creating a metaverse item. However, you will also have a chance to see how our Web3 game gets to the stage. As such, you will take a closer look at the “Scanning” and “Shooting” scripts. At 24:40, you will get to see how the “MetaverseItem” prefab works with an IFPS URL:
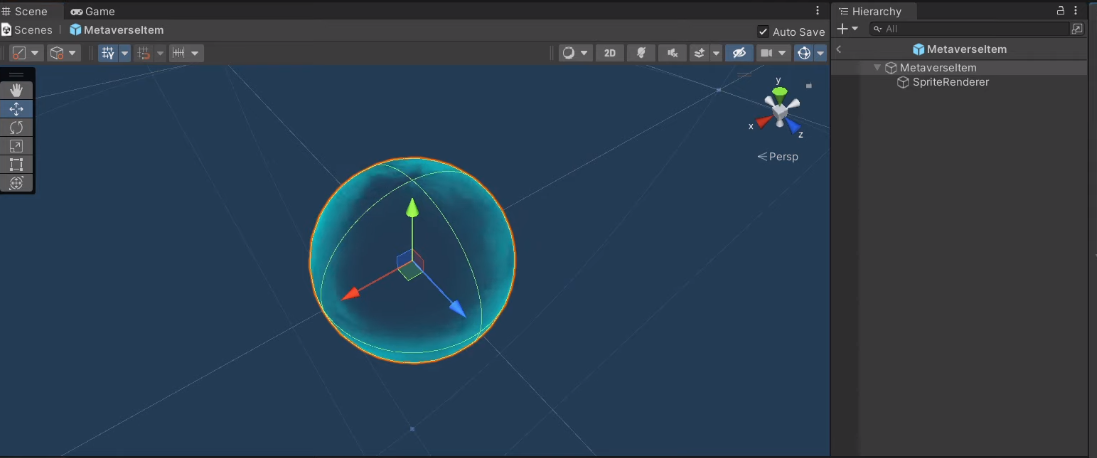
As such, you will get to see how the “MetaverseItem” script uses the IPFS URL to get the image URL and create the sprite.
Note: For the purpose of this example project, you can use our IPFS URL.
Next, you will get to see the details of the “Viewing” script (31:40), which checks when the users are tapping the metaverse item that came out of the loot box. The latter leads to the “Inspecting” state:
Stage 5: Deploy Your Smart Contract
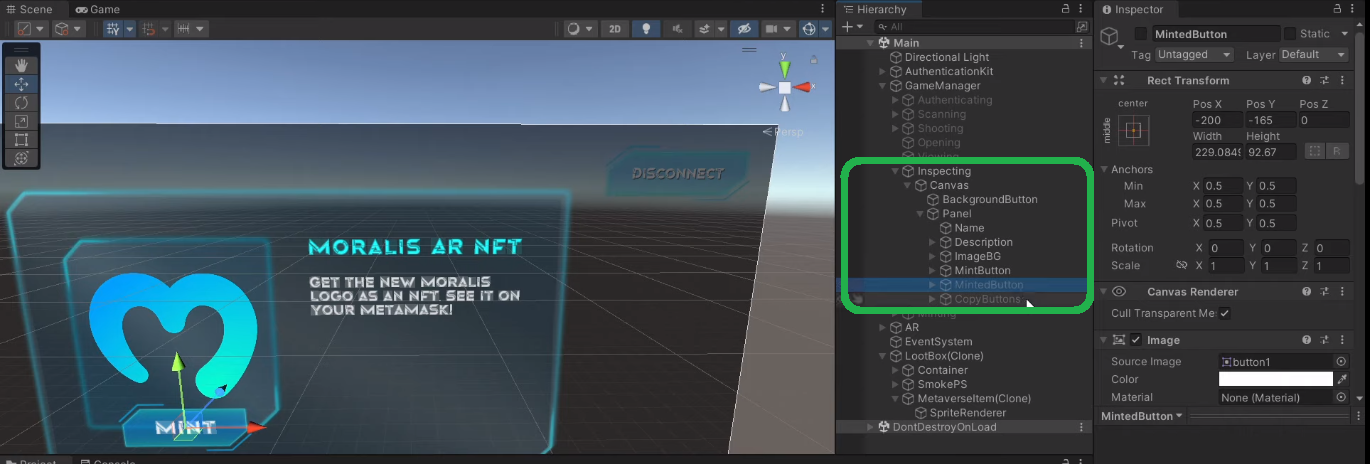
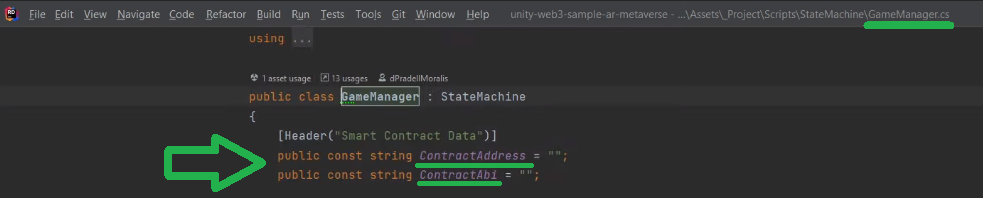
In order to activate the “Mint” button of your Web3 augmented reality dapp, you will need to add your smart contract’s ABI and address to the “GameManager” script:
As such, you will need to deploy our smart contract. For detailed guidance on how to do that with Hardhat, jump to 36:39. Moreover, here are the written instructions you can follow.
Note: In case you are familiar with Remix, feel free to deploy your smart contract using that online IDE. Furthermore, make sure to have some “play” MATIC in your MetaMask. You can use the Mumbai faucet for that purpose.
Stage 6: Mint an Item as NFT
By this point, you’ve successfully deployed your smart contract and pasted your Web3 contract’s ABI and address into the “GameManager” script. As such, you are ready to learn more details about the “Minting” script (57:00). Essentially, the “ExecuteMinting” function does all the heavy lifting by taking in the above-discussed metadata URL as a parameter. Moreover, thanks to Moralis, you get to do this very easily:

Last but not least, here’s the video tutorial:
How to Build a Web3 Augmented Reality NFT Loot Box – Summary
In today’s article, you learned that thanks to the power of Moralis you get to create cool Web3 augmented reality dapps with Unity. Furthermore, using our example project, you had a chance to create your own Web3 augmented reality dapp. As such, you learned how to connect Unity with Web3 functionality and how to use Hardhat to deploy smart contracts. In addition, by taking a closer look at some of the most important scripts, you also had a chance to learn more about all the essential moving parts of AR games created with Unity.
If you enjoyed this example project, we encourage you to visit the Moralis’ YouTube channel and the Moralis’ blog. For instance, you can learn to build a Web3 role-playing game or a Web3 MMORPG. On the other hand, feel free to explore other topics. Some of the latest articles explain our Ethereum dapp API, how to build a Web3 blog dapp, the Ethereum Merge, or our Ethereum NFT API – which is a must for any aspiring NFT coders. It’s not hard to see why Moralis was recently named one of the top web3 startups!
And, if you want to become a Web3 developer fast and with confidence, we recommend Moralis Academy. This is the place to enroll in professional blockchain development courses, get a personalized study path and expert mentorship, and become a member of one of the most advancing communities in the industry.
