If you want to utilize BNB Chain for blockchain development, you should learn how to set up a BNB wallet. Creating such a wallet is essential since it enables users to interact with dapps on BNB Chain. With so many programmable blockchains available serving as a base for decentralized applications (dapps), we know that Ethereum is widely popular. However, BNB Chain is gaining attraction due to its many benefits over Ethereum, such as low fees. Thus, it’s not surprising that programmers decide to use the more cost-efficient alternative since it becomes more profitable. If you are one of those wanting to dive into BNB Chain development and have been searching for a Binance Coin wallet guide, look no further! We’ve prepared a step-by-step guide on how to set up a BNB wallet easily, which we’ll explore herein.
Before tackling the core of this article’s topic, we need to start with the basics. Accordingly, we will first ensure that you understand what BNB, Binance Chain, BSC, and BNB Chain are. Then we’ll focus on the main topic of this BNB wallet guide. That’s when you’ll learn how to set up a BNB wallet using MetaMask. Sure, there are other BNB wallets that you can use; however, MetaMask for developers is the go-to tool. This is also true if you want to work with the best Web3 backend platform, Moralis. This “Firebase for crypto” platform makes building dapps with MetaMask effortless. Also, you can authenticate with MetaMask and, in turn, take care of Web3 authentication. In addition, the Moralis SDK is the pinnacle of the current Web3 tech stack. It is the ultimate shortcut to creating a full range of dapps across different chains, including BNB Chain.
Exploring BNB, BSC, BC, and BNB Chain
We first want to ensure that you properly understand the basics, as we mentioned earlier. Hopefully, we will also clear up some of the confusion that Binance’s latest rebranding caused. However, in case you’re eager to learn how to set up a BNB wallet, feel free to jump to the “Step-by-Step Guide” section.
When it comes to Binance – a blockchain company and centralized exchange (CEX) – it all started back in 2017. This was when they launched Binance Chain (BC) and the chain’s native coin – BNB. However, Binance Chain was not able to serve as a programmable chain where devs could create dapps. Thus, in 2020, Binance Smart Chain (BSC) was born. With that move, Binance became a lot more than just another CEX. As a result, Binance now offers a rather extensive ecosystem of crypto services. These include Binance Labs, Binance Launchpad, Binance Cloud, the Binance NFT marketplace, and much more. This clearly indicates that Binance is a sort of hybrid CeFi platform.
Meet BNB Chain
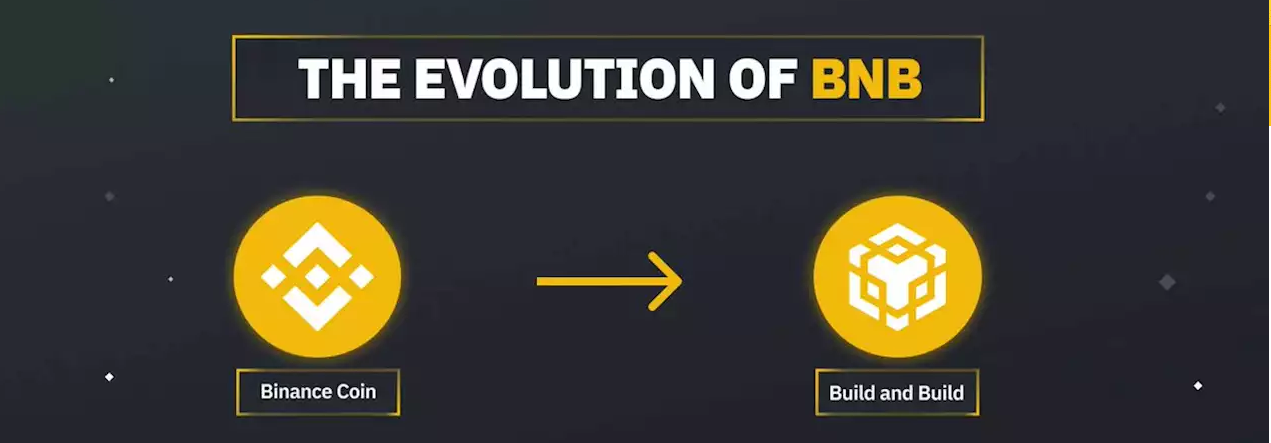
Before moving forward, we must point out that in mid-February 2022, Binance updated or rebranded its chains. As such, they introduced “BNB Chain”. The latter includes both BSC (Binance Smart Chain) and BC (Binance Chain). However, to complicate things a bit further, they also decided to rename their existing chains. As such, Binance Smart Chain is now BNB Smart Chain. Fortunately, this means that the abbreviation hasn’t changed, and it’s still BSC. Furthermore, Binance Chain became BNB Beacon Chain. In addition, this update also affected Binance Coin, which is now known as “Build and Build”. As such, the ticker “BNB” is still valid. Also, what’s fortunate is that it didn’t affect the functioning of the two chains.
Here’s the gist of Binance’s 2022 February update:
- Binance Chain and Binance Smart Chain became BNB Chain. As such, BNB Chain comprises the existing two chains.
- Binance Chain became BNB Beacon Chain, which serves for BNB Chain governance (staking, voting).
- Binance Smart Chain became BNB Smart Chain (BSC still stands), an EVM-compatible consensus layer with hubs to multi-chains.
- BNB (formerly called Binance Coin) now stands for “Build and Build”. However, BNB use cases remain the same. Although, it is now considered as the blockchain’s gas token that “fuels” transactions on BNB Chain.
- BNB Chain aims to build the world’s parallel virtual ecosystem infrastructure.
As a developer, you should remember that BSC is quite similar to the Ethereum blockchain. After all, BSC essentially uses the same codebase. Sure, some parameters were adjusted and updated, yet the principles are the same.
What is a BNB Wallet?
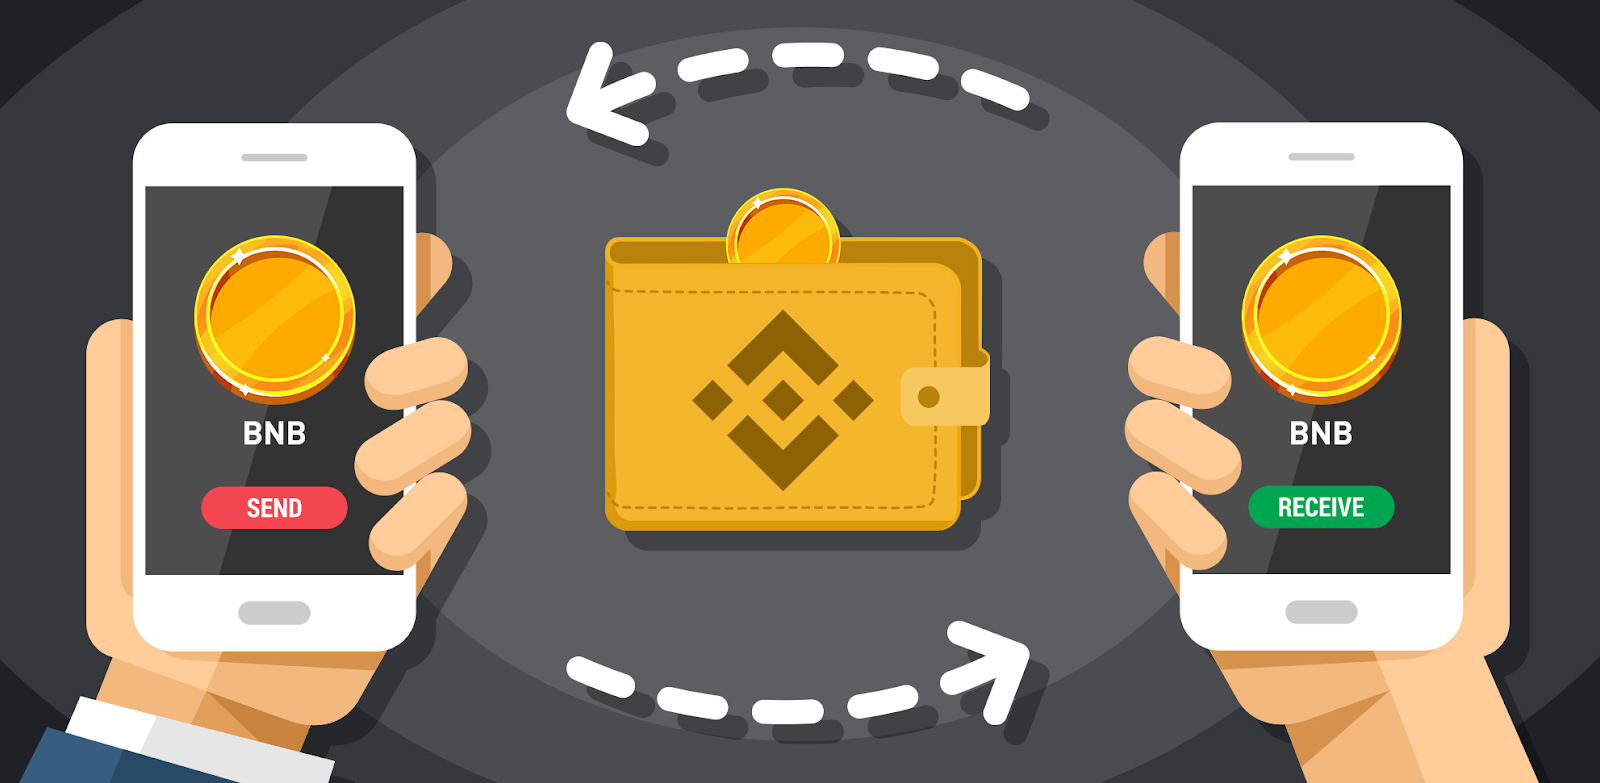
You probably know that there are many cryptocurrencies out there. A place that can store those currencies is called a crypto wallet or a Web3 wallet. Generally speaking, there are two kinds of crypto wallets: hot and cold crypto wallets. The latter is offline storage. However, hot wallets refer to online applications that enable users to interact with different blockchains. As such, it depends on how you look at things – a BNB wallet could be referred to as a cold crypto wallet that stores BNB. However, “BNB wallet” commonly refers to a hot crypto wallet that can store BNB coins. Nonetheless, note that every blockchain address that supports BNB can be used as a BNB wallet. This is definitely something to keep in mind when addressing the “how to set up a BNB wallet?” question.
We must also tell you that Binance has its own crypto wallet. It is available in the form of a browser extension and a mobile application. According to online reviews, the former is a solid choice for Binance’s exchange users. However, as mentioned above, Web3 developers and anyone looking to become a blockchain developer should focus on using MetaMask.
How to Set Up a BNB Wallet Using MetaMask – Step-by-Step Guide
This BNB wallet guide will take you by the hand through the process of setting up your first BNB wallet. By default, MetaMask enables you to create an ETH wallet. That’s because MetaMask initially only supports Ethereum’s mainnet and testnets. However, we can add other networks to the wallet. As such, we will show you how to add BNB Smart Chain to your MetaMask. Also, you will be able to use the same principles to add other reputable EVM-compatible chains to this crypto wallet.
Throughout the following sections, we’ll show you how to download, install, and set up your first wallet with MetaMask. Plus, we’ll show how to add the BNB Chain network. These four steps are essentially all there is to the “how to set up a BNB wallet” task. Nonetheless, if your browser is already equipped with the MetaMask extension, feel free to jump over to the “Add BNB Chain to MetaMask” section further down.
Download and Install MetaMask
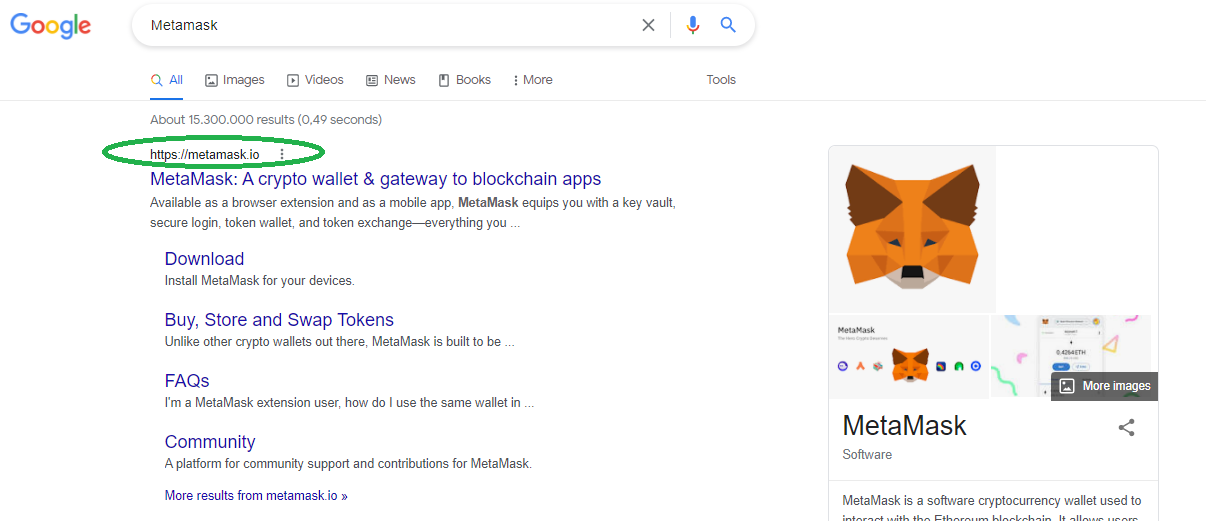
- Start by searching for “MetaMask” using your preferred browser. We recommend using Google Chrome. Next, double-check that you are about to click on the official MetaMask URL address:
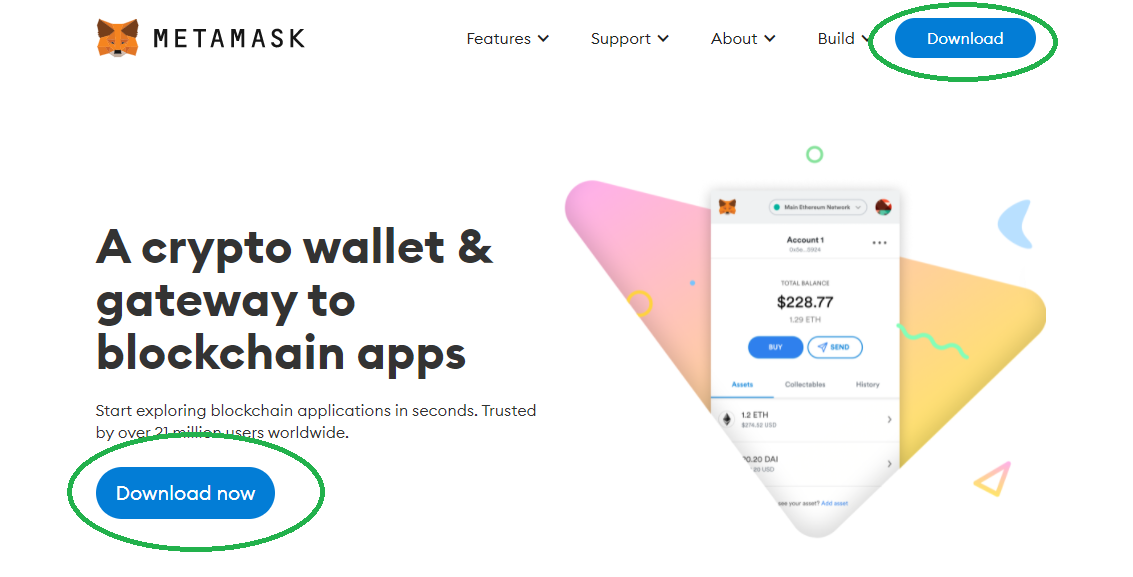
- After accessing MetaMask’s official website, you need to click on “Download”. You can find this button in the top-right corner or on the homepage:
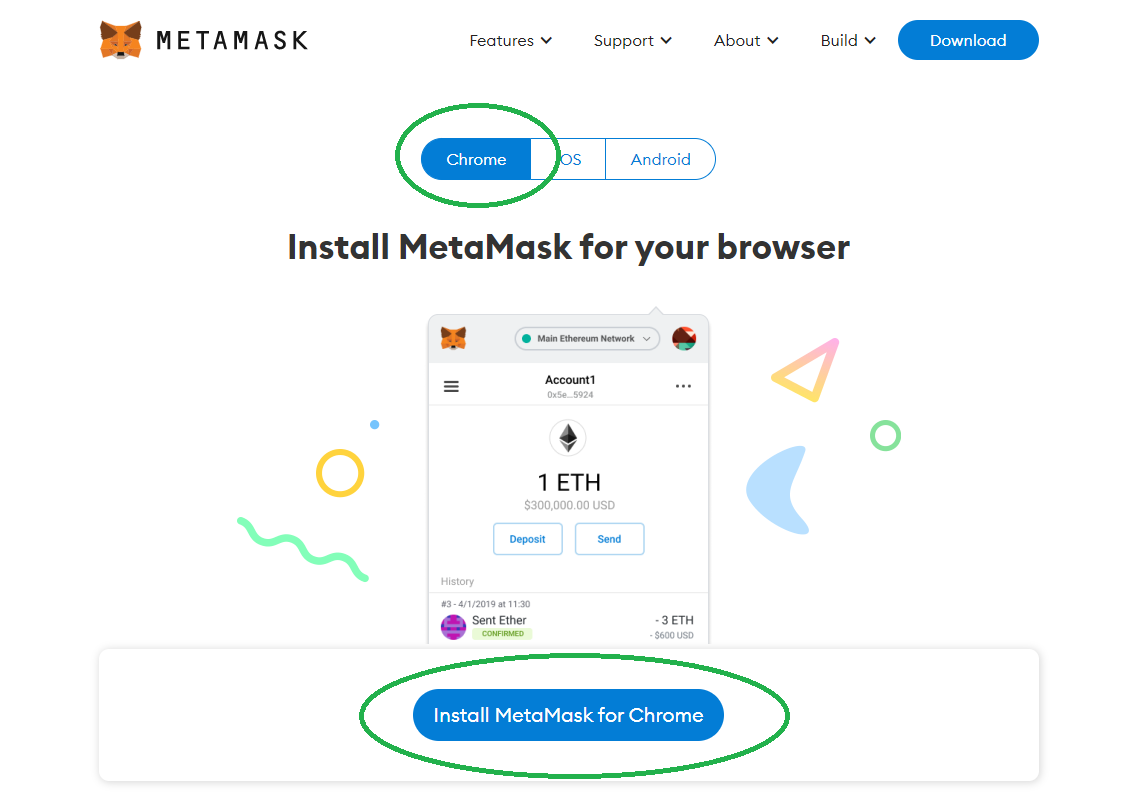
- Once on the “Download” page, you need to decide between “Chrome”, “iOS”, and “Android”. If you plan on using the MetaMask wallet for Web3 development, focus on the “Chrome” option. After selecting the “Chrome” option, click on the “Install MetaMask for Chrome” button:
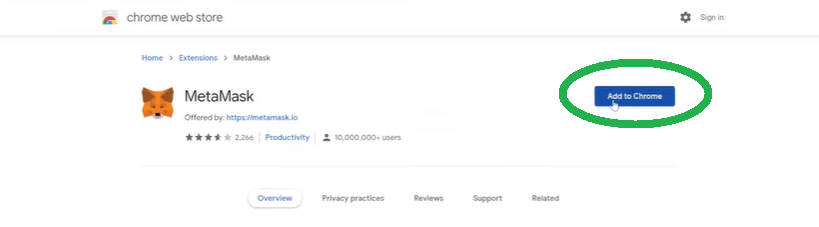
- Next, you’ll be redirected to Google Chrome’s web store. There, you need to click on “Add to Chrome”:
- After adding the extension to your browser, a pop-up window asking for confirmation will appear. To proceed, you need to click on “Add extension”:

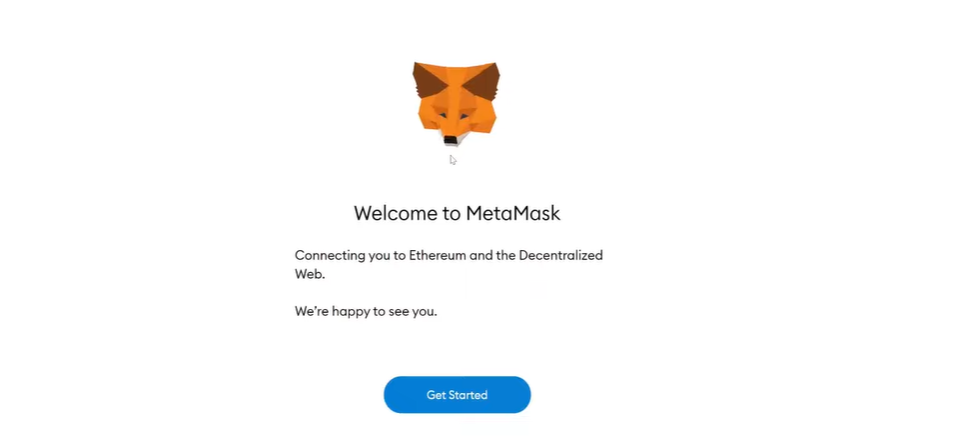
- After completing the above steps, MetaMask’s welcome message will greet you. This message also tells you that you have just finished the MetaMask extension installation process. As such, it’s time to create your new wallet. Hence, click on “Get Started”:
Create Your New Wallet with MetaMask
The above “Get Started” button will take you to a screen where you’ll be able to opt as a new or existing MetaMask user. So, in case you already have a MetaMask wallet, you can set it up by using your secret recovery phrase. If that’s the case, you’ll want to click on the “Import wallet” button. However, if you want to create a new wallet, go with the “Create a Wallet” option. That is what we’ll focus on herein.
- Click on “Create a Wallet”:

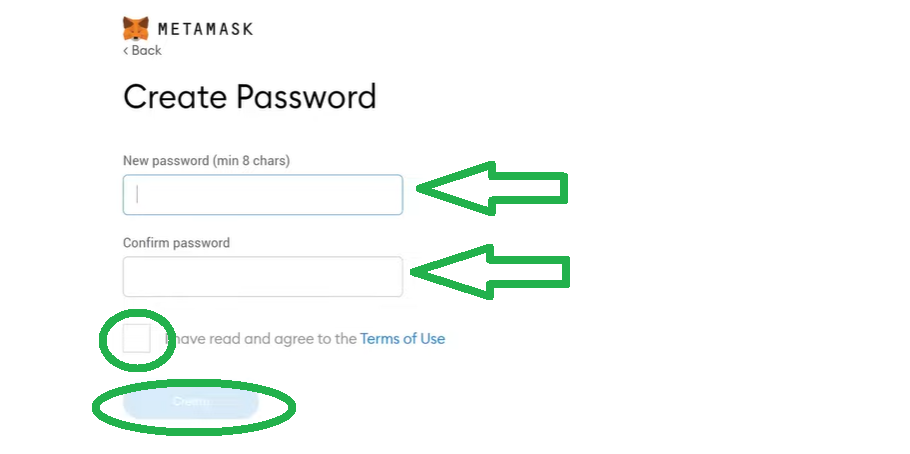
- Then, come up with a password and enter it twice. It is important to memorize your password. Of course, we also recommend writing it down and storing it somewhere safe.
- In certain regions, you will see the MetaMask guide with an instructional video. If this applies in your case, watch it. The next important step will revolve around your secret recovery phrase. As such, select “click here to reveal secret words”:

- Once you see your secret words, copy and write them down. This is extremely important, and we cannot emphasize this enough! Also, store your notes somewhere safe. Many users consider writing them down by hand on a piece of paper to be the best way. If you choose that method, make sure to double-check your spelling. Since this is an extremely important step, take it slow and do things right. With your secret recovery phrase, you will be able to access your wallet from another device. In addition, it will enable you to recover your account if needed. Once you’ve copied the phrase, click on “Next”.
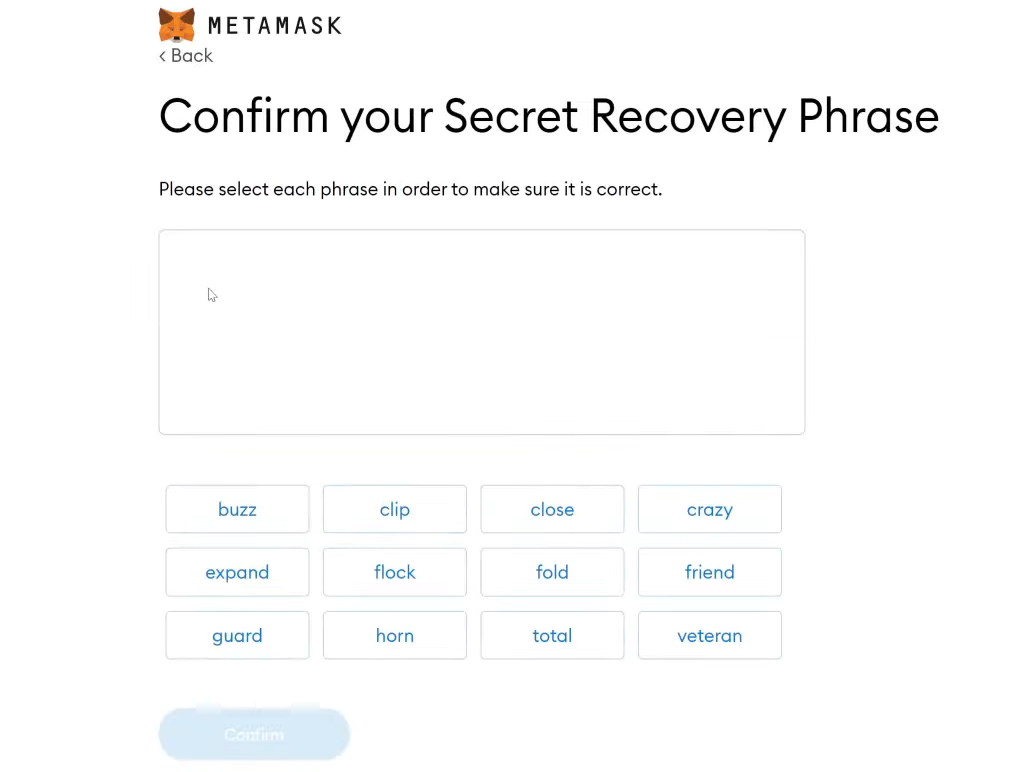
- Now, make sure to enter your phrase from the previous step in the proper order:
Add BNB Chain to MetaMask
At this point, you have your MetaMask wallet ready. However, it can’t serve as a BNB wallet yet. Hence, you still haven’t reached the finish line of your “how to set up a BNB wallet” mission. You still need to add the BNB Chain network. Moreover, when you want to add BNB Chain or any other blockchain to MetaMask, you can take two paths:
- You can do it manually. If safety is your top priority, opt-in for this method.
- Do it automatically. You can use various reputable websites, which will add any supported chain to your MetaMask with the click of a button. As such, this method is a lot faster. However, it is potentially risky. Therefore, it is vital to only use websites you trust. Fortunately, there are many reputable websites offering this shortcut, but we can only vouch only for Moralis.
How to Set Up a BNB Wallet Manually
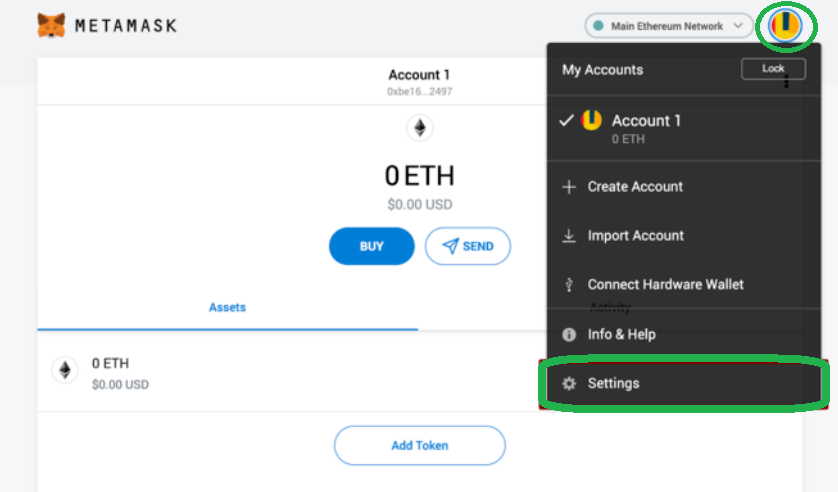
- Access your MetaMask wallet. Then, click on the “account” icon and select the “Settings” option from the drop-down menu:
- Next, select the “Networks” option:
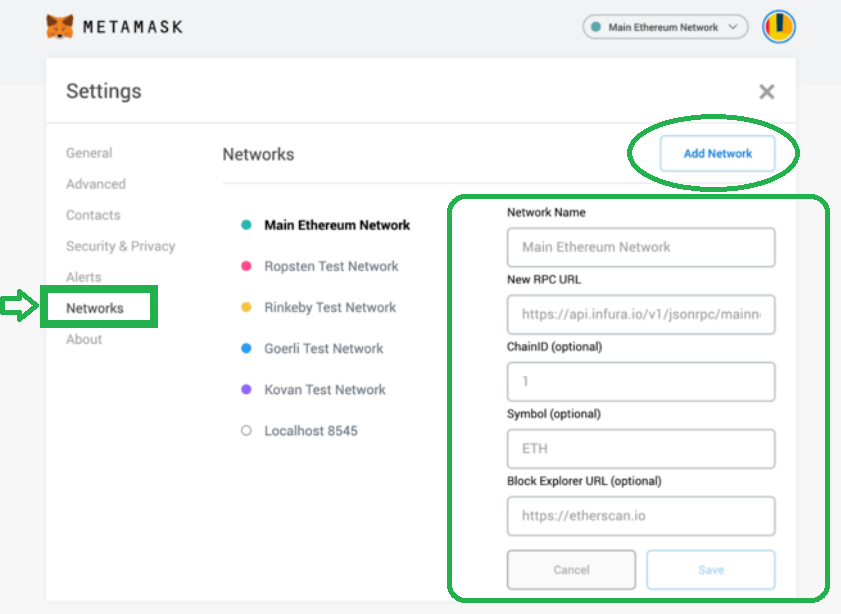
- To add the BNB Chain details, click on “Add Network” (see the image above).
- Below are the details you need to enter. After entering or pasting the details, click on the “Save” button.
- To add the BSC mainnet, use these details:
- Network Name: Smart Chain
- New RPC URL: https://bsc-dataseed.binance.org/
- Chain ID: 56
- Symbol: BNB
- Block Explorer URL: https://bscscan.com
- To add BSC’s testnet, use these details:
- Network Name: Smart Chain – Testnet
- New RPC URL: https://data-seed-prebsc-1-s1.binance.org:8545/
- Chain ID: 97
- Symbol: BNB
- Block Explorer URL: https://testnet.bscscan.com
How to Set Up a BNB Wallet Automatically
Now, let’s explore how to set up a BNB wallet automatically. As mentioned above, you can use Moralis. Once you create your free Moralis account, you get access to your Moralis admin area. From there, you’ll get to access Moralis Speedy Nodes:
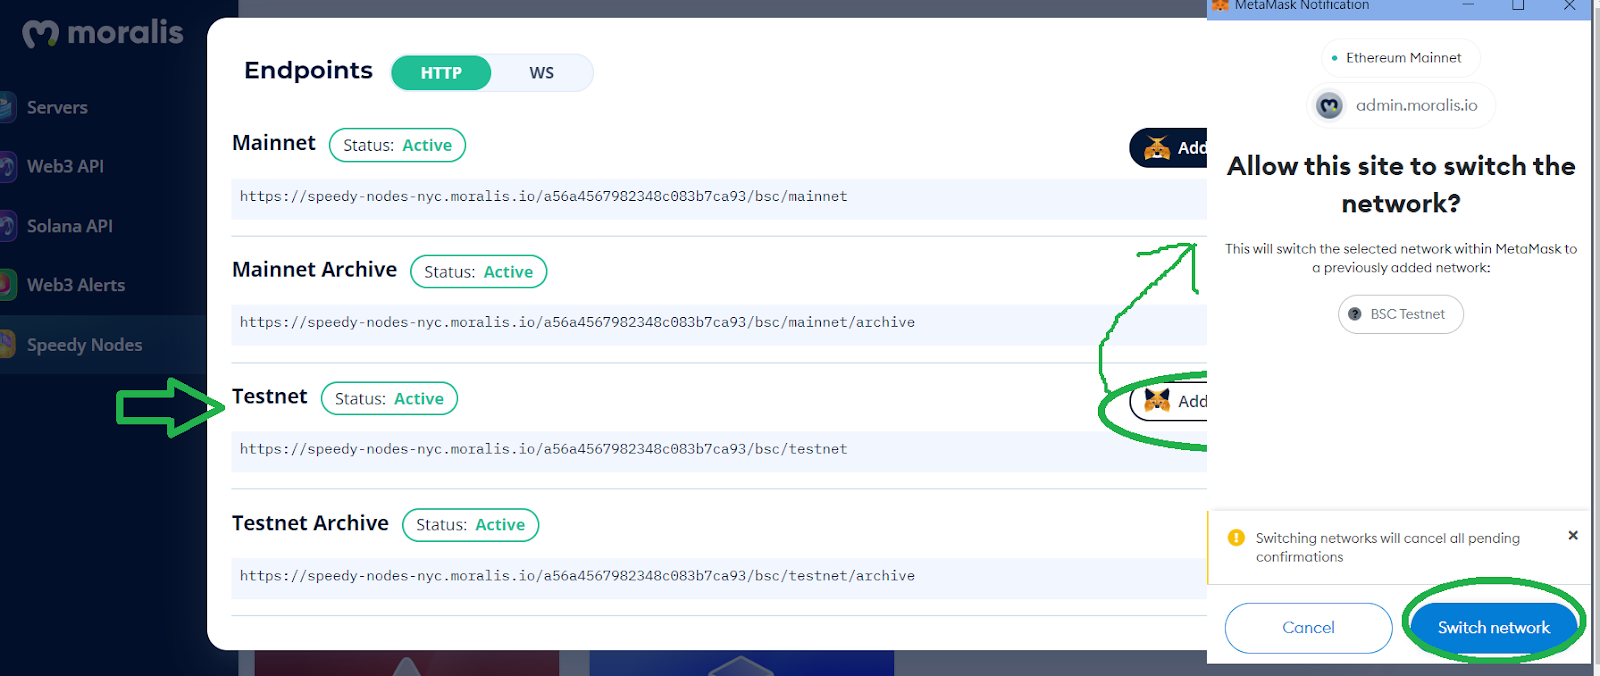
- Navigate to the “Speedy Nodes” tab:
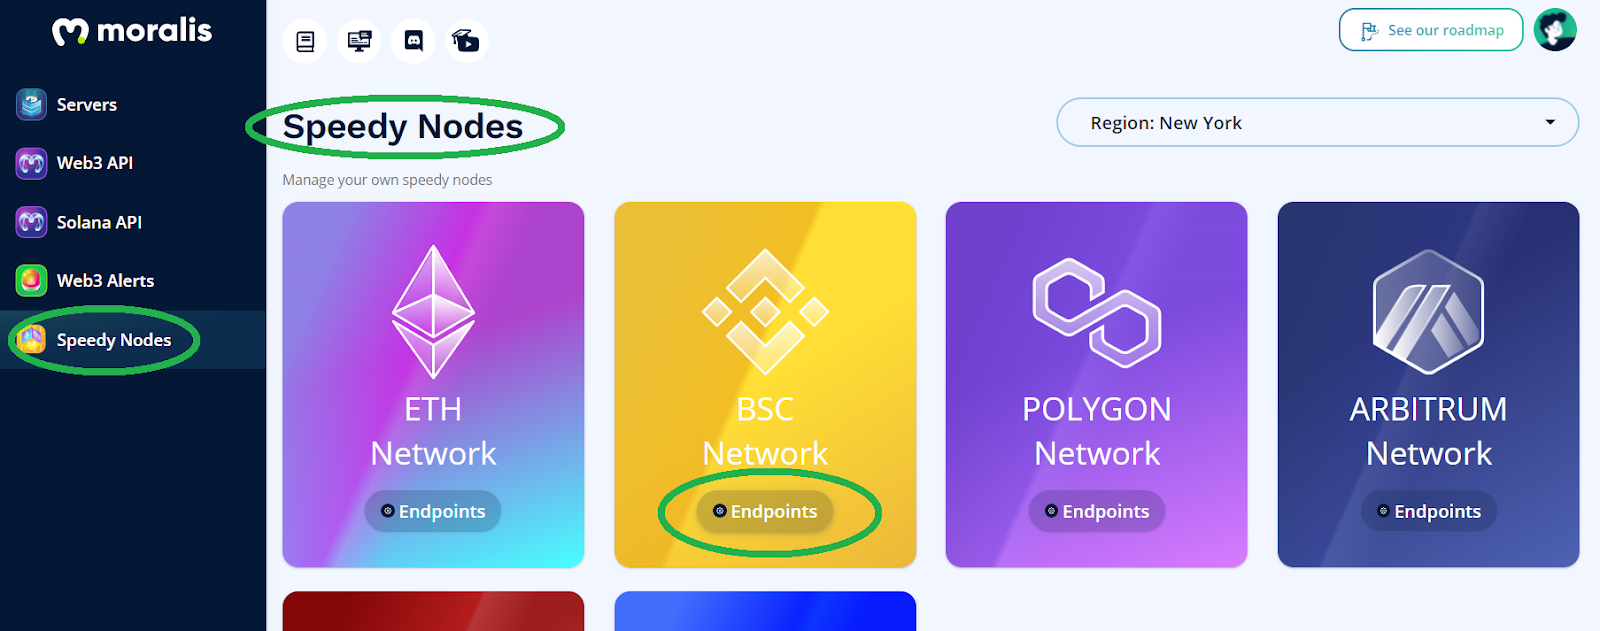
- Select “Endpoints” under “BSC Network”, as shown above.
- Next, you’ll see the endpoints in a pop-up window. There, you can click on the “Add to MetaMask” buttons. As such, you can easily add the BSC mainnet and BSC testnet:
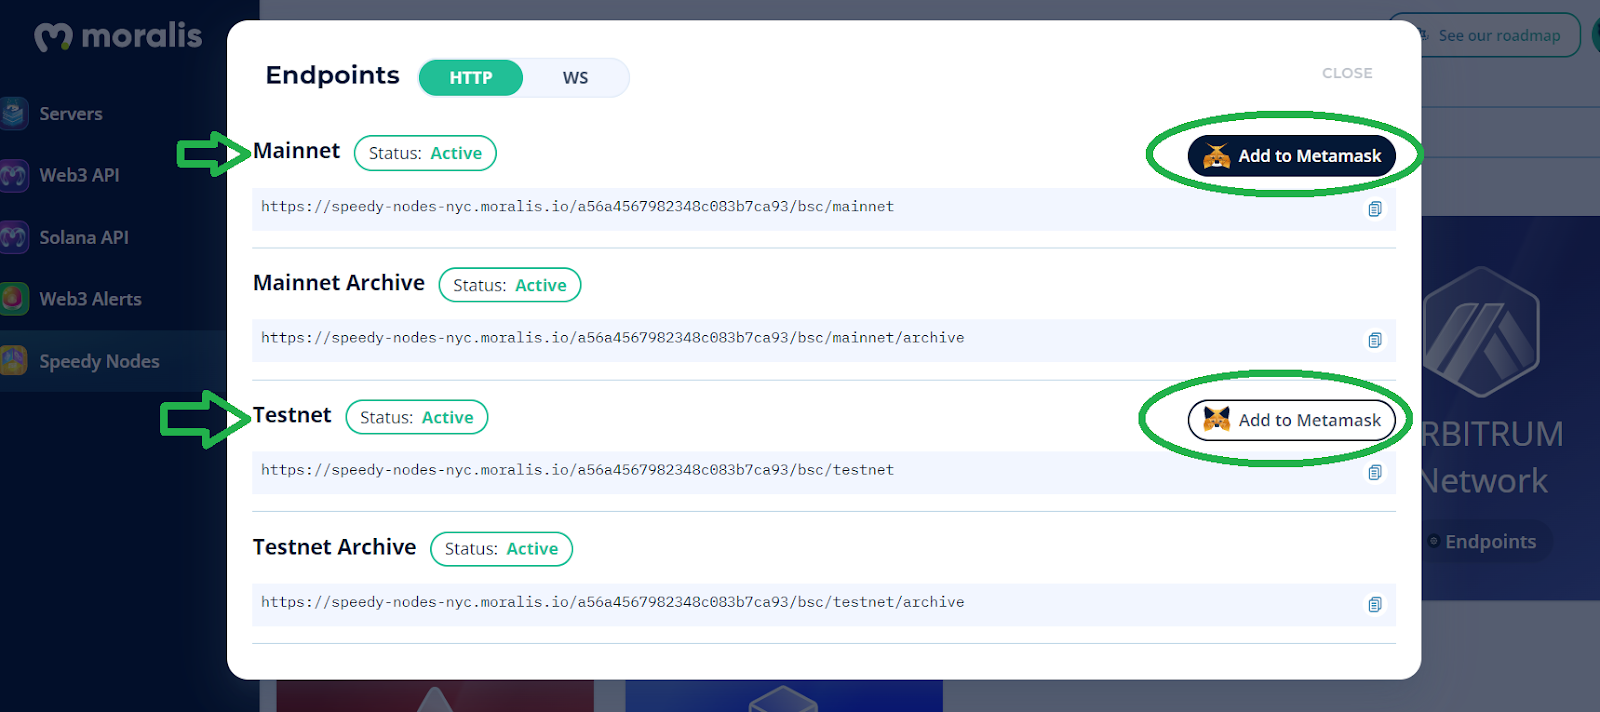
- Finally, confirm your actions by clicking on the “Switch Network” button in your MetaMask:
BNB Wallet Guide – How to Set Up a Binance Coin Wallet – Summary
At this point, you know how to set up a BNB wallet for developers. Along the way, you’ve learned the basics about BNB Chain. As a result, you now know what BSC, BC, and BNB are. Moreover, you went through the process of downloading and installing the MetaMask extension. Finally, you’ve also learned how to add BNB Chain to MetaMask, both manually and automatically. As such, you are all set to make use of your new BNB wallet. Moving forward, we recommend starting with our BSC programming guide and learning to use BscScan. Next, you can explore how to create BSC dapps or even learn to create a BSC NFT in minutes. In addition, find out how to connect to BSC nodes or learn more about Infura BSC alternatives.
On the other hand, make sure to visit the Moralis YouTube channel and the Moralis blog to explore other aspects of blockchain development. Some of the latest topics there cover the benefits of Web3 gaming, how to develop a Web3 Netflix clone, how to build a multi-chain wallet, how to communicate with a Web3 database, and how to build a metaverse game. Plus, it answers the “why is Web3 important?” question and explores topics such as DeFi staking, NFT power-ups, the Web3 metaverse, and much more. Hence, you can get free crypto education under your belt easily using those two outlets. However, if you want to become a Web3 developer with more confidence, we recommend taking a more professional approach. Thus, consider enrolling in Moralis Academy!