Although market volatility can incite fear, it provides excellent conditions for Web3 development. Thus, if you are new to crypto, we urge you to learn full stack Web3 development. Or, if you’re an experienced programmer who wants to hone your development skills, trying to launch next-gen dapps by building Web3 projects is the way to go. No matter your position, this article will be highly beneficial. By following our tutorial herein, you’ll get to experience full stack Web3 development firsthand. Also, you will get acquainted with some incredible tools, including React, Hardhat, and Moralis.
Before we give you a chance to roll up your sleeves, we’ll ensure that we are all on the same page. Accordingly, we will start our guide by answering the “what is full stack Web3 development?” question. We’ll also look at some key points that make Moralis the best Web3 backend platform. As such, you’ll be able to decide if you want to use this “Firebase for crypto” platform for your projects. Then, we will shift our attention to the example project herein. But, instead of building right away, we will first do a quick demonstration of our example dapp. That way, you’ll be able to decide if you want to get your hands dirty and dive into our full stack Web3 development feat. Of course, if you already have the basics under your belt, feel free to create your free Moralis account and start building!
What is Full Stack Web3 Development?
When it comes to Web3 development, things follow the established patterns of Web2 and all existing software. As such, we still talk about the server-side (the backend) and the user side (the frontend). Thus, full stack Web3 development includes Web3 frontend and Web3 backend development. As far as the Web3 UI goes, the decentralized internet is not reinventing the wheel. Sure, there are features and options unique to Web3; however, interfaces generally aim to follow the established lines. This also means you can utilize your existing frontend skills for Web3 development.
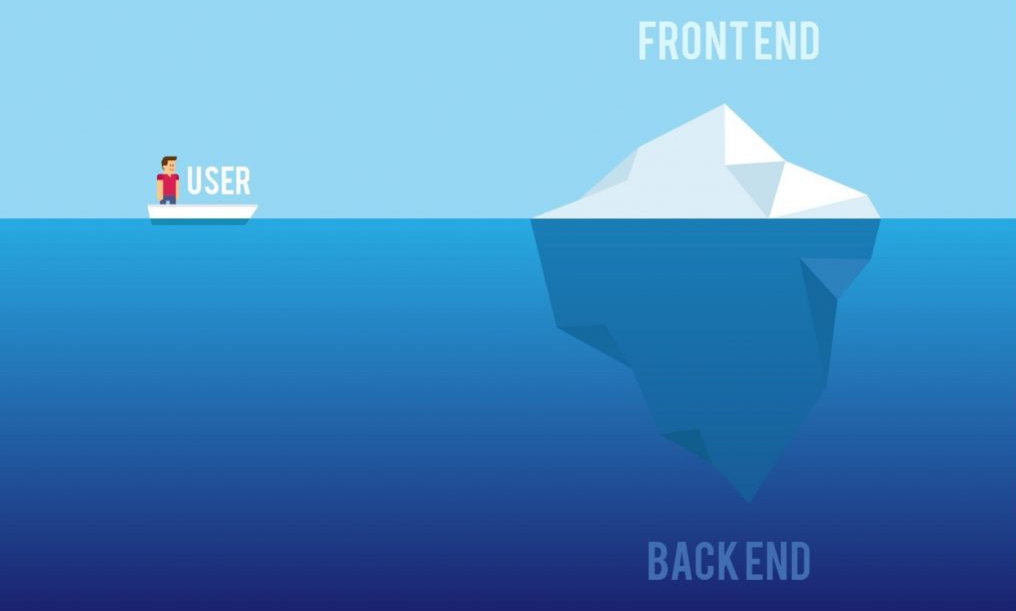
On the other hand, there’s quite a big difference when it comes to the Web3 backend side. As you probably know, programmable blockchains are the core of this new web, with Ethereum leading the pack. These distributed ledgers support smart contracts, which are the brains of decentralized applications (dapps). With that said, the Web3 backend requires you to sync and index smart contract events. If you have tried to index the blockchain before, you know it’s quite cumbersome. That’s especially true if you go about it in an outdated manner – by running Ethereum RPC nodes independently. That is a guaranteed way to encounter all of the limitations of RPC nodes and spend weeks or even months setting up the required infrastructure.
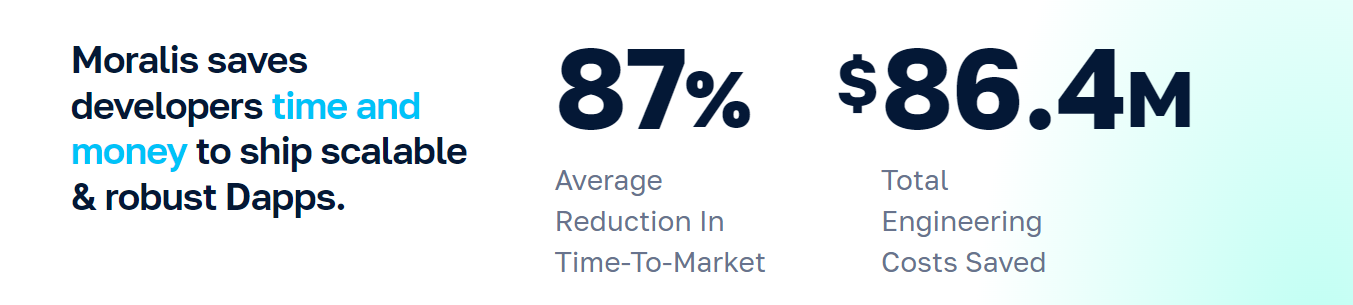
Fortunately, the Web3 tech stack has come a long way in recent years. If you’re wondering “how to get into Web3 in 2022?” the answer lies in using Moralis – the ultimate Web3 development platform! With its platform, you can be on your way to becoming a full stack Web3 development expert utilizing your JavaScript proficiency and Web3 basics!
Meet Moralis
Moralis provides a single workflow for building high-performance dapps. Accordingly, the platform enables you to cover full stack Web3 development in a single place. Moralis’ Web3 workflow comes in four stages, covering everything from authenticating users and monitoring historical and real-time transactions to a powerful cross-platform SDK and cross-chain Web3 API.
Since Web3 authentication is the starting point of all dapps, Moralis enables you to implement that with a single line of code. Hence, users can use any of their favorite Web3 wallets, such as MetaMask, to perform Web3 login. In addition, Moralis supports legacy login methods, including Web3 authentication via email and Web3 social login. Since most users are familiar with these authentication methods, they can help you boost Web3 user onboarding. On the other hand, for more crypto-savvy users, an option to authenticate with MetaMask is still the most popular choice.
Once users are authenticated, the monitoring feature from Moralis enables you to effortlessly monitor their transfers, trades, mints, burns, and all other actions relevant to your dapp. Moreover, Moralis’ SDK comes in multiple forms: web SDKs, a game SDK, and a backend SDK. That way, you get to use the power of Moralis with your favorite platforms. Nonetheless, thanks to Moralis’ cross-chain interoperability, you are never stuck to any particular chain. As a result, you future-proof your work. Plus, Moralis offers endless integrations with its ecosystem of plugins. So, in case you haven’t done so yet, make sure to create your free Moralis account and tackle our example project!
Full Stack Web3 Development – Demo of Our Example Dapp
Here’s the screenshot of our example dapp’s frontend:
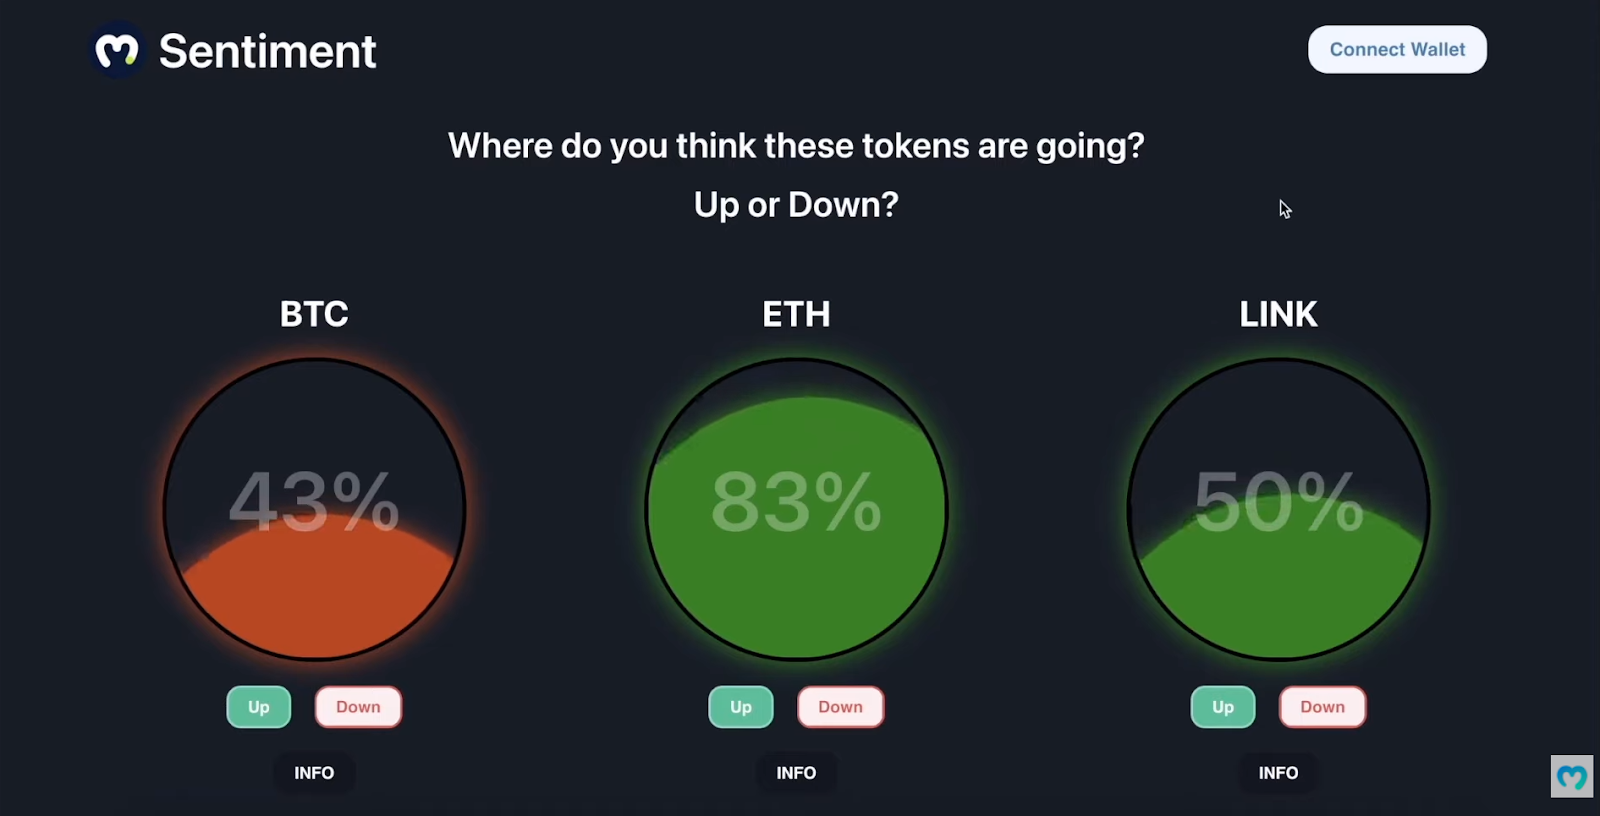
As you can see, you’ll get to build a crypto sentiment dapp. This dapp has a simple and clean design, combined with an intuitive UI. Without our explanation, you’d probably know exactly how to use it. Moreover, there are some animated aspects to our dapp, which means that a video tutorial can be even more picturesque. For that purpose, use the video at the end of this article (0:19).
If you look at the above screenshot again, you can see the percentage values inside the bubbles. These values reflect voters’ opinions regarding particular cryptocurrencies, as the tickers above the bubbles indicate. For the ones that the majority of voters are expecting the price to go up, the “liquid” turns green. Conversely, the “liquid” turns red when the number is below fifty percent. Furthermore, there are four types of buttons in our sentiment dapp: “Up”, “Down”, “INFO”, and “Connect Wallet”. Thanks to Moralis’ web3uikit, quickly setting those buttons in place is easy.
By clicking on the “info” buttons, our dapp displays the “about” information and the current prices of that ticker:

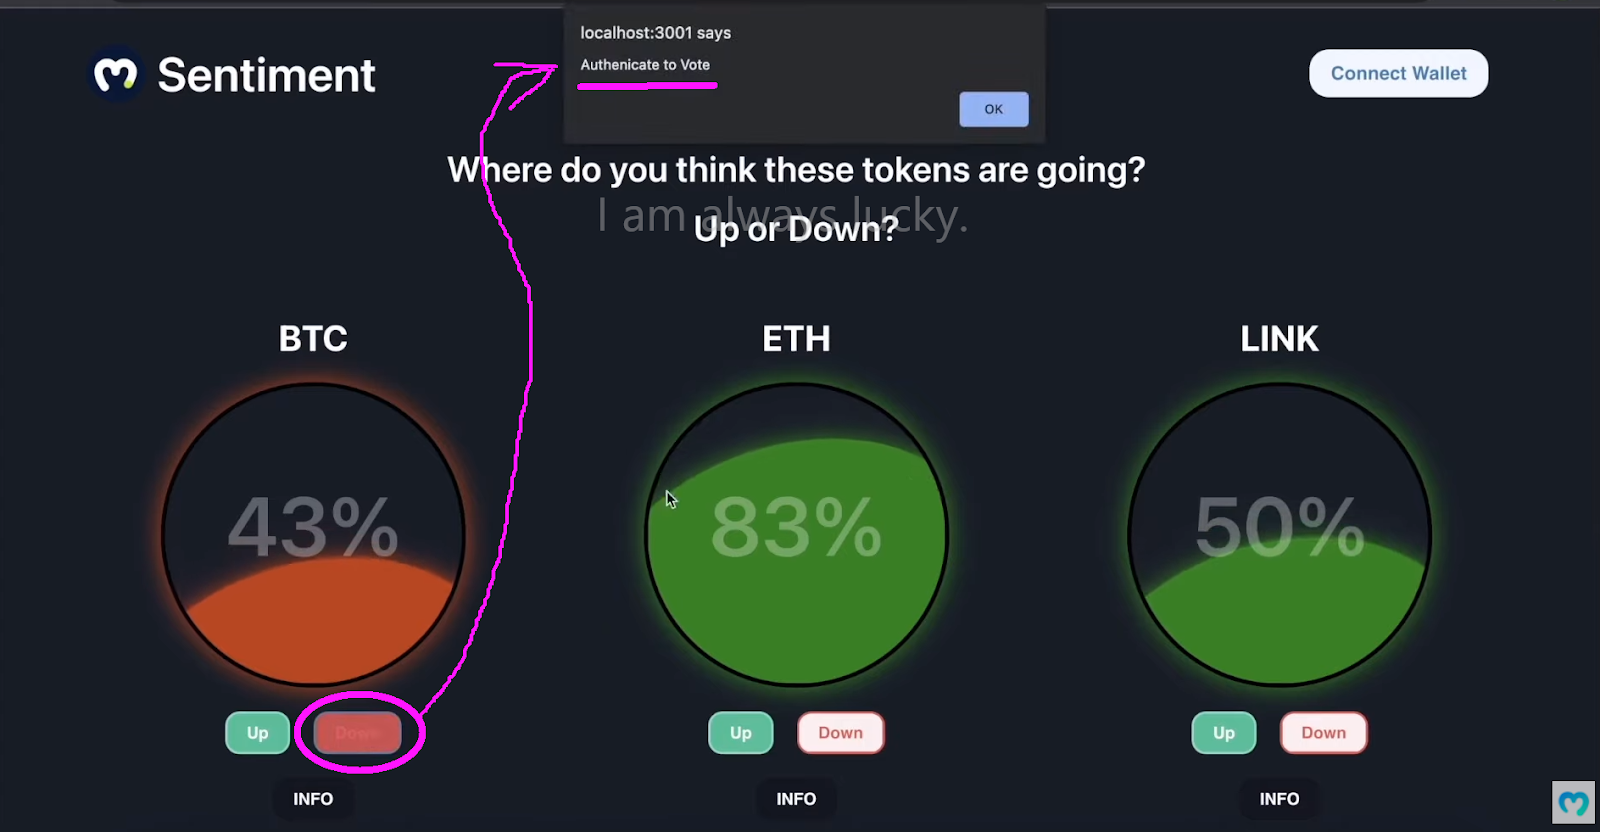
As far as the voting goes, only authenticated users can participate:
To sign in, users need to click on “Connect Wallet”:
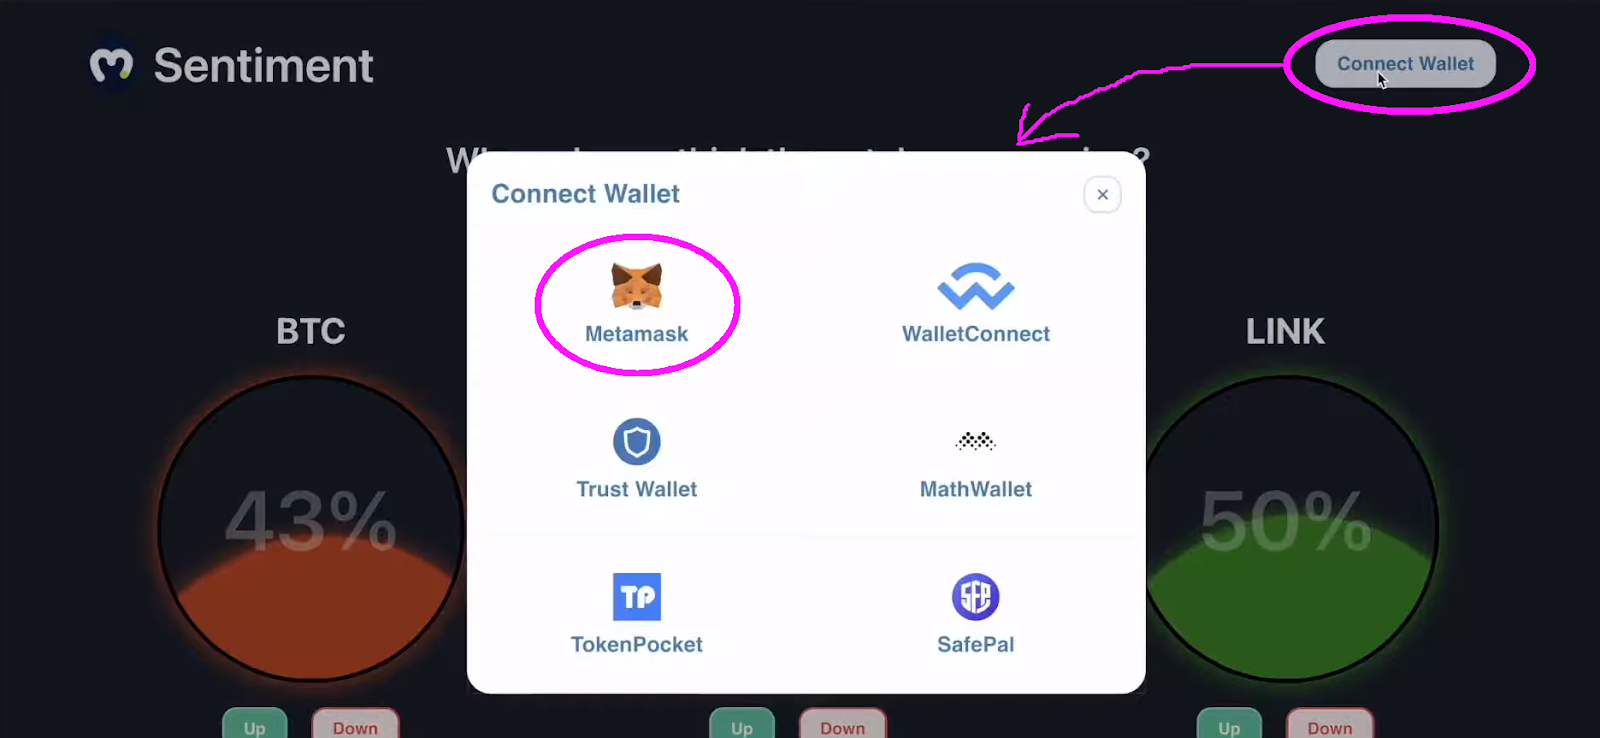
Next, they need to select their preferred wallet (e.g., MetaMask):
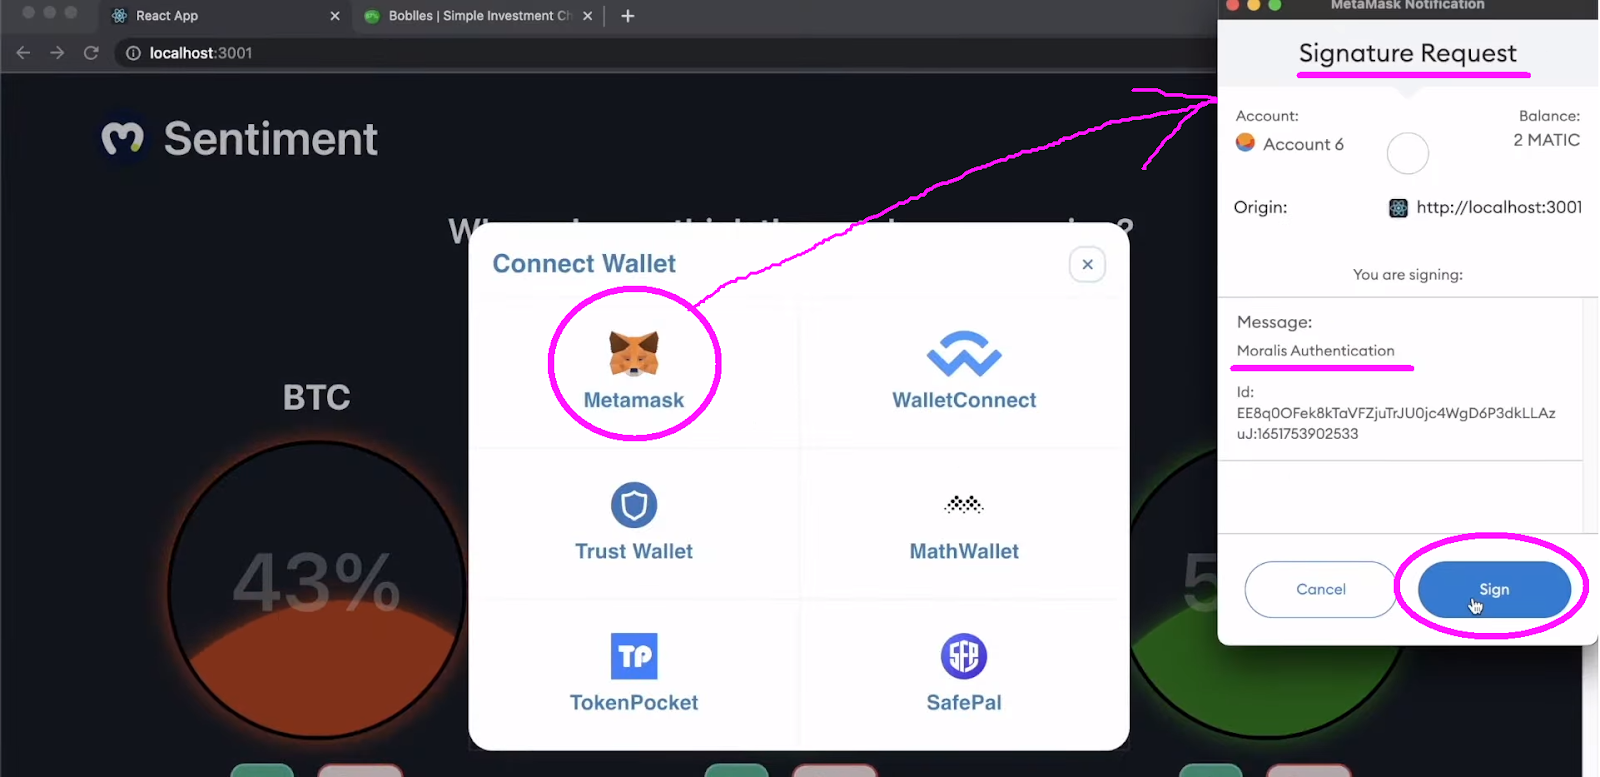
Finally, authenticated users can cast their votes. Since the votes are on-chain events, users need to confirm the related transactions:
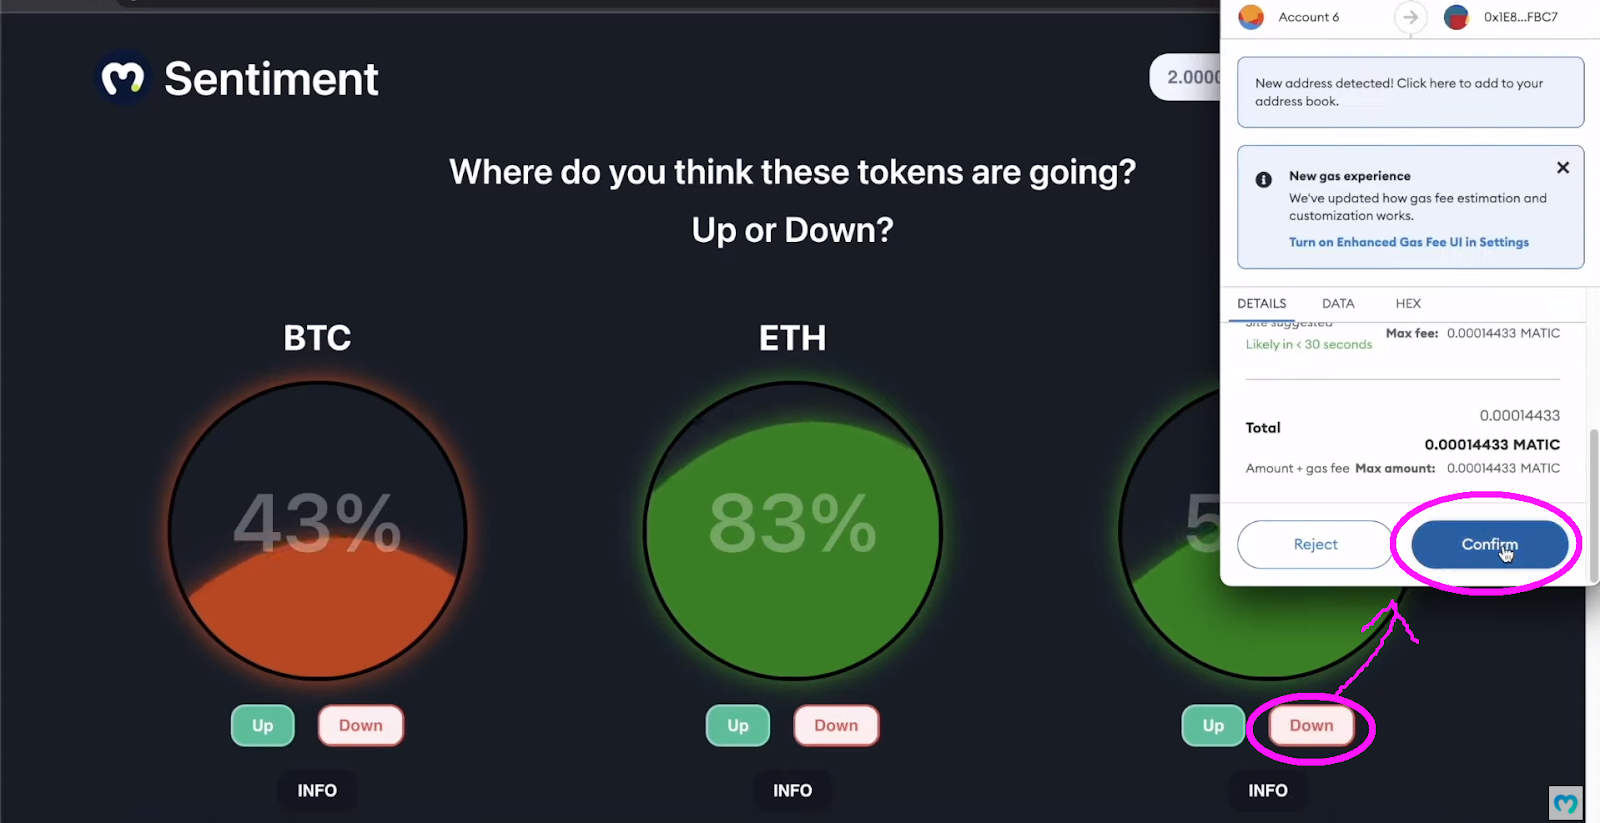
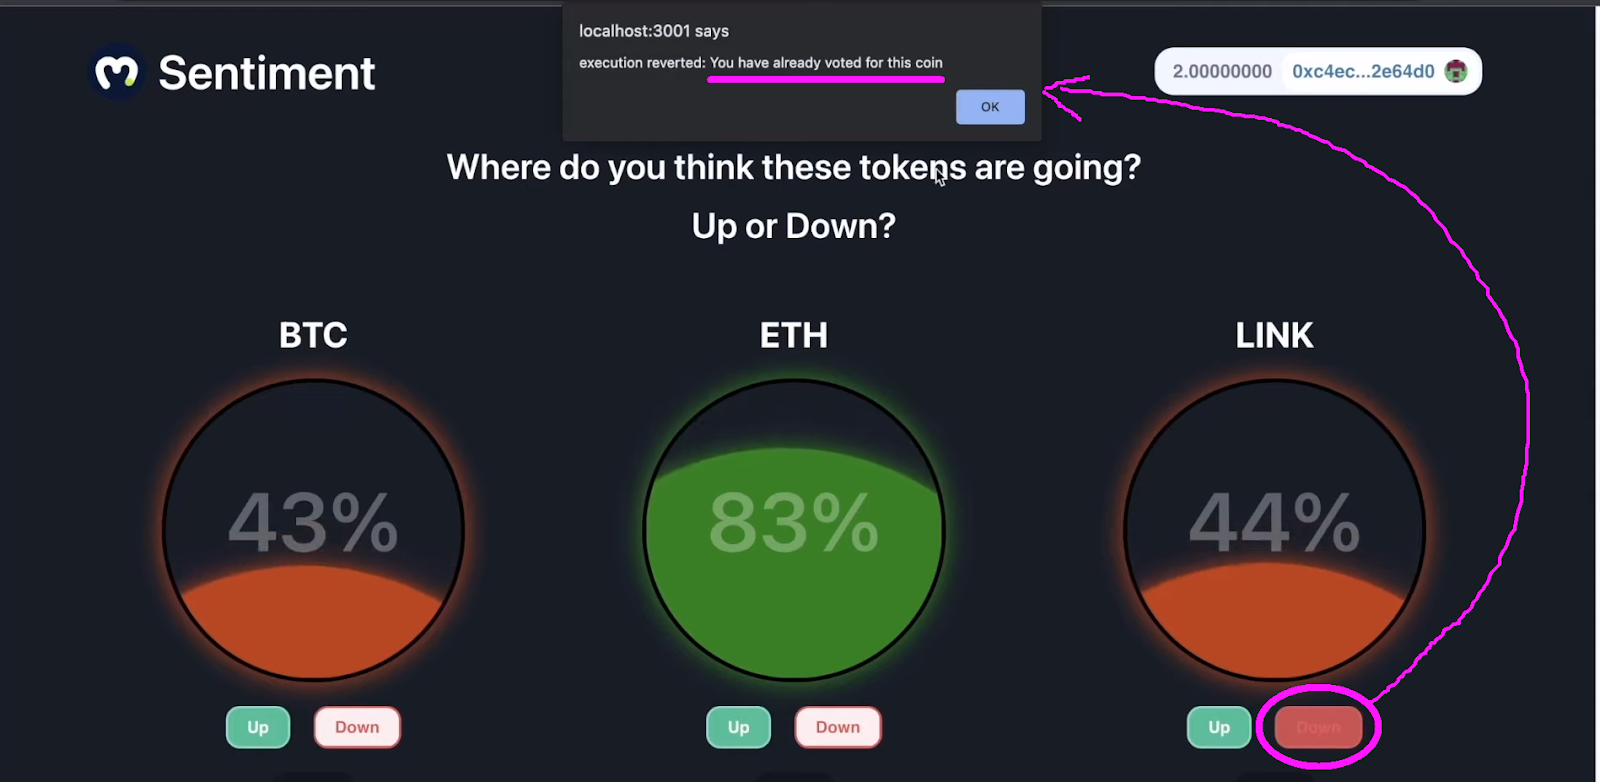
The Web3 contract behind this dapp also ensures that each user votes only once for each ticker:
Full Stack Web3 Development Tutorial
After looking at the above demo, you can see that this simple example dapp incorporates several frontend and backend elements. As such, it is a great choice for demonstrating some key aspects of full stack Web3 development. Moving forward, you will get to:
- Create, compile, and deploy a smart contract with Hardhat.
- Use React and Moralis’ web3uikit to create a neat Web3 frontend.
- Sync and index smart contract events.
Please note that you don’t have to start this example project from scratch. Instead, you can use our starter code, which awaits you on GitHub. Furthermore, in the following sections, we will focus on helping you get through the initial setup. Also, we will do our best to provide you with a clear overview of the full stack Web3 development process. However, for more details regarding the specific stage of this example project, we will refer to the video tutorial you can find at the bottom of this article.
Note: If you are in a hurry and would just like to test our example dapp or explore the code, use our final code instead.
Full Stack Web3 Development Tutorial – The Initial Setup
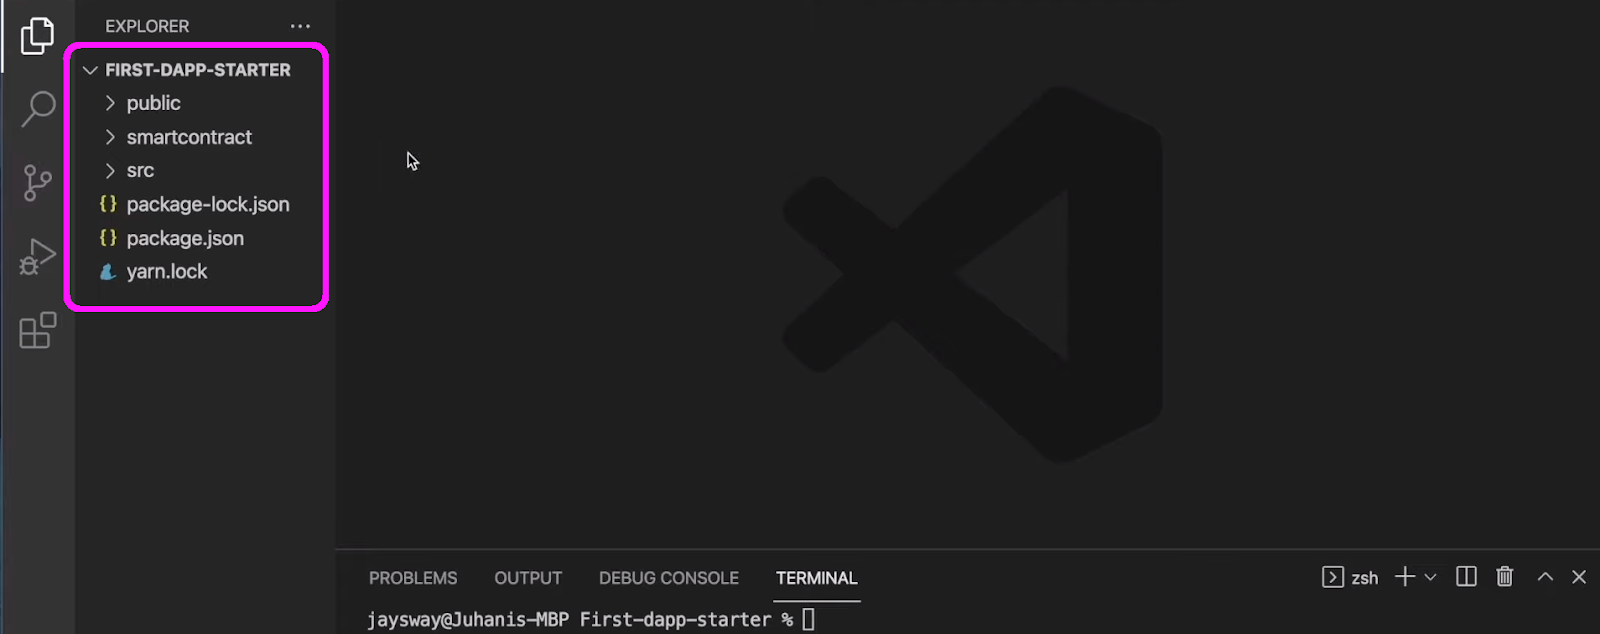
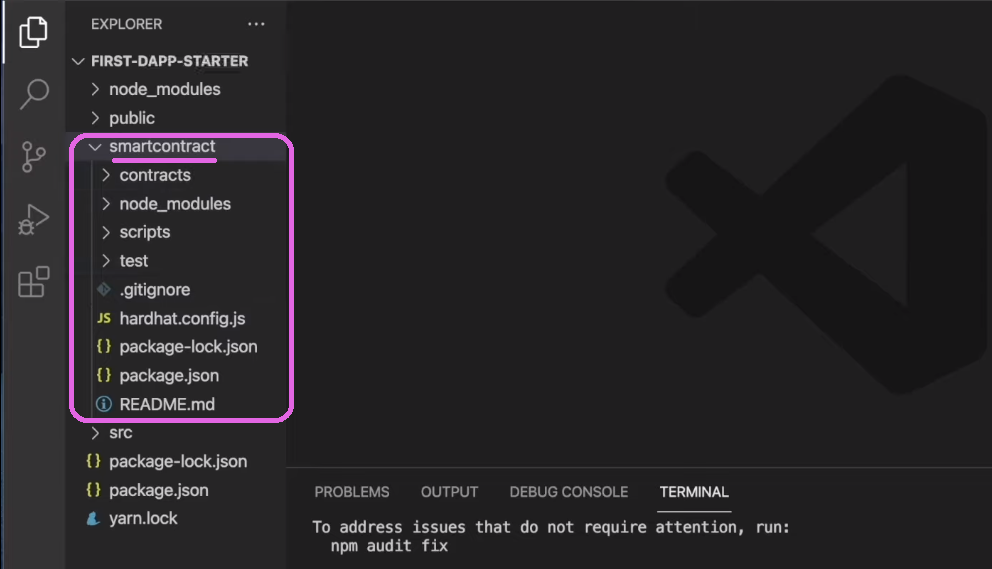
After cloning our starter code, you should be looking at the following project structure inside Visual Studio Code (VSC):
Next, you need to complete some initial Hardhat setups (4:16). You will start with the “cd smartcontract” command, which will take you to the “smartcontract” folder. There, you will install Hardhat using the “npm i -D hardhat” command:

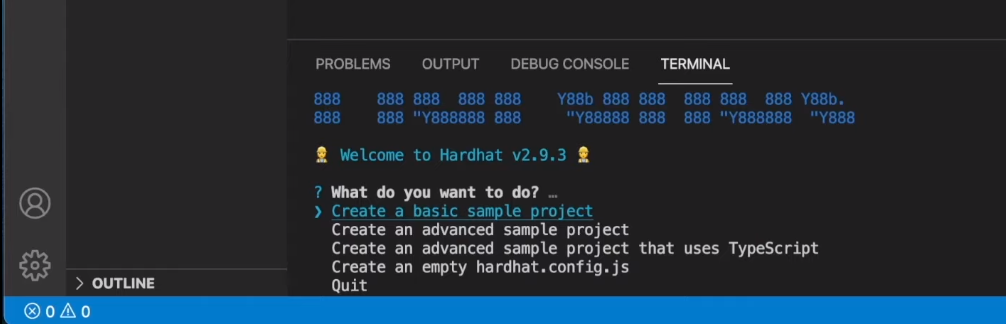
Then, enter “npx hardhat” to create a new Hardhat project. This command will prompt a sequence of setup questions. Since the top options are the ones you need to select, you essentially just need to hit “enter” several times:
Once your new Hardhat project is ready, you’ll see some additional elements inside the “smartcontract” folder:
To wrap up the setup, you also need to install two dependencies. As such, enter these two commands:
- “npm i -D dotenv”
- “npm i -D @nomiclabs/hardhat-etherscan”
Create, Compile, and Deploy Smart Contracts with Hardhat
With the Hardhat project ready, it’s time for you to create your own smart contract (5:35). Following our in-house expert’s lead, you will have your contract ready in minutes, even if you have zero Solidity skills. A quick tip is that you can often avoid creating smart contracts from scratch by using verified templates available on OpenZeppelin.
Note: There are other tools available that can enable you to deploy smart contracts. For instance, Remix is a great alternative. Hence, feel free to use that IDE to deploy the “MarketSentiment.sol” smart contract.
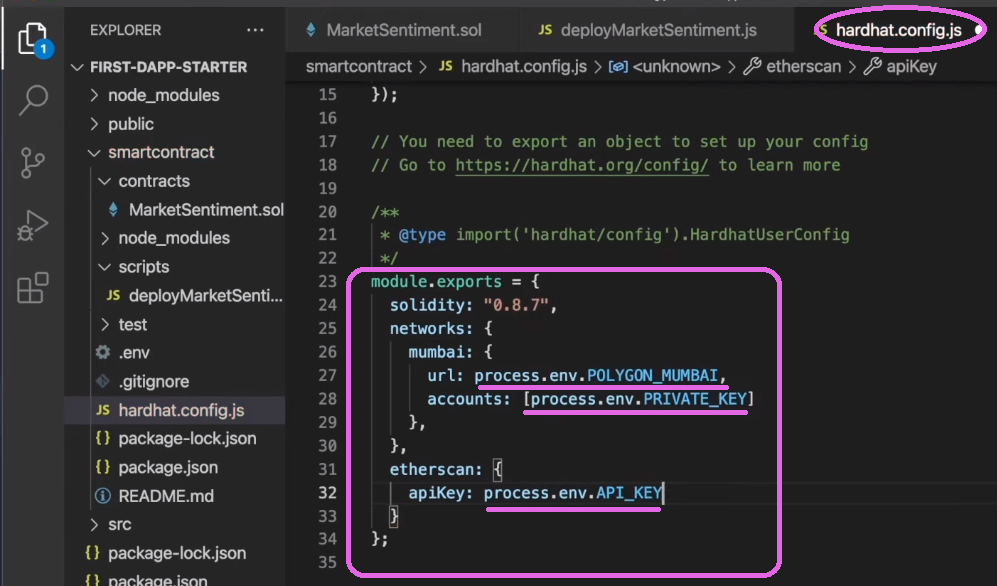
With the smart contract code in place, you will need to tweak the “sample-script.js” file so it will deploy your smart contract to Mumbai (Polygon’s testnet). Starting at 16:58 in the video below, you’ll learn how to ensure that the code matches your “.sol” file’s name. Next, you’ll focus on the “hardhat.config.js” file (18:05). This is also where you create your “.env” file. You’ll use the latter to store the following important variables:
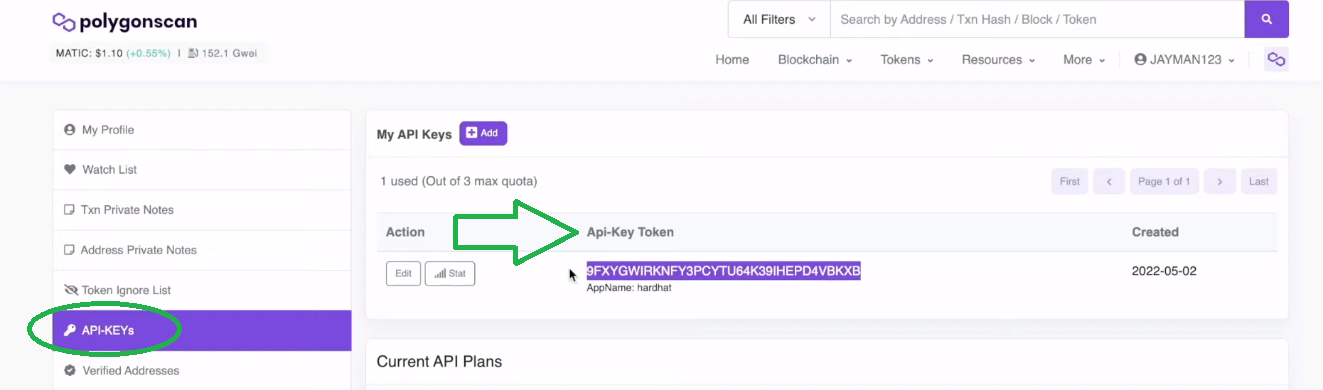
- PolygonScan’s API key
- Mumbai’s endpoint
- Your MetaMask private key
Getting Environmental Variables
You’ll get your PolygonScan’s API key inside your free PolygonScan account’s dashboard (19:08):
However, as far as the Mumbai testnet’s endpoint goes, you can use Moralis Speedy Nodes (19:53).
Note: Our in-house expert in the video tutorial uses the previous version of the Moralis admin UI. It depends on how long it’s been since this article was published, but you may still be able to switch to the legacy UI inside your Moralis admin area:

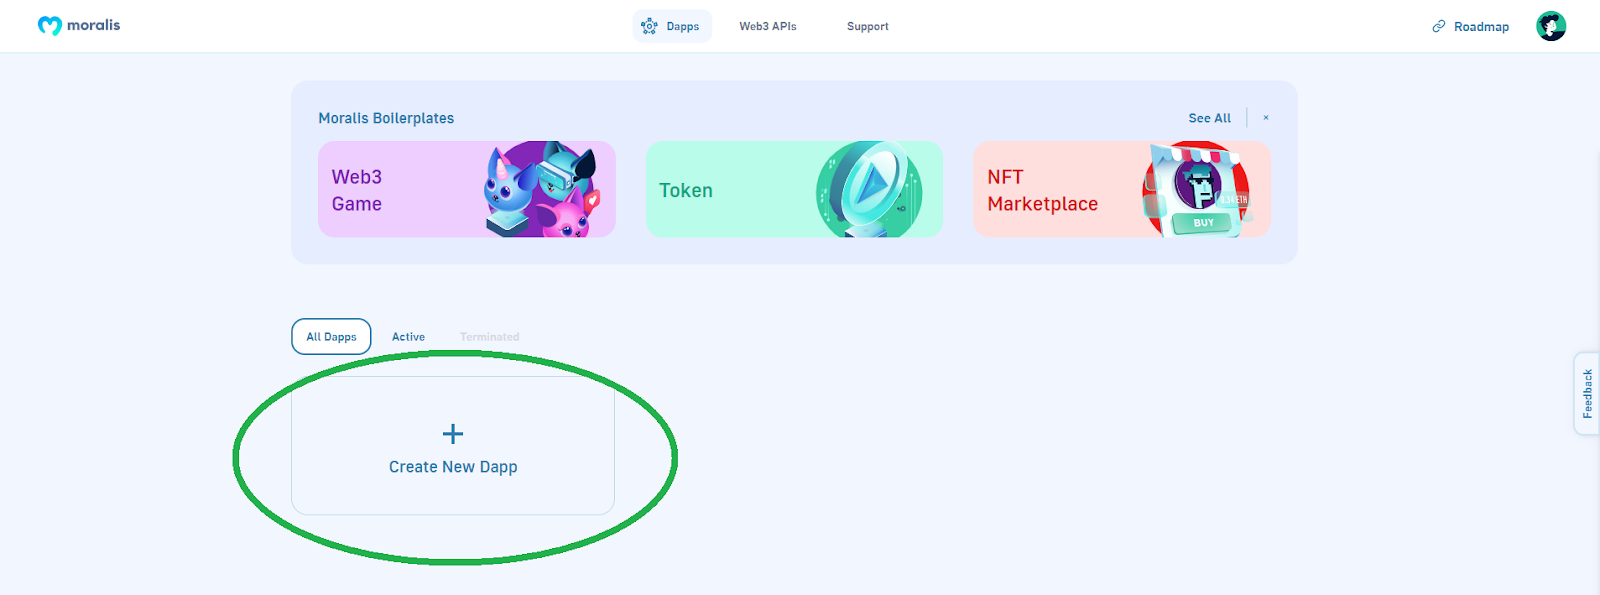
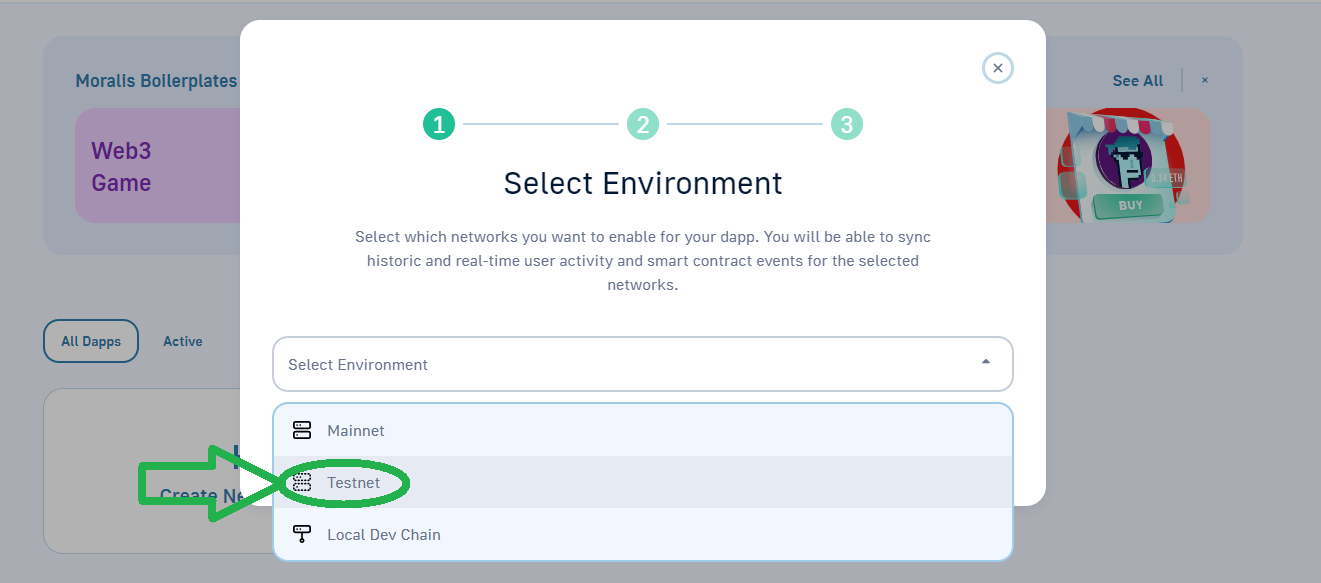
However, the new UI is quite intuitive. Start by creating a new dapp:
Then, select the environment:
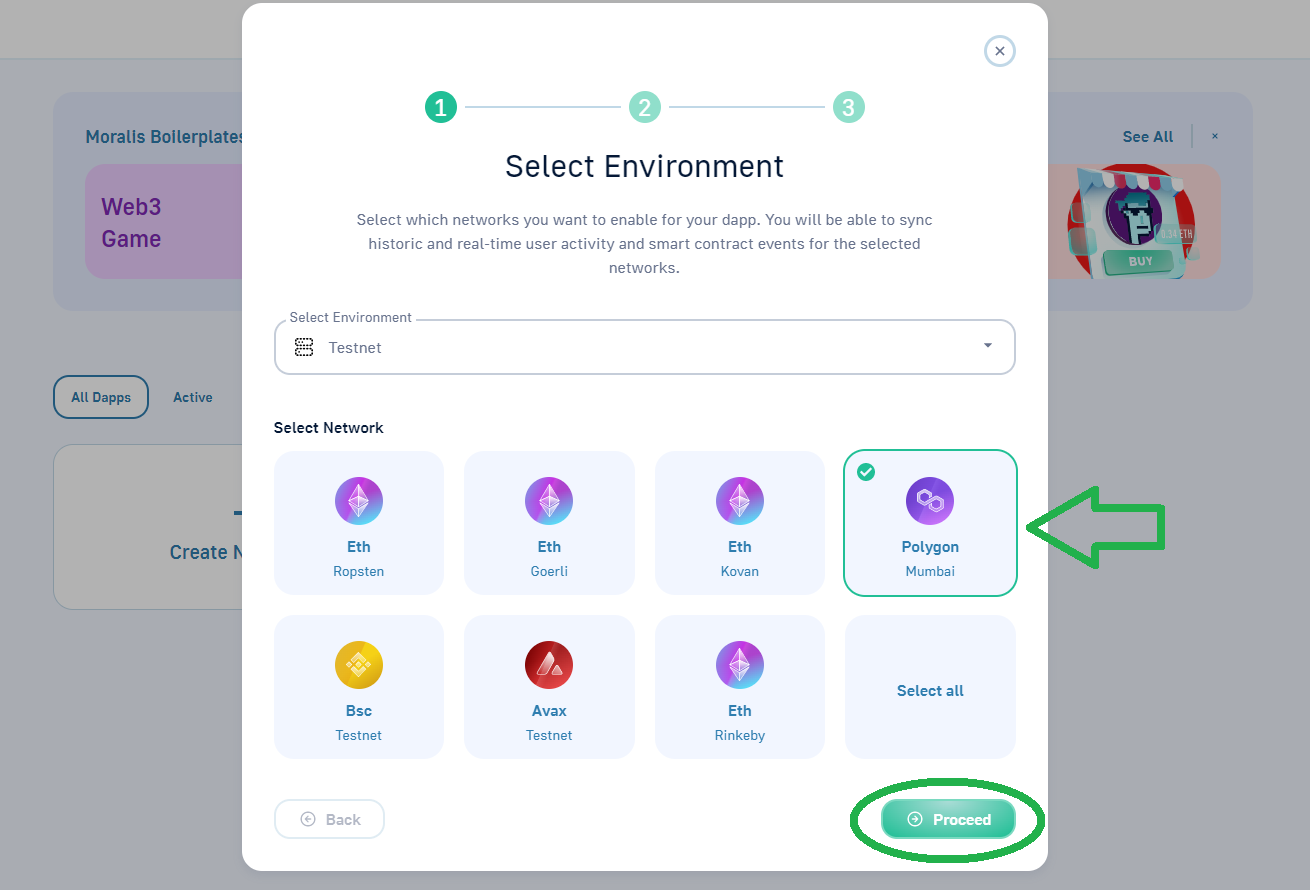
Next, choose the Mumbai chain and click on “Proceed”:
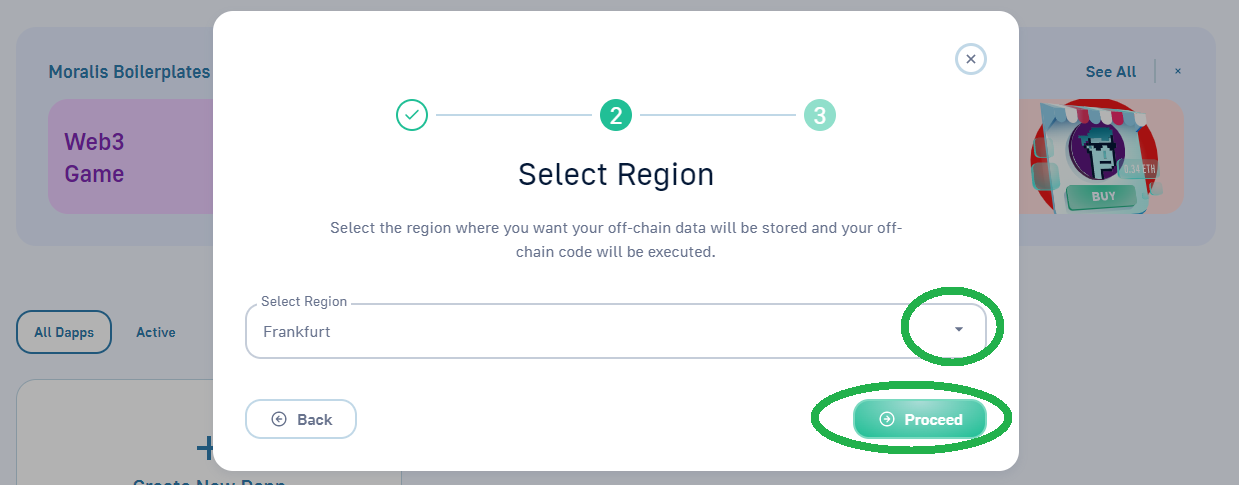
In step two, select the city closest to you:
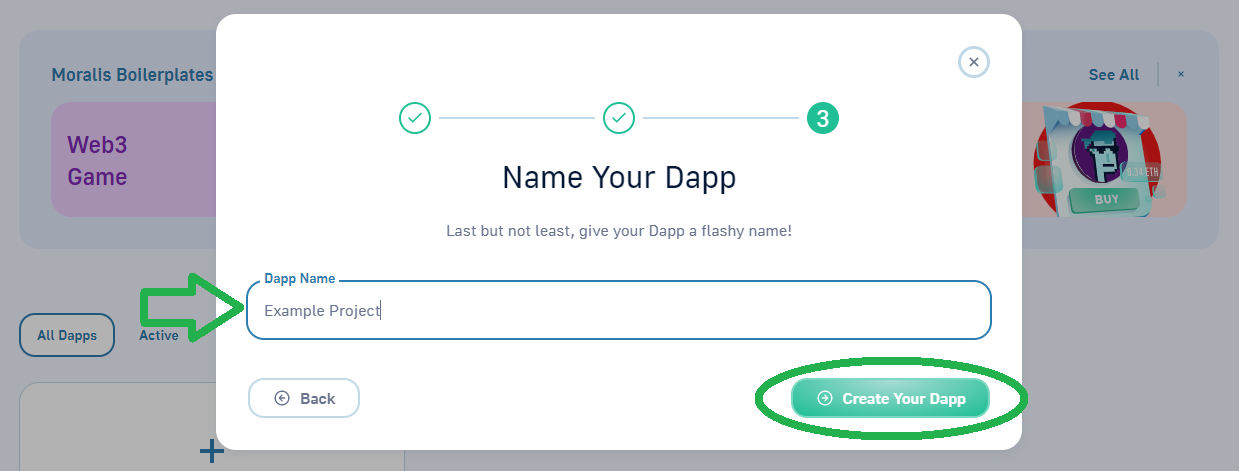
To wrap up the setup, name your dapp and click on “Create Your Dapp”:
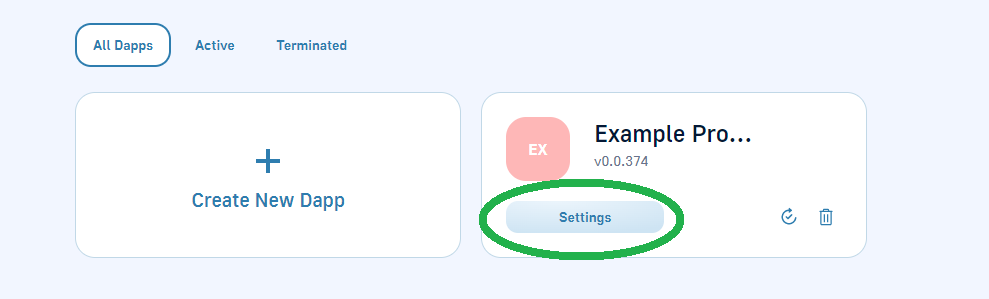
Once your dapp is live, you need to click on the “Settings” button:
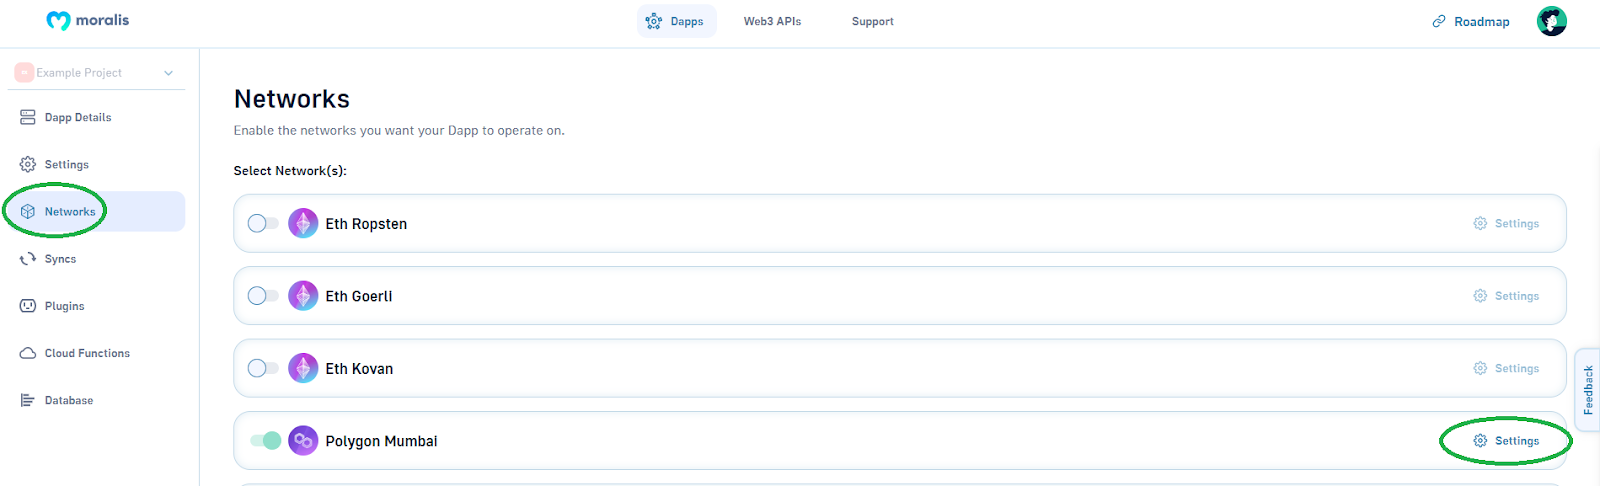
Then, go to the “Networks” tab and click on “Settings” for “Polygon Mumbai”:
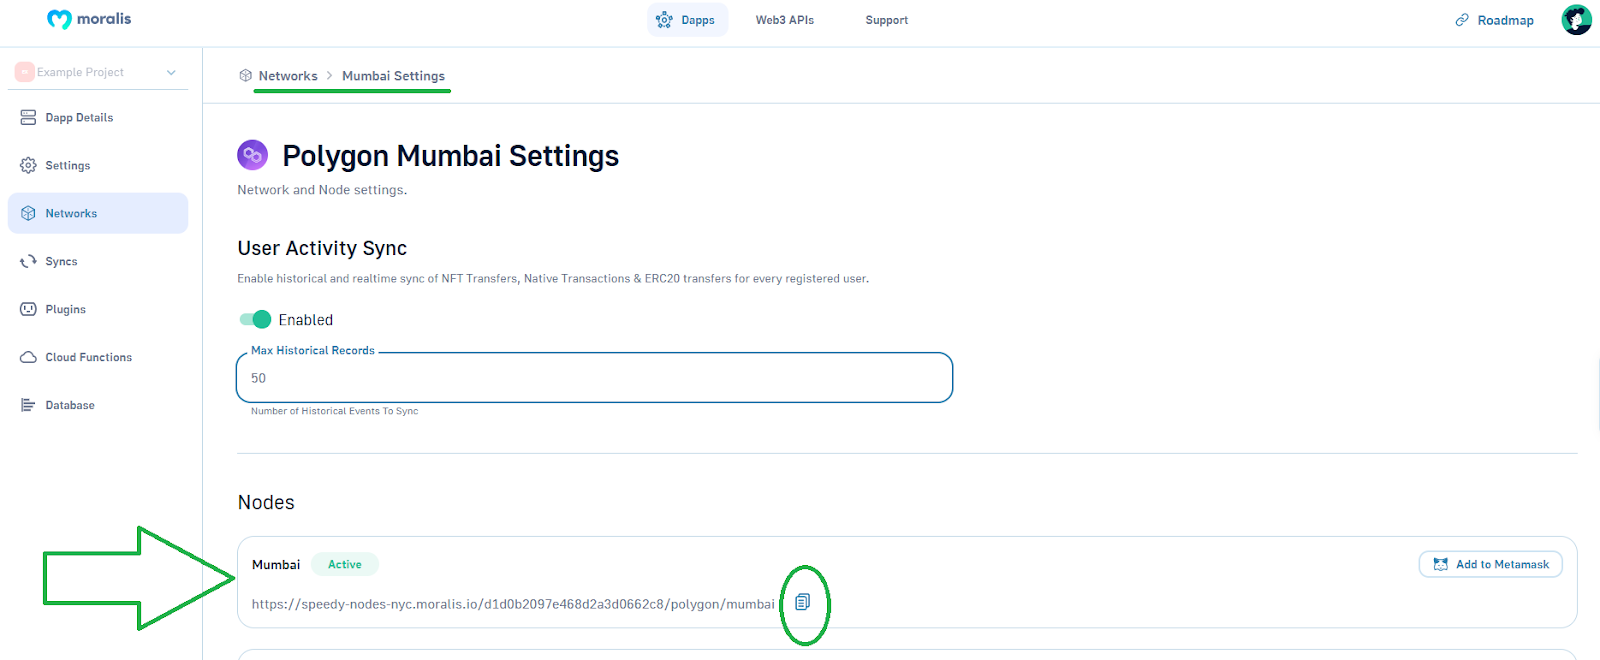
Finally, copy Mumbai’s endpoints:
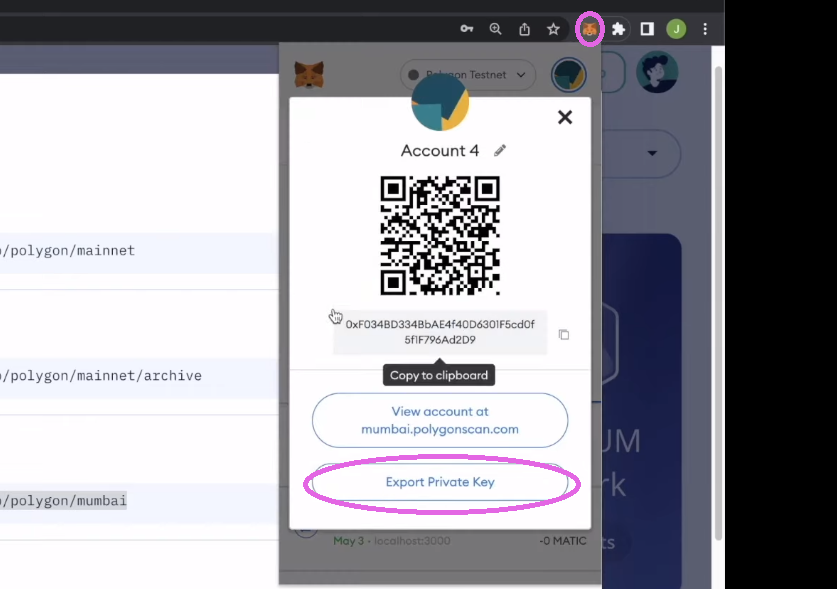
For the third environmental variable (private key), use your MetaMask (20:48):
Now that you know how to get all three environmental variables, you’ll have no problem getting your “.env” file ready:

Before compiling your smart contract, you’ll have to implement some final tweaks in “hardhat.config.js”:
At 22:38, the video will finally guide you through the steps of compiling, deploying, and verifying your smart contract. This will also wrap up the first part of this full stack Web3 development tutorial.
The Frontend Part of Our Full Stack Web3 Development Tutorial
Your next stop will be the frontend. Starting at 29:01, you learn how to use React to create the UI as presented in the demo above. Then, starting at 30:03, you will learn how to create your single-page dapp’s header. Next, you’ll add the coin components (32:26). Finally, at 38:23, you’ll implement the vote buttons.
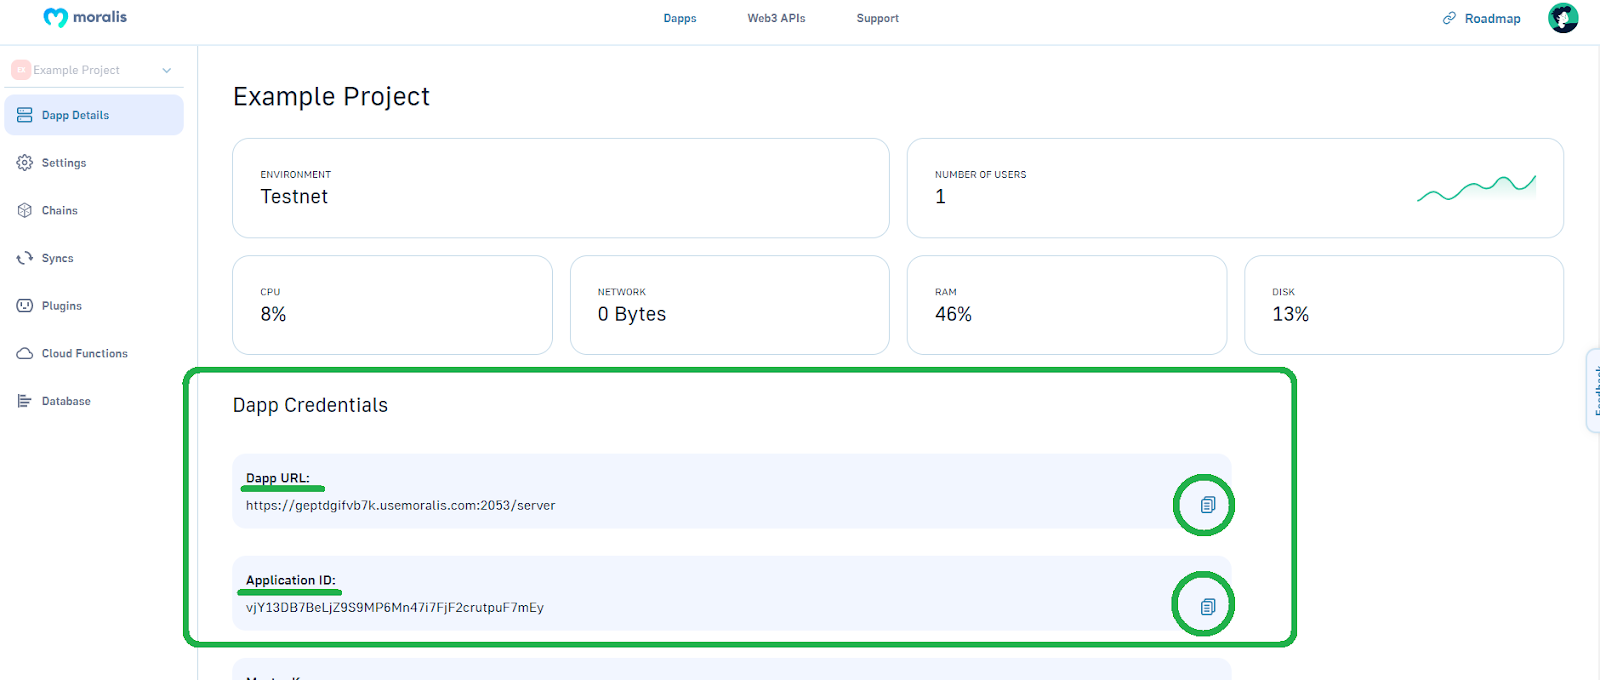
To bring the frontend part of our full stack Web3 development home, you’ll need to obtain your Moralis dapp credentials. Use the same instruction you followed to obtain Mumbai’s endpoint above. However, instead of going to the “Networks” tab, stay on the “Dapp Details” tab. Then, copy and paste your dapp URL and application ID into the “index.js” file:
You’ll now be able to use the powerful Moralis Web3 API to implement the info modal (41:26), including the token prices.
The Backend Part of Our Full Stack Web3 Development Tutorial
Starting at 50:30, you’ll get to tackle the last piece of the puzzle. This is where you will learn how to connect your React app to your smart contract. Thanks to Moralis’ “Syncs” feature and Moralis’ database, you get to do this effortlessly:
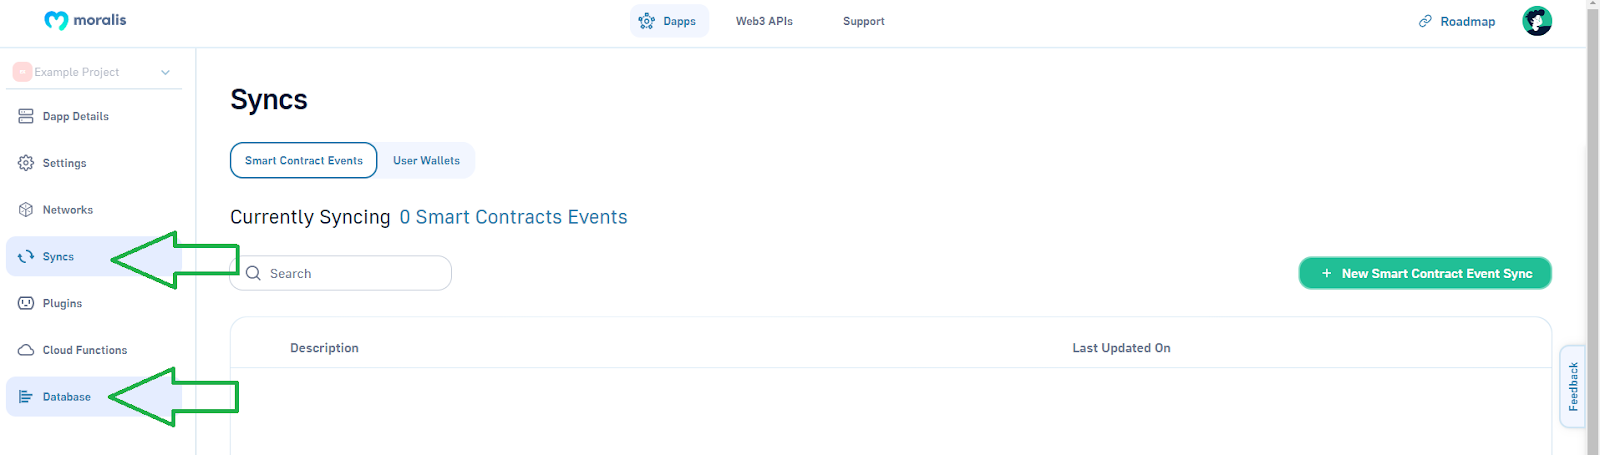
Once you set your new sync in place, the Moralis database will do the indexing automatically. As such, all on-chain data will be at your disposal. In turn, your sentiment dapp will reflect the current state!
Finally, here’s the video tutorial we’ve been referencing throughout our full stack Web3 development tutorial:
Full Stack Web3 Development – The Ultimate Guide to Building Web3 Projects – Summary
In this article, you learned what full stack Web3 development is. Next, you were acquainted with Moralis and our example sentiment dapp. Then, you had a chance to roll up your sleeves and complete our example project. As such, you were able to implement all the pieces of full stack Web3 development. These include:
- Deploying smart contracts
- Building an eye-catching and user-friendly frontend
- Indexing the blockchain
Using Hardhat, React, and Moralis, you were able to cover all the three main stages in about an hour.
If you enjoyed this guide, we encourage you to visit the Moralis YouTube channel and the Moralis blog. Both of these outlets host many blockchain development tutorials and other crypto articles. You can use them to learn about Web3 game design, non-fungible tokens (NFTs), Unity Web3 programming, and much more. Also, some of the latest topics focus on an AR metaverse NFT mystery box, Web3 augmented reality, an Ethereum dapp API, a Web3 blog dapp (Web3 Medium), and the Ethereum Merge. Ultimately, having a huge amount of high-quality content, these two outlets may support your free and ongoing crypto education. However, if you are eager to become a blockchain developer quickly and confidently, Moralis Academy may be the place for you!
