Even if you are just dipping your toes into the crypto ocean, you will have heard of ERC20 tokens. Thanks to the fact that Ethereum was the first programmable cryptocurrency chain, countless projects base their own tokens on top of this blockchain. As such, we now have quite many other reputable ERC20 tokens with interesting concepts or even actual use cases behind them. With that in mind, it is important that you learn the ins and outs of ERC20 transfer. Not only will this improve your own user experience, but it will also enable you to level up your blockchain development. And luckily, we have an awesome tool for you that allows developers to incorporate ERC20 transfer with just a few lines of code. So, are you ready to learn how to transfer ERC20 tokens?
Moving forward, we will first answer “what is ERC20?”, and then cover the details of ERC20 transfer. Moreover, you’ll learn how to transfer ERC20 tokens effortlessly using Moralis (a.k.a. Firebase for crypto). This ultimate Web3 development platform comes with a full Web3 SDK, including Web3 API. The latter enables you to build awesome dApps (decentralized applications) in minutes and easily incorporate all sorts of features, including ERC20 transfer functionality. Also, you can use Moralis for NFT token development, for both ERC721 and ERC1155 standards.
Furthermore, Moralis also has cross-chain interoperability in its DNA, thus it enables you to go beyond the Ethereum chain. It already offers full support for all major reputable chains (Binance Smart Chain, Polygon, Avalanche, etc.) and adds new ones regularly. As such, you can deploy your dApps across multiple chains without spending extra time or resources. Moreover, this cross-chain interoperability also future-proofs your work. So, make sure to create your free Moralis account today!

What is ERC20?
If you want to properly understand and use ERC20 transfer functionality, you need to know what ERC20 is. For one, ERC20 is the most known and widely spread standard for fungible tokens. Its purpose is to ensure that all fungible tokens on the Ethereum chain have the exact same qualities that follow ETH’s native token (or coin) specifics. As such, according to their fungible nature, any particular ERC20 token will always have the same standards as all other ERC20 tokens of the same kind (using the same contract address). For example, one LINK token here will always be the same as one LINK there. Aside from representing cryptocurrencies, ERC20 tokens can also be company shares, loyalty points, gold certificates, and much more.
Furthermore, in order to avoid any unnecessary confusion, keep in mind that we also refer to the ERC20 standard as the “ERC20 contract”. The reason for such nomenclature lies in the fact that smart contracts use this technical standard. Thus, the ERC20 smart contract standard is the mechanism for all other smart contracts on the Ethereum chain for fungible token implementation.
Smart contracts are essentially conditions or rules to follow for a certain action to take place. As such, the ERC20 contract standard ensures that proper rules apply when one creates ERC20 tokens. With that said, it is also logical that a smart contract, which implements the rules or methods required by the ERC20 standard, essentially is an ERC20 contract. If you want to learn more details about the ERC20 standard, use the link in the first sentence of this article.
ERC20 Transfer Explained
When it comes to the ERC20 transfer discussion, we must tell you that there are two types of transfers, both included in the ERC20 smart contract. We have “transfer” for tokens from the total supply (the address it uses to mint tokens) to users and “transferFrom”, which we use to transfer tokens between any two users. As a developer, who might create new ERC20 tokens, you need to be familiar with both of these transfers; however, for most dApps you will be focusing on “transferFrom” functionality. As a matter of fact, later on, we will also build a very simple example dApp on one of the Ethereum testnets, which will show you how simple it is to use Moralis to transfer ETH. And, the exact same principles may be used to incorporate ERC20 transfer in your dApp.

ERC20 Transfer
Without Moralis’ SDK, you need to go about sending assets in a decentralized way using bare-bones low-level libraries such as Web3.js. The latter makes programming this seemingly simple feature surprisingly challenging. Among other details, developers should know the ABI of specific smart contracts to initiate ERC20 transfer. The same is true for NFT transactions. However, with Moralis on your side, you get to skip all that complexity with just a few lines of code. Hack, in the case of ETH transfers, you only need a single line of code. To be able to put this awesome tool to use yourself, make sure to create your free Moralis account before moving forward.
From Where Can I Transfer ERC20 Tokens?
Now that you have a clear understanding of what ERC20 transfer is, we can answer “from where can I transfer ERC20 tokens?”. As only logical, you cannot send something from where it’s not. However, an address can receive ERC20 tokens even if it has no ERC20 tokens yet, presuming that it is ERC20 compatible. Note that all Ethereum wallet addresses are ERC20 compatible. Moreover, this means that every ERC20 transfer can happen between two Ethereum wallet addresses, or ERC20-compatible addresses. This typically includes all EVM-compatible blockchains.

When it comes to Ethereum wallet address from (to) where ERC20 tokens transfer, you can also use centralized exchanges (CEXs) and access their wallet addresses through your account. However, when it comes to blockchain developers, using CEXs is usually not an option.
Luckily, there are several hot wallets that offer a great user experience. When it comes to the ERC20 standard, MetaMask has the best track record and supports the widest range of tokens. And, luckily it features complete integration with Moralis. Thus, one can use this for Ethereum authentication and confirming every ERC20 transfer. Moreover, MetaMask is such an important tool that it is one of the two prerequisites to developing with Moralis. The other one is JavaScript proficiency. With that explained, let’s look at the details of how to transfer ERC20 tokens.
How to Transfer ERC20 Tokens
Sending ERC20 tokens is very easy with MetaMask. You just need to paste the ERC20 address, ensure that you have enough ETH to cover the transaction fee, and click the “Send” button. But how to transfer ERC20 tokens within your dApp? To show you how easy Moralis makes transfer integration, we will look at an example project, where we use Moralis SDK to create a very simple dApp for ETH transferring.
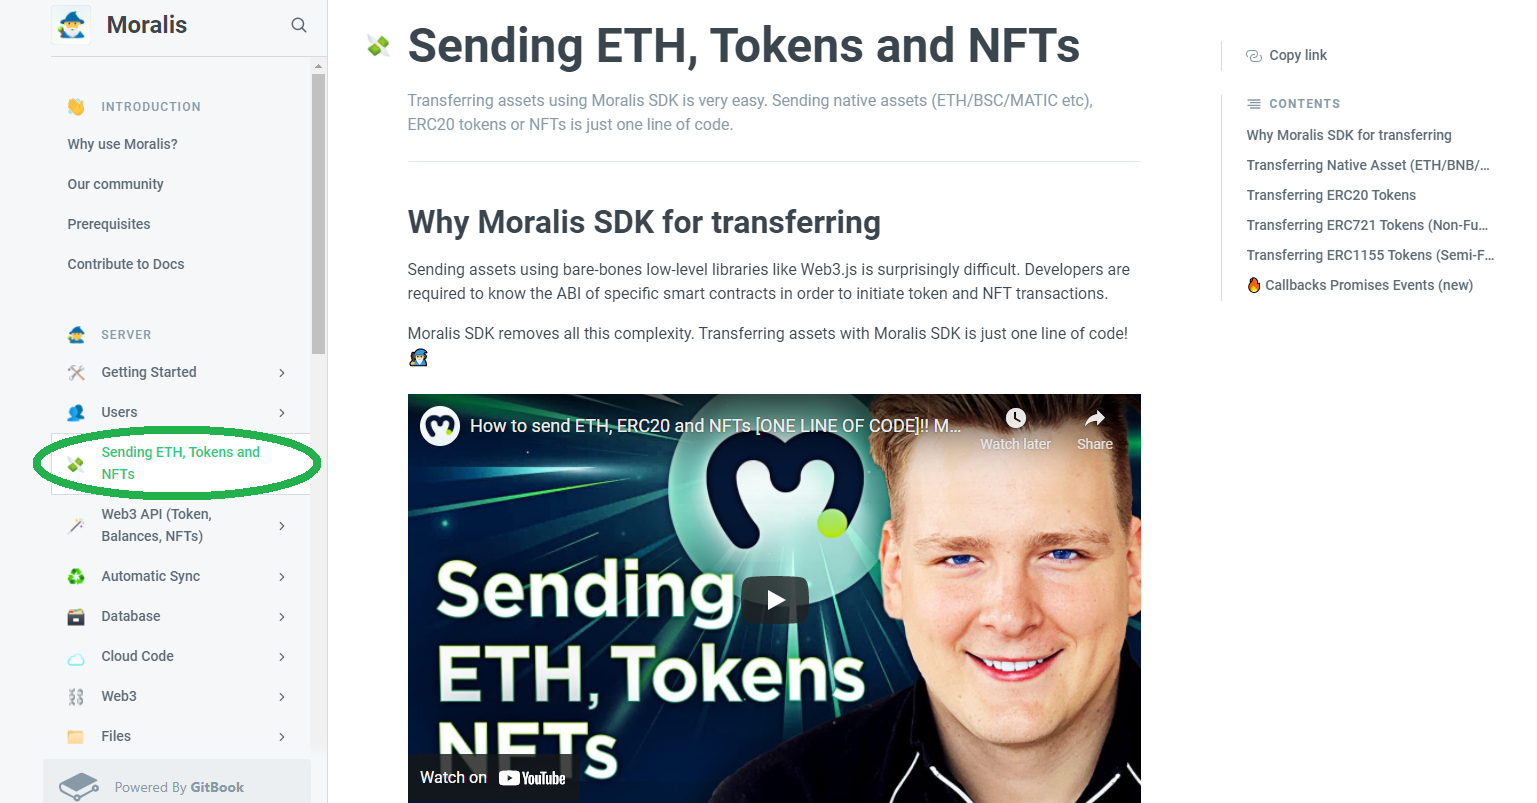
As mentioned previously, Moralis comes with one of the neatest documentation in the industry. It provides you with detailed explanations, examples, and all snippets of code you may need. For the purpose of integrating ERC20 transfer, you need to use the “Sending ETH, Tokens, and NFTs” section of Moralis documentation. There you will find the lines of code required for transferring native assets, ERC20 tokens, and NFTs (as shown below).
- Native asset (e.g.: ETH) transfer:
// sending 0.5 ETH
const options = {type: "native", amount: Moralis.Units.ETH("0.5"), receiver: "0x.."}
let result = await Moralis.transfer(options)
- ERC20 transfer:
// sending 0.5 tokens with 18 decimals
const options = {type: "erc20",
                 amount: Moralis.Units.Token("0.5", "18"),
                 receiver: "0x..",
                 contractAddress: "0x.."}
let result = await Moralis.transfer(options)
- ERC721 transfer:
// sending a token with token id = 1
const options = {type: "erc721",
                 receiver: "0x..",
                 contractAddress: "0x..",
                 tokenId: 1}
let result = await Moralis.transfer(options)
- ERC1155 transfer:
// sending 15 tokens with token id = 1
const options = {type: "erc1155",
                 receiver: "0x..",
                 contractAddress: "0x..",
                 tokenId: 1,
                 amount: 15}
let result = await Moralis.transfer(options)
Looking at the lines of code above, you can see that in most cases you only need to specify one or two parameters. However, when it comes to ERC20 transfer, you also need to add the receiver’s address and token’s address.
ERC20 Transfer – an Example Project
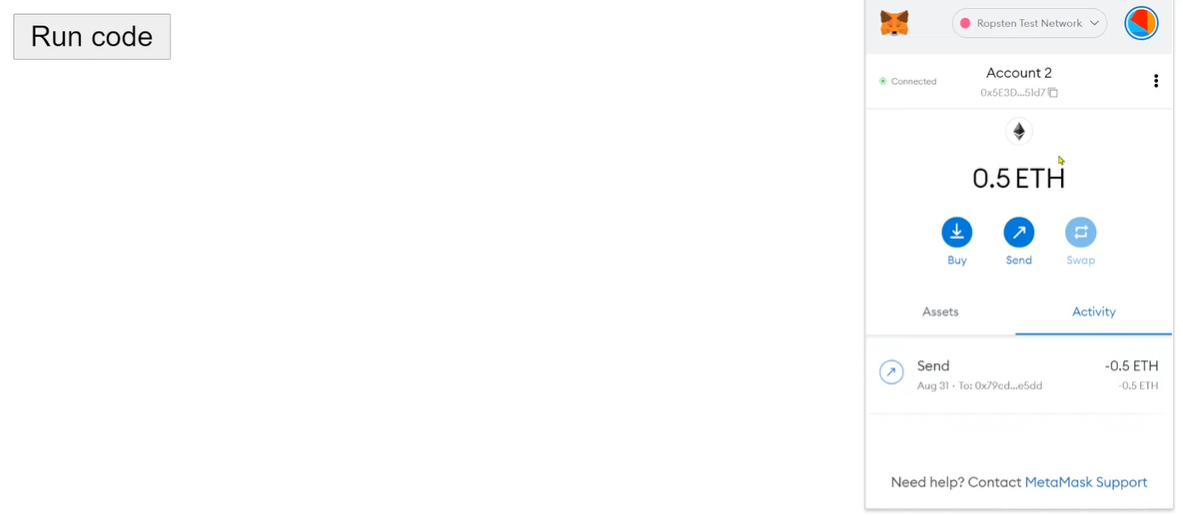
In order to use Moralis to create a dApp, you need to complete the initial setup, which includes creating your Moralis server. But before you move on, let’s look at a screenshot of the simple dApp you can create with us to practice working with Moralis SDK for ETH and ERC20 transfer option:
Initial Setup – Create a Moralis Server
Before taking on the example project covered in the video below, follow these Moralis setup steps:
- Create Your Free Moralis Account – If you haven’t created your free Moralis account yet, do so now. Follow the link at the end of the introduction, enter your email address, create your password, and click the confirmation link that will be sent to your email. On the other hand, if you already have a Moralis account, simply log in to your admin area.
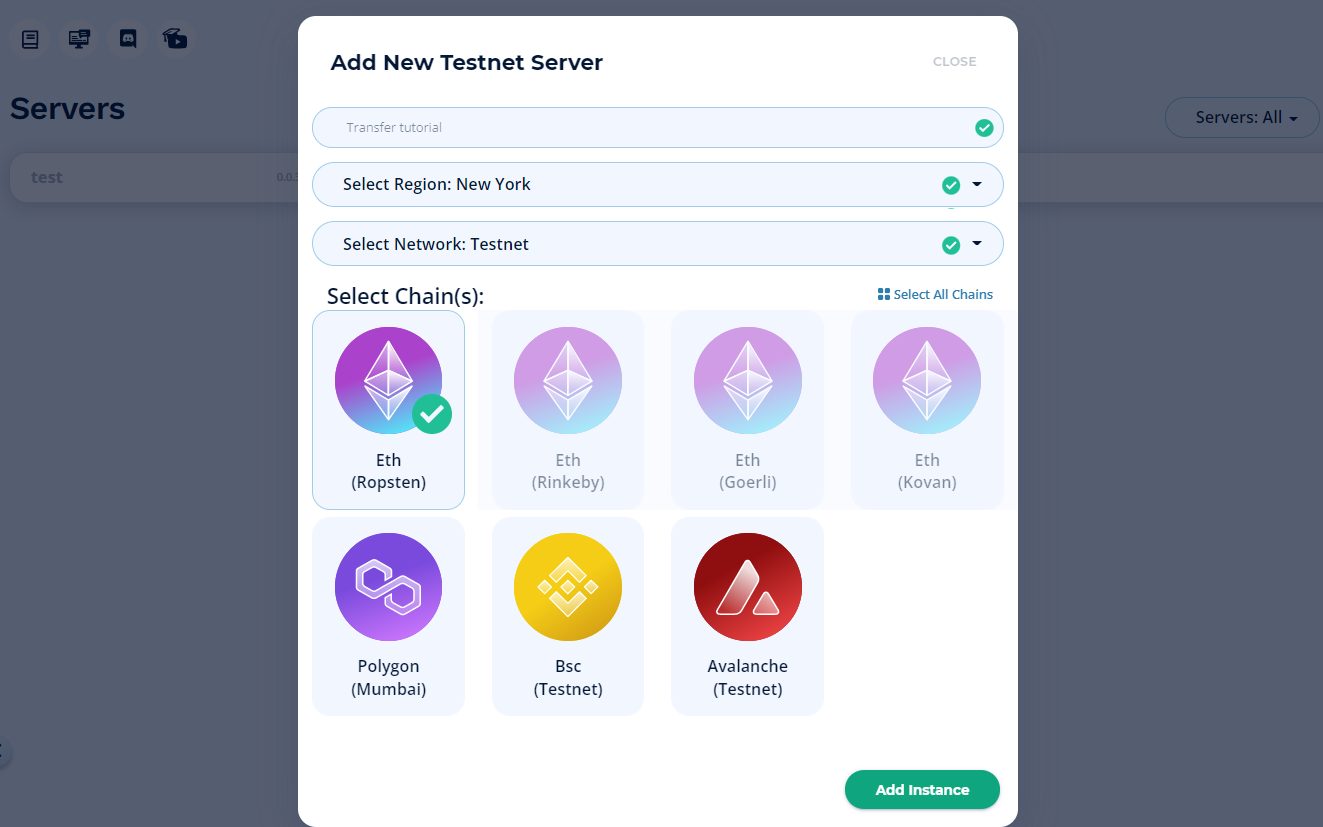
- Create a Moralis Server – Inside your Moralis admin area, navigate to the “Servers” tab, then click the “+ Create a new Server” button in the top-right corner (see the image below). Next, select the network type that best suits your needs from the drop-down menu. For the sake of our example project, we’ll use Ropsten, so select the “Testnet Server” option. However, when you’ll be ready to deploy functional dApps, you’ll need to select “Mainnet Server”.

Moving forward, enter the server name (this can be anything you want), select your region, select network type, chain(s), and spin up your server by clicking “Add Instance”:
- Access Server Details – You need your server’s details (server URL and application ID) to access Moralis’ backend functionality. You get to access that by clicking on the “View Details” button once your server is active:

You’ll see all the details displayed in a new window. There you can simply copy them (one by one) by clicking on the copy icons:

- Initialize Moralis – Use the details copied in the previous step to populate your coding files (“.html”, “.js.”, “.jsx”, or “.env” if using the ultimate Ethereum dApp boilerplate):

From ETH to ERC20 Transfer
With your server up and running and its details at your disposal, you are ready to follow a Moralis expert’s lead to put the Moralis to use. Use the video below starting at 1:25:
The video above will guide you through the steps you need to follow to implement ETH transfer functionality. However, we encourage you to take things a step further. Specifically, use the “ERC20 transfer” snippets of code to create an ERC20 transfer dApp. If you want to take things to the next level, play around with the features to track ERC20 events.
ERC20 Transfer – How to Transfer ERC20 Tokens – Summary
You now know what ERC20 is and all the ins and outs of ERC20 transfers. Furthermore, you also know how to transfer ERC20 tokens using different publicly available tools. MetaMask is a convenient choice for blockchain developers. Moreover, you’ve seen how simple it is to add ERC20 transfer functionality to your dApp with a Moralis server.
If you want to take your crypto programming further, visit the Moralis’ YouTube channel and the Moralis’ blog. Both of these outlets provide you with a ton of free content. This can help explain different blockchain development concepts and guides you through all sorts of example projects. Some of the latest articles show you how to connect to Arbitrum nodes, how to connect to Avalanche nodes, how to build an NFT trading interface, how to build Ethereum dApps in Angular, how to build a cross-chain bridge, how do flash loans work, how to do gasless transactions on Ethereum, how to use an OpenSea API alternative, how to create a DAO in minutes, how to build a prediction market dApp, and much more.
However, if you are just getting started, we recommend exploring Ethereum development for beginners, or NFT programming for beginners in case you’re more interested in non-fungible tokens. Nonetheless, if you’re eager to become a blockchain developer sooner rather than later, make sure to enroll in Moralis Academy. For those of you who are not yet JavaScript-proficient, the “2021 JavaScript Programming for Blockchain Developers” course ought to be a great option.

