Are you looking for the most efficient and effective way to build Polygon dapps? If so, you have come to the right place! This article demonstrates the fastest way to build Web3 apps using Moralis’ Polygon boilerplate. This boilerplate acts as a Web3 website template and enables a more accessible development process allowing you to create Polygon dapps in no time! To demonstrate the power of Moralis and the Polygon boilerplate, we illustrate how to create a dapp where users can sign in and view on-chain data regarding their Web3 wallet. Moreover, if you want to skip the tutorial and inspect the project’s code immediately, click on the link below:
Full Polygon Boilerplate Documentation – https://github.com/ethereum-boilerplate/ethereum-boilerplate
If you click on the link above, you will notice that the repository is called” ethereum-boilerplate”, which might be somewhat confusing. However, this template is cross-chain compatible, suggesting you can use this to build Polygon dapps alike. All you need is to make some configurations to the code, which we will cover in this guide.
Nevertheless, the Polygon boilerplate provides a more accessible Web3 development process, enabling you to launch Polygon dapps more efficiently. In combination with other Moralis tools – such as various Web3 APIs – you can use this template to create dapps quicker than the competition and beat them to market! No matter if you are looking to create Polygon dapps with Moralis’ Polygon boilerplate – or any other Web3 project – consider signing up with Moralis. With an account, you will receive immediate access to the various Moralis tools. What’s more, you can create your account free of charge, which only takes a couple of seconds!
Polygon Explained – What is Polygon?
Ethereum is the most prominent blockchain for Web3 development; however, the network has experienced issues with congestion, which is where the Polygon network enters the equation. Polygon is a decentralized scaling platform for the Ethereum network with the potential to solve the congestion issue that Ethereum experiences.
Polygon provides a more economically viable and sustainable development. As a result, developers can create dapps at a lower cost. Moreover, Polygon’s focus is on scalability and keeping transaction fees low. As Polygon is an Ethereum scaling platform, the network can achieve this without sacrificing security since it leverages the Ethereum chain. So, how exactly is Polygon able to accomplish this? To explain, we will present some of Polygon’s essential features:
- Scalability – One of the significant issues of Ethereum was scalability. Polygon can solve this by providing a more scalable consensus mechanism.
- Modularity – Polygon is modular. This suggests the network is prone to higher extensibility, upgradeability, and customizability.
- User Experience – Polygon noticed an adoption issue: that the user experience within Web2 and Web3 differs. As such, Polygon delivers a user experience similar to that of Web2.
Moreover, as Polygon and Ethereum are closely interrelated, the networks have many similarities. One clear example is token standards. Polygon, just like Ethereum, implements familiar standards such as ERC-20 and ERC-721. In fact, MATIC – which is the native token of Polygon – implements the ERC-20 standard.
Now that you might be somewhat more familiar with the Polygon network, it s time to dive into the central part of the article. Accordingly, the following sections will cover the entire process of creating Polygon dapps with Moralis’ Polygon boilerplate!
How to Build Dapps with Moralis’ Polygon Boilerplate
With a better understanding of Polygon, we will now take the following sections to showcase how easy it is to build Polygon dapps with Moralis’ Polygon boilerplate. In doing so, we will create a simple dapp where users can authenticate with their Web3 wallets. Once authenticated, they will be able to access information regarding their wallets. This includes their transaction history, transfers of particular tokens, balances, etc.
To make the tutorial more comprehensive, we will divide the guide into four sections. First, we will show you how to clone the project to your local directory. Following this, we will take a look at some necessary configurations for the environment variables. Lastly, we will show you how to start and test the dapp.
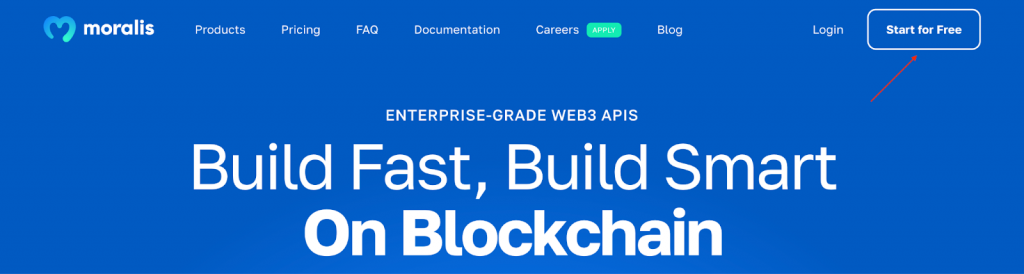
Moreover, before we get going with the tutorial, you will need to quickly deal with a prerequisite, which is a Moralis account. You will need a Moralis account when configuring the environment variables. However, creating a Moralis account is easy and only takes seconds. All you need to do is click on the “Start for Free” button at the top right of the Moralis website:
From there, enter an email, create a password, check the “I accept…” box, and hit the “Sign Up” button. What’s more, this is entirely free! Now, with a Moralis account at your disposal, we can move on and take a closer look at cloning the Moralis Polygon boilerplate!
Cloning Moralis’ Polygon Boilerplate
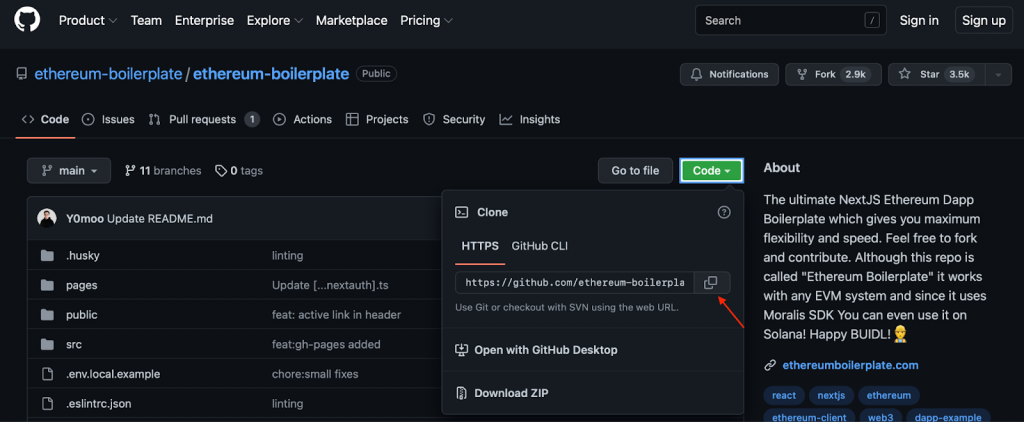
The first part of this guide revolves around cloning Moralis’ Polygon boilerplate. As such, start by navigating to the GitHub repository using the link in the introduction. Once you open the repository, you will need to copy the repo URL by clicking on “Code” and the copy button:
Next up, open your IDE (integrated development environment) of choice and create a new folder for the project. For this walkthrough, we will use VSC (Visual Studio Code). Please remember that if you use any alternative IDE, some steps might differ slightly.
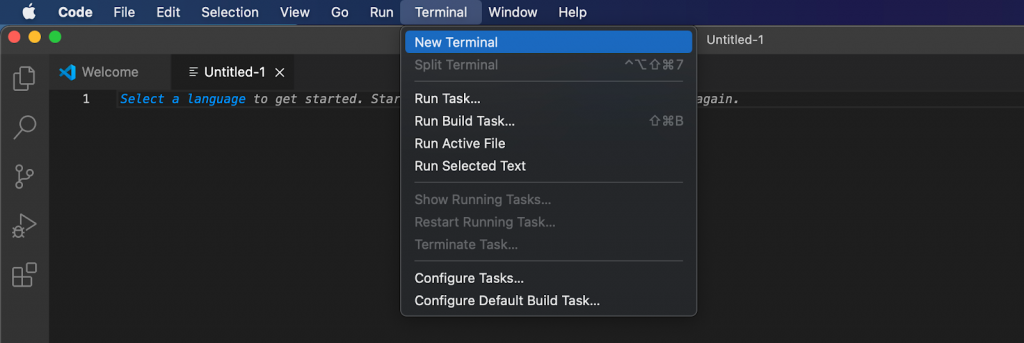
From there, open a new terminal. If you are using VSC like us, you can do so by clicking on the ”Terminal” tab and then ”New Terminal”:
Now, to clone the project to your local directory, all that remains is to run the following command in the location corresponding to the project’s folder and using the repo URL:
git clone “BOILERPLATE_URL”
Running the command above will clone the Polygon boilerplate to your local directory. From there, you can move into the correct folder once again by inputting the following into the terminal:
cd ethereum-boilerplate
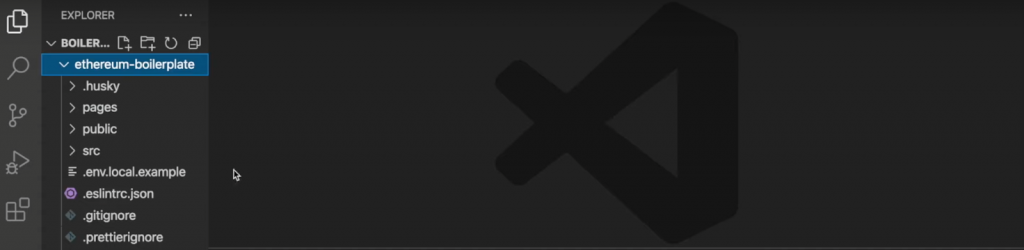
If you followed the steps in this initial section, it should result in a structure similar to this in your IDE:
Configuring Environment Variables
This section will cover all the configurations you need to make to the environment variables. So, you can continue by opening the ”.env.local.example” file and renaming it to ”.env.local”. Moreover, this is originally what the file looks like:
APP_CHAIN_ID=0x1
APP_DOMAIN=ethereum.boilerplate
MORALIS_API_KEY= # Get your KEY https://admin.moralis.io/account/profile
NEXTAUTH_SECRET= # Linux: `openssl rand -hex 32` or go to https://generate-secret.now.sh/64
NEXTAUTH_URL=http://localhost:3000 # replace for production
As you can see from the snippet above, there are five environment variables. However, in this instance, you will only need to consider the first, third, and fourth variables. Let’s start with the first one called ”APP_CHAIN_ID” with the value ”0x1”. You must change this value as ”0x1” corresponds to the Ethereum blockchain. As such, replace ”0x1” with ”0x89”, the chain ID for the Polygon network.
To the third ”MORALIS_API_KEY” variable, you must add your API key, which is where your Moralis account comes into the picture. As such, progress by logging in, clicking on the ”Account” tab, then ”Keys”, and copying the Web3 API key:

From there, simply paste your API key into the code. The final variable you need to configure is ”NEXTAUTH_SECRET”. You need to add a secret key to this variable, and you can use this link to generate a value: “https://generate-secret.now.sh/32“. With a secret key at hand, input the key into the code so that the ”NEXTAUTH_SECRET” equals this value.
The last variable, ”NEXTAUTH_URL”, is set to ”http://localhost:3000”. This will allows you to run the Polygon dapp on a local host. This is great during the development stages; however, as soon as you launch the dapp, you need to change this value to equal your dapp’s URL.
Nevertheless, below, you will find an example of what the code for the ”.env.local” file might look like:
APP_CHAIN_ID=0x89
APP_DOMAIN=ethereum.boilerplate
MORALIS_API_KEY= "YOUR_API_KEY"
NEXTAUTH_SECRET= b8e786967d7bcbc0f920d35bcc3f891c
NEXTAUTH_URL=http://localhost:3000
Starting the Dapp
Now, the Polygon dapp is essentially finalized! Thanks to Moralis and the Polygon boilerplate, it does not have to be more difficult than that. All that remains now is for you to start and test the application. As such, we will briefly take this section to show you how to launch the application.
However, before starting the Polygon dapp, you must install various dependencies. As such, run one of the following commands in a terminal (depending if you are using “npm” or “yarn“):
npm i
yarn
Next up, you can run the dapp on a local host with either of the following inputs:
npm run dev
yarn run dev
With the dapp up and running, you can launch it using the URL you specified earlier: “http://localhost:3000“. In the next section, we will make sure that everything works and cover some of the essential features of Moralis’ Polygon boilerplate!
Testing the Dapp – Exploring Moralis’ Polygon Boilerplate
Once you start the Polygon dapp, you will arrive at the following landing page:
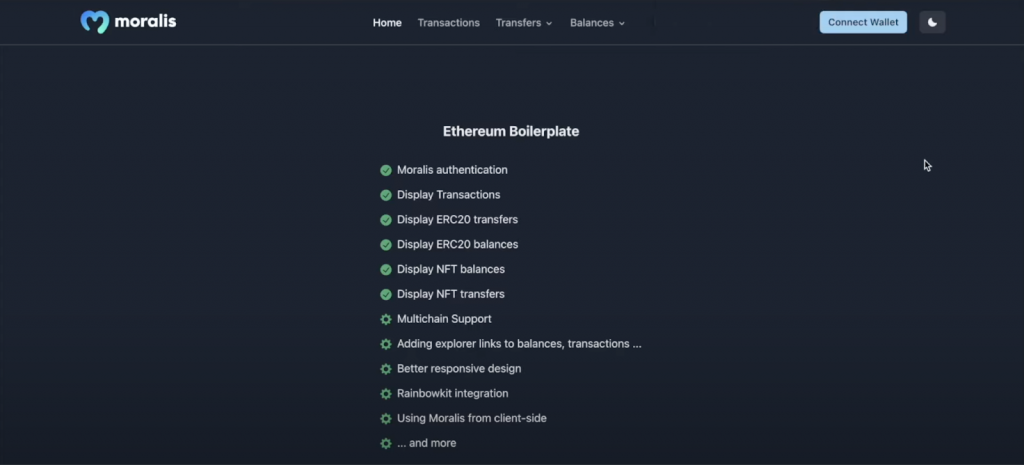
As the image above illustrates, there are a few tabs and buttons at the top for you to explore. However, before exploring the various options, you will initially need to authenticate your Web3 identity by clicking on the ”Connect Wallet” button:

This will start your MetaMask wallet and allow you to sign a message. However, MetaMask is only the default Web3 authentication mechanism of the Polygon boilerplate. With Moralis, it is possible to integrate other options easily. If this interests you, learn how to, for example, add a sign in with RainbowKit.
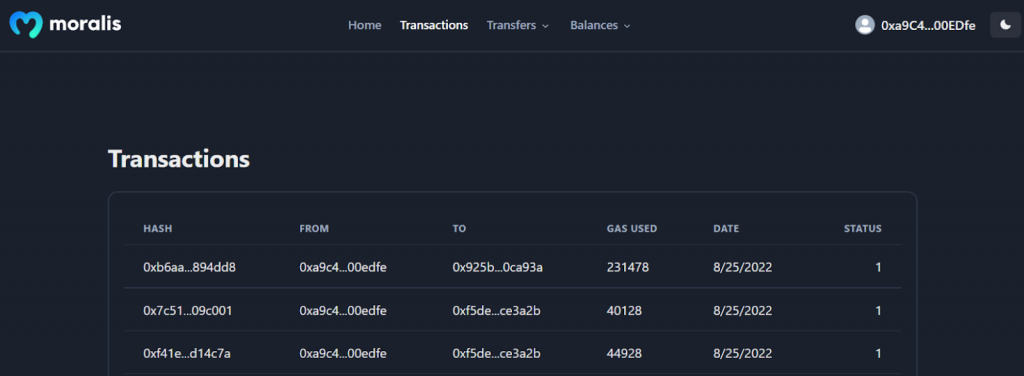
Once authenticated, the dapp will populate with all sorts of information regarding your Web3 wallet. As such, if you, for instance, click on the ”Transactions” tab at the top, you will find a table displaying your transaction history:
You can also explore the other tabs such as ”Transfers” and ”Balances”. These feature a small menu that allows you to filter between NFTs and ERC-20 tokens. If you were to click on ”Balances”, it would look something like this:
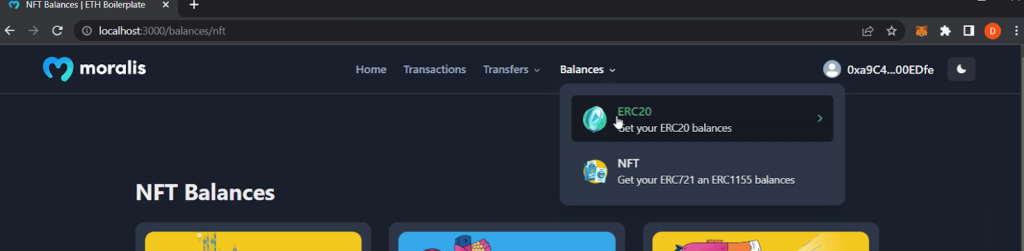
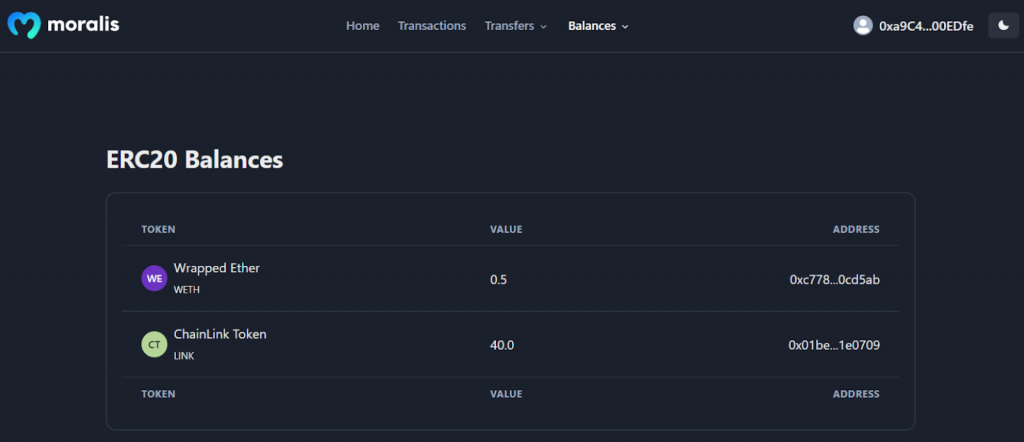
From there, you can choose either token type. For example, if the ”ERC-20” option is chosen, the dapp will display all the tokens in the wallet:
This basically covers the essential features of the Polygon boilerplate. If everything worked as intended, it is now up to you to add or remove features! Moreover, if you need inspiration, check out Moralis’ Web3 blog. The blog features fresh and exciting Web3 development content. For example, learn how to build a Web3 FIFA clone or create an NFT gated website.
However, if questions regarding the process remain, check out the following clip from Moralis’ YouTube channel explaining everything we’ve examined in this article in further detail:
Summary – Build Dapps with Moralis’ Polygon Boilerplate
In this article, we showed you how to build a Web3 app using Moralis’ Polygon boilerplate. The template allows you to easily create Polygon dapps in minutes! In fact, all you need to do is clone the Polygon boilerplate, configure some environment variables, and start the Polygon dapp.
Doing so results in a straightforward application where users can sign in with their Web3 wallets. Once signed in, they can view information regarding their wallets, including transaction history, transfers for certain tokens, balances, etc. As such, it provides a great foundation for any dapp, and all you will need to do is tailor the template by adding/removing features!
If you found this article helpful and want guides for other networks, check out either of the following articles on how to build an Ethereum dapp or build a Cronos dapp. These guides leverage the fantastic tools of Moralis, facilitating a more accessible development experience. If you have further interest and want to learn more about Moralis’ tools, we recommend that you, for example, check out Moralis’ Web3 Streams API or the Solana API.
Additionally, if you want to start your Web3 development journey and build your own projects, consider Moralis Academy. By enrolling, you can become blockchain certified and start building your first dapps in no time! For example, if you are new to the space, check out the following course covering the fundamentals: ”Blockchain & Bitcoin 101”.
Nevertheless, it does not matter if you want to build using Moralis’ Polygon boilerplate or any other project; sign up with Moralis and access the various development tools as they will aid in any development process!
