If a blockchain developer wants their dApp’s content to be available for users, developers need to host their dApp. In fact, if a programmer leaves the hosting part out of the equation, users will not be able to interact with their Web3 application. Therefore, we realize that dApp hosting is essential for any programmer who wants to build decentralized apps (dApps). If you aren’t familiar with this process and would like to have dApp hosting explained, keep reading as we’ll dive deep into what hosting a dApp entails and teach you how to host a dApp in a simplified way.
Moralis is the number one Web3 operating system, and dApp hosting becomes a straightforward task when working with Moralis. Moreover, Moralis does most of the heavy lifting when it comes to backend development. This means that all we need to do is deploy the frontend of our dApps (decentralized applications). As such, it is possible to host a dApp with only a few simple commands.

Since we will be utilizing Moralis throughout this tutorial, we highly suggest that you sign up with the platform. Joining is completely free, and it only takes a couple of seconds. Moreover, doing so will allow you to access the fully managed backend infrastructure and the platform’s tools!
What is Hosting?
Hosting is an online service that essentially allows developers to publish the files of their web applications or dApps to the internet. As such, this means that hosting makes the content of a website/application, like code and images, available for everyone. This provides anyone with access to the internet the ability to interact with your dApps. Moreover, this further means that every website that you have ever visited is hosted on a server.

When creating a dApp, the dApp often lives on a local testing server. However, once we know that the application works as intended, we need to make the dApp available to the public. As such, we need a hosting provider, which in this case is Moralis. This means that we will use our own Moralis server to deploy the dApp and make it available to the internet. The only thing the users need when doing so is the correct URL, and they can then access the dApp. As such, without hosting, this would not be impossible.
However, before getting into the process of hosting dApps with Moralis, we need to understand what Moralis is.
What is Moralis?
Moralis is the ultimate Web3 development operating system, and Moralis’ software and APIs currently power more than 65,000 blockchain projects. Not only are these projects using Moralis to build their dApps, but the software provides excellent scalability opportunities without complexity.

Moreover, Moralis provides incredible development tools that can be used to develop all kinds of different blockchain projects. For example, Moralis provides tools such as Moralis Speedy Nodes, the NFT API, Price API, and much more.
Furthermore, the platform also provides an already managed backend infrastructure, allowing a developer to save valuable time and resources. Everything from servers, databases, and an SDK (software development kit) is available to all users, meaning that Moralis does most of the heavy lifting when it comes to dApp and token development.
In addition to the backend infrastructure and the platforms’ tools, Moralis also has native support for solutions such as MetaMask and IPFS (InterPlanetary File System) along with cross-chain compatibility. Therefore, it is possible to authenticate users with MetaMask with a single line of code, among many other functionalities. It is also possible to save files and objects to IPFS just as easily. Moreover, cross-chain compatibility allows you to develop dApps for more than a single chain. Furthermore, Moralis supports Ethereum, Avalanche, Fantom, BSC (Binance Smart Chain), Polygon, and Arbitrum.
So, if you’d like to become a blockchain developer, the first step is to sign up with Moralis. Joining the platform provides immediate access to all benefits of Moralis. This allows you to save both time and resources significantly.
How to Host a dApp with Moralis
Now, with a slightly better understanding of what Moralis is and why you should join the 65,000+ projects, we can move on to the next section on dApp hosting. Once we have completed the development of our dApps, we need a way to deploy these so that users can assess them directly through their browsers. Since we are working with Moralis, this process is quite straightforward and only requires a few simple commands in the code editor’s terminal.
However, prior to deploying a dApp, we’re going to need a couple of things. First, a developed dApp is required as we need something to deploy. Second, we are also going to need a Moralis server and database. As such, we will briefly provide you with some information regarding dApp development and how to obtain your own server and database.
If you already know how to do this, then we suggest skipping the following two sections and scrolling down to the section on the process itself. You can also check out the following video from the Moralis YouTube channel. Here, you’ll find an in-depth explanation on dApp hosting with Moralis in just seven minutes:
How to Host a dApp – dApp Development with Moralis
Moralis provides you with everything you’ll need to develop, deploy, and scale dApps. All the tools and the backend infrastructure makes Moralis a vital tool for moving quickly to market and, therefore, saving resources and time. With these tools that Moralis provides, there are little to no prior development skills needed. However, it is highly beneficial to know what smart contracts are and a basic understanding of blockchain programming languages such as Solidity and JavaScript.
We won’t be going into further detail on developing dApps since there are excellent tutorials on the Moralis blog that explain this process. Therefore, we’re simply going to leave you with some inspiration, pointing you in the right direction to some of the previous articles from the blog. You can, for example, check out tutorials on how to build dApps on Ethereum, how to create BSC dApps, develop your own NFT marketplace, etc.
Tuning in to these articles will provide you with an excellent foundation on dApp development and hopefully inspire you to create your next projects. However, a universal factor from all these examples is the need for a Moralis server and database. As such, the following section will be dedicated to the creation of these two elements.
How to Host a dApp – Create a Moralis Server
Before hosting a dApp, we need to have a Moralis server up and running. To get going, all you need to do is log in to your Moralis account and click on ”+ Create a new Server” at the top right of the admin panel. This will provide a small drop-down menu with three different alternatives. Your choices here should be dependent on where you’d like to deploy your dApp. For example, it might be beneficial to select the ”Testnet Server” option as your dApp might not be ripe for deployment on a mainnet network.
Once either alternative is clicked, another window will appear where you’ll need to input a name, select region, and finally choose network(s). As was mentioned in a previous section, Moralis supports cross-chain compatibility. This means that it is possible to select more than one network in this step.
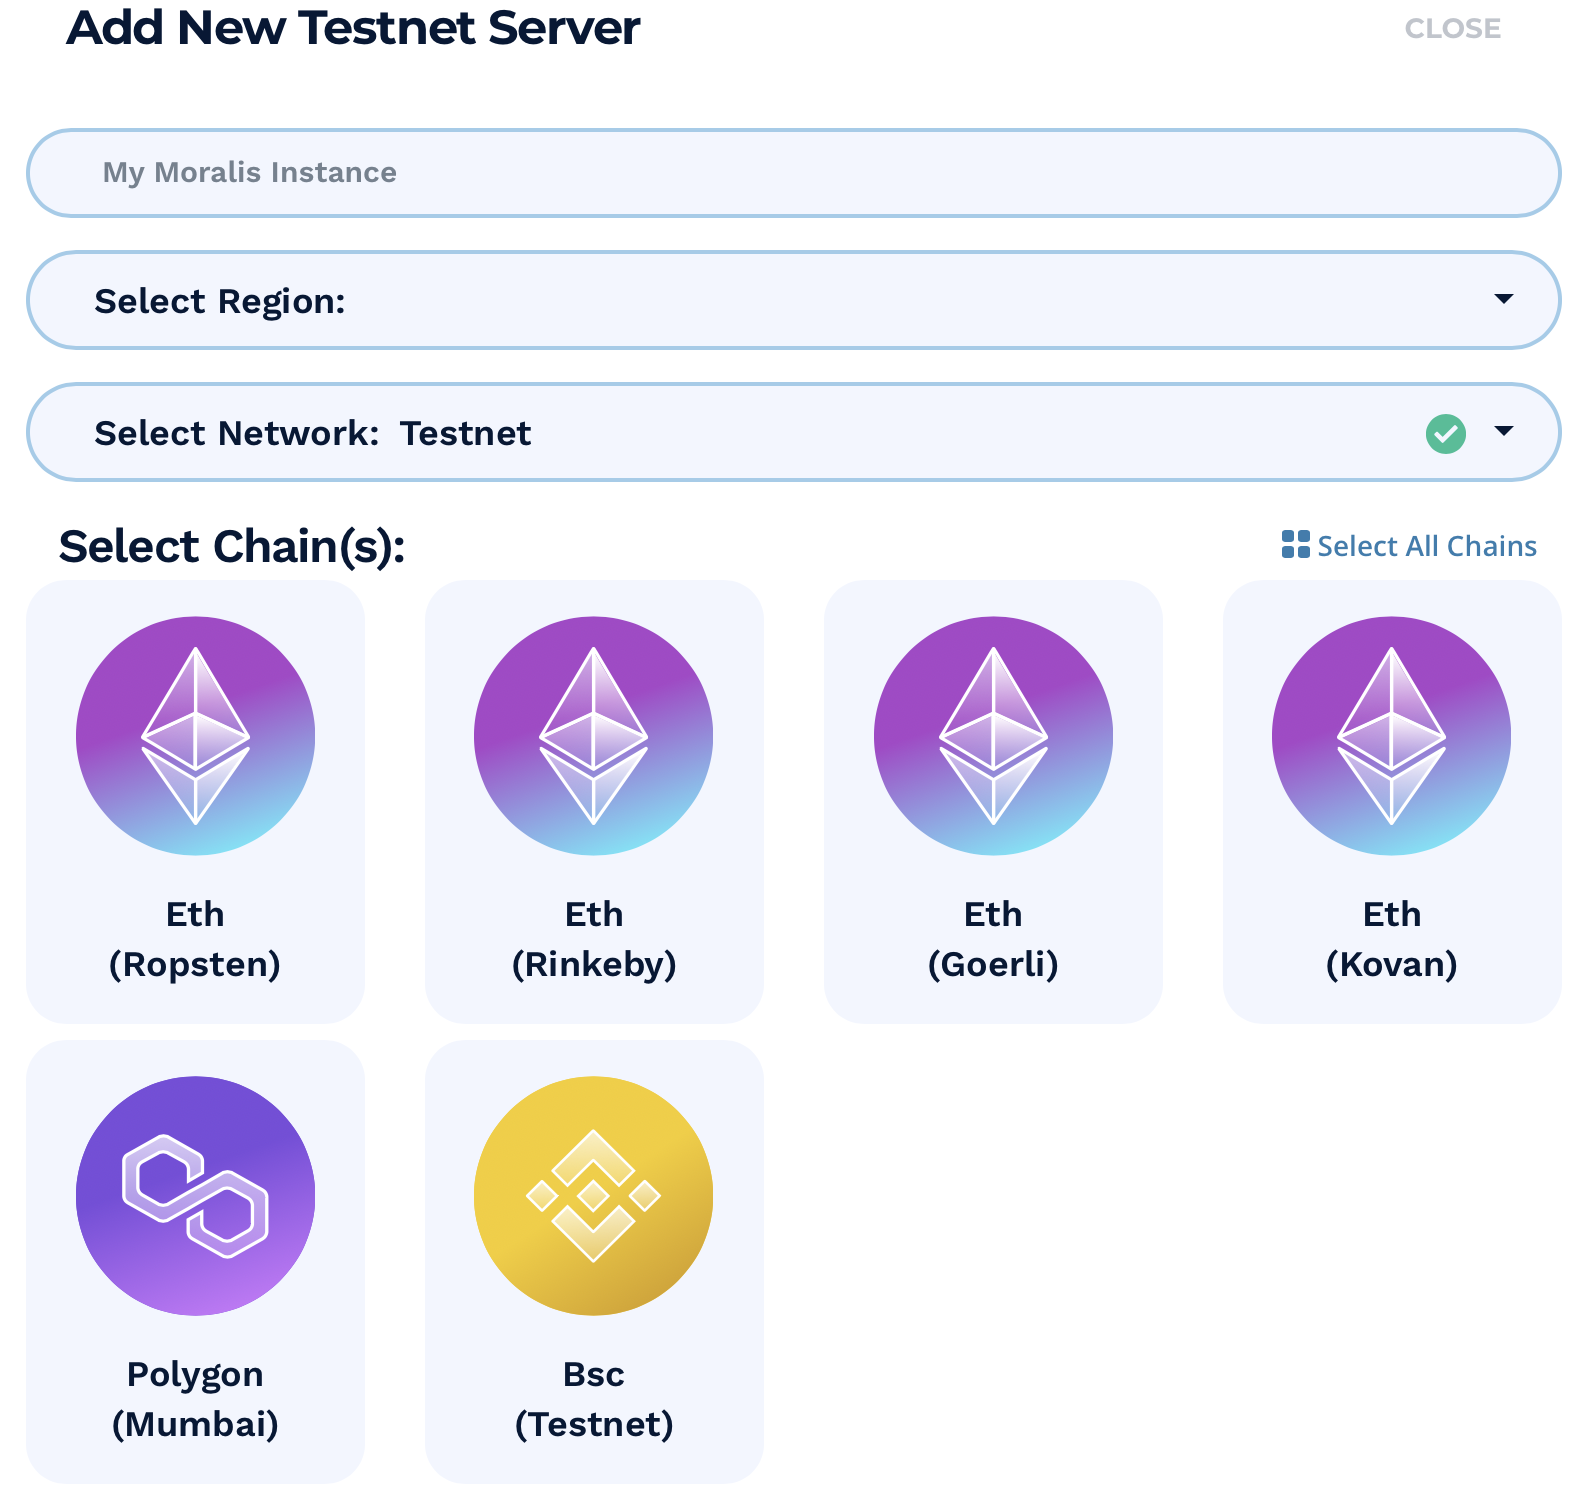
Once you are done with all your selections, all that remains is to click on the ”Add Instance” button to spin up the server. This might, however, take a short while, but don’t worry; it will be up and running momentarily.
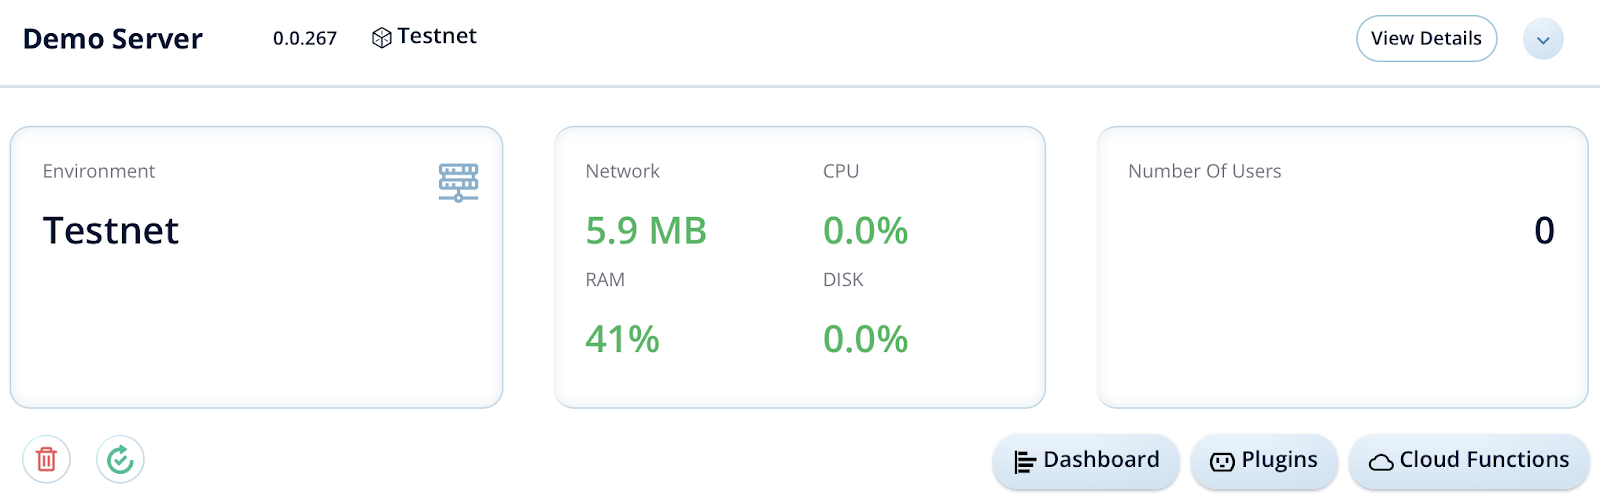
Once the server is up and running, you’ll also be provided with a database. You can access this database by clicking on the ”Dashboard” button of the server in question. Here you’ll find information regarding your dApp’s users, which allows you to fetch necessary information such as token balances and so on.
That’s it, that’s how easy it is to create a server and database with Moralis, and it only takes a couple of minutes. Moreover, it is completely free, so there is nothing to lose!
Hosting dApps with Moralis Explained
With an idea of how to build dApps and how to spin up a Moralis server, we can move on to the central part of this article on how to host a dApp with Moralis. So, with a dApp and a server at hand, the next part starts in the code editor of your choice. In this example, we will be using Visual Studio Code since that is what we prefer as we can easily access the terminal.
Terminal Inputs for dApp Hosting
The first part of the process is to install the Moralis CLI. To do so, you’ll need to input the following command into the terminal:
npm install -g moralis-admin-cli
As you can see, it is an npm package, and we are installing it globally so that it will be available for all projects. With the Moralis CLI installed, we can continue the deployment of the dApp through the following command:
moralis-admin-cli deploy
Once you execute the command, the terminal will query you for a Moralis API key. You can find this key by navigating back to the Moralis admin panel and clicking the ”Servers” tab. Then, you’ll need to click on the ”View Details” button for the server in question and copy the CLI API key. You can then input this information and execute the command.

With the command executed, you’ll be queried once again for some information. This time, you should fetch the CLI API secret from the same place, input this information, and then execute the command. With the command executed, you’ll need to choose which server you’d like to connect to. If you have multiple servers, you’ll be provided with a list where you need to select the correct server by inputting the corresponding number. Once you have chosen the valid number, you can simply click enter, and the deployment will finalize.
Launching and Un-Deploying the dApp
With the server deployed, it is possible to access the dApp through the server URL, which you can find under the ”View Details” section for the server in question. All you need to do is copy the URL (excluding the port), which looks like this, and input it into a browser:

That’s it for deploying the dApp; however, if you’d like to un-deploy the dApp, you can basically follow the same procedure but use the ”undeploy” command instead. As such, you’ll need to input the following:
moralis-admin-cli undeploy
This will trigger the terminal to query the CLI API key and the CLI API secret, which you can obtain in the same manner as earlier. Then, all that remains is to choose the correct server and finally execute the command.
That’s it for this tutorial; we can deploy a dApp with a few simple terminal commands allowing us to access the dApp directly through a browser. Moreover, the process was just as simple when un-deploying the dApp.
How to Host a dApp – dApp Hosting Explained – Summary
Moralis makes dApp development significantly more accessible, and it is possible to save both time and resources. As such, becoming a member of the community should be a given for any blockchain developer. Moreover, the development process of dApps becomes more straightforward, but so does the dApp hosting process.
In this article, we demonstrated how easy it is to host a dApp with just a few commands. All that was necessary was to install the Moralis CLI and then execute the ”moralis-admin-cli deploy” command and follow the instructions. Moreover, the process remains almost exactly the same for un-deploying a dApp. However, instead of the ”deploy” command, we used ”moralis-admin-cli undeploy” instead.
This tutorial further demonstrates the power of working with Moralis. However, there is more to the platform, and you are not limited to creating dApps. You can, for example, make everything from non-fungible to fungible tokens. To showcase the potential further, you can check out articles from Moralis’ blog on how to create a BSC token, create your own NFT, and how to create a Polygon token.
So, if you are looking to become a blockchain developer, then sign up with Moralis right away. It only takes a couple of seconds to join, and you’ll be able to shorten the development time for all future blockchain projects. Moreover, you’ll receive immediate access to all the platform’s tools!
