Whenever we are dealing with live data, it is important to somehow ensure that we use proper syncing. And, as you most likely know, when it comes to the blockchain, there’re new on-chain events taking place all the time. Hence, you need to implement reliable Web3 syncing. In case you ran your own nodes in the past, you know how overwhelming and challenging it is to index the blockchain. However, let’s assure you that the Web3 tech stack came a long way in the last couple of years. As such, there are now tools at your disposal that enable you to avoid all the limitations of RPC nodes. With these tools, you can sync and index smart contract events, which is your ticket to Web3 syncing.
As you may know, smart contracts are sort of on-chain pieces of software powering programmable chains (e.g.: Ethereum). Moreover, Web3 contracts ensure that predefined actions are properly executed when predefined conditions are met. So, how to easily go about Web3 syncing? Use the ultimate Web3 development platform – Moralis. This Firebase for crypto has a special “Sync” feature that makes the process effortless. In addition, thanks to Moralis’ database, you get to work with on-chain and off-chain data in a single place. Aside from this game-changing feature, this holistic Web3 backend platform offers you the ultimate Web3 SDK. Thus, you get to create killer dapps (decentralized applications) in minutes. And, since Moralis is cross-platform interoperable, you get to become a blockchain developer using your favorite platforms and programming languages.
For instance, you can use JavaScript or Unity skills to develop all sorts of web or mobile dapps. Nonetheless, Moralis is also all about cross-chain interoperability, which means that it future-proofs your work. So, create your free Moralis account today and start building.
Smart Contract Events Explained
In order to show you how to implement Web3 syncing, we must first ensure that you all know the basics. As such, let’s make sure we are all on the same page regarding what smart contract events are. As mentioned in the introductions, smart contracts are specific sets of coded rules. These rules execute predefined actions once the predetermined conditions are met. Moreover, smart contracts emit events whenever something meaningful happens within them (based on their code). Basically, smart contract events are some sort of signals that smart contracts emit. And, using those signals, dapps or other smart contracts can communicate. However, you ought to keep in mind that it’s up to devs of smart contracts to define when the events should take place.
To further clarify smart contract events, let’s look at an ERC-20 token standard smart contract. The latter emits a “Transfer” event whenever someone sends an ERC-20 token. Furthermore, events normally contain additional details. In the case of ERC-20 contract events, that means details regarding the ERC-20 token transfers. With that said, it’s quite clear that real-time Web3 syncing is extremely important when developing dapps.
Moving forward, we will showcase an example task. We encourage you to follow along and take action to learn how to work with Web3 syncing with Moralis.
Web3 Syncing with Moralis
Since NFTs (non-fungible tokens) continue to be all the rage, we decided to take on a Web3 syncing task where we will sync and index smart contract events for CryptoPunks. So, let’s presume we have a dapp, in which we want to track these NFTs. Hence, we want all real-time and also all historical data regarding CryptoPunks. Moreover, this NFT collection utilizes the ERC-721 token standard. Hence, there must be an ERC721 contract running the show. Furthermore, this means that we need to apply Web3 syncing to transfer events of CryptoPunks’ contract. However, if you want to work with Moralis, you need to first take care of some simple initial setup.
Initial Moralis Setup
To obtain Moralis’ full backend functionality, you need to create a Moralis server. The latter is also essential to sync and index smart contract events. So, here are the steps to follow:
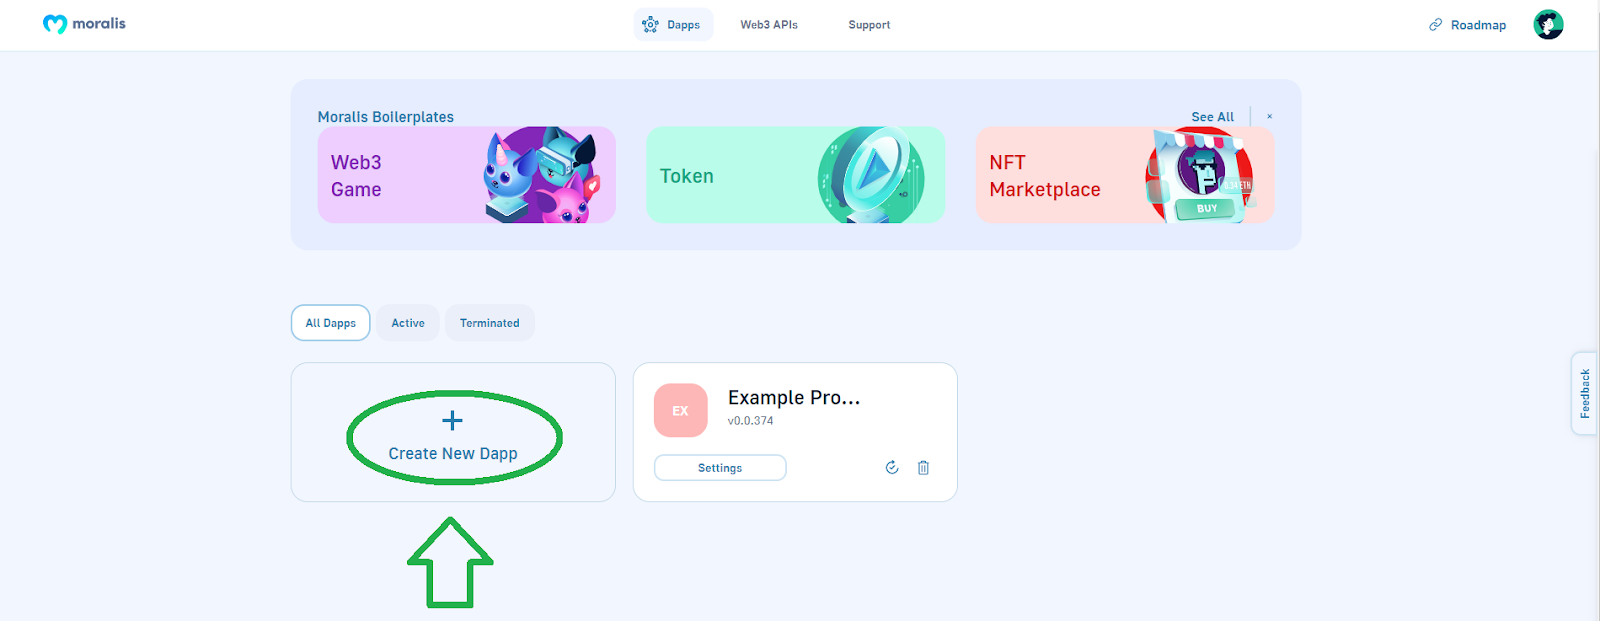
- Create your free Moralis account – Follow the ”create your free Moralis account” link in the intro. However, if you’ve already created your Moralis account, use your credentials and log in.
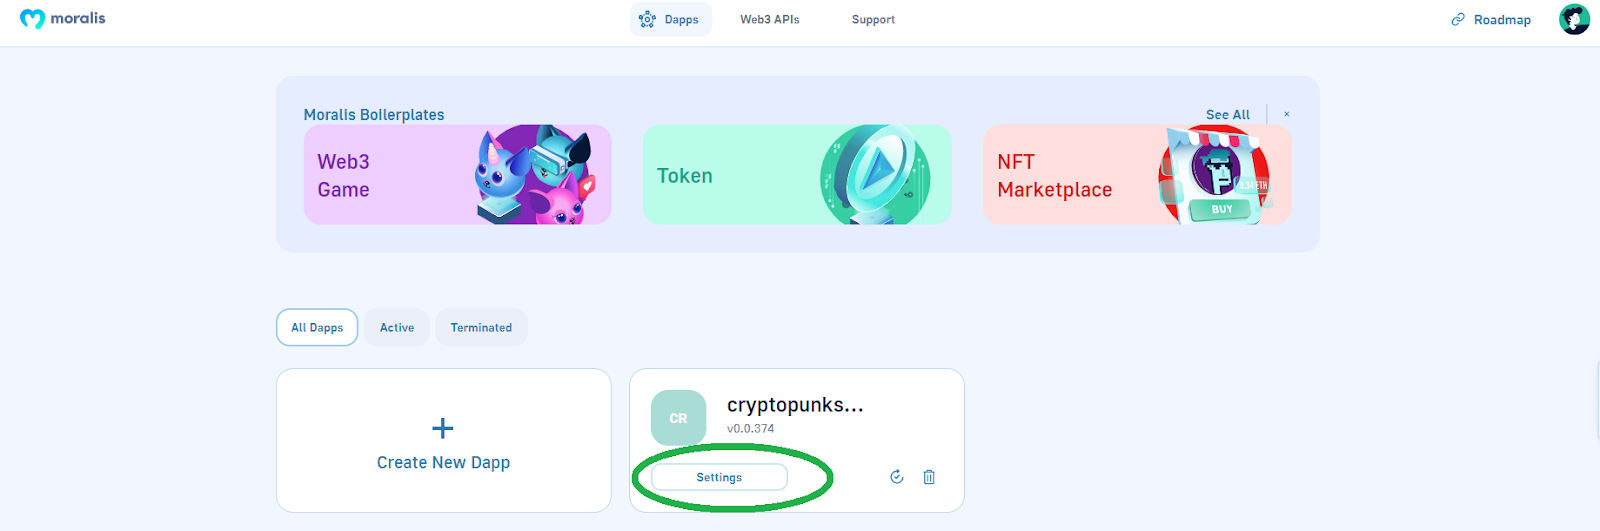
- Create a Moralis dapp – Once inside your Moralis admin area, use the “Create New Dapp” button:
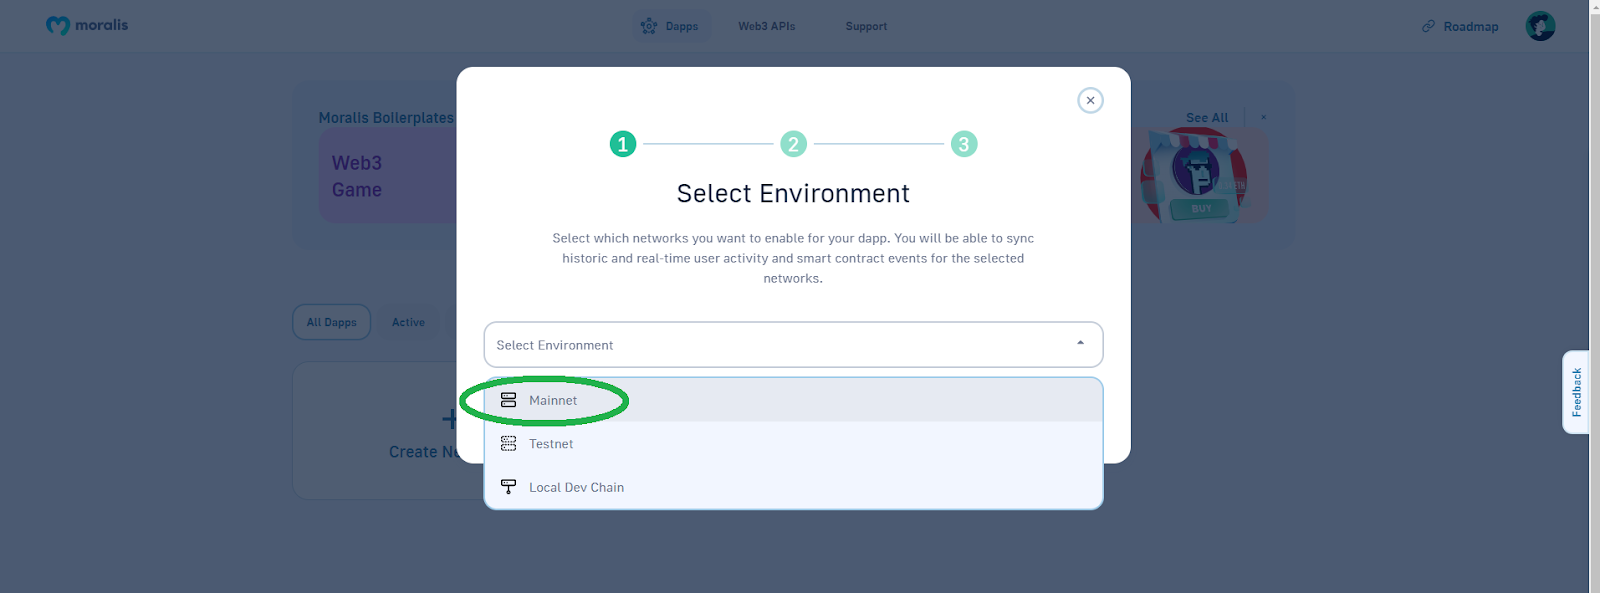
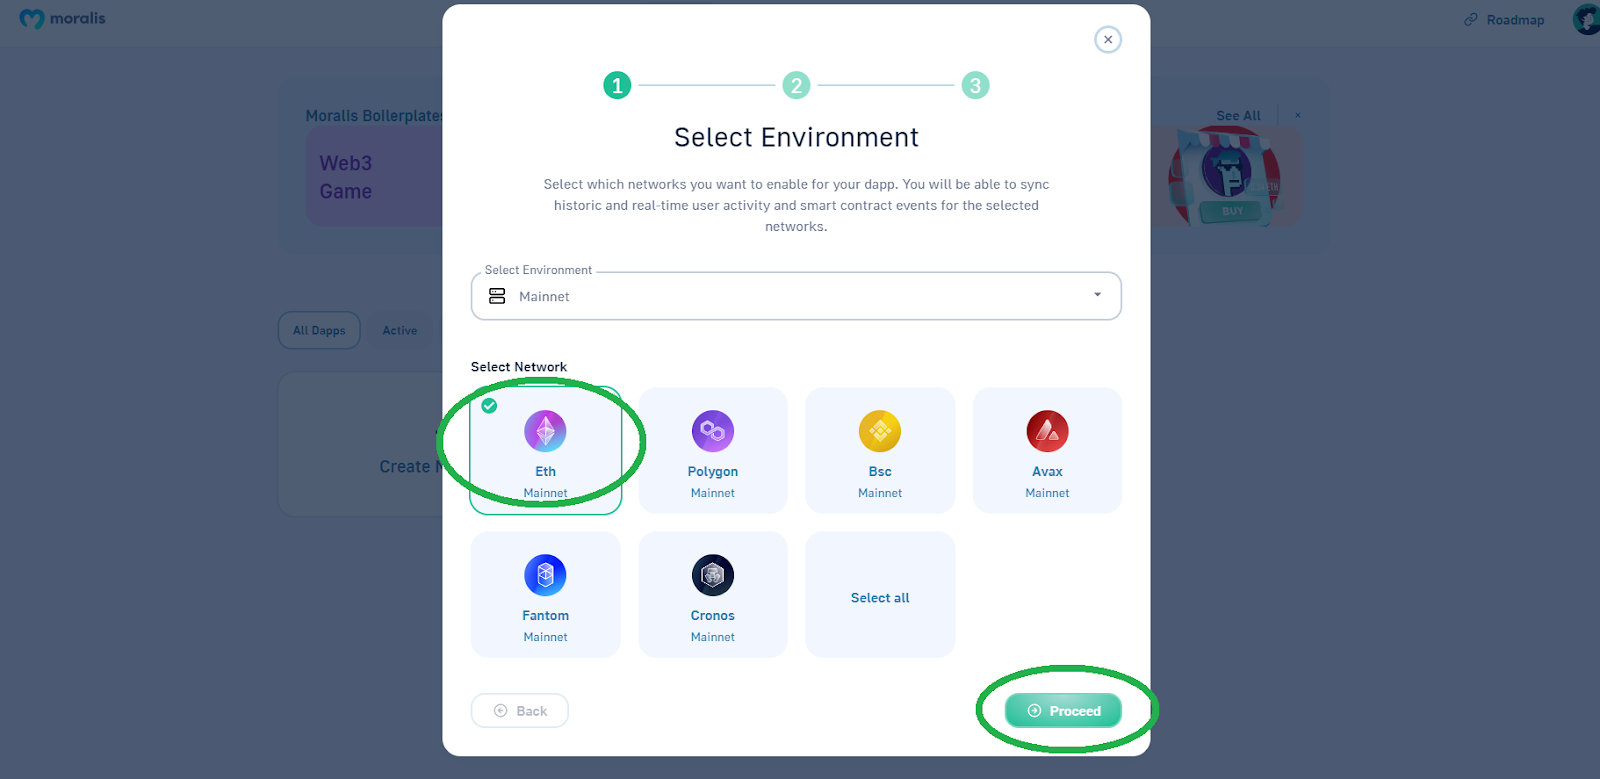
- Select environment – In most example projects, you will use testnets (e.g.: Ethereum testnets). However, since CryptoPunks is a live project, you need to select “Mainnet”:
- Choose the Ethereum mainnet and proceed:
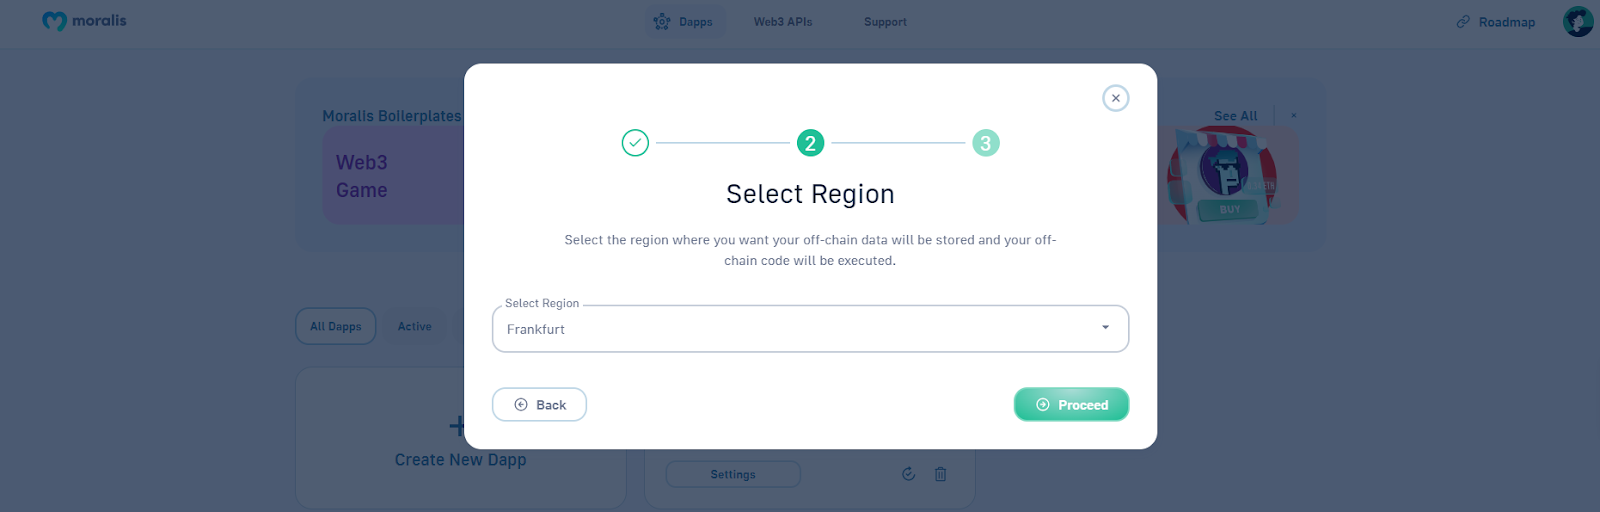
- Select the city closest to your location:
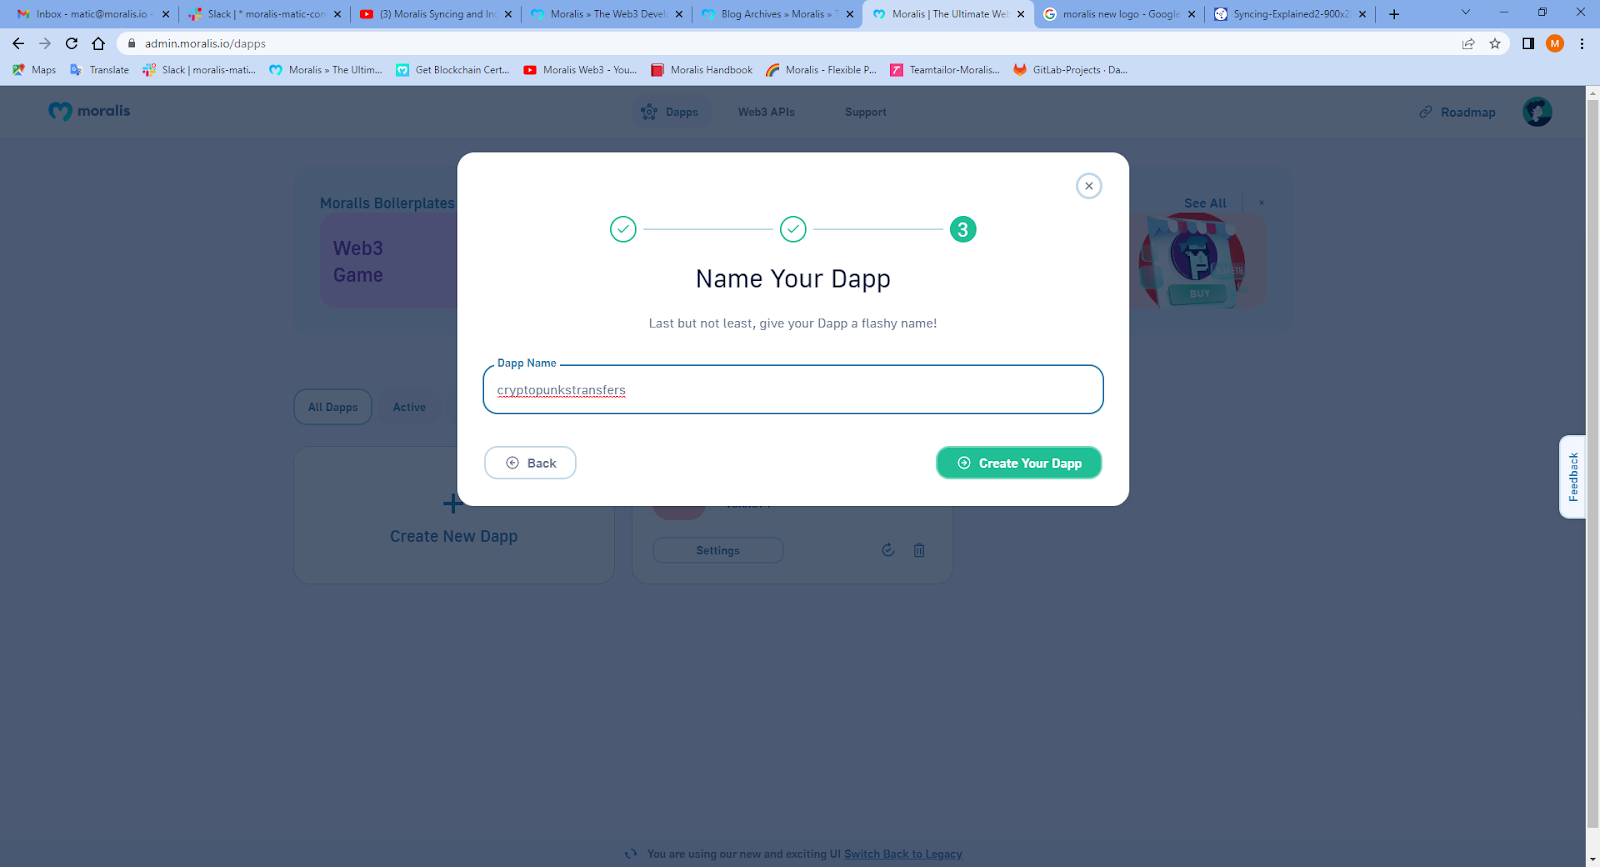
- Name your dapp and hit the “Create Your Dapp” button:
The above steps are your ticket to accessing the power of Moralis. Once you’ve successfully created your Moralis dapp, you can start utilizing its tools. And, as promised previously, to tackle Web3 syncing, we will focus on the Moralis’ “Sync” feature.
Web3 Syncing Example Project
To do Web3 syncing with Moralis, click the “Settings” button under the above-created dapp:

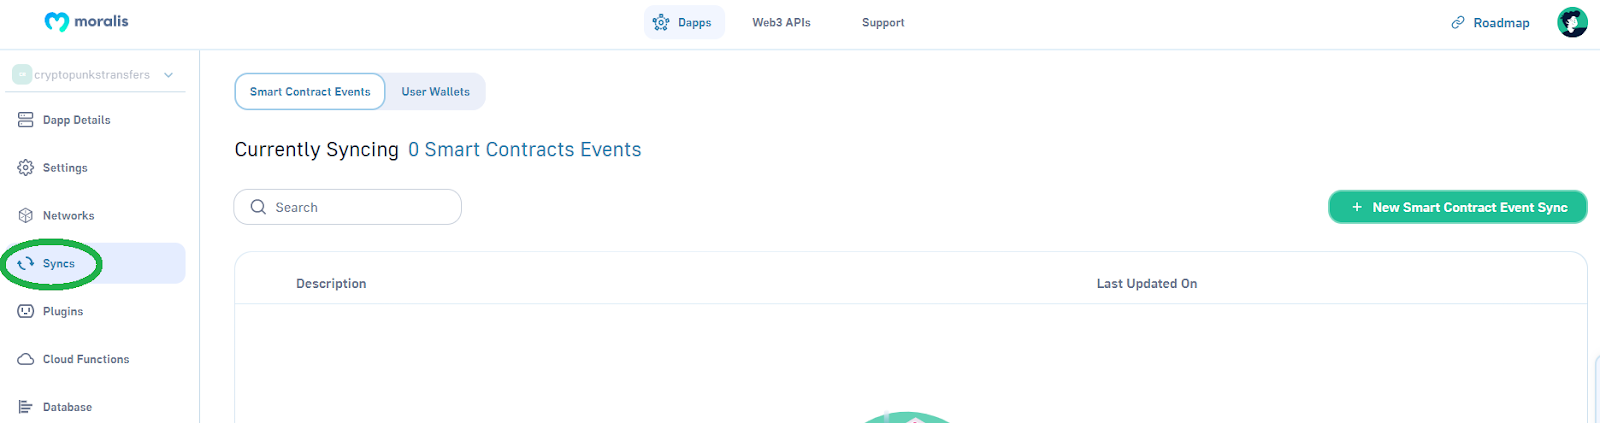
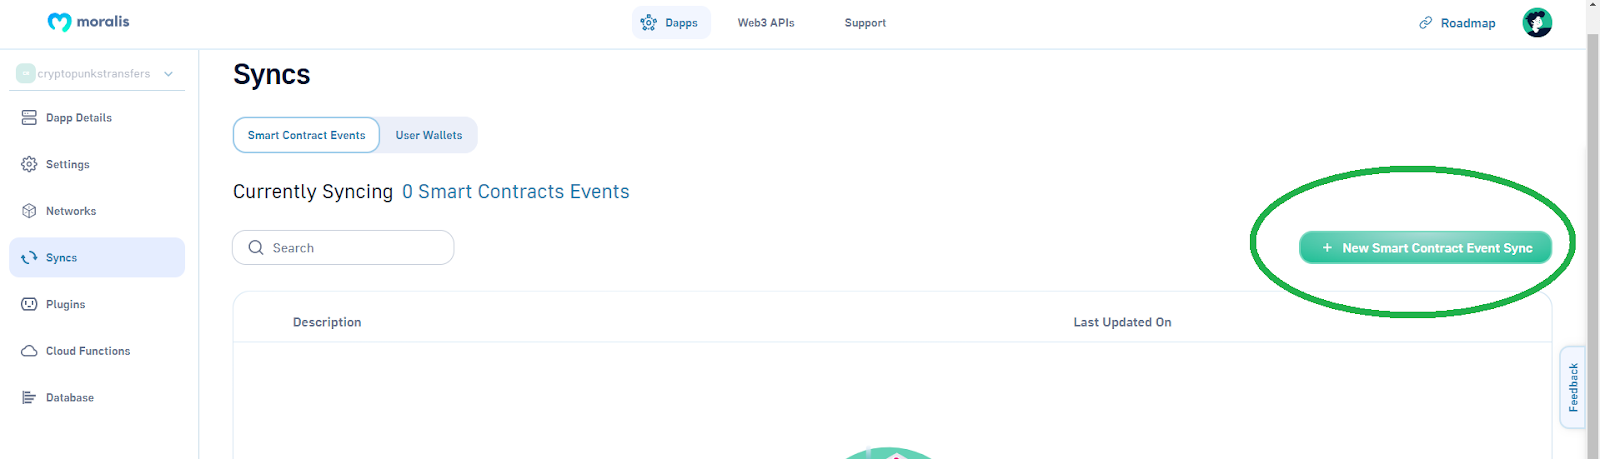
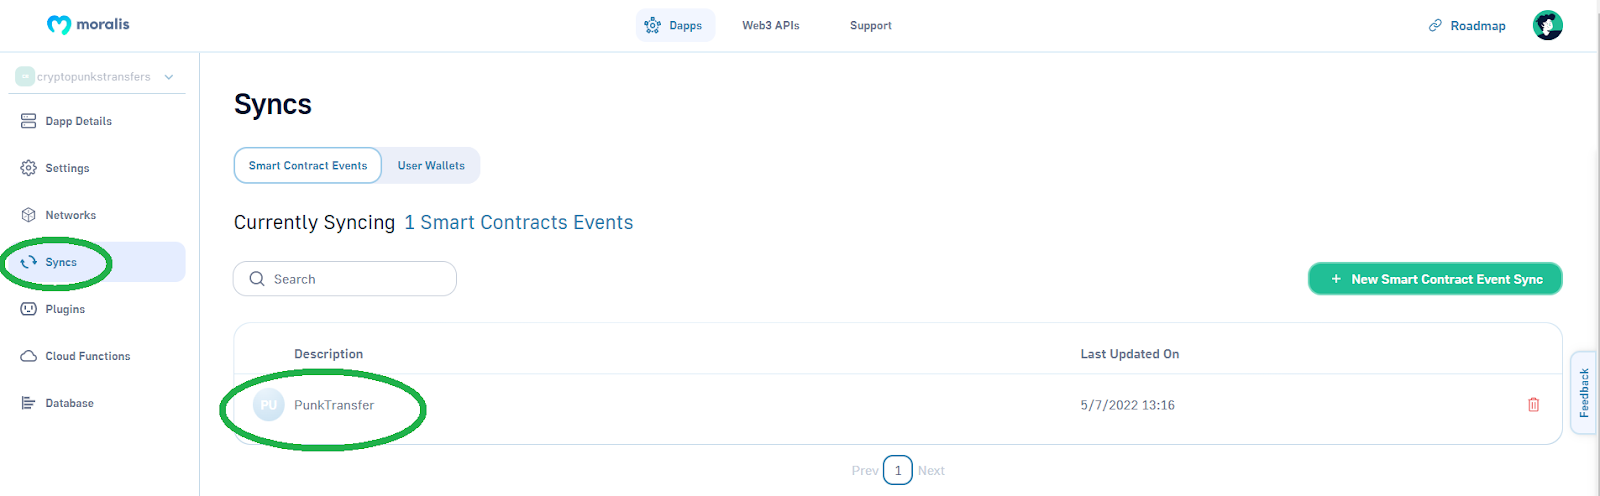
Next, you need to select the “Syncs” tab from the sidebar:
Once on the “Syncs” tab, click the “New Smart Contract Event Sync” button:
Next, you have two options – you can either go with “Custom Event” or select “NFT ERC-721” option for our example project. However, since we will focus on the “PunksTransfer” topic, we need to go with the “Custome Events” option:

After completing the above steps, you will be on the “Sync Settings (2 of 2)” screen:
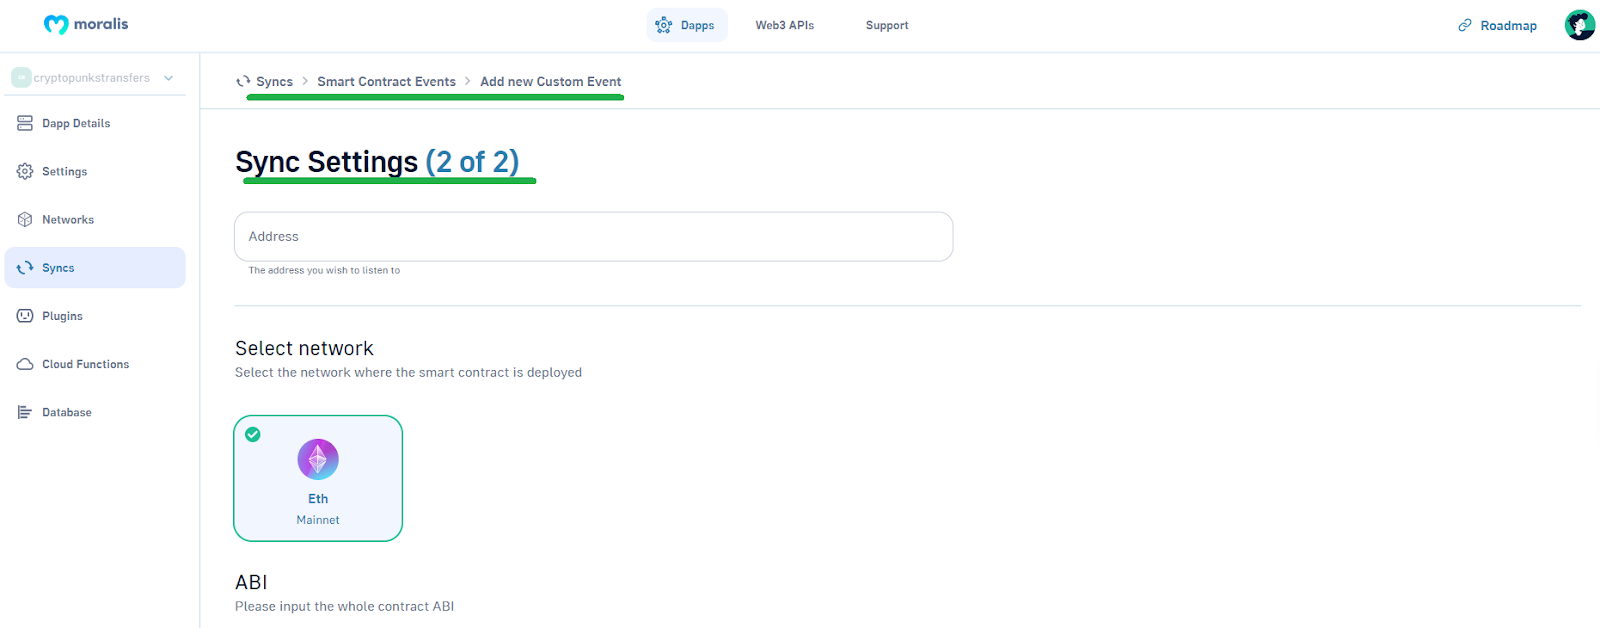
This is where you need to enter specific information that matches this example project’s goal, which is to set in place Web3 syncing for CryptoPunks transfers. Luckily, the configuration process is very simple; basically, you just copy and paste publicly available on-chain data.
Utilizing Public On-Chain Data for Web3 Syncing
Following are the steps you need to complete to sync the on-chain events for our CryptoPunks example project. Then, it’s up to you to use these concepts and apply them to your own projects.
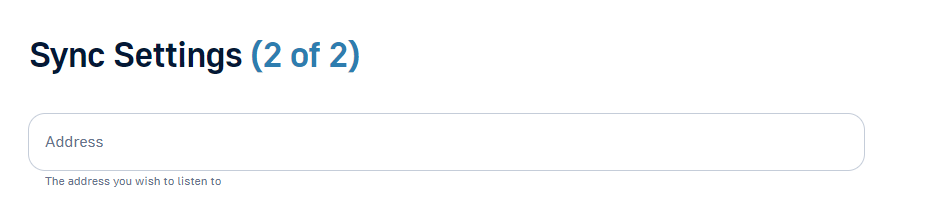
If you’ve been following our previous steps, then you are now on the second part of the sync settings. At the top, you have the “Address” entry field:
As such, let’s show you how to use Etherscan to obtain that piece of information.
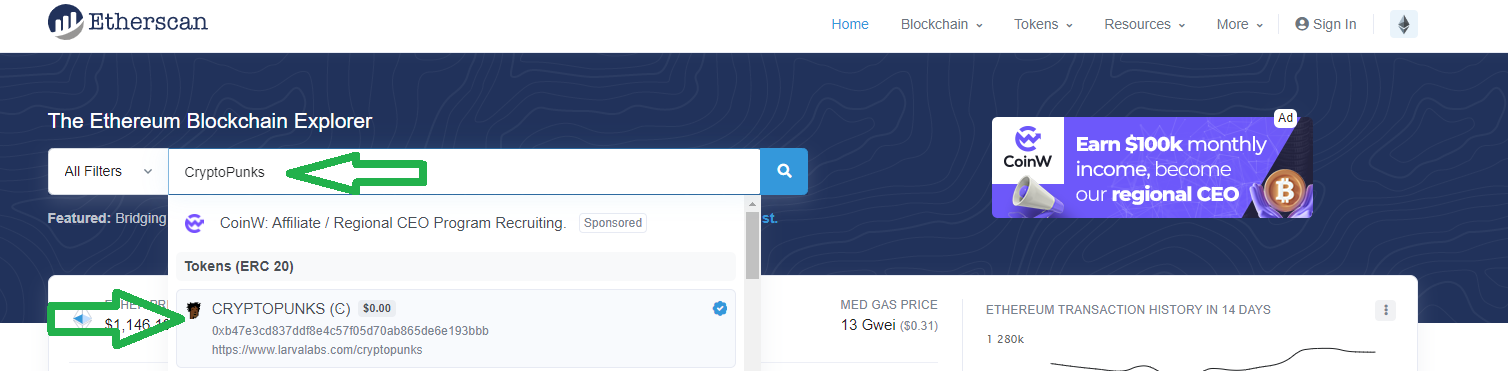
Using Etherscan to Obtain the Contract Address
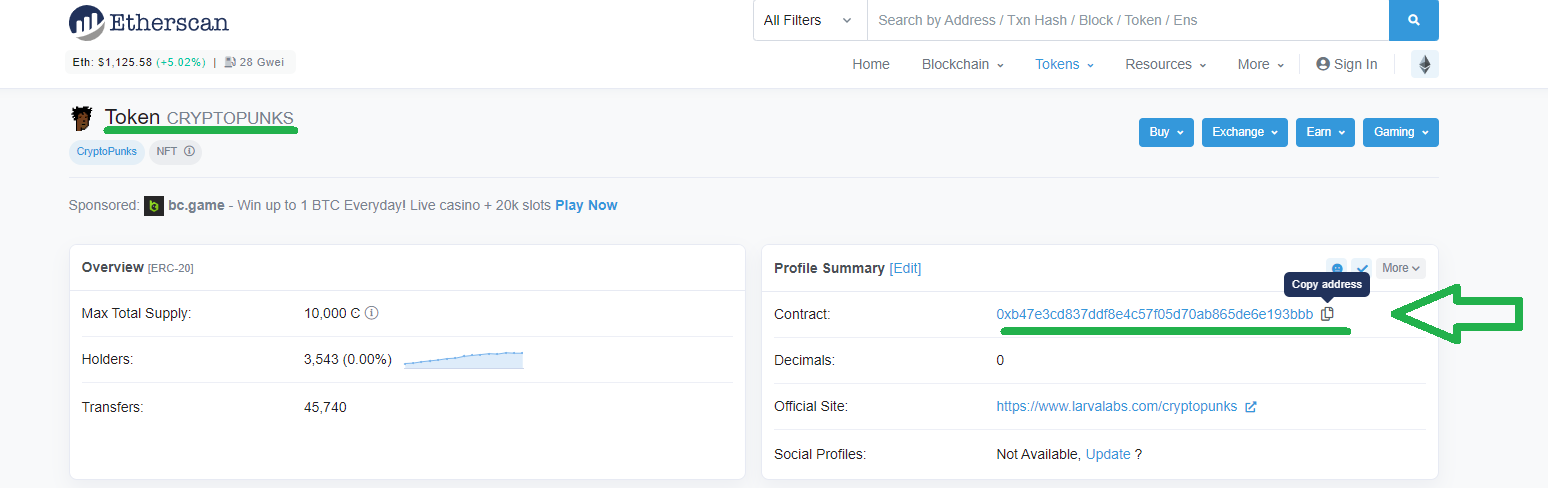
Open Etherscan and use its search option, where you want to type “CryptoPunks” and click the verified option:
On the “Token CRYPTOPUNKS” page, copy this project’s contract address by using the “copy” icon:
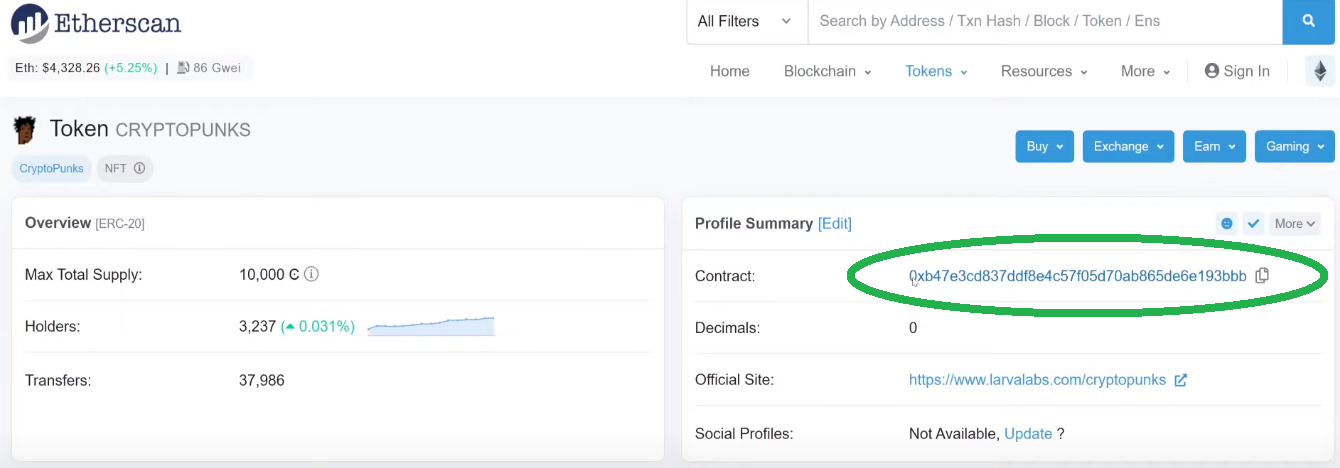
Next, go back to the “Sync Settings (2 of 2)” screen and paste the above-copied address into the designated field:

Below the address tab, you will see “Eth Mainnet”. The “sync” feature automatically selects this chain because we choose this network when creating our Moralis dapp:
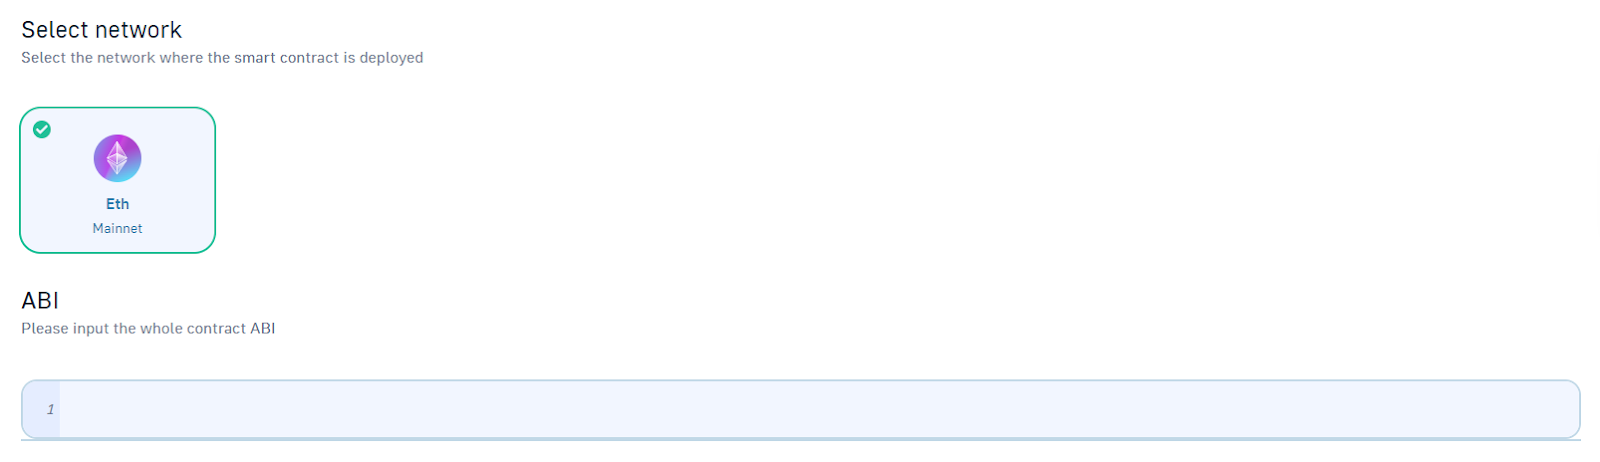
Moreover, as indicated by the above screenshot, next is the “ABI” entry field.
Using Etherscan to Obtain the ABI
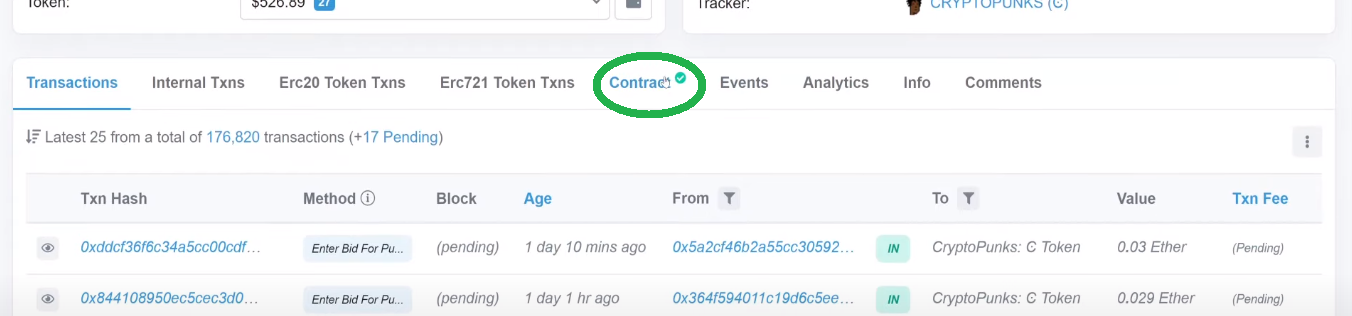
Luckily, CryptoPunks’ contract ABI is also a piece of information we can get from Etherscan. In order to locate the ABI, click on the contract address of CryptoPunks:
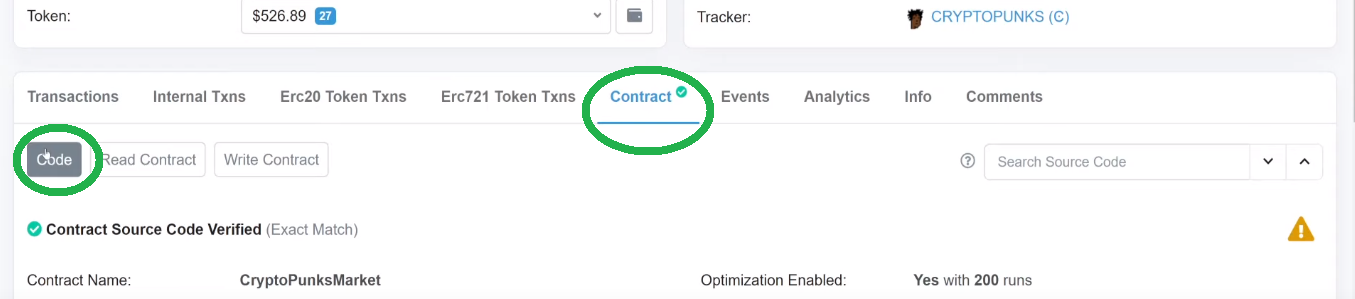
Then, on the next page, scroll down a bit. You will see a horizontal option bar starting with “Transactions”. Among these options, you need to click the “Contract” tab:
Now that you’re on the “Contract” tab, first, ensure that you are in the “Code” section:
Then, scroll down until you see “Contract ABI”:
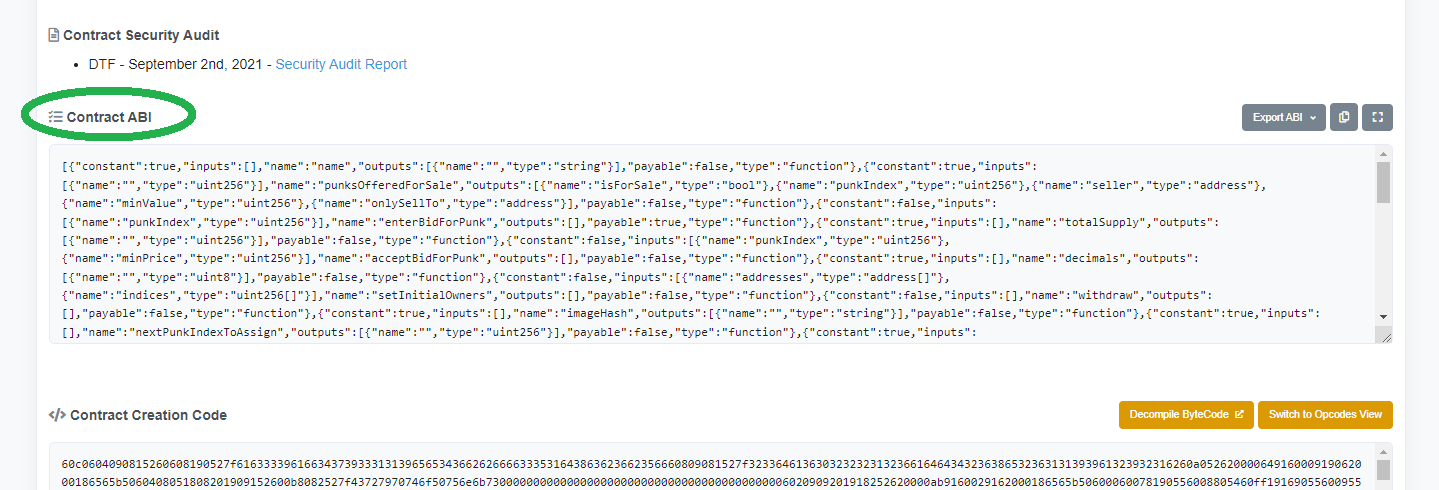
As the above screenshot indicates, this is a rather long array. However, you need only a specific part of it. Moreover, to make things easier on yourself, use your browser’s search option and type in “PunkTransfer”. By doing so, your browser will highlight the search results, which is the part of the ABI that interests you:
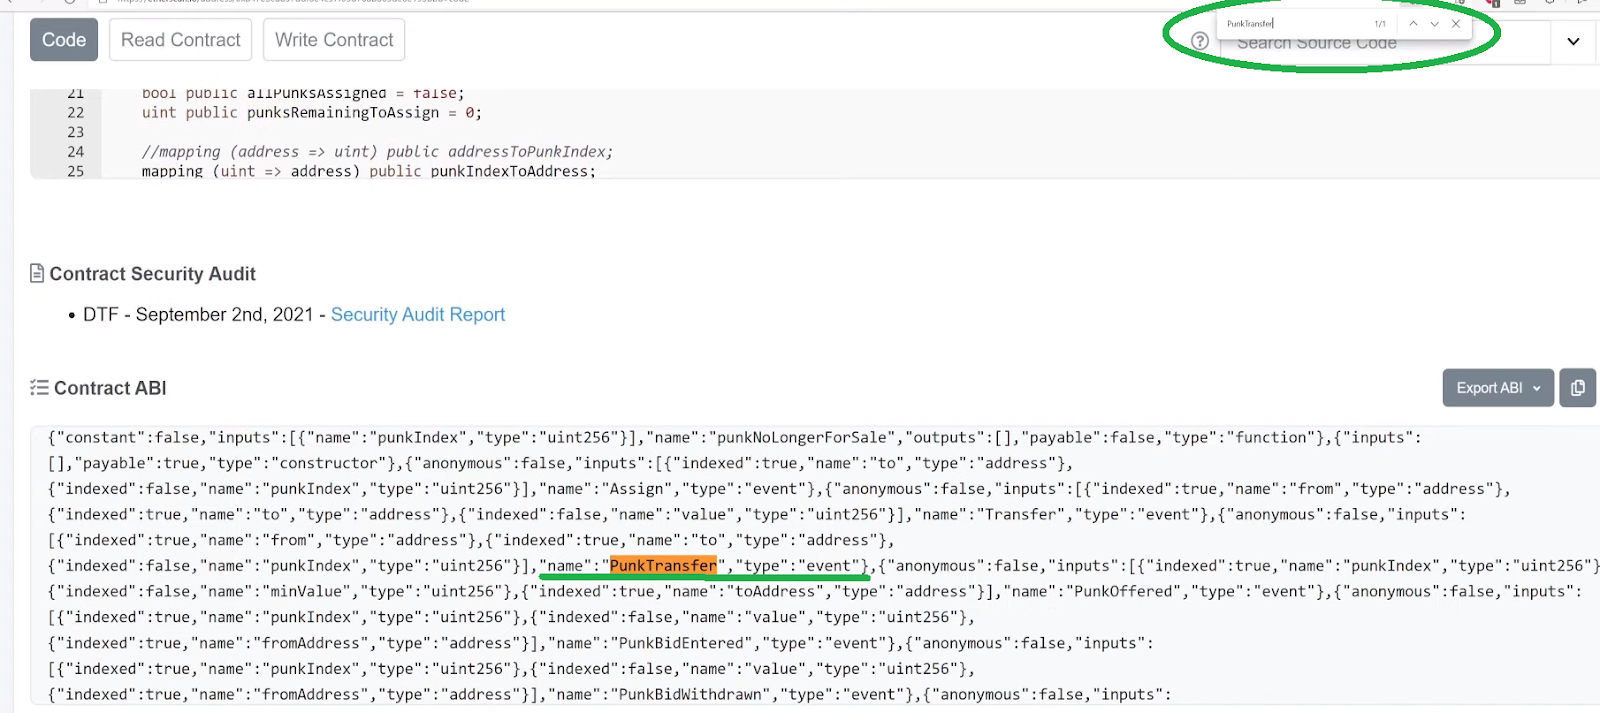
Next, copy the entire object that contains the highlighted “PunkTransfer”:

Then, go back to your sync settings and paste the above-highlighted object into the “ABI” section. Make sure to add squared parentheses around the object. With the ABI in place, you need to select the right topic (there will be only one option):

Table Name, Description, and Syncing Historical Events
As far as the table name goes, you can use whatever you want; however, we encourage you to follow our lead and enter “PunkTransfer”:

Moreover, you can also use “PunkTransfer” for description:

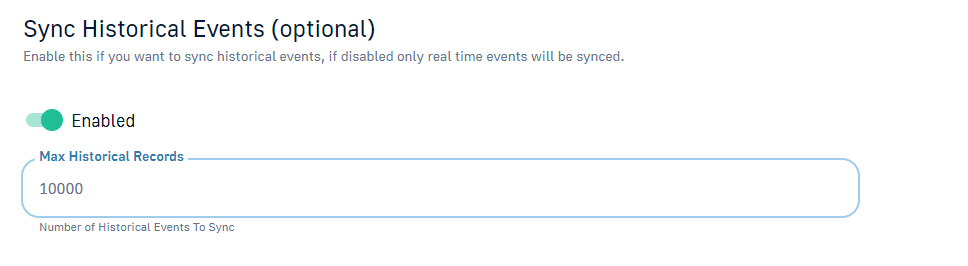
If you remember, we said we want to include historical events as well. As such, make sure to enable this option and enter the max number of historic events that you want to include:
Furthermore, there’s also the “filter” option, which we will not be using for the purpose of this tutorial. As such, click the “Proceed” button in the bottom-right corner of the sync settings screen.
By completing the above steps, you should see your new Web3 syncing inside your Moralis dapp’s “Syncs” tab:
Note: The above instructions are for the new Moralis admin UI. However, at the button of the article, you can find a video tutorial completing the same steps using our legacy UI. So, in case you prefer to follow along with the video below, it might make sense to switch to our legacy UI:

Moreover, when using the legacy UI, it is useful to know how to use Etherscan to obtain the right topic.
Using Etherscan to Obtain Smart Contract’s Topic
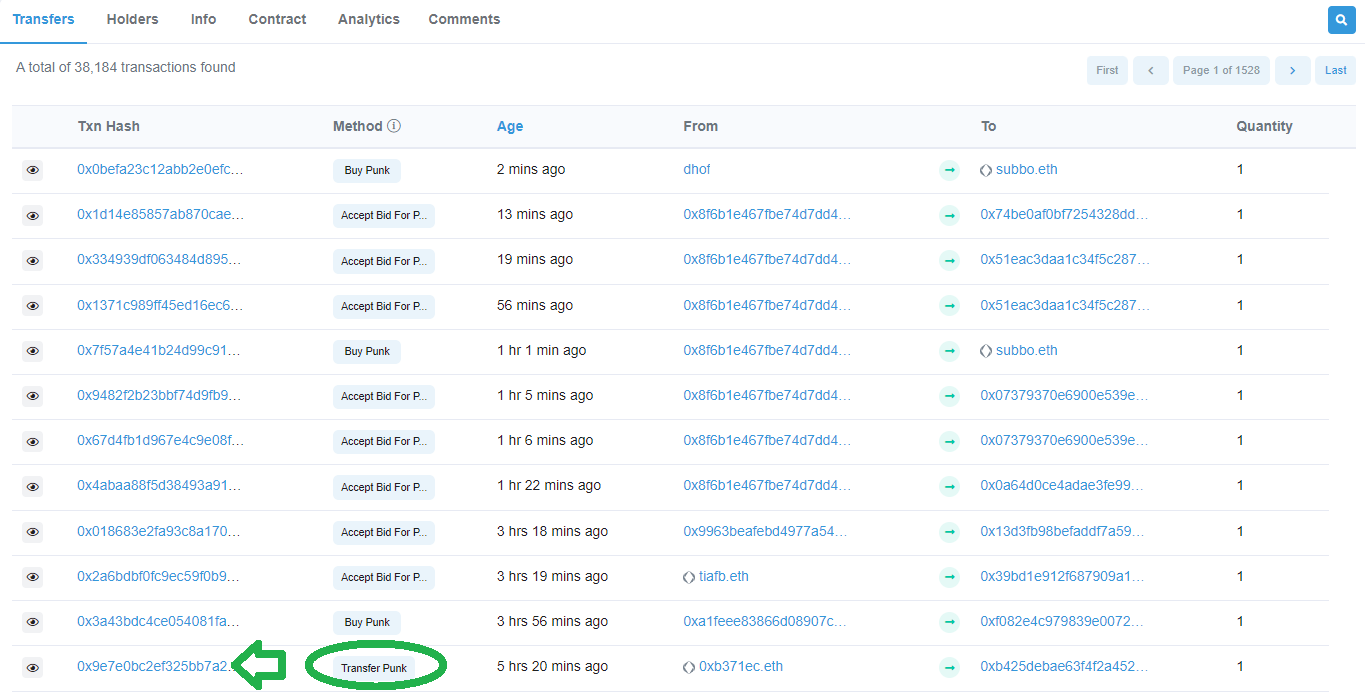
To obtain the topic for smart contract events, you get to use Etherscan again. In our example, go back to the CryptoPunks page and scroll down until you see the “Transfers” tab. In that tab, click on any of the transaction hashes for the “Transfer Punk” methods for more details:
Within the “Transaction Details” page, select the “Logs” tab:
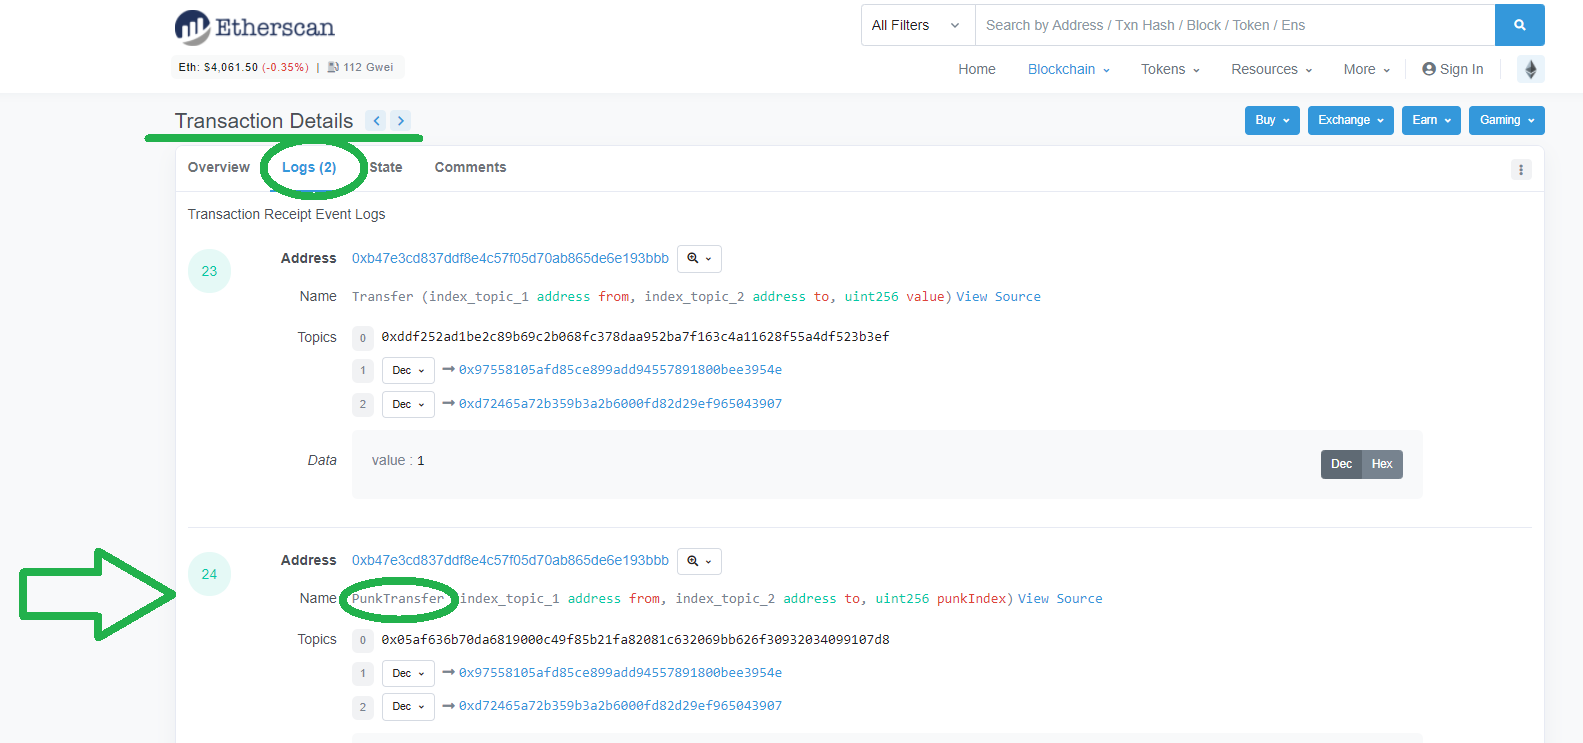
Looking at the screenshot above, you can see that there are “Transfer” and “PunkTransfer” names. And, since, “PunkTransfer” is the one that interests us, focus on its details. To finally get the topic, you need to use the details inside the parentheses (only the types):

So, this it the topic for our example:
PunkTransfer (address,address,unit256)
Results of Web3 Syncing – On-Chain Events at Your Disposal
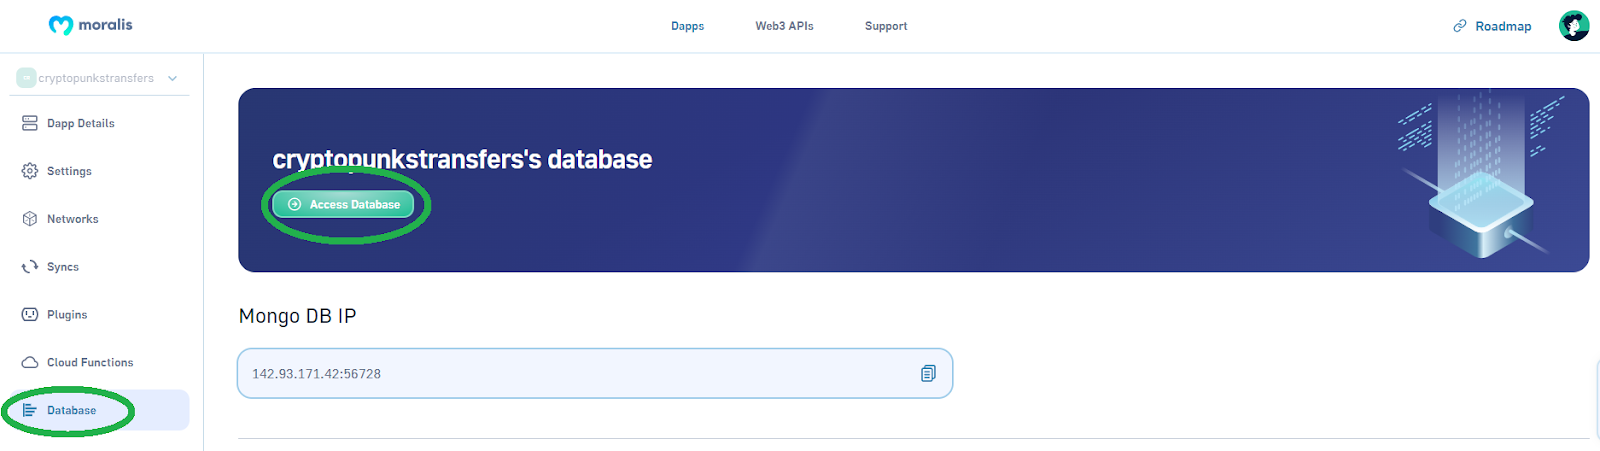
Once you have your Web3 syncing set in place (as done in the previous sections), you can view the details of related events in your Moralis database. To access your database, use your dapp’s settings.
Next, go to the “Database” tab where you need to click the “Access Database” button:
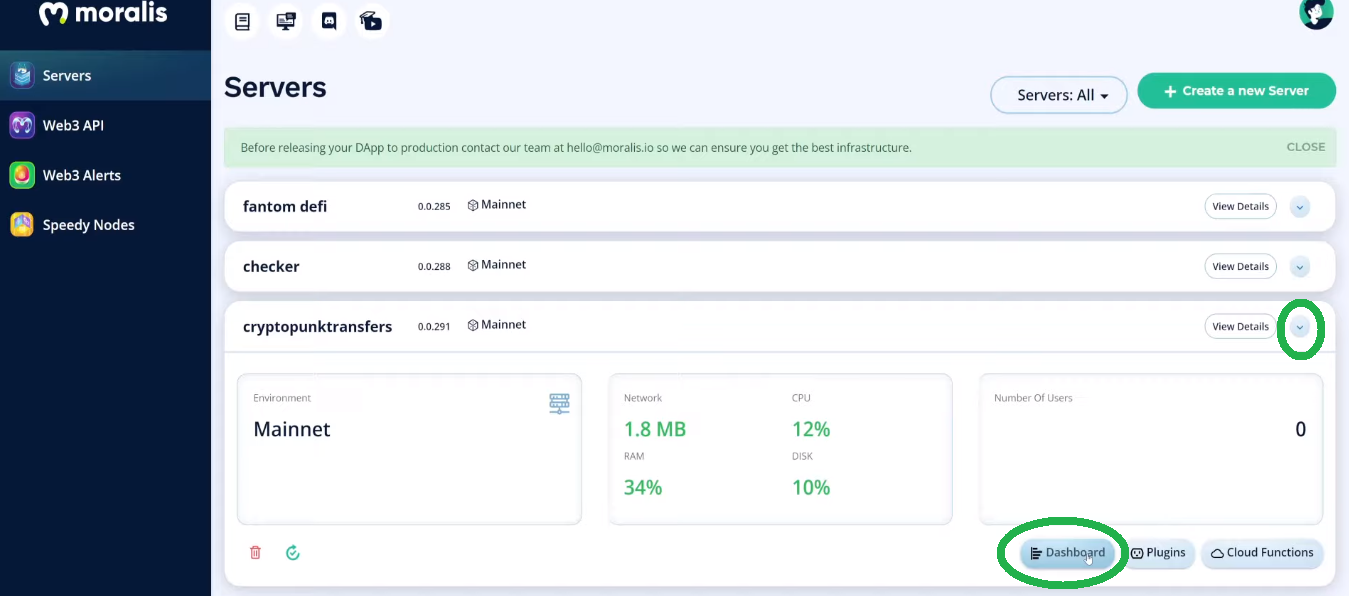
On the other hand, in case you’ve decided to use our legacy UI, this is how you access your Moralis database:
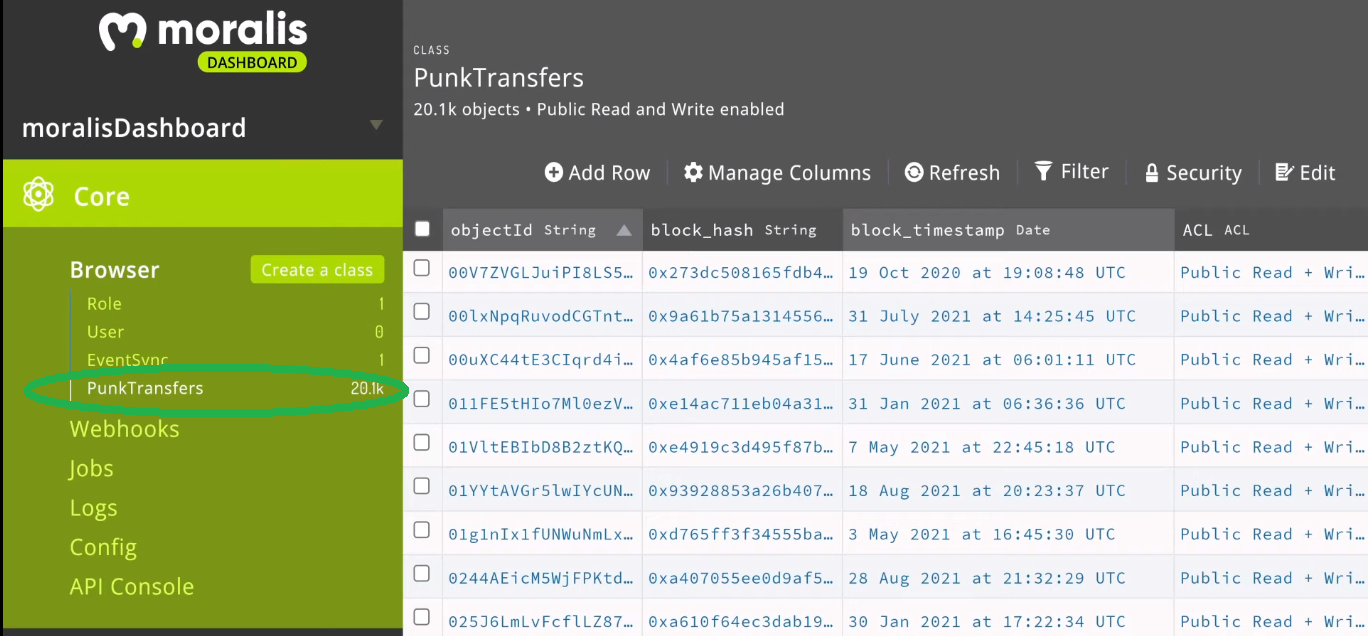
Inside your database’s dashboard, you will now see the “PunkTransfers” class. The latter was automatically added when you created this sync:
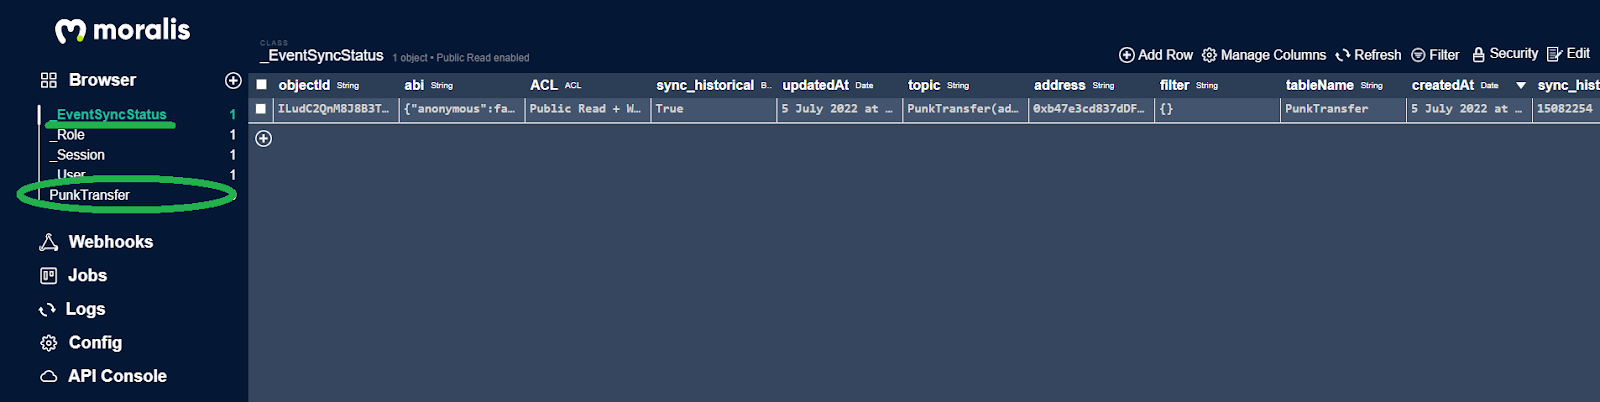
Note: The above screenshot represents the older database UI (matching the video tutorial below). The updated database UI is a bit more eye-catching, though it contains the same details. However, at the top, it also creates the “_EventSyncStatus”, which includes all the details about your syncs:
Finally, as promised, here’s the video tutorial of today’s Web3 syncing example project:
Web3 Syncing – How to Sync Smart Contract Web3 Events – Summary
In this article, you had a chance to learn all you need to know about Web3 syncing. We first explained what smart contract events are and then showed you how to effortlessly sync your dapps to any smart contract event. Moreover, you also learned some details about Moralis and how to complete its initial setup. As such, you now know how to create your Moralis dapps. Then, we took on an example project, where we set in place a new Web3 syncing for CryptoPunks. Thus, you had a chance to either use the new admin UI or the legacy UI to set in place a custom sync. Last but not least, you also learned how to access the events in your Moralis database. Moralis also gives you access to the most powerful solution for Web3 authentication.
If you enjoyed today’s example project, we encourage you to visit the Moralis’ blog and the Moralis’ YouTube channel. There you’ll find a ton of high-quality content that can serve as your free blockchain development education. For instance, some of the latest topics focus on Web3 webhooks, how to build on Web3, full stack Web3 development, how to create an NFT minting website, our Ethereum dapp API, Polygon dapp API, and much more.
However, if you want to become a Web3 developer sooner rather than later, we recommend taking a more professional approach. In that case, enrolling in Moralis Academy is the path you need to consider. Aside from top-notch crypto development courses, this is also the place to get expert mentorship. On top of that, you get your personalized study path and become a member of one of the most awesome crypto communities.
