If you’re proficient in JavaScript, odds are you’re probably familiar with React, and you might even be able to build a React dApp easily. React’s popular JavaScript library enables developers to build applications with highly efficient user interfaces (UIs). Moreover, with Moralis’ ultimate Web3 development platform, you can utilize React.js and build phenomenal dApps (decentralized applications). In addition, even beginner developers can use a proper React dApp template and create next-gen applications. By using a template for React dApps, you get to skip the repetitive parts of programming and thus further speed up the process of dApp creation. As such, this article will demonstrate how to build a React dApp by using a React dApp template.
With that said, in case you’ve been wondering how to build a React dApp, you came to the right place. This article will show you a simple and fast way to create dApps using a basic React dApp template. In the upcoming sections, we’ll focus on properly setting up all the tools. That includes setting up a code editor, accessing the React dApp template, tweaking the React dApp template, and connecting to Moralis to get all the blockchain-related backend needs covered. As such, this article is designed to be a great starting point when looking to learn how to build a React dApp.
Prerequisites to Using a React dApp Template
Like with any other programming task, there are elementary Web3 projects you can start working on – even if you are a complete beginner. However, to use a React dApp template and best learn how to build a React dApp, we recommend having a firm grip and solid understanding of the following:
- Proficiency in JavaScript (JS) – This simple and highly popular programming language will get you a long way when you combine it with Moralis. In case you’re not proficient in JavaScript yet, we recommend enrolling in the “Javascript Programming for Blockchain Developers” course from Ivan on Tech Academy.
- Know the Basics of Moralis – This ultimate Web3 operating system provides the tools and expertise needed to deploy killer dApps easily and quickly. It provides you with Moralis’ Web3 SDK, a premier NFT API, Moralis Speedy Nodes, neat documentation (one of the best in the industry), free high-valuable content (Moralis’ blog and Moralis’ YouTube channel), and a knowledgeable community.

- Know How to Use MetaMask – MetaMask is the most popular crypto wallet that may also serve as a gateway to the Web3 industry. Furthermore, it’s the most straightforward authentication solution available. Fortunately, it’s easy to set it up and use it. Moreover, Moralis has full integration for MetaMask built-in.
- Be Able to Answer “What is React?” – To make the most out of any React dApp template and to dive deeper into the “how to build a React dApp” topic, you need to have a clear understanding of this useful JavaScript library.
In case you are a complete beginner to blockchain development, we recommend learning how to become a blockchain developer. In addition, it can be hugely beneficial to know what the best languages for blockchain development are to advance your crypto journey.

React dApp Template – How to Build a React dApp with Moralis
Before we go any further, we first recommend that you have your free Moralis account set up and ready. To do so, just enter your email address, and create your password. Then complete the process by confirming your email (click the link inside the confirmation email), and you’ll be all set.
Aside from Moralis, MetaMask, and the React.js library, we’ll be using VSC’s code editor (Visual Studio Code), a package manager (npm), and an open-source CSS framework (called “Chakra”). In case you need help with obtaining and setting up MetaMask and VSC, we recommend checking out our article covering Ethereum development for beginners.
React dApp Template – Setting Up VSC
Visual Studio Code (VSC) is one of the most popular code editors on the market, and most of Moralis’ experts use it as well. Of course, feel free to use any other code editor of your choice; however, if you are a beginner, we recommend using the same tools as we are since it’ll make things simpler. When using VSC, we’ll be taking advantage of its built-in terminal. To open it, click “View” in the top menu bar and then click “Terminal”.

Furthermore, we’ll make use of several extensions that can make your work easier. To add extensions, navigate to “View” and then “Extensions”, then use the search bar to find the extensions listed below and install them. Here are the extensions that we’ll be using:
- Babel JavaScript – It provides highlights for React and JavaScript.
- Bracket Pair Colorizer – It makes seeing matching brackets easier and helps you avoid missing opened brackets.
- Prettier – Code Formatter – It forms the code automatically. Also, set the settings inside this extension regarding the “Format On Save” to be enabled.
Running React dApp Template
As mentioned previously, we’ll be using VSC’s terminal to initiate specific actions. To create a React dApp, we’ll be using the “Create React” library, which will bootstrap the entire dApp for us. To achieve this, we type “npx create-react-app twitter-clone” into the terminal’s command line (see the image below). The “twitter-clone” is the name we chose for our React dApp (it could be anything you’d like). Furthermore, you may need to install the Create React library. If that happens, just click “yes”, and it will be done automatically.

By default, the package manager from “Yarn” will be used. You can go with that option; however, we prefer npm. Thus, we will delete “yarn.lock” and install npm.
- Right-click on it and select “delete”.

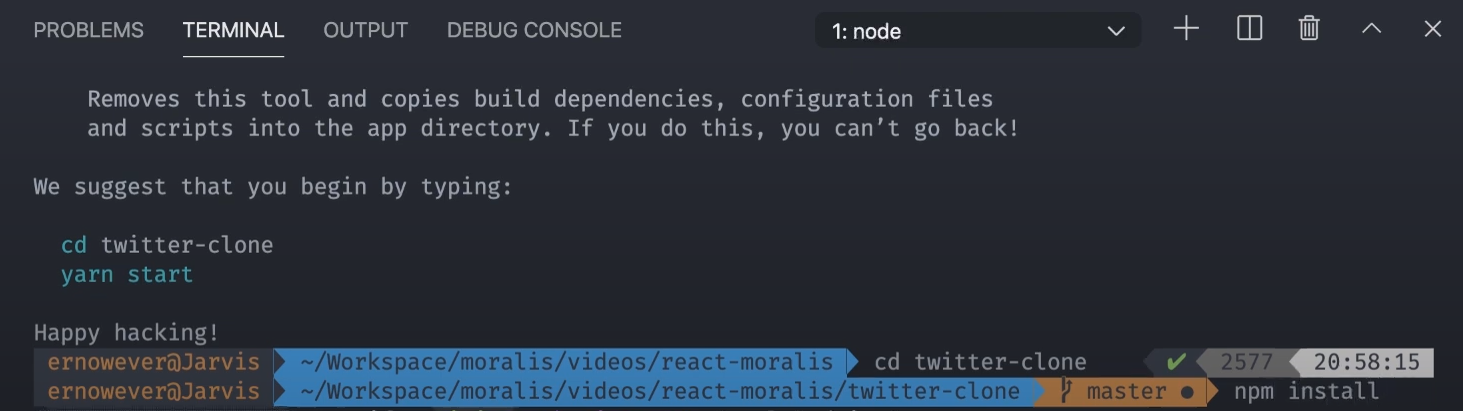
- Use the terminal and type in “cd twitter-clone” to direct to the corresponding directory.
- Type in “npm install” in the terminal. This will get us a new package’s “.lock” file.
Now that we have everything ready, we can get our application up and running. We do this by typing “npm run start” in the terminal.

How to Build a React dApp – Template Files Clean-Up
As we proceed, we want to remove some files that are automatically created, which we don’t actually need (such as “App.css”, “App.test.js”, “index.css”, and “logo.svg”). We do this by right-clicking on the file in question and then selecting “delete”.
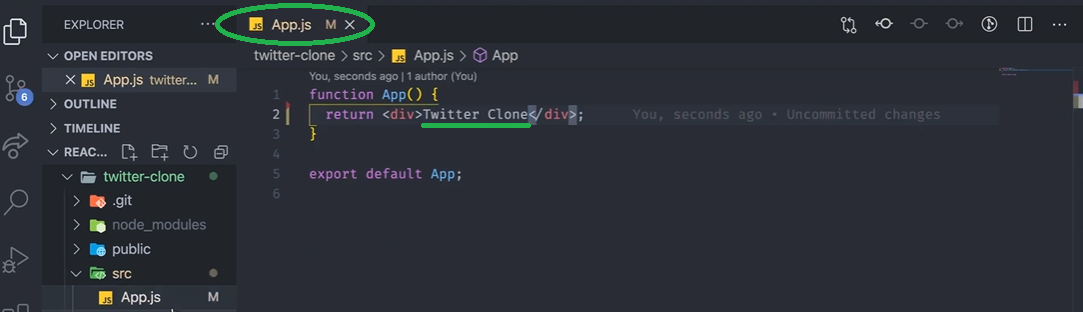
Moreover, we also want to remove all the code lines referring to those files. Inside the “App.js” file, we delete the “import ‘./App.css’;” and “import logo from ‘.logo.svg’;” lines of code. We also want to remove the entire code inside the ”div” element in the same file and add our app’s name inside the “div”. That way, we’re left with the code displayed in the image below:
We now move on to the “index.js” file and perform a similar clean-up by deleting the “import ‘./index.css’;” line of code. This is what we’re left with:

Adding Style to Our React dApp Template
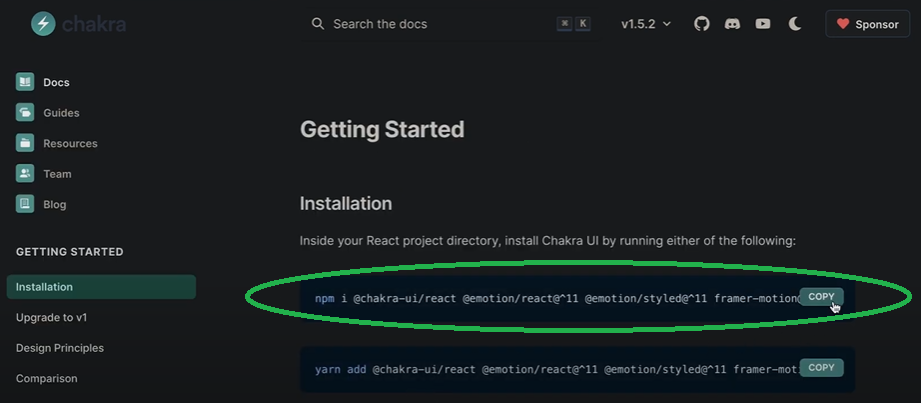
Furthermore, to make our React dApp template look more enjoyable, we can use various open-source websites to add some styling. For this, we’ll use the “Chakra” library. Once we’re on their official website, we need to click the “Get Started” button. On the next page, we simply copy the line of code at the top (the installation script for npm).

Next, we click inside the area of the terminal in VSC and press “CTRL+C”. Then we paste the copied code into the command line. This will initiate the installation process. Once completed, we’ll have the complete functionality of Chakra available. If you’re familiar with the CSS framework from Bootstrap, Chakra is quite similar to it, perhaps just a bit more customizable.
We also need to add this line of code to the “index.js” file:
Import { ChakraProvider, extendTheme } from “@chakra-ui/react”
We used “extendTheme”, which enables us to set the dark background to our dApp. Moreover, in the same file, we add “<ChakraProvider>” and close it after the “<App />”. This is what we get:

Once the installation is complete, we again use the terminal’s command line and type “npm run start”. We can now open our application. As you can see below, we have a dark-themed application with nothing but our dApp’s name for now:

How to Build a React dApp with Moralis
As mentioned at the beginning, we’ll cover most of the on-chain-related backend coding with Moralis. To add Moralis’ functionality, we need to install Moralis and React Moralis dependencies. This will make the creation of our React dApp a straightforward process.
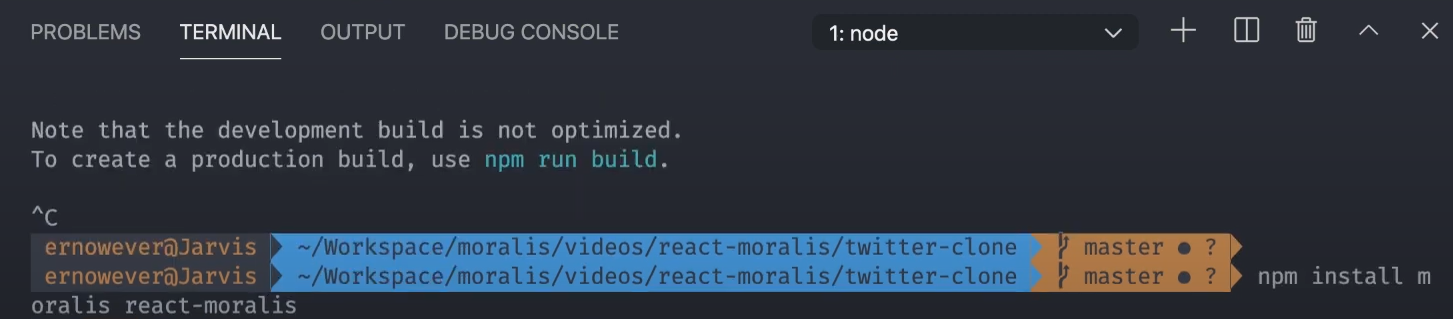
In order to add this functionality, we again use VSC’s terminal. We start by pressing “CTRL+C”. Next, we type “npm install moralis react-moralis” into the command line and hit enter:
Moving forward, we use the “react-moralis” documentation available in GitHub. That way, we only need to copy and paste the proper lines of code. Once you’re on the GitHub page and in the quick start section, we find everything needed for our “how to build a React dApp” quest.
Here’s the most important line of code that will establish a connection with our Moralis server:
<MoralisProvider appId= {appId} serverUrl={serverUrl}>
We add the line of code above in the “index.js” file in the same manner as we did for “ChakraProvider”. This means that we must wrap it around “<App />”. Furthermore, we add “const appId=”” ” and “const serverUrl =”” ” to the “index.js” file. Within the quotation marks, you’ll add your Moralis server’s details (instructions to set up your Moralis server are provided below). We must also add “import { MoralisProvider } from “react-moralis”;” inside our “index.js” file.
How to Build a React dApp With Moralis – Obtaining “appId” and “serverUrl”
Until we actually populate the “const appId” and the “serverUrl” constants, we’ll not have access to Moralis’ power and thus no blockchain functionality. As such, we need to obtain this information to turn our Web2 application into a Web3 application.
Obtain Application ID and Server URL in 4 Steps
- Create Your Moralis Account – In case you haven’t created your Moralis account yet, do so now. If you already have an active Moralis account, just log in.
- Create a New Server – Once logged in to your Moralis account, you’ll have an option to create a new server. Just click the “+ Create a new Server” button in the top-right corner of your Moralis admin page. Next, a drop-down menu will appear offering different types of networks (see the image below). We recommend starting with the “Testnet Server” option.
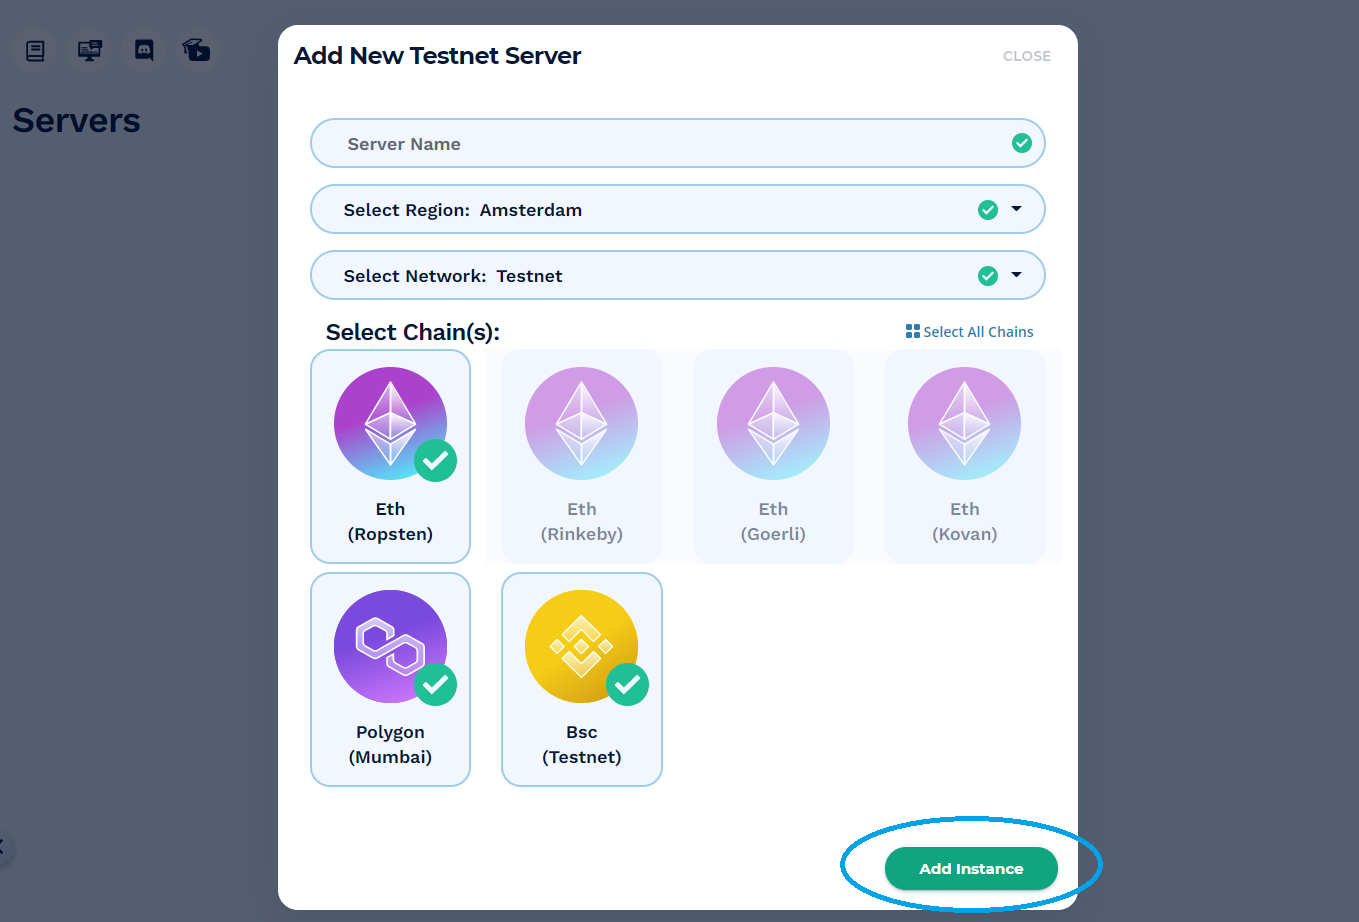
You need to enter the required details, including server name (it can be anything you want), select region, network, chain(s) (you can select one or multiple options), and click “Add Instance” to complete this step (as shown below).
- Access Server Details – Now, you can finally obtain the details (to be used inside your “index.js” file). Simply click the “View Details” button next to your server name. This will cause a pop-up window to appear. There you’ll see the required details (view the image below). In case you’ve used Moralis before, you may already have one or more servers set up. In that case, you may use any of those servers.

- Initialize Moralis – All that’s left is to populate the “const appId” and the “serverUrl” constants inside the “index.js” file with the Moralis server details (application ID and server URL). With that, your dApp gets the required backend functionality:

React dApp Template – How to Build a React dApp – Summary
We’ve covered quite a lot of ground in this article. Hopefully, you’ve learned how to build a React dApp. Sure, a blank one, but this is an excellent starting point before adding specific functionality to it. Furthermore, we got the job done quickly by using several powerful tools, with Moralis in the lead. By using the React dApp template and tweaking it a bit, we created a black application. We then added Web3 functionality by connecting our code with a Moralis server. As such, we’ve made everything ready to take on any specific dApp development project.
Now it’s time for you to dive even deeper and take on some specific projects. Moreover, if you’re not yet ready to start your own project, use Moralis’ content to guide you. You may want to learn how to implement Ethereum authentication, create your own NFT and master NFT token development, or perhaps tackle other chains by learning “what is BEP20” and taking on BEP20 token development. Furthermore, if you feel confident in your skills and have some cool ideas, we highly encourage you to check out the details about the Chainlink Fall 2021 Hackathon, where Moralis is an official sponsor!

