Over the past decade, the majority of the world has gotten used to social media and chat apps. At this point, most people cannot imagine their lives without these useful tools. However, at the same time, the awareness of tech giants behind those apps exploiting users’ data also grows fast. As such, many users are concerned about privacy issues. Thus, there’s never been a better time for Web3 and decentralization to go mainstream. Fortunately, there are several reputable and well-tested programmable blockchains available for developers to build dApps on. However, Ethereum still remains the leading choice. As such, we want to devote this article to show you how to create an Ethereum chat app.
Despite the first programmable blockchain (Ethereum) being around for over six years already, some developers are still focused on centralized solutions. As such, opportunities for JavaScript proficient individuals couldn’t be better. Moreover, unlike a couple of years ago, when the only way to build was directly on top of RPC nodes, there are now advanced tools available, enabling you to overcome all of the limitations of RPC nodes. Furthermore, the toll that is breaking all paradigms is Moralis. This ultimate Web3 development platform, also known as “Firebase for crypto”, provides everything you need to create all sorts of Web3 and mobile-friendly decentralized applications (dApps) in the shortest time possible. By using Moralis’ SDK, you can easily cover blockchain-related backend coding with short snippets of code. As such, you get to focus on delivering the best frontend.
In the following sections, you’ll learn how to use Moralis and the ultimate Ethereum mobile boilerplate to create an excellent Ethereum chat app. Of course, to make the most out of this article, we invite you to follow along and create your own version of an Ethereum chat app.

Create an Ethereum Chat App with Moralis
In this article, we will take on an example project in which we will take the Ethereum mobile boilerplate and add the necessary functionality to create an Ethereum chat app. However, there are some basic setup steps that we must first take care of, including creating a Moralis server so that we can use these powerful tools to our advantage properly. As such, make sure to follow the two sets of steps below before moving forward with our “Ethereum chat app” quest. Moreover, another great thing about Moralis and the Ethereum mobile boilerplate combined is that they enable you to create both Android and iOS applications simultaneously. It is the latter that makes them the ultimate Ethereum iOS dev kit.
Ethereum Chat App – Mobile Boilerplate Quick Start
Moralis and the Ethereum mobile boilerplate are all about simplicity and speed. So, getting started with these tools is pretty straightforward. To use the Ethereum mobile boilerplate, complete the following steps:

Most of you should not have any problems completing these steps; however, let us guide you through the process to avoid any confusion.
- Start by cloning or forking the Ethereum mobile boilerplate. As such, click the copy icon next to the GitHub URL on the GitHub page of the boilerplate:

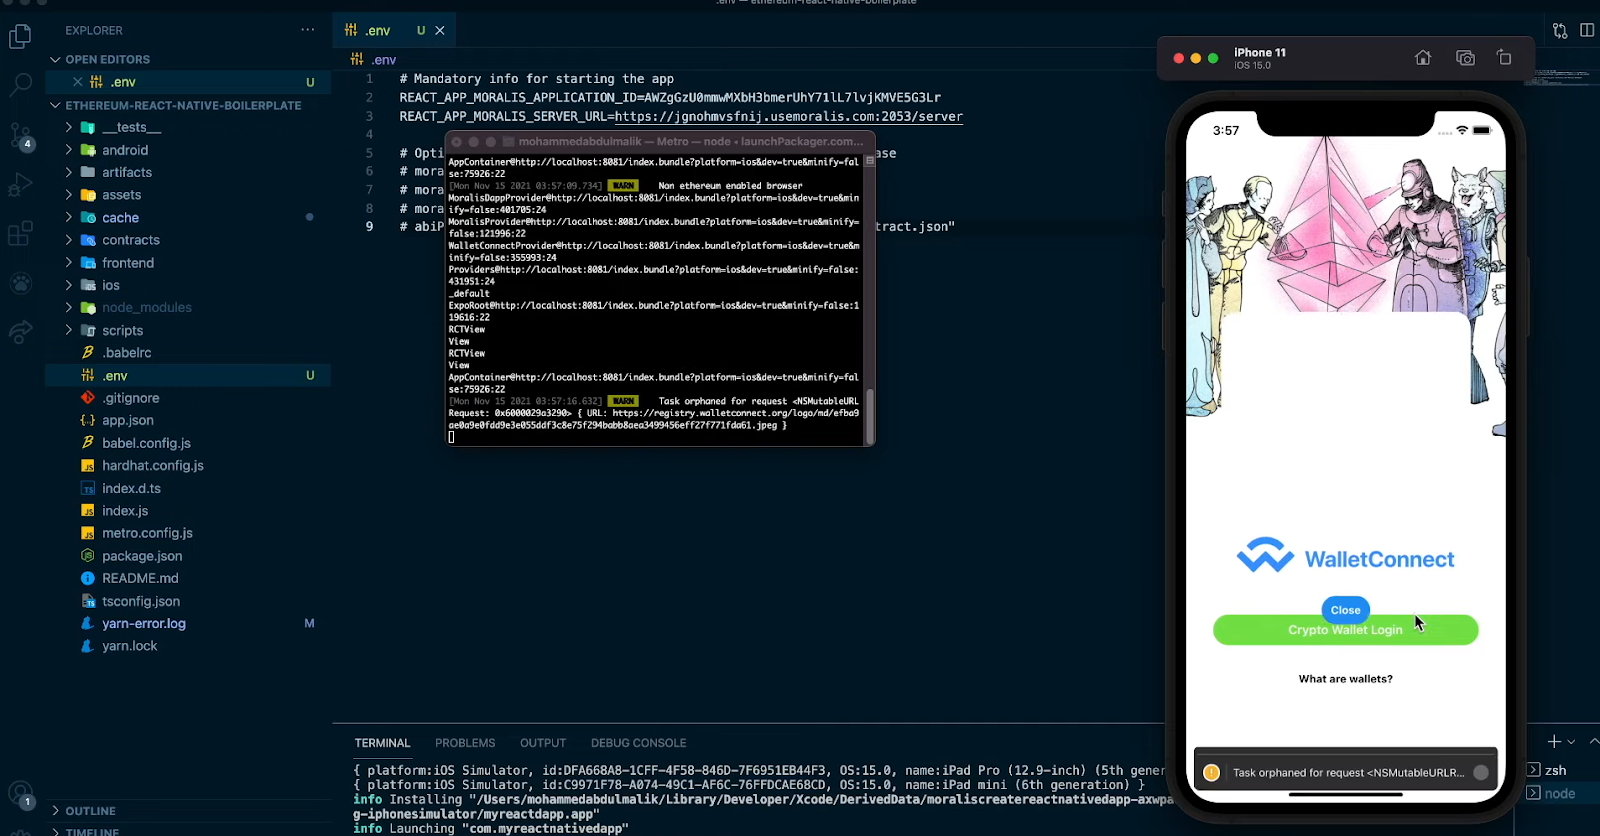
- Then, open your code editor (we use Visual Studio Code [VSC]) and paste the copied URL in the code editor’s terminal:

- Next, it’s time to install “expo CLI” globally. To do this, type “npm i -g expo-cli” into the code editor’s terminal. You can also copy the code from GitHub and then paste it into the terminal:

- Rename the “.env.example” file to “.env” and populate it with your Moralis server URL and application ID (obtained from the Moralis setup part – follow the instructions in the subsection further down):

- After you’ve inserted your Moralis server’s details in the “.env” and “Providers.tsx” files, you need to install all dependencies. However, since you’re most likely already in the folder, you may skip the “cd ethereum-react-native-boilerplate” command. As such, you can move on to the next command – type or paste “yarn install” in VSC’s terminal:

- All that’s left is to run your dApp. Note that the actual command you need to use for this purpose depends on the operating system you are working with:
- Web: yarn web
- iOS: yarn ios
- Android: yarn android
For the purpose of the “Ethereum chat app” project, we will focus on Android. Thus, we will run our dApp with the “yarn android” command.
Creating a Moralis Server
To obtain the Ethereum mobile boilerplate’s functionality, you need to create a Moralis server. These are the steps you need to complete:
- Create a Free Moralis Account – Follow the link and create your account by entering your email and creating your password (don’t forget to confirm your account by clicking the confirmation link in the confirmation email). In case you already have your Moralis account ready, just log in.
2. Create Your Moralis Server – Once logged in, access the “Servers” tab of your Moralis admin area (as shown in the image below). There, click on the “+ Create a new Server” button in the top-right corner and select the network type from the drop-down menu. For example projects, we recommend selecting the “Testnet Server” option (check out our Ethereum testnet guide). However, when you want your mobile dApps to go live, you need to select “Mainnet Server”.

In the pop-up window that appears, enter your server’s name (this can be anything you want) and select region, network, and chain(s). Complete this step by clicking “Add Instance”.

- Access Server Details – As soon as your server is up, you get to access its details by clicking “View Details” next to your server’s name:

Your server details will be displayed in a new window. In it, you’ll see your application ID and server URL:

4. Initialize Moralis – As instructed in the section above (step four), you need to populate your “.env” file (as well as the “Providers.tsx” file) with your server’s details. By doing so, you’ll obtain the entire backend functionality offered by Moralis’ SDK.

Note: Do NOT use the details from the image above; instead, paste the details of your particular server.
Preview of the Ethereum Chat App
If you’ve completed the two sets of steps provided above, you now have a boilerplate dApp ready. Consider this as your starting point. Moving forward, we will apply the necessary changes to get an Ethereum chat app. However, before we take a closer look at the code, let’s do a preview of our finished Ethereum chat app.
As mentioned, we will keep things as simple as possible. In order for users to use our Ethereum chat app, they need to log in. We cover this feature with a great Ethereum authentication solution, especially for mobile devices – WalletConnect.

Once users log in, they’re able to send text and emojis. There’s an emoji icon and a paper plane icon that users need to tap to send the content of their choice. Moreover, looking at the screenshots from two mobile devices below, you can see that our Ethereum chat app also detects and simulates when other users are typing (three blinking dots). Furthermore, next to the sent messages, you can see users’ names and their wallet addresses (those used to authenticate).

This is more or less the gist of our app. As a matter of fact, this is usually the core of most chat apps. Moreover, now that you have a clear sense of what we are going to create, it’s time to take a closer look at the code that will make that possible.
Ethereum Chat App – Code Walkthrough
As mentioned previously, we recommend you to use our Ethereum mobile boilerplate dApp as a starting point and then apply tweaks and extra code to get to the Ethereum chat app presented above. However, to make things even simpler for you, we made the entire code for the finished Ethereum chat app available at GitHub. As such, we leave it up to you to explore the details and the changes applied to the boilerplate dApp that led to the finished Ethereum chat app. However, there are particular parts of the code that we believe deserve some extra attention.
Code Walkthrough of the Ethereum Chat App – The “App.tsx” File
The “App.tsx” file is where the code for our application’s structure is written. This is where we must create a proper navigation container:
function App(): JSX.Element {
  const connector = useWalletConnect();
  const {
    authenticate,
    authError,
    isAuthenticating,
    isAuthenticated,
    logout,
    Moralis,
  } = useMoralis();

  return (
    <NavigationContainer>
      <Stack.Navigator initialRouteName="SplashScreen">
        {/* SplashScreen which will come once for 5 Seconds */}
        <Stack.Screen
          name="SplashScreen"
          component={SplashScreen}
          // Hiding header for Splash Screen
          options={{ headerShown: false }}
        />
          <Stack.Screen
            name="Auth"
            component={CryptoAuth}
            options={{ headerShown: false }}
          />
          <Stack.Screen
            name="Home"
            component={Home}
            options={{ headerTitle: (props) => <Header /> }}
          />
      </Stack.Navigator>
    </NavigationContainer>
  );
}
Code Walkthrough of the Ethereum Chat App – The “CryptoAuth.js” File
Another important file is “CryptoAuth.js”. Among other details, it contains the “handleCryptoLogin” function, where we ensure that the chat window is displayed after users log in. Here’s the part of the code that covers that aspect:
  const handleCryptoLogin = () => {
    authenticate({ connector })
      .then(() => {
        if (authError) {
          setErrortext(authError.message);
          setVisible(true);
        } else {
          if (isAuthenticated) {
            navigation.replace("Home");
          }
        }
      })
      .catch(() => {});
  };

  useEffect(() => {
    isAuthenticated && navigation.replace("Home");
  },[isAuthenticated])
Code Walkthrough of the Ethereum Chat App – The “Chat.js” File
The “Chat.js” file is where we cover all of the above-covered functionalities of our Ethereum chat app. This includes entering the text, sending messages, displaying those messages to all users, and showing the “typing” animation. To handle the messages, we use Moralis’ database that comes with every Moralis server:

For the purpose of storing messages, we’ve created a new class – “Messages”:

By using Moralis and constructing Moralis functions, we get to handle messages properly:
  const newMessage = new Moralis.Object("Messages");
  const newUserTyping = new Moralis.Object("UserTyping");
We use the above with the “sendMessage” function, which ensures that the messages are saved in the right column of the “Messages” class inside our Moralis server’s database:
  const sendMessage = () => {
    newMessage.set('userId', currentUserId);
    newMessage.set('message', message);
    newMessage.save();
  }
Next, we need to ensure that they also get displayed in our Ethereum chat app. We achieve this by using Moralis’ cloud functions option. The latter is also available for every Moralis server:


With the above cloud function set in place, we can display messages in our Ethereum chat app by using the “getAllMessages” function to all the above cloud functions:
  const getAllMessages = async () => {
    const result = await Moralis.Cloud.run("getAllMessages");
    setMessages(result)
  }
Moreover, to ensure that all messages displayed in the app are updated in real-time, we use the “subscribeToMessages” function:
  const subscribeToMessages = async () => {
    let query = new Moralis.Query('Messages');
    let subscription = await query.subscribe();
    subscription.on('create', notifyOnCreate);
  }

  const notifyOnCreate = (result) => {
    setUpdated(result)
  }
The above function subscribes us to the “Messages” class inside our Moralis database (created above).
Code Walkthrough of the Ethereum Chat App – The “Chat.js” File and “UserTyping” Class
To take our app to the next level, let’s also include an additional function that tracks users’ typing and animates that in the chat. To implement this functionality, we again use Moralis’ database. So, let’s create a new class called “UserTyping”:

Moreover, just like before, we create another cloud function to help us populate the database:

In addition, following the “subscribeToMessages” example, we create the “subscribeToTyping” function, which will make sure that this action is tracked properly and marked inside the database:
const subscribeToTyping = async () => {
    let query = new Moralis.Query('UserTyping');
    let subscription = await query.subscribe();
    subscription.on('create', notifyOnType);
    subscription.on('update', notifyOnType);
  }

  const notifyOnType = async (result) => {
    setOtherUserTyping(result)
  }
In addition to the “subscribeToTyping” function, we also create the “onChangeText” and “Type” functions to gain the functionality we are after:
  const onChangeText = (message) => {
    setMessage(message);
    Type(currentUserId);
  }

  const Type = async (userId) => {
    const params = { userId: userId };
    const result = await Moralis.Cloud.run("getTypingUser", params);

    if (result.length > 0) {
      result[0].set('isTyping', true);
      result[0].save();
    } else {
      newUserTyping.set('userId', userId);
      newUserTyping.set('isTyping', true);
      newUserTyping.save();
    }
  }
Moreover, we also need the “stopTyping” function that detects when a user stops typing:
  const stopTyping = () => {
    if (otherUserTyping && otherUserTyping.attributes.isTyping) {
      otherUserTyping.set('isTyping', false);
      otherUserTyping.save();
    }
  }

  useEffect(() => {
    setTimeout(() => {
      stopTyping();
    }, 5000)
  }, [otherUserTyping]);
Note: To get a clear understanding of the functions presented above, make sure to view the entire code of the “Chat.js” file.
In case you’re more of a video person and would like to look over one of Moralis’ expert’s shoulders as he takes on the challenge of creating the Ethereum chat app presented above, make sure to watch the following video:
How to Create an Ethereum Chat App – Summary
We’ve covered quite a lot of ground in this article. At this point, you should know how to use the ultimate Ethereum mobile boilerplate and Moralis to set up a fully functional mobile dApp in minutes. The latter is what we used as the starting point to create our Ethereum chat app. With the help of the Moralis server, we’ve established full backend functionality and gained access to an impressive database, where we’ve added two new classes. Moreover, we’ve set up two cloud functions to make use of the two new classes. Therefore, our Ethereum chat app properly displays messages and tracks if any of the users are typing. All in all, this wraps the core functionalities of this example project.
Furthermore, please keep in mind that the main purpose of this example project was to show you the possibilities of using Moralis and our Ethereum mobile boilerplate. Now, it is up to you to take the information obtained herein and create your own unique Ethereum chat app.
Also, we encourage you to visit the Moralis YouTube channel and the Moralis blog for additional free education and inspiration. Both of these outlets cover a wide range of blockchain development topics, including many other example projects. Some of our latest articles cover the Web3 boilerplate, how to create a Reddit clone for Web3, how to send Ethereum with one line of code, how to lazy mint NFTs, how to create an Ethereum dApp instantly, how to generate thousands of NFTs, and use cases for Solidity smart contracts.

