When interacting with most dApps (decentralized applications), it is generally necessary to have cryptocurrencies at hand. It doesn’t matter if dApps run on Ethereum, Polygon, or any other blockchain; users still need tokens to pay the necessary gas fees. Therefore, it makes sense to enable users to buy cryptocurrencies directly through the dApps themselves. This provides a far superior customer experience which is highly beneficial in a competitive market. For this reason, we’re going to show you in this article how to add a fiat gateway to your dApps using the Moralis platform.
Moralis is the best middleware for Web3 development, and the platform provides everything needed to develop and deploy dApps. For example, Moralis Speedy Nodes is a service that allows its users to access the fastest, most reliable nodes on the market for dApp development. Furthermore, the platform also eliminates the most pressing issue with Web3 development, which is the setup of backend infrastructure. Moralis takes care of all the heavy lifting and provides users with an already developed and managed backend. As a result, Moralis users can focus on building the best frontend and create smart contracts of the highest standard.
So, if you want a quick, easy, and reliable way to save resources and shorten your route to market, then sign up with Moralis right away. You can join the platform for free, and it will give you access to all the platform’s features and tools!
What is a Crypto-to-Fiat Gateway?
A crypto-to-fiat or fiat-to-crypto gateway is essentially a tool for exchanging one currency for another. As such, it’s possible to utilize these gateways to quickly exchange fiat for cryptocurrencies and vice versa. In this article, we’re going to use a Moralis plugin called “Fiat Onramp” as an example to set up a gateway.
In a rapidly growing market where new dApps are created frequently, it’s important to stay ahead of the competition. It isn’t only necessary to have the most appealing UI, but the functionalities of dApps are even more critical. Providing users of our dApps with access to a gateway means that they can instantly and easily buy crypto using their fiat currencies, enabling them to interact with our dApps.
In this case, the primary benefit is the fact that a gateway enables a more convenient user experience. This won’t necessarily be a competitive advantage but rather a requisite to stay relevant on the market. Without a crypto-to-fiat gateway, users would need to leave the dApp, find a platform offering the ability to purchase crypto for fiat currency, and then come back to use the dApp. This is just another unnecessary and time-consuming endeavor that most consumers would love to avoid.
Therefore, implementing a fiat gateway into dApps can be quite a vital task to enable the best possible user experience. Furthermore, when using a platform such as Moralis, the process of how to add a fiat gateway to dApps becomes relatively accessible. In fact, as a platform user, it’s possible to add the gateway with one single line of code, and we’ll show you just how in the following sections!
How to Add Fiat Gateway to Your dApps Easily
We learned from the previous section that a fiat gateway allows users to purchase and sell crypto directly through our dApps. As such, a gateway enables a more convenient experience for our users. For this reason, adding a fiat gateway becomes essential to stay relevant in the rapidly growing market. However, even with such an important function, it’s still unknown to many developers how to add fiat gateways to dApps.
Without the appropriate tools, it can be quite a cumbersome task to add this functionality. The reason for this is backend development and the process of setting up a complex data structure that traditionally takes both time and resources. However, with the proper tools provided by Moralis, we can avoid all the complicated backend development and simply focus on building the perfect UI. The platform provides you with an already developed infrastructure which is one of the many reasons we can add fiat gateways to our dApps with just one single line of code.

To showcase the power of Moralis, we are in the following sections going to create a small dApp where we add the functionality of a fiat gateway. This process can be broken down into three different steps:
- Create a Moralis server.
- Install the Moralis plugin.
- Create the dApp.
Following this guide will provide a straightforward explanation of how you can add a gateway to all your future dApps. So, let’s start this process by creating our own Moralis server.
If you’d rather watch a video tutorial of the process, then check out this video from the Moralis YouTube channel:
Step 1: Create a Moralis Server
If you haven’t already, the first thing we need to do is sign up with Moralis. Signing up is completely free and a necessity for creating our own Moralis server for our dApp. Once you have an account, you can get the ball rolling by clicking the ”+ Create a new Server” button on the Moralis admin panel.
Once the button is clicked, a drop-down menu will appear, providing you with three options: ”Mainnet Server”, ”Testnet Server”, and ”Local Devchain Server”. For this tutorial, it doesn’t matter which of the alternatives you choose; however, we will select the ”Testnet Server”.
If either option is clicked, you’ll be presented with a new window where you need to choose a server name, select a region, and then select the network(s) of your choice. One feature of Moralis is that the platform supports cross-chain compatibility. This means that you have the option to choose multiple networks.
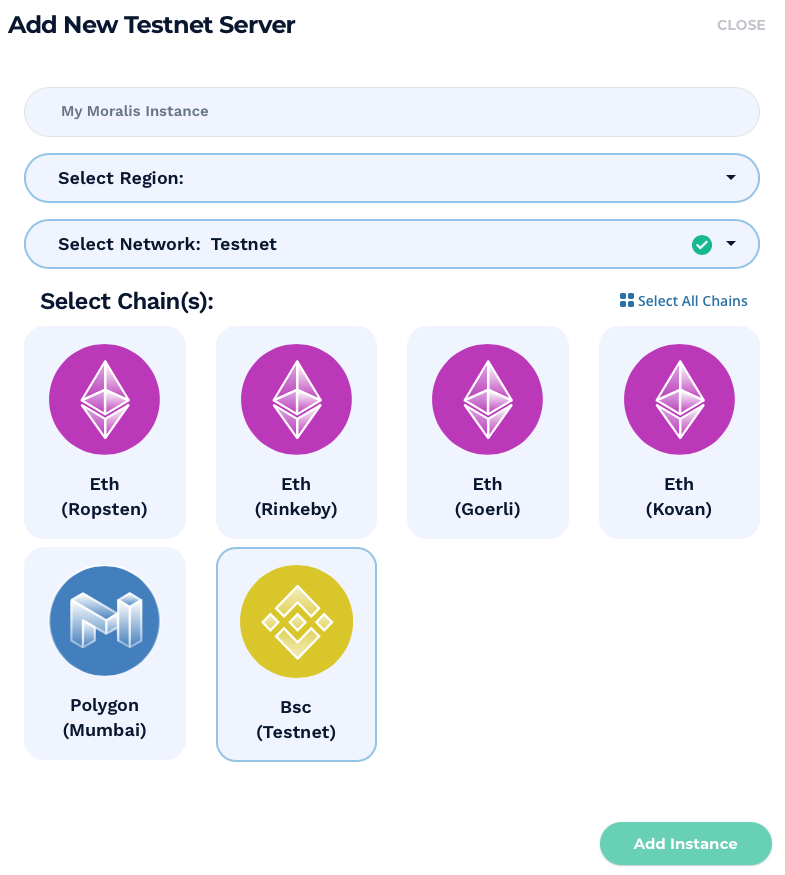
Once you’ve selected and chosen your preferences, all that remains is to simply click the ”Add Instance” button, which will spin up the server. It might take a little while to get the server going, but it will be up and running in just a few minutes.
Step 2: Install the Moralis Plugin
Now that you have a server up and running, we can move on to the next step – install the Moralis plugin. To do so, you need to click the three small dots for the server in question and then click the ”Plugins” button. This will provide us with the following pop-up window:
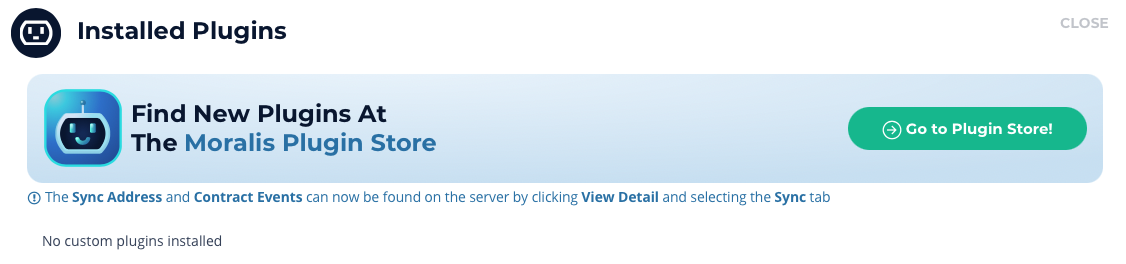
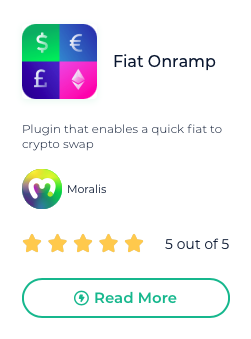
As you can see, there are no current custom plugins installed. For this reason, we want to visit the Moralis plugin store to find and install the plugin in question, which in this case will be Fiat Onramp. We can install the plugin by clicking the ”Read More” button, then ”Install the plugin”, and then choose the right server to where we want to add the plugin.
Once you’ve chosen the correct server, you can go ahead and click ”Confirm”. Then only one thing remains, and that is to fetch an Onramper API from their official website. You can simply sign up with the website to get a hold of your own API key.
With the API key at hand, you can use it to finalize this step of adding the plugin to your server. As you can see now from the image below, the plugin is installing and will be added in just a few minutes.

So, now with the proper plugin installed on the server, we can move on to creating the dApp itself.
Step 3: Create the dApp
The first thing that we’re going to add to our simple dApp is a button. This button will have an ”onclick” event that will trigger the function ”buycrypto()”, which we’ll get to later. This is what the HTML code for the button will look like:

With the button added, we also need to initialize Moralis. This connects our code to the Moralis server that we created in the first step. To connect the server and initialize Moralis, we need to input the following two lines into the code:

As you can see, we need the app ID and the server URL from our server. To acquire this information, we need to navigate ourselves back to the ”Servers” tab in the Moralis admin panel and then click the ”View Details” buttons for the server in question. So, from here, you can just go ahead by copying and pasting these two elements into the code.
With Moralis initialized, the next step is to run the Moralis ”initPlugins()” command. This command will signal to our code which plugins are installed and make them accessible to us when developing. So, to implement this into our code, we simply create a function that instantly defines and executes the command in basically one line. This is what the function looks like:

Finally, we must also add some functionality to the ”buycrypto()” function mentioned previously. All we need here is to add the Moralis ”Plugins.fiat.buy()” function within the curly braces of our own function. As such, this is what the code will look like:

That’s it; this is all we need to do to add the fiat gateway to our dApp!
How Does the dApp Work?
To show you how the dApp functions and what it will look like, we’re now going to test our newly created dApp. So, once we launch the application, all that will show up is a button that says ”Buy crypto”. The dApp will do nothing until a user clicks on this button. Once the button is clicked, it will trigger the ”buycrypto()” function from our code which will launch the gateway. As such, you’ll be presented with the following window:
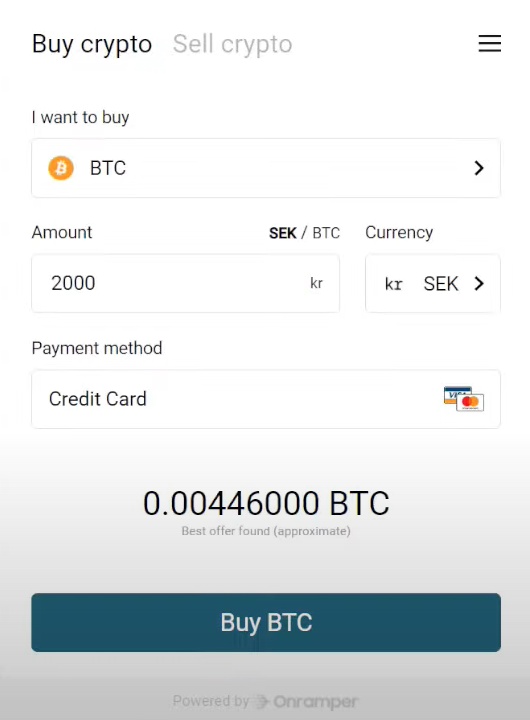
This allows users to both buy and sell cryptocurrencies directly through the dApp. It is possible to change both the cryptocurrency and the fiat currency depending on the user’s preferences. This demonstrates how easy it is to work with Moralis, only one line of code to add a fiat gateway to any dApp. If you’d like to build similar dApps, we highly recommend checking out the following guides from the Moralis blog: “How to Create Ethereum dApps” and “How to Build Polygon dApps”. These guides will give you a good fundamental structure for building your own dApp and provide you with some inspiration based on already existing blockchain projects on the market.
How to Add Fiat Gateway to dApps – Summary
Accessibility and usability are two crucial aspects of dApps and business in general. Customer focus and providing an excellent user experience are essential in a rapidly growing market with increasing competition. As such, supplying users with the ability to purchase and sell cryptocurrency directly through an application is an outstanding feature. The easiest way to add a fiat gateway to dApps is to use Moralis.
Moralis is the premier middleware for Web3 development, and the platform provides everything necessary to develop and deploy dApps. With the already developed infrastructure of Moralis, it’s possible to add a fiat gateway with only one line of code. We published this article to demonstrate the power of Moralis by creating a simple dApp with a fully integrated gateway. We could accomplish this in three simple steps:
- Create a Moralis server.
- Install the Moralis plugin.
- Create the dApp.
The process only took us a couple of minutes. However, you can also implement the same functionalities to already existing projects with ease.
Furthermore, Moralis also offers several other helpful development tools such as the Moralis NFT API, Price API, and native support for IPFS and MetaMask. In combination with the already developed infrastructure of the platform, these tools ensure that you as a developer can save both valuable time and resources.
So, if you want to significantly shorten the route to market and access all of Moralis’ platform’s tools, then sign up with Moralis right away! Creating an account is totally free and only takes a couple of seconds. With an account, you can begin developing and scale all your future blockchain projects.
