Are you looking to expand your knowledge on specific Ethereum node types? Or perhaps want to dig deeper into blockchain development on the Ethereum chain? Whichever the case, you came to the right place. The time to do this has never been better as we are still in the infinite stages of this new technology.
There are many new terms and concepts that you should grasp to be successful on your blockchain (BC) journey. ‘Geth’ and ‘Geth node’ definitely fall in that category. And you’ve guessed it, they are exactly what we will cover in this article.
In the sections below you will learn the basics related to a specific Ethereum node type, discover how to use Geth, and much more. As a bonus, you will also learn about a powerful method that can help you avoid the blockchain backend, including dealing with nodes and focus directly on the front end.
We hope you are excited and prepared to load up on useful info.
Are you ready? Let’s dive into the world of Geth nodes!
Prerequisites to Understanding Geth & Geth Node
Let’s start with the concept of a peer-to-peer (P2P) network. In this case, the “peers” refer to computer systems that are all connected to each other using the internet. This sort of network enables users to share and transfer data directly between the computers connected to the network. All that without any need for a central server.
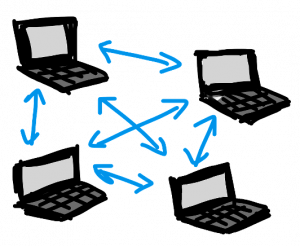
The concept of the P2P network is the basis for blockchain technology. In cases where peers are distributed and not controlled by a single group, entity, or organization, we talk about decentralization.
The second thing we need to cover is EVM. Have you heard of EVM before? Do you know what it stands for? Ethereum Virtual Machine or EVM is basically a software platform that is based on blockchain. It is where all Ethereum accounts and smart contracts live. Moreover, it is the EVM that defines the rules for the validation of new blocks.
Throughout the article, you should also keep in mind other blockchain basics. For instance, knowing that Ethereum is a decentralized network or platform, which runs smart contracts is quite essential. And that smart contracts are blockchain-based applications that run based on pre-programmed conditions in order to prevent downtime, censorship, third-party interference, or fraud.
Note that as you start your ‘blockchain’ journey you decide to take part in a new and fast-growing field. As such, be aware that constant learning and growth are an essential part of it.
A Simpler Way – Geth Knowledge Not Needed
However, all this growth and learning doesn’t have to be difficult at all. It can all be naturally attained while working on an interesting project, building something you care about. Before moving on to covering other Geth-related terms, we want to tell you about an amazing opportunity.
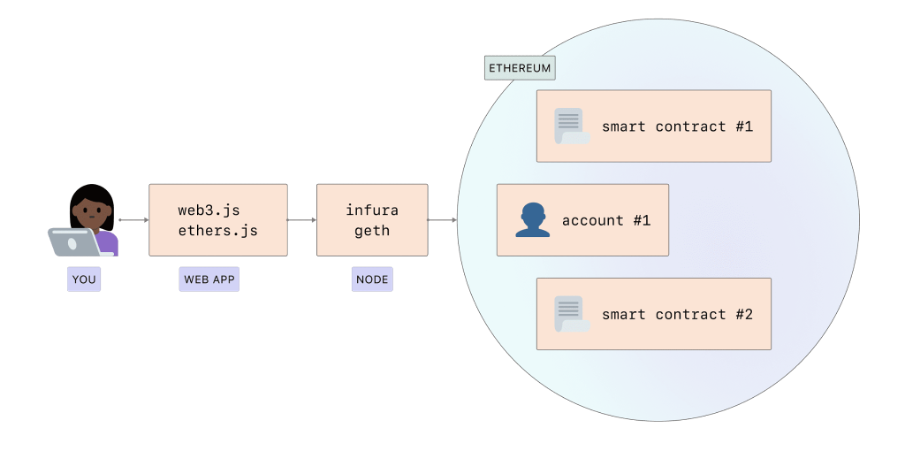
If you are a front-end developer or have a team of people with coding skills, you can and should take advantage of an amazing shortcut. Moralis gives you access to a powerful Web3 backend infrastructure platform that enables you to skip all the tedious Web3 backend development by using a single line of code. You might have guessed it, it’s called Moralis. With the use of Moralis, you do not need to worry about Geth nor a Geth Node. Knowing JavaScript alone can enable you to build blockchain-based apps on multiple blockchains. We don’t want to brag too much about the benefits of our amazing platform; we prefer for Moralis to speak for itself. So, make sure not to let this shortcut pass you by.
What Are Clients?
When it comes to clients in the blockchain sphere, in the case of Geth on the Ethereum chain, the term refers to pieces of software. Moreover, clients are capable of establishing P2P communication channels with other clients. This enables broadcasting and signing transactions, mining, deploying and interacting with smart contracts, and confirming other blockchain operations.
Furthermore, there are various Ethereum client types in various programming languages, including Rust, JavaScript, Python, C#.Net, and Java. Despite different programming languages, all Ethereum clients follow the same formal specifications defined in Ethereum Yellow Paper.
What Are Nodes?
The lines between what clients and what nodes are, are normally very blurry. Many people tend to use the two terms interchangeably.
However, in reality, nodes refer to running pieces of client software.
Remember:
- Clients = Pieces of software on blockchain
- Nodes = Clients in use or running pieces of software on a specific blockchain.
Everyone Can Check Active Clients
Do you remember that full transparency is one of the key elements of blockchain technology? With that in mind, you definitely shouldn’t be surprised that you can easily view the real-time Ethereum network condition by looking at the map of nodes. Cool, right?

As far as we’re concerned you now know enough to take the next step towards understanding Geth. Let that step unveil what Go Ethereum is.
What is Go Ethereum?
The Ethereum protocol has three original implementations, which include Python, C++, and Go Ethereum. As the name suggests, Go Ethereum uses Go (Golang) programming language. Like many programming languages, Go is fully open source. It is licensed under the GNU LGL v3.
So, why is Go Ethereum important for the understanding of Geth? Well, because Geth is nothing but a standalone client through which Go Ethereum is available. In understanding Ethereum programming, you might also want to take a closer look at our article describing the Solidity smart contract programming language.

In practice, people often refer to Geth as an abbreviation for Go Ethereum. However, this is technically not completely accurate. Especially because users may also use Go Ethereum as a library, which they’ve previously embedded in their Android, iOS, or Go project.
Geth vs. Geth Node
Since we’ve covered quite a lot thus far, let’s do a short recap before moving on.
The essence of the sections above:
- Geth (along with Parity) is one of the most popular Ethereum clients. It functions based on Go (Golang) programming language.
- Once a client is operable (in use by an individual computer connected to the Ethereum network), it becomes a node.
- As part of the simplification (which tends to cause confusion among noobs), developers and the entire blockchain community tend to use ‘Geth’ and ‘Geth Node’ terms interchangeably. This follows the interchangeability of general ‘client’ and ‘node’ terms.
We hope you are not lost and overwhelmed by all the Geth-related terminology. It is not rocket science, but it also isn’t very interesting, right? What if we told you that you can create dApps on Ethereum (and other blockchains) without needing to know anything about Geth. Would you believe us?
By this point, you may know that Moralis is the shortcut you can exploit completely for free. We really encourage you to put your creativity to work ASAP. Based on our experience the best way to learn is by creating something. With that in mind, you may want to jump into creating your first dApp today. It’s much simpler than you may think when you use Moralis. Jump in, register today, and start building your first serverless Web3 app!
But by all means, feel free to first finish this article and get a clearer picture of what a Geth Node is and how to use Geth. Geth node types are what we cover next.
Geth Node Types
There are many Ethereum node types, however, focusing our attention on Geth nodes, there are three options. These include light nodes and full nodes, which are the two main types. In addition, there is a third Geth node type – an archive node, which is a special case of a full node.
Let’s take a closer look at full nodes and light nodes.
Full nodes ensure that the transactions contained within the blocks meet all the rules defined in the Ethereum yellow paper. By doing so, they essentially verify blocks that are broadcast onto the network. They verify every block or transaction. With that verification process, full nodes maintain the current state of the entire network in full accordance with Ethereum specifications.
In cases when full nodes preserve the entire history of the transaction, they are labeled as full archiving nodes. These types of nodes are essential to ensure the health of the network.
In contrast, light nodes do not verify every block, which implies that they may not have a copy of the current Ethereum blockchain state. Thus, they rely on full nodes to provide that information. The advantages of running light nodes include a shorter time of getting them up and running, less storage consumption, and lower computational/memory requirements. Their obvious downside is that they are not self-sufficient as they rely on full nodes. The element of trust is also much lower for light nodes.
Now you know what Geth is but why would one want to run it? That is what we address in the next section.
Why Run An Ethereum Node?
Do you know why you might want to run an Ethereum node in the first place? If not, do not worry, we are here to help. We are laying out the benefits of this action below.
The most obvious benefit of running an Ethereum node is the fact that it gives a user true privacy and self-sufficiency on the Network. It gives a user the power to overcome the need to trust the network since a user’s client does the verification. Furthermore, by running a Geth node (or any other type of Ethereum node) one supports the ecosystem.
To get the most out of running a node, we recommend you focus on running a full Ethereum node.
Key benefits (for users) of running an Ethereum node:
- A user doesn’t have to rely on the network nor fully trust it. A user’s node verifies all the transactions and blocks.
- Users running a node avoid leaking their addresses and balances to random nodes. Their own client can perform the checking.
- Users’ dApps can be more private and more secure.
- Users can easily point their MyEtherWallet, MetaMask, and some other wallets to their own local node.
Key benefits (for network) of running a full Ethereum node:
- The more diverse set of nodes, the healthier, more secure, and more operationally resilient the network.
- Since all light nodes rely on full nodes, users running full nodes are essential for the entire network.
Using A Node Provider Instead Of Running Your Own Geth Node
Though, keep in mind that using a node provider, such as Moralis, gives you a chance to not worry about running your own node and focus fully on the front end. But you must make sure to do your own research before choosing among blockchain node providers, as not all available options have such an extensive privacy policy set in place as Moralis does. Moralis doesn’t log your requests or users’ IP addresses. Nothing is stored. With that said, when using Moralis, you know that your users are in good hands, which should definitely be one of your top priorities. What’s more, Moralis comes with support for technologies like IPFS.
However, if you have strong enough reasons to run your own Geth Node, make sure to ensure that you have the proper equipment and preparations.
Geth Node Hardware Requirements
You should not confuse running an Ethereum node with mining. These are two different things. Among the two, running a node requires way less computing power than mining. Still, the more powerful the hardware, the better performance and the faster sync time will be when running a node.
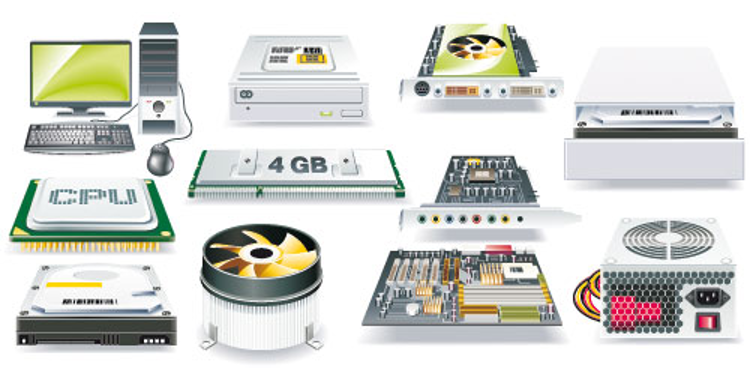
Do not forget to ensure that your computer meets the requirements before even trying to install and run your Ethereum node. These vary from client type to client type but you can find general guidelines below.
Minimum requirements:
- 2-core (or more) CPU
- 8 Mbit/s bandwidth
- 4 GB or more RAM for SSD or 8 GB or more for HDD
Recommended specs:
- 16 GB or more RAM
- 25 Mbit/s or faster bandwidth
- Fast CPU with 4 cores or more
- Fast SSD with 500 GB of free storage or more
As a Geth user, you may be interested in the fast sync option. If so, you need to focus on disk sizes with 400 GB of free space or more. Moreover, if you want to run a full archive node, you need to aim for disks with 6 TB or more.
Ethereum Mist – Geth Interface
Before diving deeper into learning how to use Geth, you also need to hear about the basics of Ethereum Mist.
Probably the best way to describe Ethereum Mist is to present it as a human-friendly Geth interface introduced back in 2018. It is a client extension (a program) that enables users to avoid using the command line option and thus provides less experienced developers with a much more user-friendly approach.
![]()
As Ethereum Mist connects to Geth in the background it also serves as an interface for the wallet. It is Geth that does all the heavy lifting (it synchronizes with the public blockchain by downloading its data) – it serves as a node and a wallet. However, it is Ethereum Mist that makes communication with Geth way less complicated.
Using Ethereum Mist enables users to bypass the need to enter complicated commands using the traditional command line.
Ethereum Mist is publicly available and all users can download it with ease.
You should know that a big part of the whole ‘Mist’ project was Ethereum Mist Browser. It was intended to serve as an integral part of the Ethereum network’s dApps ecosystem. However, back in 2019, the project was deprecated as other providers offered better solutions.
The fact that the Mist Browser was deprecated also had a negative effect on the Ethereum Mist wallet and interface program as no more updates were coming out. With that said, there are now other user-friendly Geth interface options available.
How to Use Geth
The main purpose of all sections above was to equip you with the required background knowledge to successfully implement what will be covered within the following paragraphs. It is the use of Geth where the true value lies.
You will truly learn how to use Geth only after you put the theory into practice and actually use this type of Ethereum node yourself.
Installing Geth
You cannot learn how to use Geth without installing it on a computer. Since there are many ways to install Geth, this article doesn’t cover the exact installation steps. You can install Geth via various package managers, by downloading a standalone pre-built binary, building it themselves, or running it as a docker container.
To install Geth successfully, you need to follow the installation process that corresponds to your computer’s operating system (macOS, Windows, or Linux).
To get detailed installation instructions, use GitHub and then select the method that is suitable for your case.
Using Clef
Using Clef in order to learn how to use Geth is not essential. You can exploit many tools for signing transactions with Geth. Of course, Geth’s account management alone is a possible option. However, since geth.ethereum.org lists Clef as a preferred tool, this article focuses on that option to best fit the majority of developers.
1st Step: Initialize Clef
In order to use Geth with Clef, you first need to initialize Clef (command: clef init) using a random master seed. It is encrypted with a 10-character (or more) password that you define.
2nd Step: Create Accounts
Next on your to-do list is to create two accounts using the ‘clef newaccount’ command. Then you need to set up a password for each of the two accounts. Do not forget to note the public address for each account.
Note: Clef will return a debug message related to ‘Failed to reload keystore contents.’ Your upcoming steps will fix that issue.
Prior to Starting Geth
To use Geth you must connect it to a network. You do that by entering the network name as an argument. There are several networks available to you. These include a private network that you can create, the main Ethereum network, and three test networks (Ropsten, Rinkeby, and Görli).
In accordance with node types, syncing Geth offers three options (sync modes). These include full mode, fast mode, and light mode. Choosing the kind of sync mode that corresponds to your preferences is very important as it determines the node type.
Note: The exact commands and values that you must enter vary based on network selection. As such, the article focuses on general guidelines.
Steps Using Geth
- Start Clef: To proceed, you need to start Clef and set the keystore and chain id for the network that you’ve selected.
- Start Geth: You need to enter a command line that includes the network name, sets Clef as the transaction signer (if that is the option you chose), and sync mode. This step may also include a command that enables the Geth RPC interface.
- Get ETH: Depending on the type of network you chose, you need to use either real ETH or test ETH to execute transactions. In the case of test networks, you can use a faucet to send ETH.
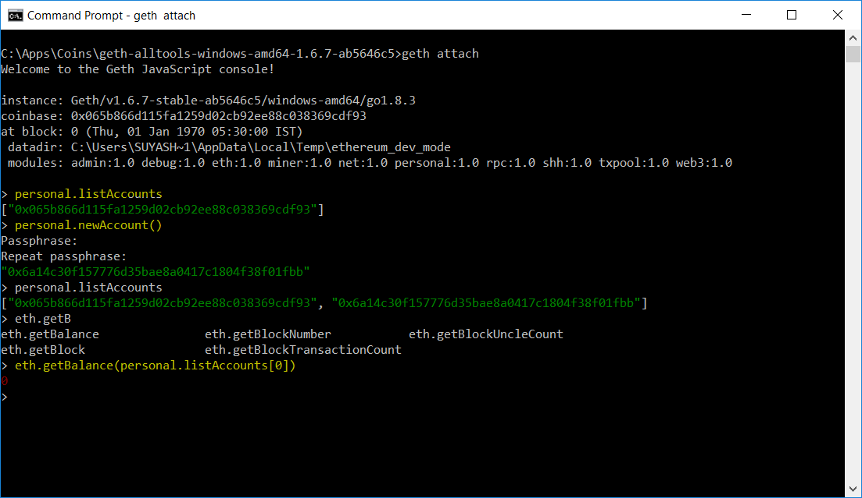
- Connecting to Geth with RPC or IPC: There are two ways you can interact with Geth – either via the JavaScript console over IPC or by connecting to the node over HTTP remotely. The latter is done using RPC. Each method has its perks and downsides. For instance, IPC offers you to do more, especially from creating/interacting-with-account point of view but is limited to direct access. On the other hand, RPC offers remote access but comes with multiple limitations and security constraints.
o Depending on the IPC or RCP method, you need to use different commands for standard actions, such as:
- Connecting to console/RPC
- Checking account balance
- Sending ETH to account
To find detailed instructions for your exact setup and choice of network, node type, and more, you need to visit Go Ethereum’s official org website.
Summary – What is Geth?
We don’t know about you, but we feel rather overwhelmed just by writing about Geth and how to use it. Things really shouldn’t be that tricky.
So before you put the above steps into action, consider if running your own node is really something you need. Do the benefits truly compensate for the overhead?
In case you’d like to exploit a simpler and much faster solution that practically eliminates the entire blockchain backend development process, we really encourage you to check out Moralis. This ultra-powerful free tool lets you build a simple dApp in as little as 3 minutes. Quite amazing, right?
Moralis platform provides you with all the instructions, in written and video format (it has a dedicated YouTube channel), it has an ultra-fast growing and highly engaging community, and continues to add full integration options with other blockchains. Moreover, there are also many highly reputable partners joining in supporting this ‘developers’ friend’ on a regular basis, which definitely tells you something.
The way we see it, using Moralis is really a no-brainer. Try it out and let us know if you agree!
