Moralis presents the easiest way to resolve any ENS domain with its ENS resolver solution. In fact, with Moralis’ EVM API, all it takes is a single call to the ”resolve_address” endpoint while passing a crypto address as an argument:
from moralis import evm_api

api_key = "YOUR_API_KEY"
params = {
    "address": "0xd8dA6BF26964aF9D7eEd9e03E53415D37aA96045",
}

result = evm_api.resolve.resolve_address(
    api_key=api_key,
    params=params,
)

print(result)
By calling the ”resolve_address” endpoint, you receive a response in return with the ENS domain, looking something like this:
{

  "name": "Vitalik.eth"

}
Resolving any ENS domain is as easy as that when working with Moralis! By familiarizing yourself with the EVM API and the” resolve_address” endpoint, you can implement similar functionality into any future Web3 projects. For more info on the endpoint, check out Moralis’ resolve address documentation! Now, you can visit the documentation and start implementing the code immediately using various languages, such as NodeJS and Python. Or, if you want an in-depth explanation of implementing the above, you can learn all about it in this ENS domain resolver tutorial. First, make sure to sign up with Moralis for free!

Overview
Going into today’s article, we will show you how to resolve any ENS domain using Moralis in three steps:
- Calling Moralis’ ”resolve_address” endpoint
- Setting up the backend
- Building the frontend
By completing the steps above, you will learn how to create a Python application, allowing you to continuously resolve any ENS domain. If this sounds exciting and you are eager to start, click here to jump immediately into the ENS resolver tutorial!
To accelerate the mainstream adoption of Web3, it is vital to find potential friction points within the blockchain space and streamline them. A clear example is long and tedious cryptocurrency addresses for Web3 wallets designed for computers. One protocol aiming to solve this issue is Ethereum Name Service (ENS). ENS solves this issue by mapping machine-readable identifiers to human-readable names or domains. But to fully leverage the accessibility of ENS, you need to know how to, for instance, resolve an ENS domain. For this reason, this article explores how to resolve any ENS domain using Moralis in just minutes!
Throughout this tutorial, you will familiarize yourself with the best Ethereum API in 2023. This is one of many blockchain development resources offered by Moralis. In addition to enterprise-grade Web3 APIs, Moralis also provides excellent Web3 development guides. For instance, learn how to get Ethereum transaction details or read about Ethereum webhooks!
Also, remember to sign up with Moralis right now! Creating an account is free, and you receive immediate access to all tools offered by Moralis!
ENS Resolver Tutorial – How to Resolve any ENS Domain
We will kickstart this ENS domain resolver tutorial in the following sections. We will specifically show you how to create a Python application to resolve any ENS domain. Once you complete the app, you can continuously resolve ENS domains by simply providing a crypto address.
To make the development process as seamless as possible, we will use Moralis’ EVM API and the ”resolve_address” endpoint. With these amazing blockchain development resources, you can resolve any ENS domain through a single API call. If this sounds exciting, join us in this ENS resolver tutorial as we show you exactly how this works!
You can also check out the clip below from Moralis’ YouTube channel if you prefer watching videos to educate yourself. In this video guide, one of Moralis’ talented software engineers walks you through the process from start to finish:
You can also join us here as we start by covering the required prerequisites before jumping into the main ENS resolver tutorial’s first step!
Prerequisites
Before getting into the first step of this ENS resolver tutorial, make sure you have the following prerequisites completed:
- Django and Rest Frameworks – Open a new terminal and run the commands below to install Django and Rest:
pip install django
pip install djangorestframework django-cors-headers
- Moralis – Install Moralis with the following terminal input:
pip install moralis
- A Moralis Account – If you have not already, sign up with Moralis now!
Step 1 – Calling Moralis’ ”resolve_address” Endpoint
To resolve any ENS domain, start by setting up a new Django project. From there, you can create a new file called ”services.py” and add the following code snippet:
from moralis import evm_api

api_key = "YOUR_API_KEY"

params = {

    "address": "0xd8dA6BF26964aF9D7eEd9e03E53415D37aA96045",

}

result = evm_api.resolve.resolve_address(

    api_key=api_key,

    params=params,

)

print(result)
The code above is copied directly from Moralis’ resolve address documentation if you want to check it out yourself.
Next, you need to configure this code by replacing ”YOUR_API_KEY” with your actual Moralis API key:

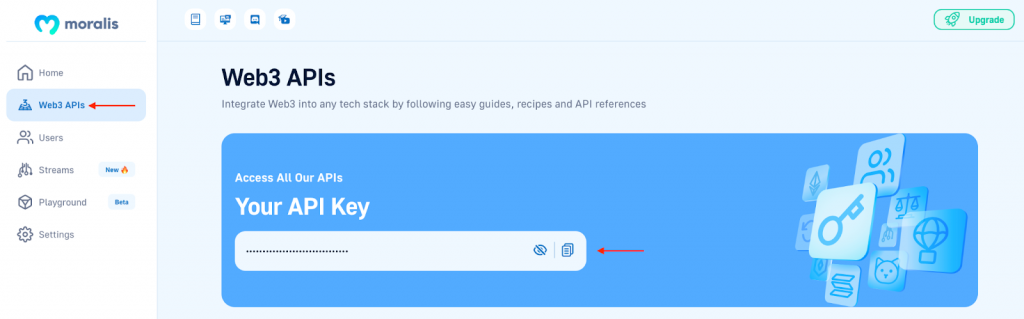
To get the API key, log in to Moralis’ admin panel, click on the ”Web3 APIs” tab, and copy the key:
That is it; all that remains from here is running the code by opening a terminal, inputting ”python services.py”, and hitting enter. In return, you should receive a JSON response similar to the one shown below:
{

  "name": "Vitalik.eth"

}
If you inspect the code further, you resolve the ENS domain by calling the ”resolve_address” endpoint while passing the ”api_key” variable and ”params” object as arguments. The current address specified in the ”params” object is linked to the ”Vitalik.eth” ENS domain. So, if you want to resolve another ENS domain, all you need to do is modify the address!
Now, let’s take a closer look at making this code more dynamic by creating the Python app allowing us to continuously resolve any ENS domain!
Step 2 – Setting Up the Backend
You have two options for the second step of this ENS resolver tutorial: setting up a project from scratch or using our pre-made Python application template. To make this tutorial as straightforward as possible, we will be using the template, which you can find in the GitHub repository down below:
Complete ENS Resolver Application Documentation – https://github.com/MoralisWeb3/youtube-tutorials/tree/main/resolve-ens-domain
To begin, go ahead and clone the project to your local directory. To make the code from the repository more understandable, we will start by breaking down the essential backend code.
The first thing we did was modify the code in ”services.py”, making it more dynamic:
from moralis import evm_api

from dotenv import load_dotenv

import os

load_dotenv()

api_key = os.getenv("MORALIS_API_KEY")

def resolve_ens_domain(address):

params = {

    "address": address,

}

result = evm_api.resolve.resolve_address(

    api_key=api_key,

    params=params,

)

return result
In the snippet above, we altered the code from the first step by creating a function taking an ”address” parameter as an argument. The address is fetched from the frontend, letting users decide what crypto address they want to resolve.
We also removed the API key and placed it within a new ”.env” file, as displaying the key is a security risk. So, the next step is to create a new file called ”.env” and add the following environment variable:
export MORALIS_API_KEY = ”REPLACE_ME”
That is it for the backend! So, let us move on to the frontend in the third and final step of this ENS resolver tutorial!
Step 3 – Frontend Code Breakdown
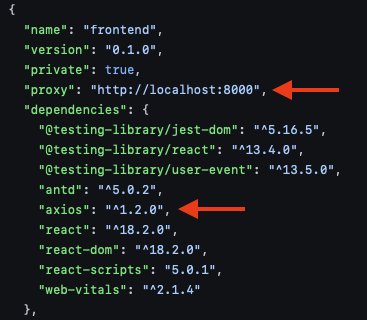
First, let’s go to the ”packages.json” file. Here, we add a ”proxy” pointing to the Django server and ”axios”:
Next up, we will take a closer look at the code in the ”App.js” file. In this file, the central function is ”refreshDomain”:
const refreshDomain = async () => {

  await axios

    .get(`/resolve_domain?address=${params.address}`)

    .then((res) => {

      setEnsDomain(res.data);

    })

    .catch((err) => console.log(err));

};
The function uses “axios” to connect to the ”resolve_domain” endpoint from the previous step. Next, also make sure to add an on-click event for this function so that it is called whenever a user presses a button on the app’s UI.
From there, the remainder of the code is responsible for fetching the address from the app’s UI input field, displaying the results to the users, etc.
Now that’s it for this tutorial. Congratulations! You have now completed the Python application for resolving any ENS domain with Moralis! However, before launching the application, make sure to open a new terminal, ”cd” into the frontend folder, and install the required dependencies:
npm moralis axios
In the following section, we will briefly examine the end results to see what you just created!
Resolve any ENS Domain with Moralis – ENS Domain Resolver End Results
With the completed application, let us explore what it looks like when you resolve an ENS domain. As such, here is the application’s landing page:
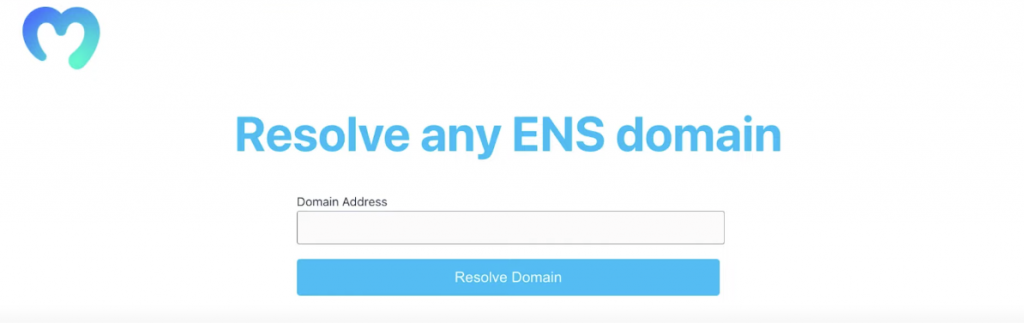
As you can see from the print screen above, the UI features three core elements: a heading, an input field, and a ”Resolve Domain” button. To use the app, all you need to do is input a valid Ethereum address and hit the button. Doing so should provide you with a response similar to the one shown below:
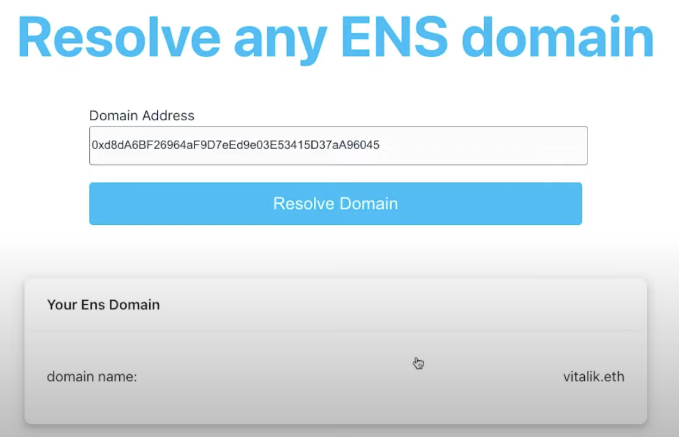
As you can see, the app resolves any ENS domain and neatly displays it to the UI!
That is it for this entire ENS resolver tutorial! You can now use the same principles to add similar functionality to any future blockchain development endeavors!
What is an ENS Domain Resolver?
The point of ENS is to map human-readable names like “vitalik.eth” to machine-readable identifiers such as cryptocurrency addresses. As such, ENS has the same purpose as the internet’s domain name service (DNS), and they share many commonalities.
For one, both DNS and ENS operate on a system of dot-separated hierarchical names. These names are what are referred to as domains. But, due to the constraints and capabilities of the Ethereum blockchain, the two systems have significantly different architectures.
Within the architecture of ENS, so-called resolvers handle the process of translating names into addresses. Any smart contract that implements a relevant standard can act as a resolver in ENS. So, in conclusion, a resolver is a smart contract responsible for translating ENS names into addresses.
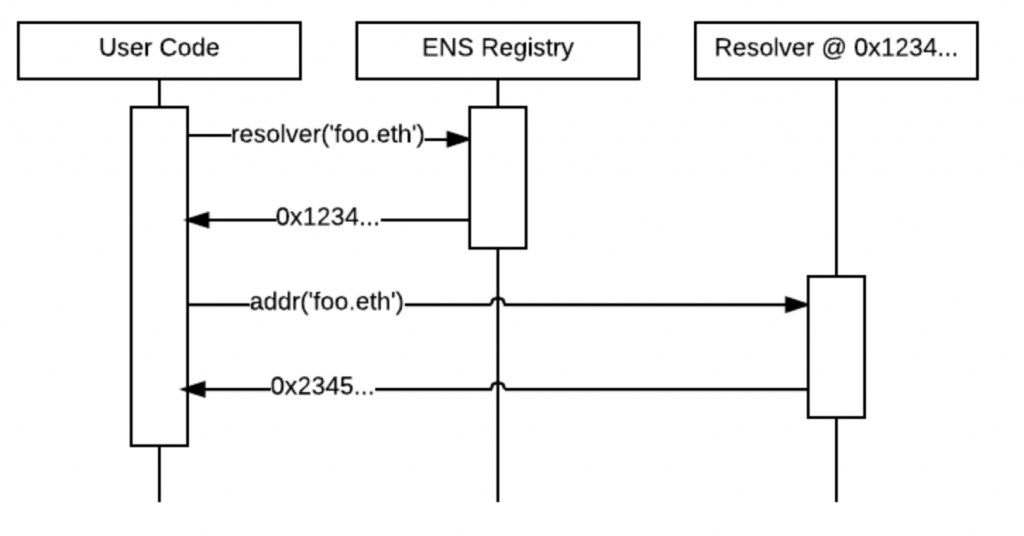
In this article, we used Moralis’ ”resolve_address” endpoint, which takes an address as input, and resolves the ENS domain. As such, this endpoint “reverse resolves” a given Ethereum address to its ENS domain. For more information on this, check out the resolve address documentation.
To make more sense of this and what a resolver actually does, let us explore ENS in further detail in the next section!
Exploring ENS
Ethereum Name Service (ENS) is an extensible, distributed, open Ethereum-based naming service. The core purpose of ENS is to map human-readable names, such as ”john.eth”, to machine-readable identifiers like Web3 wallets, Ethereum, or other cryptocurrency addresses.
The machine-readable identifiers generally consist of long, complex combinations of numbers and letters. As such, ENS connects tedious addresses like ”0xb76F37…” to more understandable domains or names. ENS also supports ”reverse resolution”. Through this, it becomes possible to associate metadata, such as canonical names or interface descriptions, with an Ethereum address.
ENS shares the same purpose as DNS, which, in essence, is to facilitate a more seamless web experience. As such, ENS supplies the same service for Web3 as DNS does for the conventional Web2 space. This means that ENS simplifies Web3, making blockchain technology more adapted for mass adoption.
If you want a more detailed breakdown of ENS, check out the following article on our Web3 blog: ”What is Ethereum Name Service?”.
What is an ENS Domain?
An ENS domain is essentially a name, such as ”john.eth”, mapped to one or several crypto addresses. By following the rules imposed by ENS registrar contracts, anyone can claim ownership of a domain for their own use.
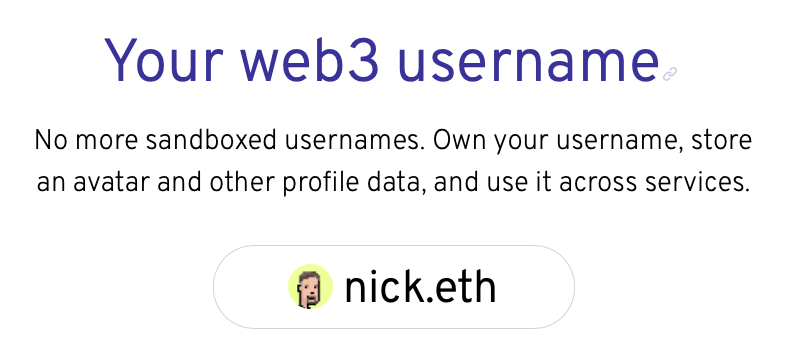
ENS uses the same dot-separated hierarchical system as DNS for all domains. This provides owners of a domain with complete control over configurations of subdomains. This means that if Nick owns ”nick.eth”, he can create ”pay.nick.eth” and configure the domain as he wishes.
With a better understanding of what an ENS domain is, let us take the following section to cover the process of registering one!
Registering an ENS Domain
Registering an ENS domain is simple, and you can do so through three straightforward steps:
- Creating a MetaMask Wallet – The first step is to create a MetaMask wallet. As such, head over to “metamask.io”, create an account, and download the browser extension.
- Acquiring ETH – With a wallet at your disposal, you also need to add some ETH (ether, Ethereum’s native coin). You can get ETH through a centralized (CEX) or decentralized exchange (DEX).
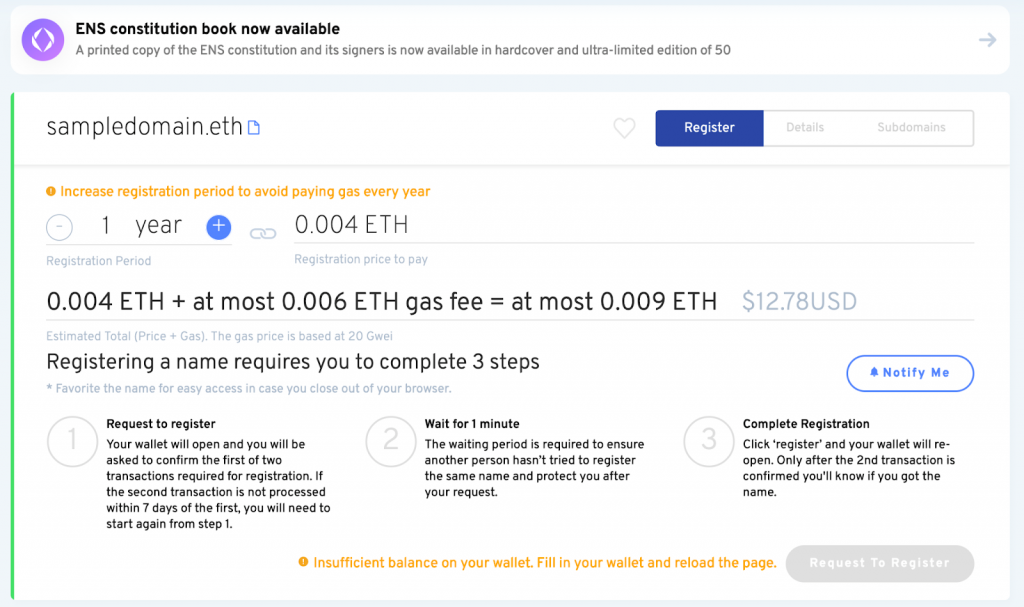
- Choosing Domain – Lastly, head over to “https://app.ens.domains”, connect your wallet at the top left, and search for the domain you want to register:
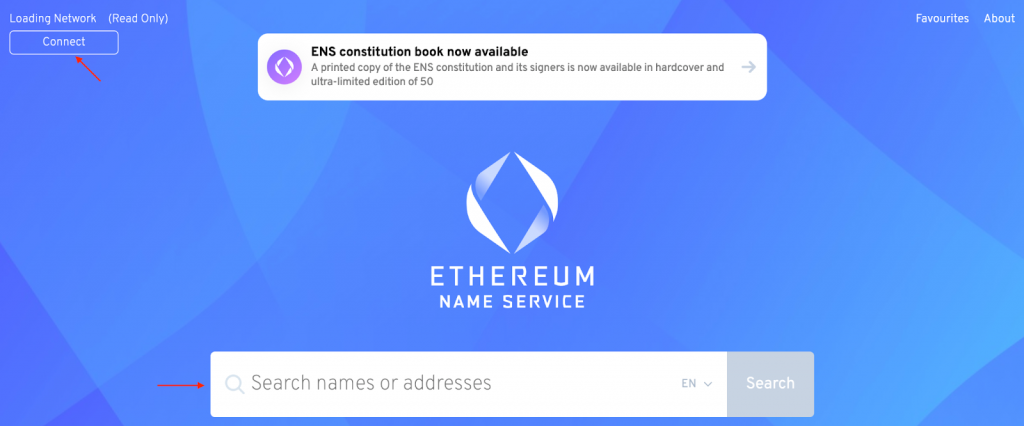
If the domain is available, click on it and follow the registration instructions:
Summary – ENS Domain Resolver
In this tutorial, we taught you how to resolve any ENS domain using Moralis in only three simple steps:
- Calling Moralis’ ”resolve_address” endpoint
- Setting up the backend
- Building the frontend
Completing the steps above results in a Python application allowing anyone to continuously resolve ENS domains by providing a crypto address. If you have followed along this far, you can now use the same principles to implement similar functionality into future projects!
If you found this guide helpful, consider checking out additional articles here at Moralis’ Web3 blog. For example, learn about how Web3 get event logs for Ethereum works. Or, read our article answering the question, ”what are event logs on the Ethereum network?”.
You can also learn Web3 programming and become a more proficient blockchain developer by enrolling in Moralis Academy. Moralis Academy offers a great selection of development courses for everyone. For instance, check out the following course to start your Web3 journey: ”Blockchain & Bitcoin 101”.
Nevertheless, if you want to resolve any ENS domain, remember to sign up with Moralis. By registering, you also receive access to the enterprise-grade Web3 APIs offered by Moralis. With these tools, you can fully leverage Web3 technology to the fullest!
