As you most likely know, smart contracts are an essential part of programmable blockchains’ functionality. Among other events, Web3 contracts ensure that token minting and transactions run according to standards. Of course, you can create your own smart contract and deploy them with some Solidity basics. However, you can also listen to smart contract transactions and events that are already live. In fact, you can build all sorts of explorer dapps around existing smart contracts. However, many devs interested in indexing the blockchain take an outdated approach. As such, they often spend weeks or even months building the infrastructure to properly listen to smart contract events. Luckily, there’s a much simpler and faster way to do this. Thanks to Moralis, you can index the blockchain in minutes. All it takes is some quick initial setup and a contract’s address.
Moving forward, we will tackle an example project, where you will learn how to listen to smart contract events. You will see how Moralis enables you to do so for ERC20, ERC1155, ERC721, and custom smart contract events. In order to experience the power of Moralis’ Web3 Syncs first-hand, we encourage you to follow our lead and take action. As such, you will first need to create your free Moralis account, followed by creating our Moralis dapp. This is a very simple and quick process. However, to make things as straightforward for you as possible, we will guide you through that part step-by-step. With the initial Moralis setup under your belt, we will be able to focus on using the Web3 Syncs. As such, we’ll also take a look at the Moralis dashboard, where you get to see the Web3 contract events neatly indexed.

Benefits of Listening and Syncing Smart Contract Transactions
Having a strong “why” behind what you do in life is very important. And, while that’s something you will have to determine for yourself, knowing the benefits of listening and syncing smart contract transactions can help you understand why it can be so important. As such, let’s take a closer look at the benefits of Web3 syncing before we get our hands dirty.
As mentioned in the introduction, listening and syncing smart contract transactions enables you to index the blockchain. This is the way to obtain real-time transactions as well as historical on-chain data. With transaction details, you can create all sorts of cool and useful dapps (decentralized applications). Furthermore, by syncing Web3 contract events, you get to ensure that your dapps interact with blockchains. Whether in listen-only mode or by actually triggering specific functions within smart contracts. Essentially, Web3 syncing is the bridge that enables you to ensure that your UI and on-chain data work together. And, being able to listen to smart contract transactions and events is the starting point of Web3 syncing.
All-in-all, by listening and syncing smart contract transactions and events, you know when on-chain changes that interest you take place. Of course, it’s up to you to decide on which transactions and events you want to focus on. However, essentially the sky’s the limit. Of course, each programmable blockchain has its own smart contracts. Though, thanks to Moralis’ cross-chain interoperability, you get to listen to smart contracts across all leading chains in one place. That includes testnets and mainnets for chains like Ethereum, Polygon, BNB, Chain, Avalanche, and others.
With the benefits of listening and syncing Web3 contracts in mind, it’s time we focus on today’s example project.

Listen to Smart Contract Transactions with Moralis’ Web3 Syncs – Example Project
As promised in the intro, we will first help you get started by guiding you through the initial Moralis setup. The latter is also your ticket to Moralis’ Web3 Syncs, which is what we’ll be using moving forward. Moreover, we will listen to the smart contract transactions of two projects. First, we will focus on the ERC20 contract for LINK tokens on Mumbai (Polygon’s testnet). Second, we’ll show you how to listen to a custom smart contract. In which case, we will focus on our example “Donation” contract also on the Mumbai network. So, make sure to have your MetaMask ready, with Mumbai and some test MATIC added to your wallet.
Initial Moralis Setup
Follow the steps below to get your Moralis dapp up and running. This is a prerequisite to accessing our Moralis Web3 Syncs feature:
- Use the “create your free Moralis account” link from the intro or visit moralis.io and click the “Start for Free” button. In case you already have an active account, log in with your credentials:

- Inside your Moralis admin area, click on “Create New Dapp”:

- The above step initiates the three-stage dapp setup. As you can see in the screenshot below, you first need to select the environment. As mentioned above, we will focus on Polygon’s testnet; hence, select “Testnet”. However, when you will be ready to reach your users, you will need to focus on “Mainnet”:

- Next, you need to select the chain you want to focus on. Again, if you want to follow our lead, select “Polygon Mumbai”. Though, you can also select other chains since Moralis is cross-chain interoperable. With the chain(s) selected, click the “Proceed” button to move on:

- The second stage of your dapp setup evolves around your region. This is where you need to choose the city closest to your physical location. Simple, use the drop-down menu. Again, move forward using the “Proceed” button:

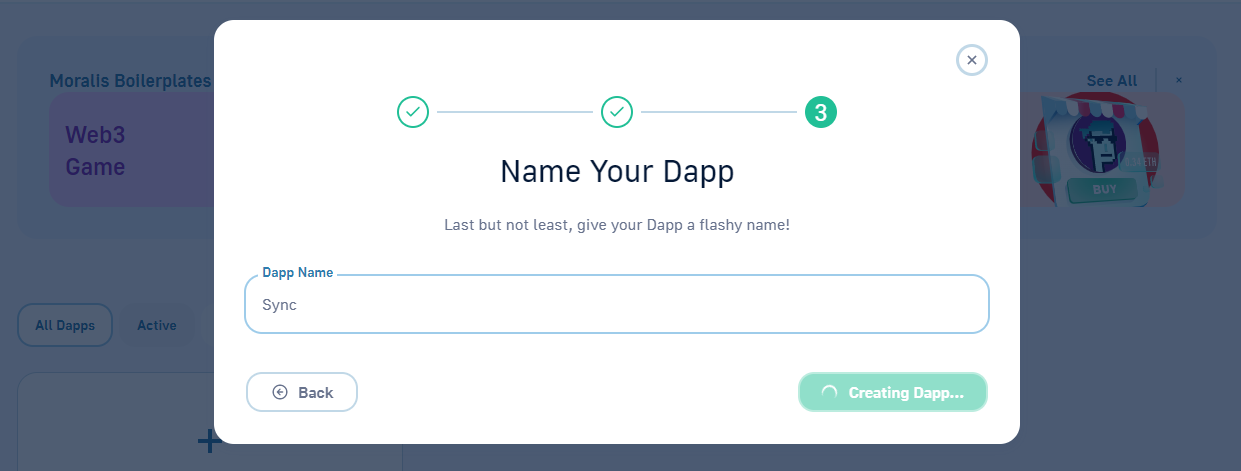
- The third and final stage of your dapp setup requires you to name it. This can be anything you want; however, do not overthink this step as it plays no significant role. With your dapp’s name in place, click the “Create Your Dapp” button:
After completing the above six steps, your dapp will be ready shortly. Then, you get to access all the settings and features via the “Settings” button:

Finally, you will need to select the “Syncs” tab, which is where our focus will be moving forward:

How to Listen to ERC20 Smart Contract Transactions
Make sure that you are on the “Syncs” tab of your Moralis dapp settings (see the screenshot above). Next, select the “Smart Contract Events” option and use the “New Smart Contract Event Sync” button:

Next, you have four different event types to choose from: NFT ERC-1155 events, NFT ERC-721 events, token ERC-20 events, and custom smart contract events. As promised, we will first focus on LINK tokens on Mumbai. Thus, make sure to select the “Token ERC-20” event type and hit “Proceed”:

ERC20 Sync Settings
Next, you need to complete the sync settings. At the top is the most important part – this is where you enter a smart contract address:

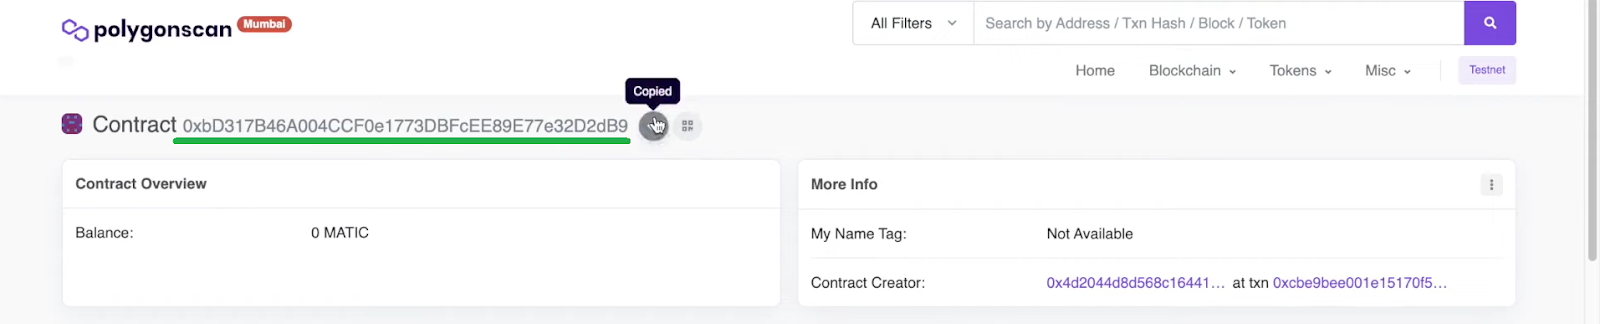
This address is essential to listening to smart contract transactions and events. Luckily, you can obtain all addresses using blockchain explorers, such as Etherscan, Polygonscan, Bscscan, etc. In our case, we will use Polygonscan (Mumbai) to copy the LINK token address:

With the above-copied address, you need to return to “Sync Settings” and paste it into the designated entry field:

Then, you need to select the topic. For the ERC20 contracts, you can choose between “Approval” and “Transfer”. However, since we want to focus on transfers, go with the corresponding topic:

Next, you have to name the table that will represent this contract’s syncs. You also need to enter a description of this sync:

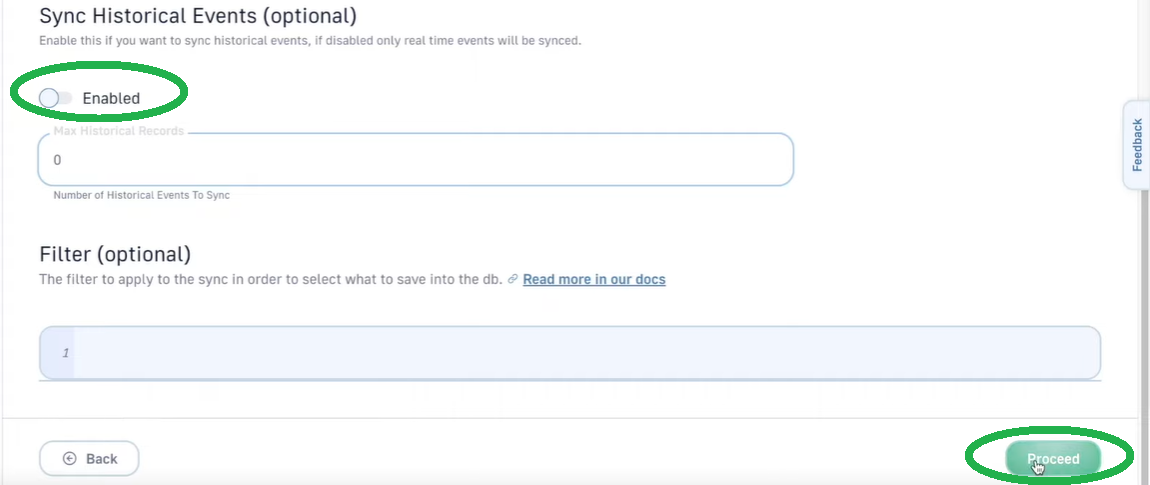
Moreover, you also have an option to include historical events. So, if you need historical transfers or other events that took place, you need to enable this option. Moreover, you also get to enter the number of records you want to sync. For the sake of this example, let’s enable historical events, and let’s say we want to include three past historical events. Furthermore, since we want all transactions, we will not be using any filters. As such, click the “Proceed” button to complete the settings:

Back at the “Syncs” tab, you will now be able to see the above-created “LinkTransfers” sync:

Moralis’ Database
As you listen to smart contract events, your Moralis database does the indexing. To access your database, go to the “Database” tab and click the “Access Database” button:

Looking at the classes in your database, you can see “LinkTransfers”. This is the table name we entered during the above sync settings. So, if you select this class, you should be able to see the three historical transfers and all ongoing transfers that took place since you created this sync:

If you wait a couple of minutes, you will see that all new transfers are logged in your dashboard. In our case, another 47 transfers took place in about 30 minutes and they were all indexed in our “LinkTransfers” class:

Moreover, as you can see, the table provides us with other useful details related to the synced events. Hence, you can easily implement those details into your dapps.
How to Listen to Custom Smart Contract Events
Let’s now look at a sync example for custom events. Thus, go back to the “Syncs” tab of your Moralis dapp’s settings. There, select the “Custom Event” option and click “Proceed”:

Like with the “ERC20” sync, you will again need to complete the settings, starting with a custom smart contract’s address:
Note: Since you most likely don’t have your own contract, we recommend you use our example contract. This contract enables simple donations on Mumbai. You can learn more about this particular smart contract in the video at the bottom of the article, starting at 5:40. Moreover, the Moralis’ blog and the Moralis’ YouTube can teach you how to compile, deploy, and verify smart contracts.
Return to the sync settings and paste the above-copied address in the “Address” entry field:

Furthermore, if you remember we launch our Moralis dapp only on Mumbai; hence, this network is automatically selected. Next, the custom events sync asks for a smart contract ABI:

Luckily, this is also something you can get on blockchain explorers for verified contracts. You just have to scroll down your smart contract’s page a bit (make sure you have the “code” tab selected):

Then, you simply copy your Web3 contract’s ABI and paste it in the designed entry field inside the syncs settings:

Thanks to Moralis’ UI, which reads the entered ABI, you get to select the topic again. For this example donation smart contract, there’s only one topic:

The rest of the settings follow the ERC20 example, so make sure to name the table and add a description:

However, we will not include historical events for this example. Moreover, we will also not use any filters either:
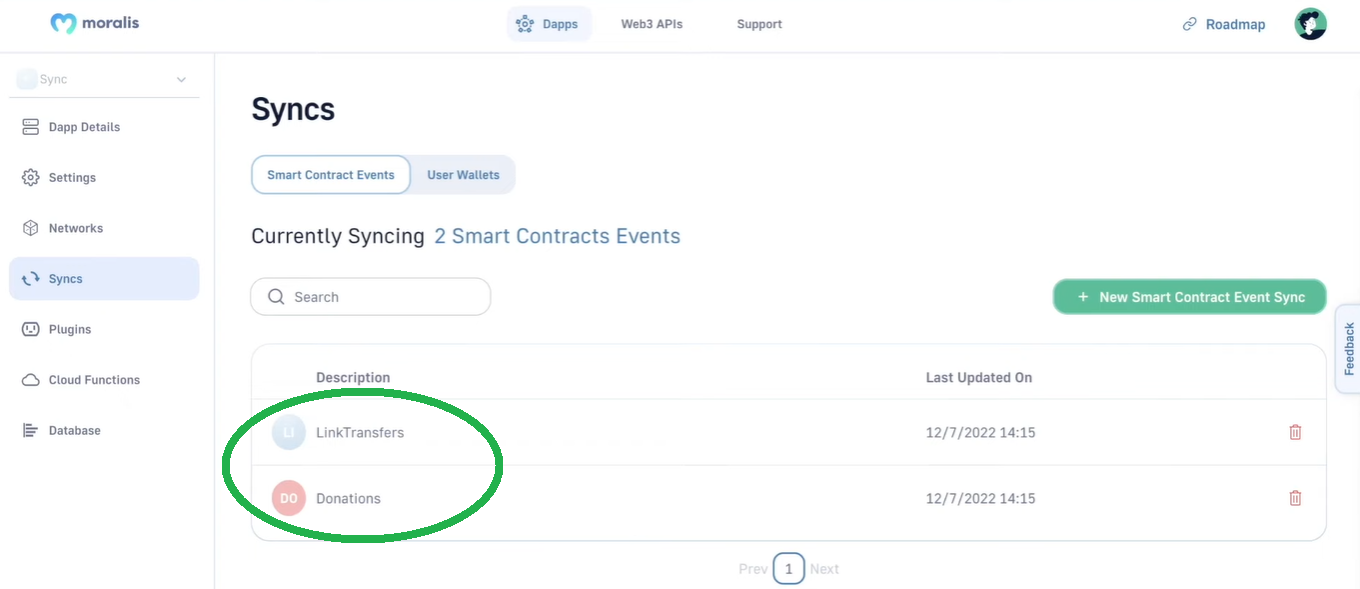
If we now return to the “Syncs” tab, there are two syncs in place:
Our Moralis’ database also reflects that:

Exploring Our Donation Smart Contract Events
As you can see in the above screenshot, while we do listen to smart contract events in our donation contract, the corresponding class is empty. That’s because we disabled historical events and no donation was executed since we started to listen to that smart contract. However, once we execute a donation (video below at 7:44), a new event is indexed in the “Donations” class:

Nonetheless, here is the video that we’ve been referencing throughout the article:
How to Listen to Smart Contract Transactions in Real-Time – Summary
Today, you first had a chance to learn about the benefits of listening and syncing smart contract events. Then, we guided you through an example project, where you first learned how to complete the initial Moralis setup. With your Moralis dapp up and running, you were able to access Moralis’ Web3 Syncs. This is where we showed you how to listen to smart contract events. Hence, you had a chance to set in place ERC20 and custom events syncs. As far as the NFT smart contracts go, the steps are more or less the same as for the ERC20 example. Furthermore, you also had a chance to see the power of Moralis’ dashboard, which neatly indexes your syncs.
With the knowledge and skills obtained herein, you are ready to take your Web3 development to the next step. If you have your own smart contracts or other existing ones that you want to listen to, you now know how. On the other hand, you also know that you can learn more about smart contracts on the Moralis’ YouTube channel and the Moralis’ blog. These outlets also provide you with countless example projects that enable you to put the theory to practice. Essentially, these two outlets enable you to become a Web3 developer for free.
However, if you want to go full-time crypto sooner rather than later, you ought to consider a more professional approach. If that resonates with you, Moralis Academy might be the place for you. Aside from getting blockchain certified, this is where you get a personalized study path and expert mentorship. Last but not least, this is also the place to become a member of one of the most advancing communities in the industry.
