2021 was a game-changer for NFTs (non-fungible tokens). Sure, some projects were just trying to capitalize on the surging popularity of NFTs. However, 2021 saw NFT utility start exploring new frontiers. As such, it’s clear to most that NFTs are here to stay and could reshape countless industries. Thus, devs already know that NFT on-chain analysis will be essential. And, while this might sound very complicated, we assure you it’s quite simple. With the right set of tools, you can do NFT on-chain analysis with very few lines of code. Then, you can utilize that skill in all sorts of ways. For instance, you can create an NFT whale watcher dapp (decentralized application), which is exactly what we will focus on herein.
Moving forward, we will show you how to use Moralis to easily fetch historic and live on-chain data for any NFT collection. Moreover, you’ll also learn how to easily scan any Web3 wallet address related to those NFT collections. Moreover, with NFT on-chain analysis under your belt, we’ll show you how to create a neat Web3 frontend around it. As far as today’s example project goes, we will focus on the Moonbirds NFT collection. However, we encourage you to do the same for at least one other collection for practice.
As we take on today’s “NFT on-chain analysis” feat, we will guide you through the following stages:
- Setup Moralis
- Set API rate limits
- Implementing NFT on-chain analysis
- Node JS server setup
- Initialize a React app
- Populate NFT data to the React app
And, we will do so with the help of a video tutorial, which awaits you at the end of this article.

NFT On-Chain Analysis in Action – NFT Whale Watcher Dapp Demo
However, before we dig deeper into the first stage, we want to do a quick demo of our finished example dapp. So, here’s the initial screen of our example dapp:
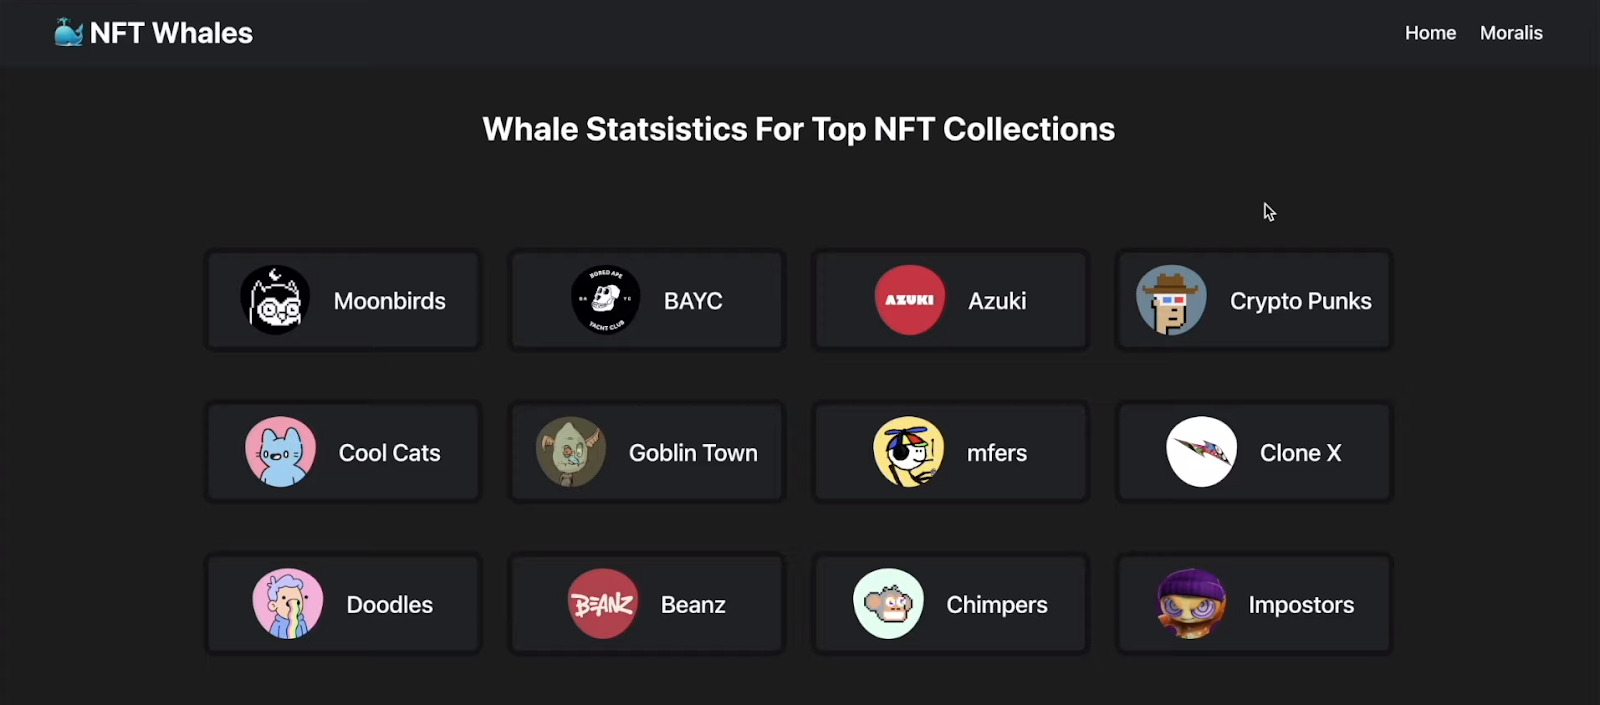
If users want to explore any of the above-listed NFT collections, they need to click on it.
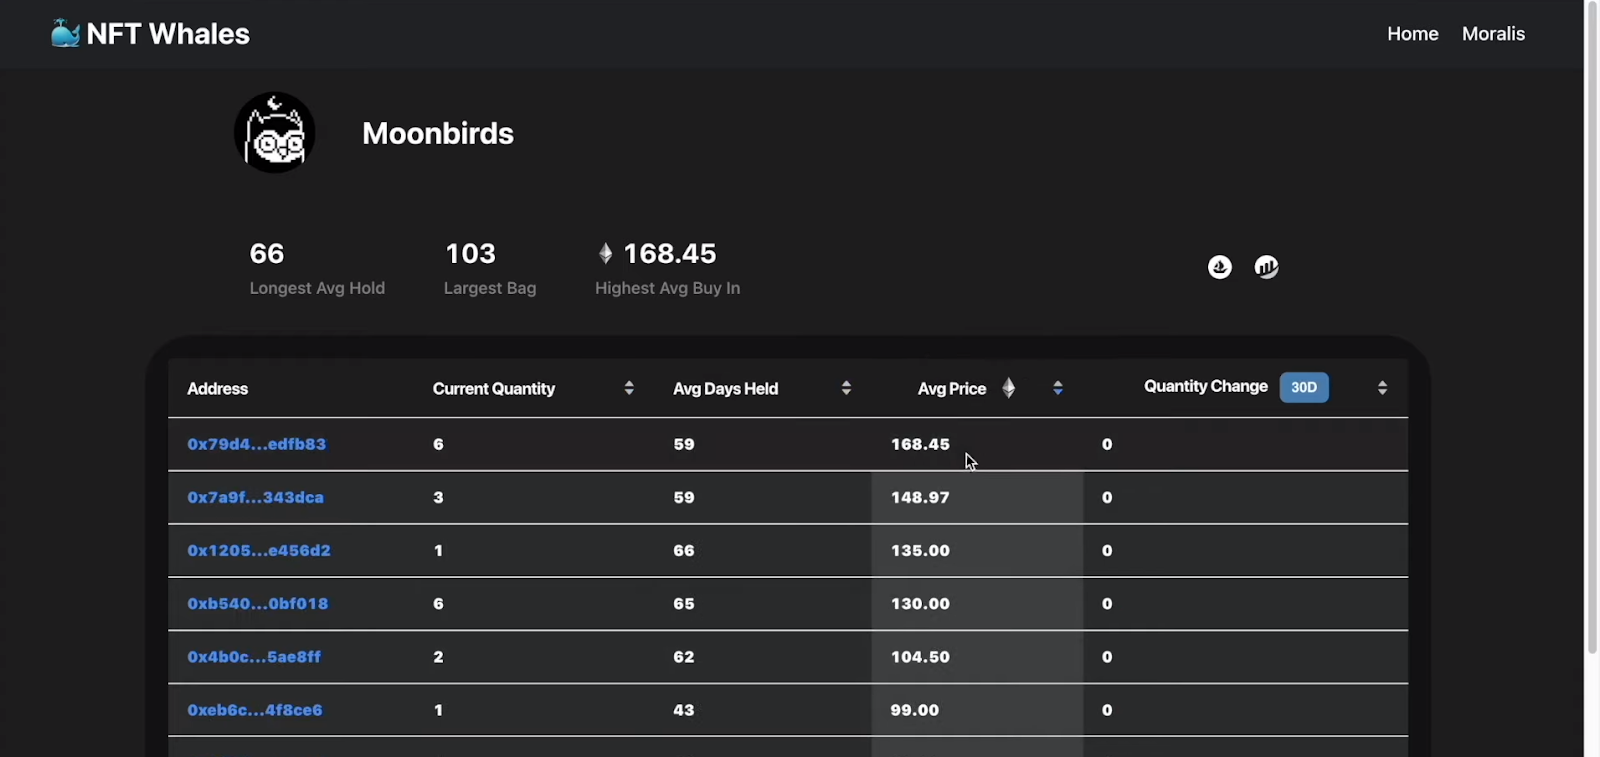
Once on the Moonbirds page, users can explore NFT on-chain analysis performed in the backend. As you can see, we designed our dapp to display some interesting stats at the top. These include the longest average hold, the largest bag, and the highest average buy. Then, there is the table containing all the details. On the far left, there are all addresses owning Moonbirds NFTs. Next, our dapp contains the “Current Quantity” column, which displays the number of current Moonbirds NFTs for a corresponding address. Then, we have “Avg Days Held”, “Avg Price”, and “Quantity Change” columns. The latter also offers users a way to select a time period that interests them. Furthermore, each column has an option to arrange the table according to the values of that column, either in ascending or descending manner.
Moreover, as the blue color indicates, users can click the address to check out NTF on-chain analysis for a particular address:

Inside a particular address, the dapp displays that address in the same line as the name of the collection but on the opposite side. Next, there’s the “User Collection” section, which displays the thumbnails of all NFTs of that collection for the given address. And, at the bottom, we again have an NFT on-chain analysis table containing that address’ activity. As such, it clearly indicates the event (buy or sell), token IDs, price of NFTs, date, and “To” and “From” addresses involved in transactions.
NFT On-Chain Analysis – Example Project
Now that you know what an amazing dapp, you’ll be building, you must be eager to roll up your sleeves. Of course, we want to make things as simple for you as possible, as such, you can clone our starter code from GitHub.
Setup Moralis
Here are the steps you need to take to complete the initial Moralis setup, which will enable you to use the Moralis’ SDK:
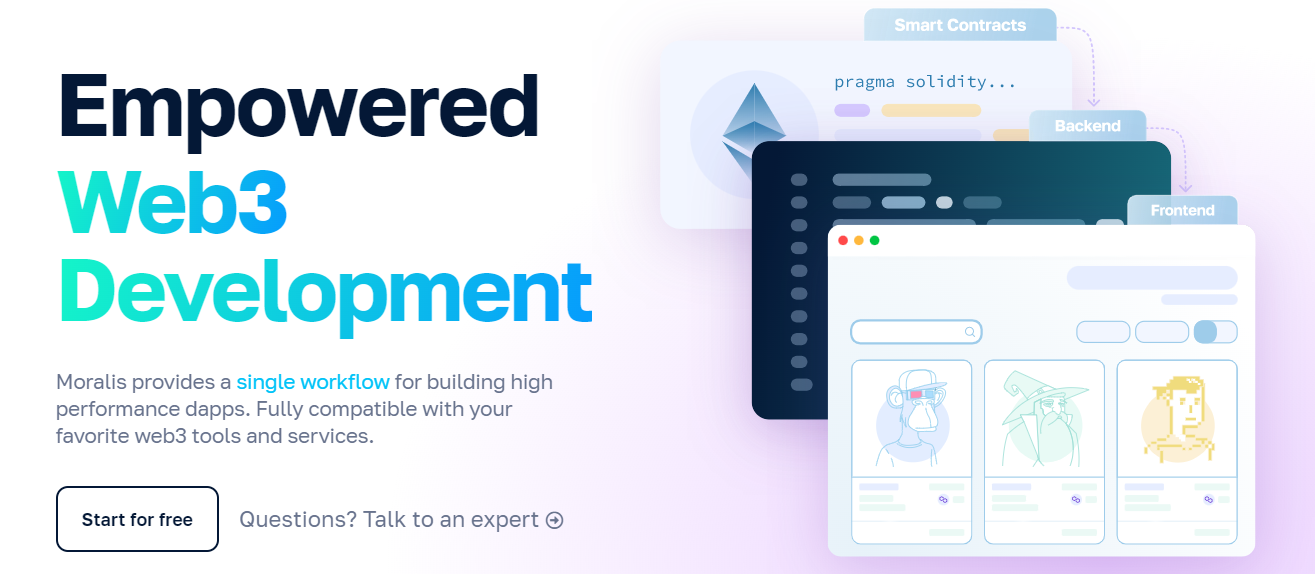
- First, create your free Moralis account. Go to Moralis’ home page and click the “Start for Free” button. However, in case you already have an active account, just log in to your admin area:

- After accessing your Moralis admin area, you need to create a new Moralis dapp:

- Then, select the environment. For most example projects, you will use testnets; however, today we are interested in live NFT projects, so go with “Mainnet”:

- We will focus on the Ethereum mainnet. Though, thanks to Moralis’ cross-chain interoperability, you could select multiple chains:

- For the region, select the city closest to your location:

- Finally, give your dapp a name and hit the “Create Your Dapp” button:

Once your Moralis dapp is up and running, you can access its details and all the functionality via the “Settings” button:

Moralis’ Web3 APIs for NFT On.Chain Analysis
Inside the settings of your dapp, go to the “Web3 APIs” tab. Then scroll down to the “Token” section. There’ you’ll find the “/nft/{address}/transfers” API:
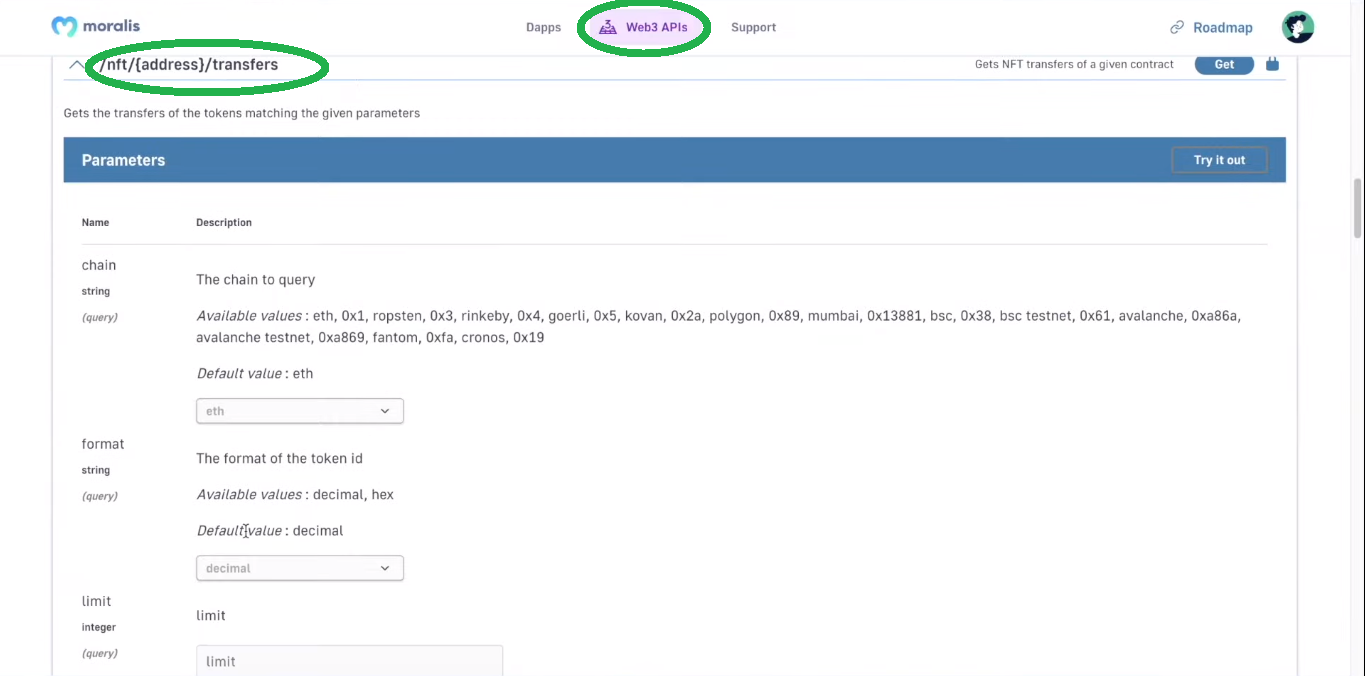
This API gets NFT transfers of a given contract. Moreover, this is the API we will mainly focus on for the purpose of today’s NFT on-chain analysis. Since this API provides us with all the data we need, we can significantly limit the number of API calls we need to make.
Furthermore, looking at the above screenshot, we can see that the “/nft/{address}/transfers” API takes in some parameters:
- The chain we want to query (Ethereum is the default option)
- The address of the smart contract we are interested in
Then, the above API provides us with the results in the following format:
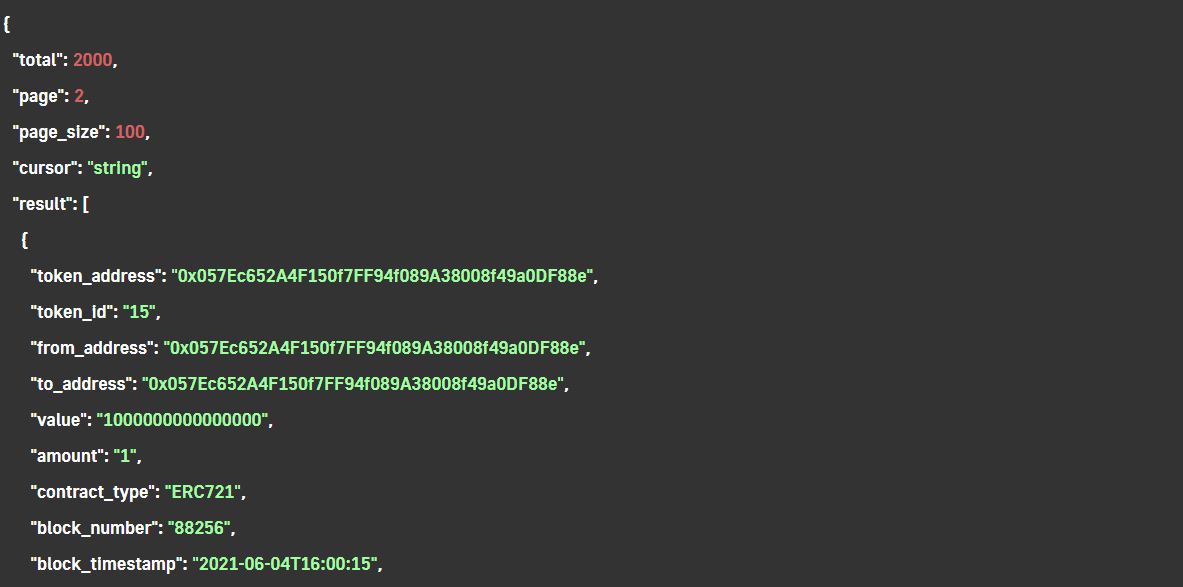
As you can see, it returns 2000 transfers, which is something we will need to account for as we move forward. Furthermore, you can see all the details it provides regarding the tokens for that particular contract. Hence, we can perform NFT on-chain analysis based on all this data with some backend post-processing. Actually, this single API provides us with all the data we need for our example dapp (presented in the demo above).
However, since many popular NFT collections on Ethereum have been around for quite a while, we must first set API rate limits inside our cloud function.
Set API Rate Limits
Note: You can learn more about the rate limits in the Moralis documentation (Web3 API > Rate limit).
This is where we copy the following lines of code into the “cloud.js” file inside the “cf” folder (video below, starting at 6:30):
Moralis.settings.setAPIRateLimit({
  anonymous:10, authenticated:20, windowMs:60000
})
So, to avoid limitations, we can add a couple of zeros to the “anonymous” and “authenticated” values. Next, we need to inform our Moralis dapp that we are using this cloud function. As such, we need to return to the Moralis admin area and click the “Settings” button for our “Whale Watcher” dapp. Then, we go to the “Cloud Functions” section:
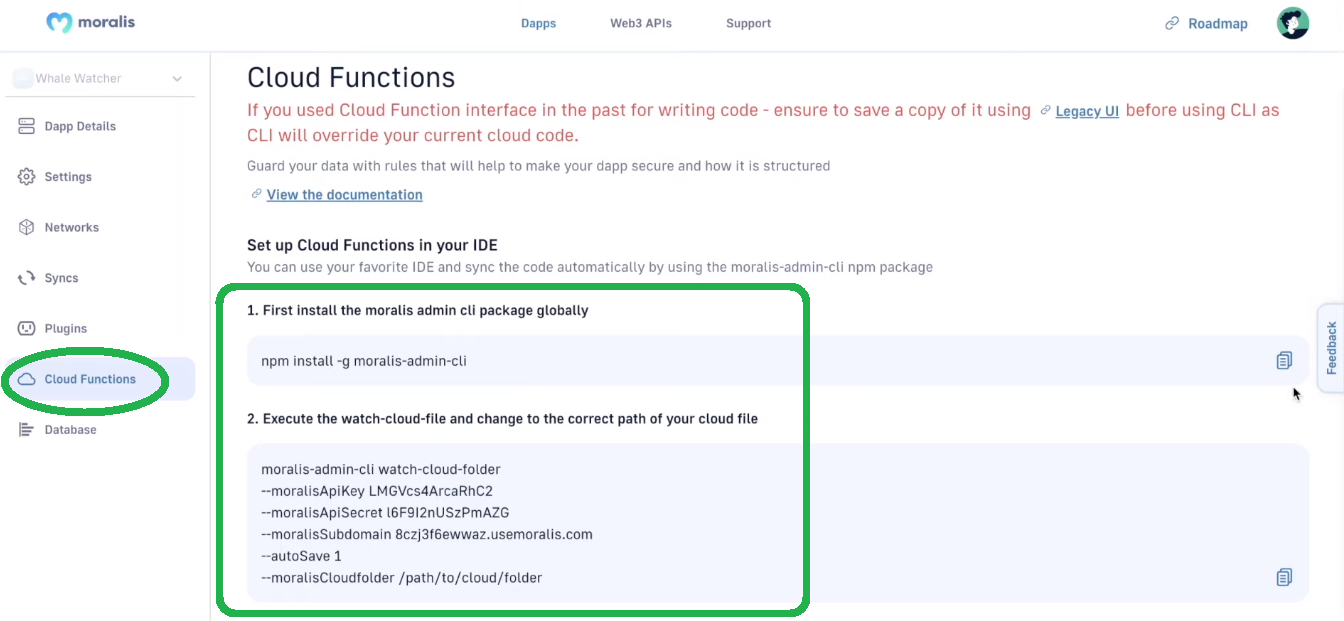
Next, we need to complete the two steps indicated by the on-page instructions. Hence, we use our terminal window to install the Moralis admin CLI package:

Then, we need to execute the watch-cloud-file and change the cloud folder into the correct path of our cloud file:

Finally, the terminal will ask you to select the mode and server to save your cloud function to:
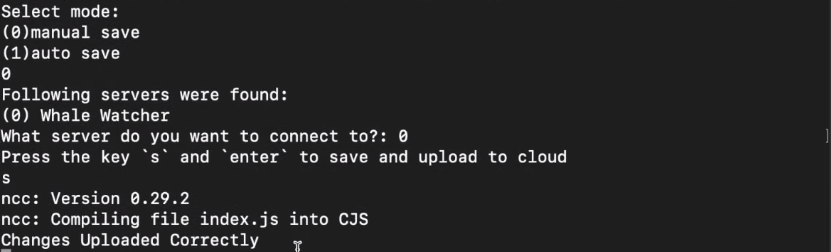
If you’ve followed the above steps, you’ve successfully changed your API rate limits.
Implementing NFT On-Chain Analysis
With the API rate limits set properly, we use our code editor to “cd” into the “stats” folder:

Next, we use the “npm init” command and press “enter” a couple of times, which will result in a new “package.json” file inside the “stats” folder. Then, we create the “stats.js” file in the same folder:

This is where we will implement all the backend functionality regarding the NFT on-chain analysis. But we must first install some packages (“npm i moralis” and “npm i fs”) (10:05). With the packages installed, we have everything ready to start writing our script. For a detailed coding tutorial, use the video below, starting at 10:30.
We will first and the above-installed packages:
const Moralis = require("moralis/node");
const fs = require("fs");
Then, we also need to add our Moralis dapps’ credentials:
const serverUrl ="xxx";
const appId="xxx";
To get these details (replace “xxx”), we use the “Settings” button for our dapp and then copy dapp URL and dapp ID from the “Dapp Details” tab:

Moreover, we also need to define a contract that we want to focus our NFT on-chain analysis on. And, as mentioned previously, we will focus on the Moonbirds collection herein:
const contractAddress = "0x23581767a106ae21c074b2276D25e5C3e136a68b"; //Moonbirds
Of course, we can change that address to focus on any other NFT collection at any time.
The Power of Moralis – Using the “getContractNFTTransfers” API
With the above lines of code, we also have everything ready to use the “getAllOwners()” function (11:39). This is where we will initialize Moralis (“Moralis.start”) and the cursor. Then, we will create the “owners” object, the response (“res”) variable, and the “accountedTokens” array. Moreover, we’ll use a “do-while” loop to get through all the transfers. And, inside this loop, we will use the above-presented “getContractNFTTransfers” API.
Furthermore, to go through the API results array, we will create a “for” loop inside the “do-while” loop. That way we will go through all the objects inside the results array and check if a specific token ID has already occurred. Next, starting at 17:21, you will learn how to stringify the “owners” object and use the “fs” package to write a file containing these strings.
Now, that we’ve set in place the basic code inside the “stats.js” file, we can run the “getAllOwners()” function:

As you can see, our code will go through all 312 pages and save all the data related to the Moonbirds NFT collection for us. As a result, we get the “moonbirdsOwners.json” file inside the “stats” folder that contains all the details about the owners of these NFTs:

That is the essence of the NFT on-chain analysis. However, at 20:00 you’ll get to learn how to add other details about the NFT collection in question. Moreover, you’ll also learn how to collect all the historic data for the related addresses. This is where you will find out about the “dateToBlock” API. All-in-all, you will end up with the “moonBirdsOwners.json” and “moonbirdsHistory.json” files containing all the data you need to build a neat frontend around it.
Node JS Server Setup
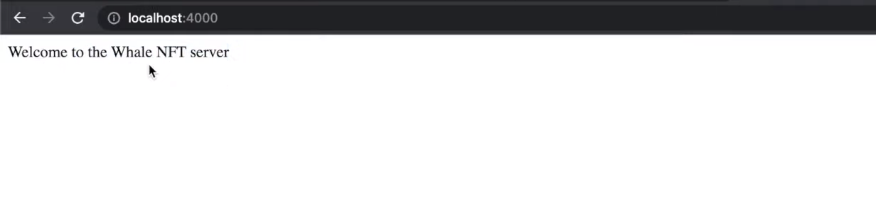
Starting at 34:42, you will learn how to set up your Node JS server. Essentially, you will create your “index.js” file, which will serve as your backend server. This will be the beginning of the frontend part of this example dapp:
Furthermore, to present the previously created JSON files, you will create corresponding JS files. Hence, you will add the “moonbirdsOwners.js” and “moonbirdsHistory.js” files to the “server” folder.
Web3 UI: Initialize a React App and Populate NFT Data to the React App
Starting at 40:25, you will get a quick code walkthrough regarding the UI as presented in the demo. Moreover, if you cloned our code, you already have the basics set up in the “app” folder. Next, you’ll need to install all the dependencies and run the application. So, thanks to our boilerplate, you will already have a cool interface ready. However, the collection pages are still empty:

Thus, your final task is to populate the Moonbirds collection using the following video tutorial (44:02):
NFT On-Chain Analysis – How to Explore NFT Wallets – Summary
Using today’s article, you had a chance to create your own NFT whale watcher dapp. As such, you learned how to do NFT on-chain analysis effortlessly. Moreover, since the core of this feat requires backend programming, we predominantly focused on that aspect. However, thanks to Moralis, you were able to obtain all the on-chain NFT data with a single API. Aside from completing the initial Moralis setup you also had to set API rate limits. Then you implemented NFT data processing. As a result, you had all the on-chain data neatly arranged in two JSON files. Finally, you had a chance to use our boilerplate and create a neat Web3 UI to display that data in a user-friendly manner.
If you liked this example project, we recommend you visit the Moralis’ blog and the Moralis’ YouTube channel. Both of these outlets offer a ton of valuable content. From on-point explanations to detailed blockchain development tutorials. As such, this is where you can learn more about dapp development, Web3 authentication, and how to become a blockchain developer. The greatest thing about Moralis is that it enables you to use your frontend skills to become a Web3 developer. Thus, you get to develop killer dapps using your JavaScript proficiency or develop Web3 games with Unity.
However, in case you are looking for a guided path to going full-time crypto, Moralis Academy might be the place for you. This online educational platform offers a ton of professional blockchain development courses. Moreover, it provides you with a personalized study path, expert mentorship, and one of the most advancing communities. As such, it offers a magic sauce to catapult your career in this disruptive industry!
