Are you looking for free Ethereum RPC nodes? If so, then you’re precisely where you need to be. In today’s tutorial, we’ll introduce you to Moralis – the industry’s leading Web3 infrastructure provider. With our node solution, you can efficiently set up and run free Ethereum nodes at the click of a button. And if you’re eager to get going, here’s a straightforward breakdown of the process:
- Step 1 – Create a free Moralis account.
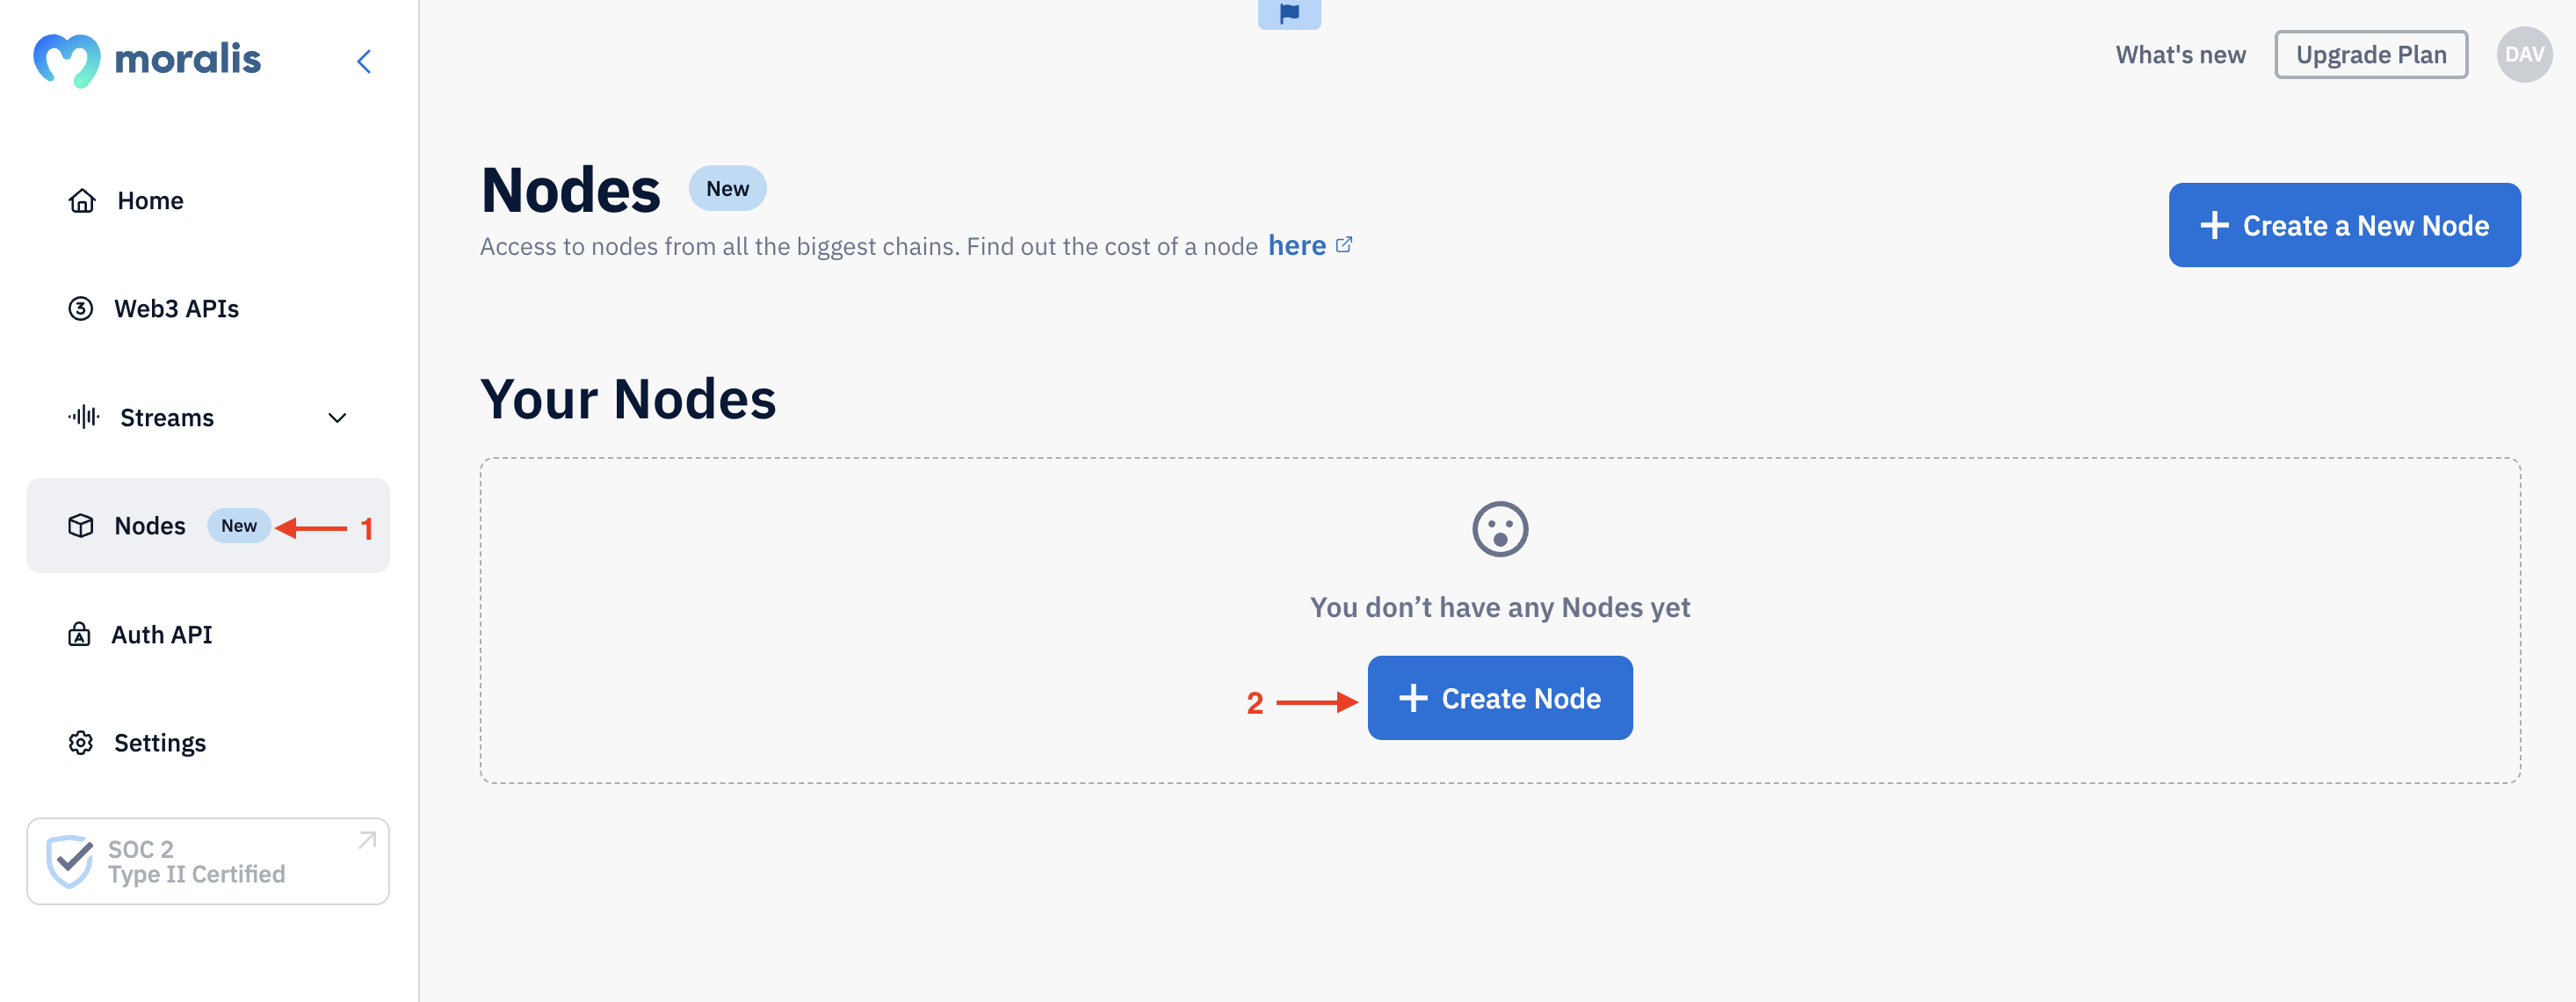
- Step 2 – Sign in, go to the ”Nodes” tab, hit the ”+ Create Node” button, and set up your Ethereum node:

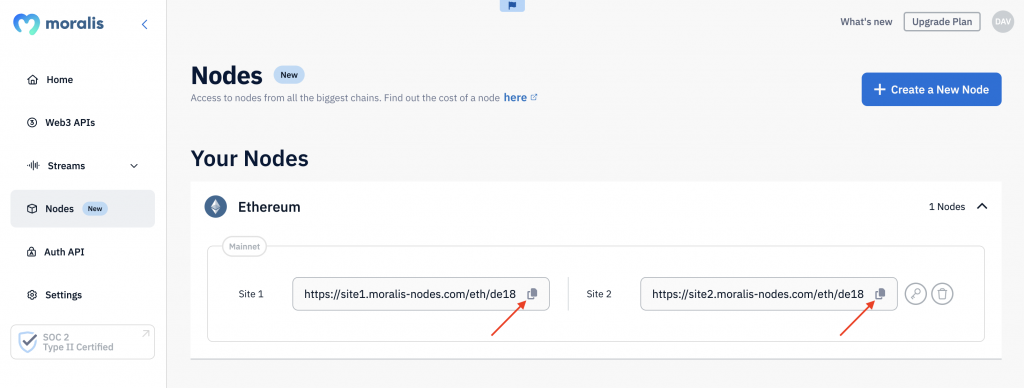
- Step 3 – Copy one of your Ethereum node URLs and integrate it into your project:
That’s it; setting up free Ethereum RPC nodes doesn’t have to be more challenging than that when leveraging Moralis. However, for a more in-depth breakdown, check out our RPC nodes documentation page or join us throughout this article!
Also, if you want to set up your own Ethereum RPC nodes, don’t forget to sign up with Moralis. You can create your account for free, and you’ll gain immediate access to our node service and top-tier Web3 APIs!
Overview
Setting up Ethereum nodes from scratch can be a challenging and time-intensive task. For instance, operating full or archive Ethereum nodes demands significant computational power, substantial bandwidth, and extensive storage capacity. Additionally, nodes are specific to each blockchain, requiring you to establish the necessary infrastructure for every chain you interact with. This can make developing cross-chain compatible decentralized applications (dapps) both costly and resource-intensive. Fortunately, you can now avoid most of these challenges with Moralis – the industry’s premier Web3 infrastructure provider!

At Moralis, we streamline the process of managing Ethereum nodes by handling the complexities for you. Our user-friendly interface allows you to set up an Ethereum node with just a few clicks. So, if you’re interested in exploring how to run Ethereum nodes easily, this guide is perfect for you. Let’s dive right in!
What are Ethereum RPC Nodes?
RPC nodes are servers, computers, and other devices running the Ethereum client software. The Ethereum blockchain is made up of thousands of these nodes that are responsible for verifying transactions, maintaining a consistent, accurate state of the network, and much more. As such, they collectively contribute to the secure and decentralized architecture of Ethereum!

Nodes are critical to the Ethereum blockchain, performing tasks that ensure the network’s reliability and security. Down below, you’ll find three prominent examples:
- Consensus: Nodes are essential to Ethereum’s proof-of-stake (PoS) consensus mechanism. In this system, nodes can lock up Ether (ETH) to become eligible to validate blocks. The staked ETH then acts as collateral, ensuring that nodes act honestly. In return for this work, validator nodes gain additional ETH as a reward.
- Data Storage: Certain Ethereum nodes are designated to maintain a comprehensive archive of all historical transactions on the network. This enables anyone to verify the current state of Ethereum, thereby enhancing the network’s security.
- Web3 Development: Nodes are essential for Web3, allowing developers to seamlessly interact with the Ethereum network. With a node, it’s possible to read and write blockchain data, which is often necessary when building dapps.
With that overview of Ethereum RPC nodes complete, let’s now delve into the various types of nodes!
Types of Ethereum RPC Nodes
There are various types of nodes, each serving a distinct purpose. Below, we’ll explore three specific examples:
- Light Nodes: A light node only downloads block headers, which is the minimum amount of data needed to interact with the Ethereum network. These nodes are designed with efficiency in mind, providing an economically friendly solution for users that only require basic blockchain functionality.
- Full Nodes: Full nodes store recent data from the last 128 blocks. These nodes are vital for maintaining the integrity of the Ethereum network, ensuring that all states are accurate and consistently up-to-date.
- Archive Nodes: An archive node stores the full history of the Ethereum chain, including all transactions, smart contract states, and more. These nodes are large, making them expensive to manage and maintain. However, despite the high maintenance costs, archive nodes are still essential for developers and users who need historical data.

Now that you know what Ethereum nodes are, we’ll also show you how to set them up using Moralis!
How to Set Up Free Ethereum Nodes
The simplest and most effective method to set up free Ethereum nodes is to use Moralis – the leading infrastructure provider in Web3. With our node service, you can effortlessly create nodes across 20+ networks at the click of a button. If you’re interested in learning how to do this, follow us as we guide you through the process of setting up nodes for the Ethereum mainnet, Sepolia, and Holesky!
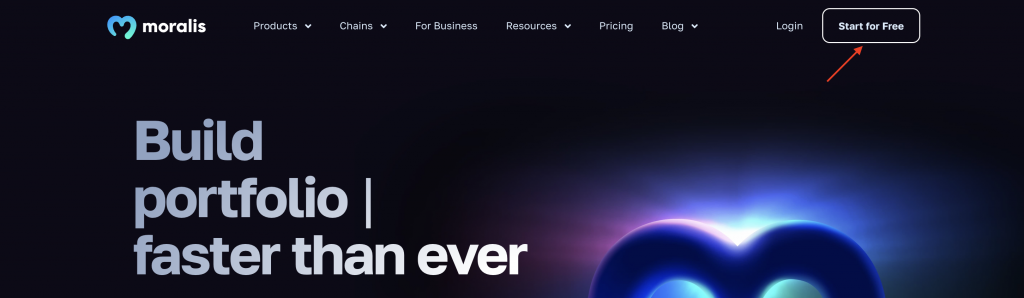
However, before you can begin, you need to sign up with Moralis. You can create an account free of charge, and you simply need to click the ”Start for Free” button at the top right and follow the instructions:
With an account at hand, you’re now ready to set up your free Ethereum nodes!
Ethereum Mainnet Nodes
Sign in to Moralis, navigate to the ”Nodes” tab, and click ”+ Create Node”:

Select the Ethereum protocol, followed by ”Mainnet”:

After clicking ”Create Node”, you’ll now have received two node URLs for the Ethereum mainnet, which you can interact with:

That’s it! Setting up Ethereum mainnet nodes doesn’t have to be more challenging than that when leveraging Moralis!
Ethereum Sepolia Nodes
Log in to Moralis, go to the ”Nodes” tab, and hit the ”+ Create Node” button:

Select ”Ethereum”, pick the Sepolia testnet, and click ”Create Node”:

Doing so will generate two node URLs for the Sepolia testnet:

Congratulations! It doesn’t have to be more difficult than this to set up nodes for the Sepolia testnet!
Ethereum Holesky Nodes
Sign in to your Moralis account, go to the ”Nodes” tab, and click ”+ Create Node”:
Select the Ethereum protocol followed by ”Holesky”:
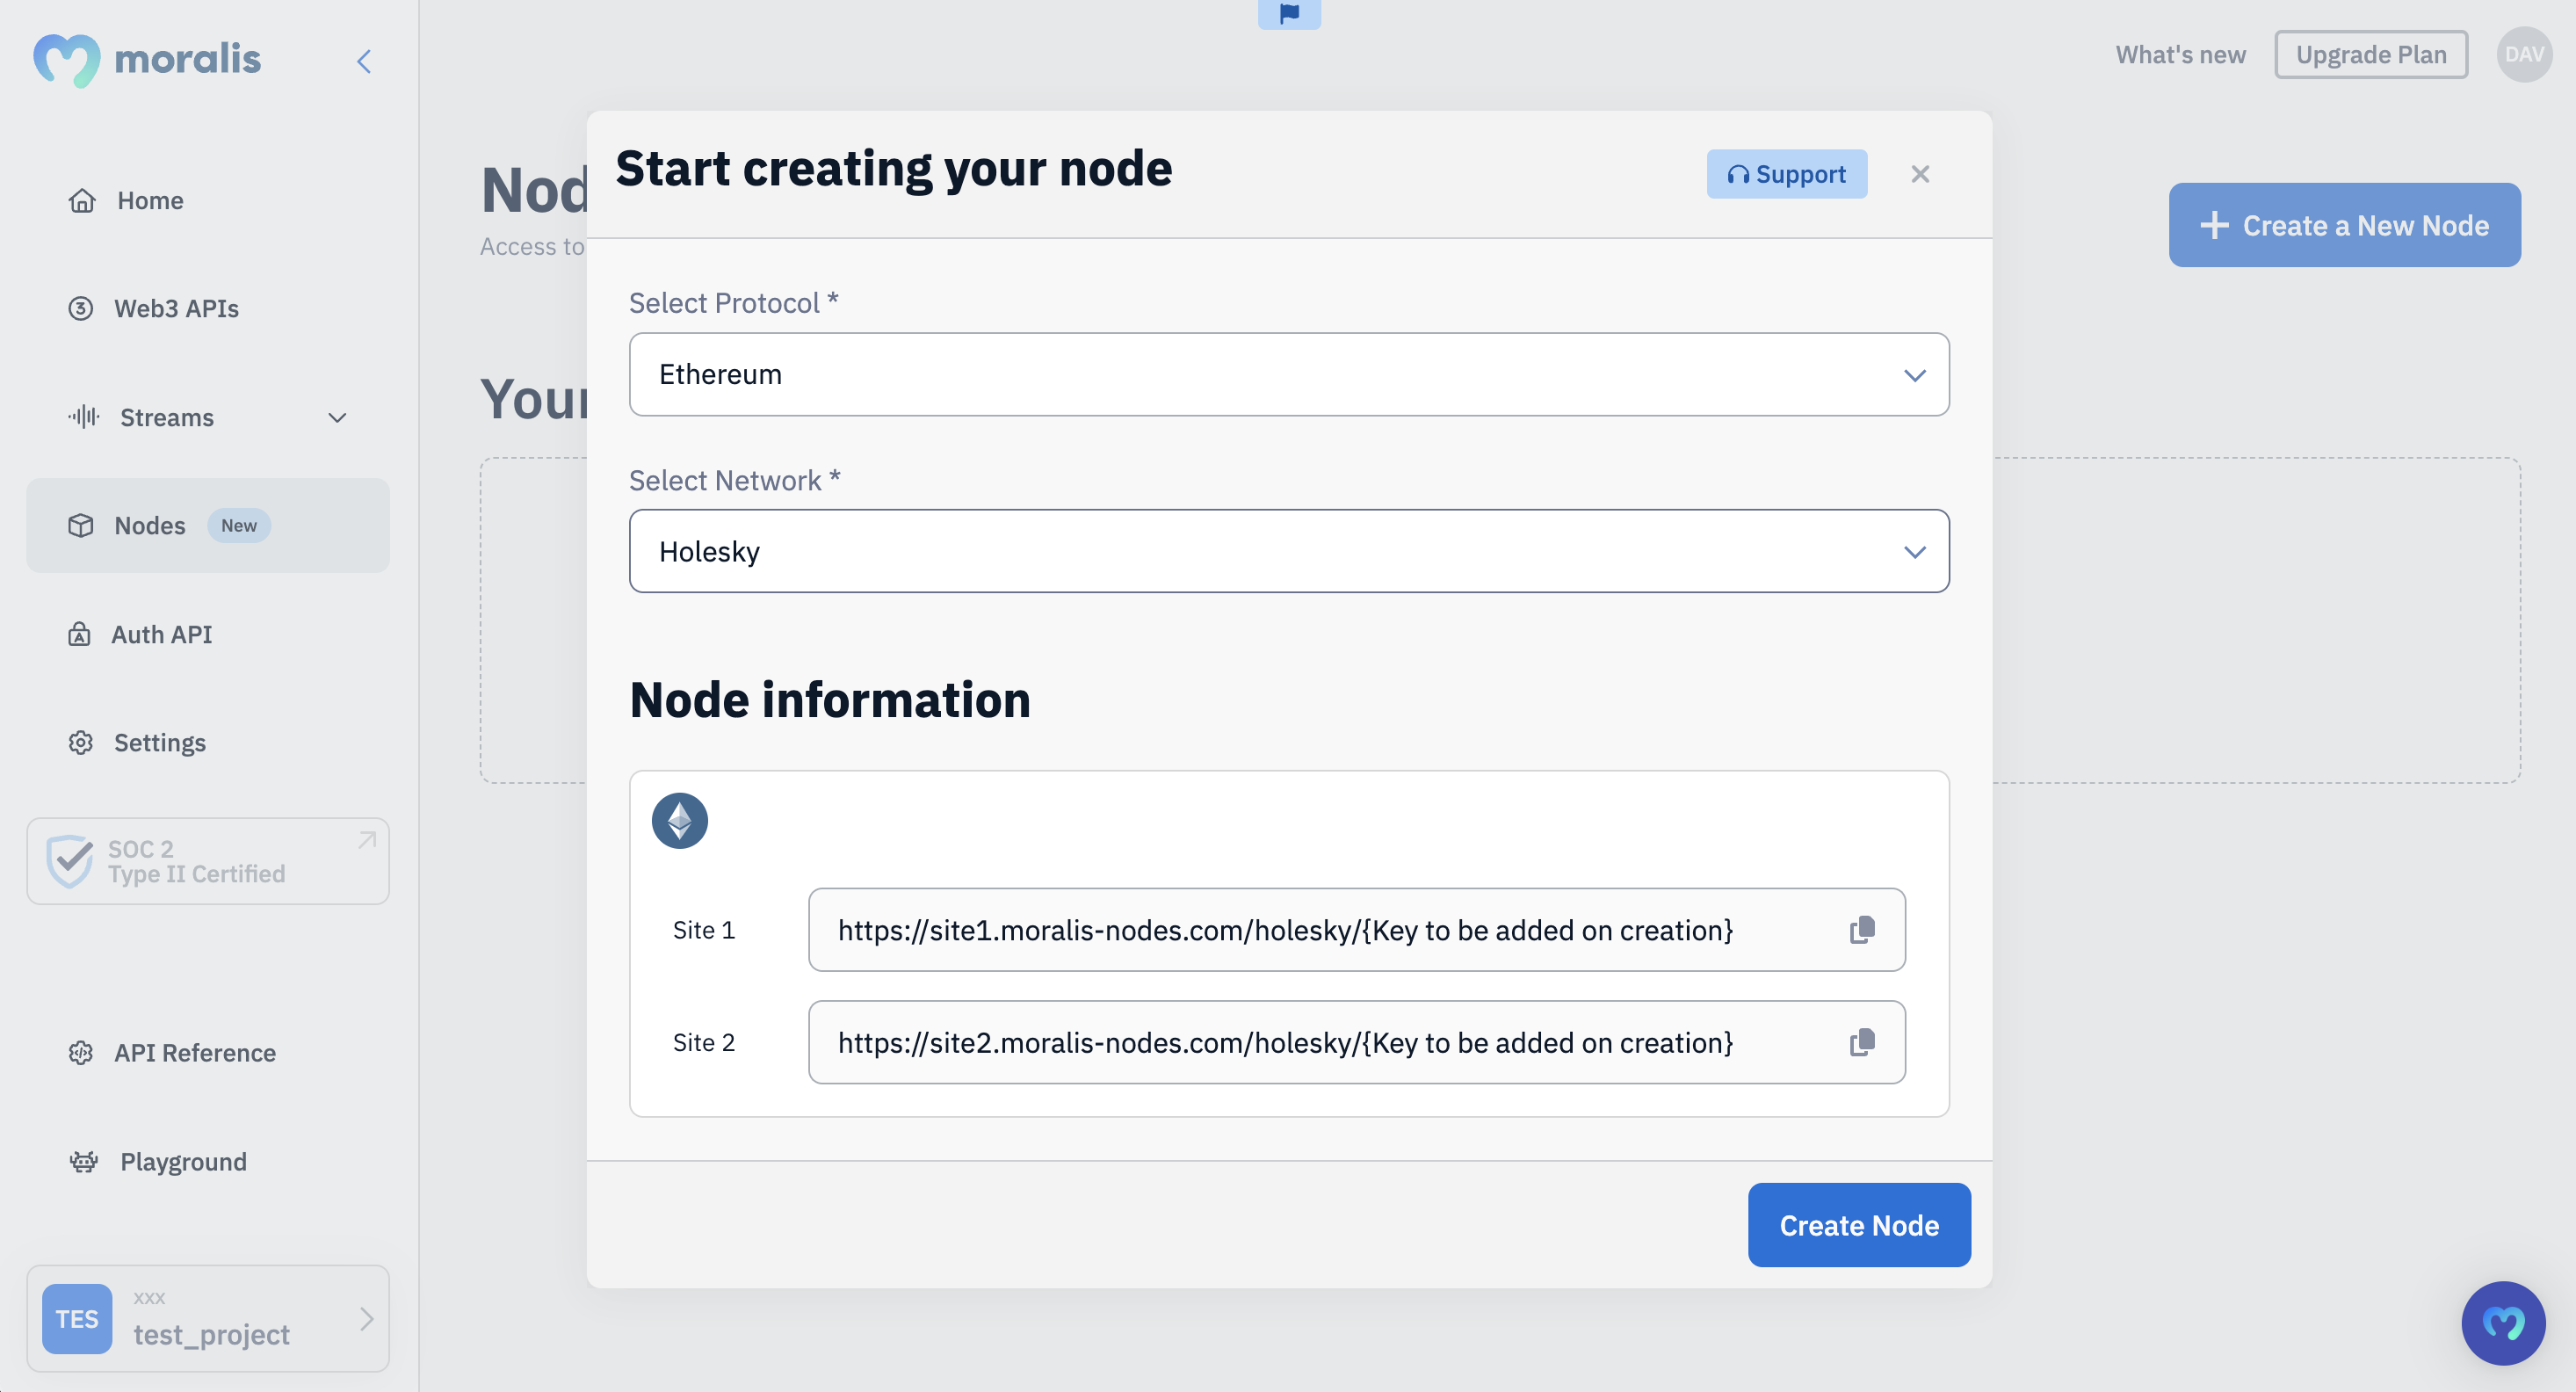
Once you click the ”Create Node” button, you’ll get two node URLs for the Holesky testnet:

That’s it! Creating nodes for the Holesky testnet doesn’t have to be more challenging than that!
3-Step Tutorial: How to Call Ethereum RPC Nodes
Having learned how to set up Ethereum nodes for the various networks, we’ll now show you how to use them to make RPC calls with ethers.js. More specifically, we’ll show you how to retrieve the native balance of a wallet in three simple steps:
- Create a New Project
- Write a Script
- Run the Code
However, before you can get going, you need to deal with a few prerequisites!
Prerequisites
Before moving on to the first step, make sure you have the following ready:
- Node.js v14+
- Npm/Yarn
Step 1: Create a New Project
Open your preferred IDE, set up a folder, and initialize a new project using the following terminal command:
npm init
Next, install the ethers library by executing the following command in the terminal:
npm install ethers
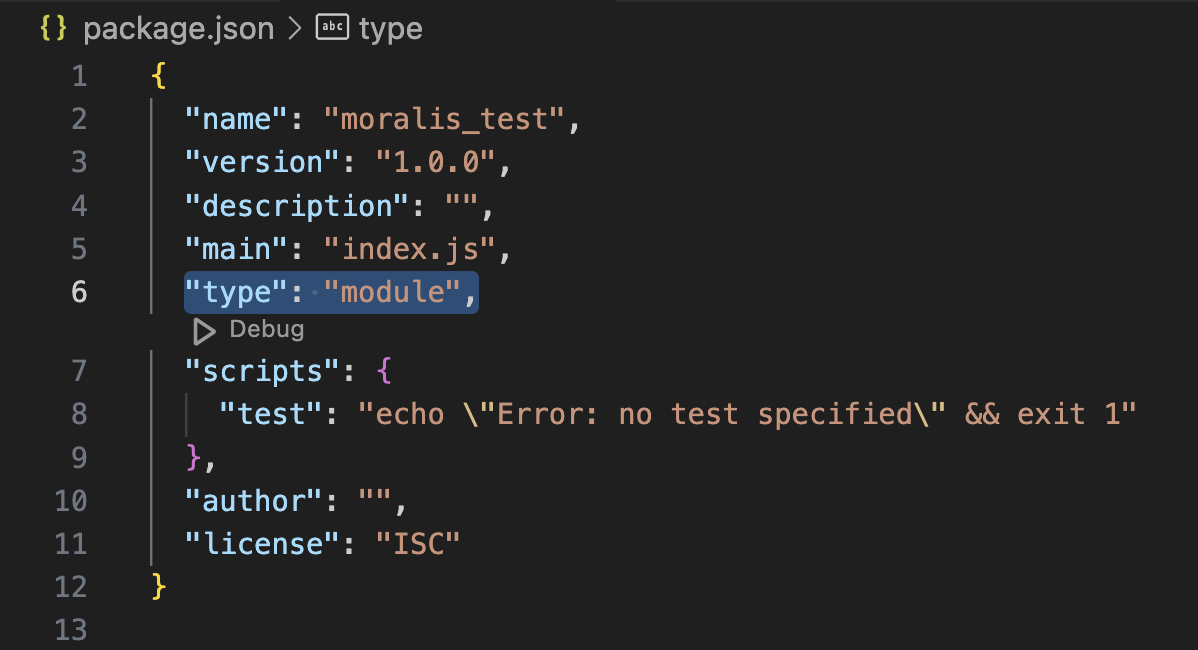
Lastly, add ”type”: ”module” to your ”package.json” file:
Step 2: Write the Script
Create a new ”index.js” file in the root folder of your project and add the following code:
import { ethers } from "ethers";

const provider = new ethers.providers.JsonRpcProvider("YOUR_NODE_URL");

const address = "0xd8da6bf26964af9d7eed9e03e53415d37aa96045";

const balance = await provider.getBalance(address);
console.log("Balance: ", ethers.utils.formatEther(balance));
From here, you now need to replace YOUR_NODE_URL with one of your Moralis node URLs:

Next, configure the address parameter to fit your query:

That’s it! All that remains from here is executing the script!
Step 3: Run the Code
Open a new terminal, cd into the root folder of your project, and run the following command:
node index.js
In return, you’ll now get the native balance of the wallet in question. The response should look something like this:
Balance: 605.372305714297746638
Congratulations! You now know how to make RPC calls to your Ethereum nodes!
However, if you want a more detailed tutorial with more examples, please check out the Moralis YouTube video down below:
The Drawbacks of RPC Nodes
While you can use RPC nodes to interact with a blockchain network, it’s not always your best option. To elaborate on this further, let’s explore three drawbacks of RPC nodes when it comes to querying on-chain data:
- Chain-Specific: Nodes are chain-specific. This means you’ll need to run and maintain a node for each chain you interact with. And if you’re building multi-chain dapps, this can quickly spiral out of control and become an expensive endeavor.
- Complex to Query: It’s generally difficult to query nodes, and it’s not possible to ask common questions like ”What tokens are wallet X holding?”. You generally need to make several requests and stitch together data to get information like this.
- Raw Data: When querying blockchain nodes, you get raw data. Consequently, before it becomes usable, you must interpret, decode, and integrate the information into the proper format.

So, how can we circumvent these challenges and more efficiently query on-chain data?
One solution is to use a blockchain indexer like Moralis. With our state-of-the-art Web3 APIs, you can effortlessly get decoded and insightful data with just a few lines of code. If you want to know more about how this works, please continue reading!
Exploring Moralis – The Easiest Way to Query On-Chain Data
Moralis is the industry’s leading Web3 data provider. We offer a great selection of nodes and ten+ use case-specific APIs, including premier interfaces like the Wallet API, NFT API, Token API, and many others. As such, it doesn’t matter whether you’re building a crypto wallet, DeFi platform, or any other project; with Moralis, you can seamlessly streamline on-chain data integration for your dapps!
But why should you leverage Moralis as your Web3 data provider?
- One Call – All the Data: Moralis features the industry’s most comprehensive API responses, giving you more data with fewer calls. This allows you to build dapps significantly faster and more efficiently.
- Cross-Chain: Our APIs are fully cross-chain, supporting 20+ blockchain networks. This includes Ethereum, Polygon, BNB Smart Chain, Optimism, Base, and many others. As such, with our APIs, you can easily streamline your developer experience as you don’t have to bother with a new provider for each chain.
- Trusted: 100,000+ developers and leading Web3 enterprises like MetaMask, Blockchain.com, Delta, etc., already use and trust Moralis.

Nonetheless, that gives you an overview of Moralis. Let’s now dive a bit deeper into three of our Web3 APIs to further highlight the benefits of Moralis!
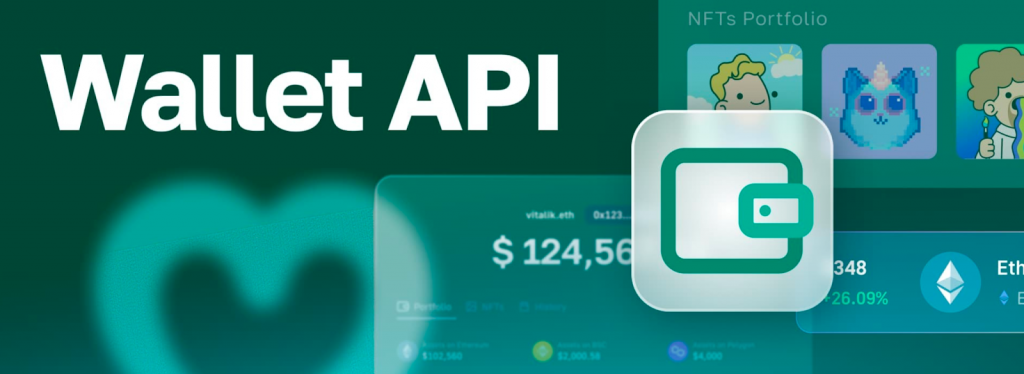
Wallet API
The Wallet API is the premier interface for anyone looking to integrate wallet data into their dapps. With single endpoints, you can leverage this API to get any wallet’s history, token balances, profitability, net worth, and more!
To highlight the accessibility of this top-tier tool, we’ll now show you how to seamlessly get the history of any wallet:
import fetch from 'node-fetch';

const options = {
 method: 'GET',
 headers: {
   accept: 'application/json',
   'X-API-Key': 'YOUR_API_KEY'
 },
};
fetch(
 'https://deep-index.moralis.io/api/v2.2/wallets/0xd06Ffc9107649344e7AB9182B685071163276BE8/history?chain=eth&order=DESC',
 options
)
 .then((response) => response.json())
 .then((response) => console.log(response))
 .catch((err) => console.error(err));
Just replace YOUR_API_KEY with your Moralis key, configure the query parameters, and run the script. In return, you’ll get a comprehensive response containing the wallet’s full history, complete with address labels, category tags, summaries, and more for each event:
{
    //...
     "result": [
       {
         "hash": "0xcee9d47cb827d792f7a25b216e32adad475eac490da40a805cef7554ab7eb308",
         "nonce": "6037420",
         "transaction_index": "64",
         "from_address": "0xddfabcdc4d8ffc6d5beaf154f18b778f892a0740",
         "from_address_label": "Coinbase 3",
         "to_address": "0xd06ffc9107649344e7ab9182b685071163276be8",
         "to_address_label": null,
         "value": "449953580000000000",
         "gas": "21000",
         "gas_price": "311257923036",
         "receipt_cumulative_gas_used": "7730854",
         "receipt_gas_used": "21000",
         "receipt_status": "1",
         "block_timestamp": "2022-05-11T13:35:40.000Z",
         "block_number": "14755151",
         "block_hash": "0x181942955a0fda682b60cad5d2e9ee76f31fcf6349d7653e0b17ccf948bca758",
         "nft_transfers": [],
         "erc20_transfers": [],
         "method_label": null,
         "native_transfers": [
           {
             "from_address": "0xddfabcdc4d8ffc6d5beaf154f18b778f892a0740",
             "from_address_label": "Coinbase 3",
             "to_address": "0xd06ffc9107649344e7ab9182b685071163276be8",
             "to_address_label": null,
             "value": "449953580000000000",
             "value_formatted": "0.44995358",
             "direction": "receive",
             "internal_transaction": false,
             "token_symbol": "ETH",
             "token_logo": "https://cdn.moralis.io/eth/0x.png"
           }
         ],
         "summary": "Received 0.45 ETH from 0xdd...0740",
         "possible_spam": false,
         "category": "receive"
       },
       //...
     ],
   }
Token API
The Token API is the go-to interface for ERC-20 data. With just a few lines of code, you can use this tool to get token balances, prices, metadata, and more without breaking a sweat!

To demo the power of the Token API, we’ll now show you how to get a wallet’s token balances with price data:
import fetch from 'node-fetch';

const options = {
  method: 'GET',
  headers: {
    accept: 'application/json',
    'X-API-Key': 'YOUR_API_KEY'
  },
};

fetch('https://deep-index.moralis.io/api/v2.2/wallets/0xcB1C1FdE09f811B294172696404e88E658659905/tokens?chain=eth', options)
  .then(response => response.json())
  .then(response => console.log(response))
  .catch(err => console.error(err));
Replace YOUR_API_KEY, configure the query parameters, and execute the code. In return, you’ll get all tokens held by the wallet in question, along with prices, price changes over time, and more. As such, with a single endpoint, you get all the data you need to build a comprehensive portfolio view:
{
   //...
  "result": [
    {
      "token_address": "0xa0b86991c6218b36c1d19d4a2e9eb0ce3606eb48",
      "symbol": "USDC",
      "name": "USD Coin",
      "logo": "https://cdn.moralis.io/eth/0xa0b86991c6218b36c1d19d4a2e9eb0ce3606eb48.png",
      "thumbnail": "https://cdn.moralis.io/eth/0xa0b86991c6218b36c1d19d4a2e9eb0ce3606eb48_thumb.png",
      "decimals": 6,
      "balance": "4553447",
      "possible_spam": false,
      "verified_contract": true,
      "balance_formatted": "4.553447",
      "usd_price": 1.001818879776249,
      "usd_price_24hr_percent_change": 0.1818879776249283,
      "usd_price_24hr_usd_change": 0.0018221880998897314,
      "usd_value": 4.561729172660522,
      "usd_value_24hr_usd_change": 0.008297236936878599,
      "native_token": false,
      "portfolio_percentage": 100
    },
    //...
  ]
}
NFT API
Moralis’ NFT API is the industry’s #1 tool for NFT data, giving you everything you need to build powerful NFT-based dapps. Use this API to get NFT balances, prices, metadata, and much more with single API calls!

To underscore the accessibility of using the NFT API, we’ll now show you how to fetch any NFT’s metadata:
import fetch from 'node-fetch';

const options = {
 method: 'GET',
 headers: {
   accept: 'application/json',
   'X-API-Key': 'YOUR_API_KEY'
 },
};

fetch('https://deep-index.moralis.io/api/v2.2/nft/0xb47e3cd837dDF8e4c57F05d70Ab865de6e193BBB/1?chain=eth', options)
 .then(response => response.json())
 .then(response => console.log(response))
 .catch(err => console.error(err));
Replace YOUR_API_KEY with your Moralis API key, configure the parameters of the query, and run the script. In return, you’ll get the metadata of the NFT. It should look something like this:
{
  amount: '1',
  token_id: '1',
  token_address: '0xb47e3cd837ddf8e4c57f05d70ab865de6e193bbb',
  contract_type: 'CRYPTOPUNKS',
  owner_of: '0xffa914c83d851b9fe372e4ba6a6e131373aa16ab',
  last_metadata_sync: '2024-05-10T08:06:07.736Z',
  last_token_uri_sync: '2024-05-10T08:06:07.440Z',
  metadata: '{"image":"https://www.larvalabs.com/cryptopunks/cryptopunk001.png","name":"CryptoPunk 001","attributes":["Smile","Mohawk"],"description":"Male"}',
  block_number: '16079985',
  block_number_minted: null,
  name: 'CRYPTOPUNKS',
  symbol: 'Ͼ',
  token_hash: 'a99d02058e62e327e79aabd57e0b88a3',
  token_uri: 'Invalid uri',
  minter_address: null,
  verified_collection: true,
  possible_spam: false,
  collection_logo: 'https://i.seadn.io/gae/BdxvLseXcfl57BiuQcQYdJ64v-aI8din7WPk0Pgo3qQFhAUH-B6i-dCqqc_mCkRIzULmwzwecnohLhrcH8A9mpWIZqA7ygc52Sr81hE?w=500&auto=format',
  collection_banner_image: 'https://i.seadn.io/gae/48oVuDyfe_xhs24BC2TTVcaYCX7rrU5mpuQLyTgRDbKHj2PtzKZsQ5qC3xTH4ar34wwAXxEKH8uUDPAGffbg7boeGYqX6op5vBDcbA?w=500&auto=format'
}
If you’d like to explore all our premier development tools, please visit our Web3 API page, where you’ll find the rest!
Summary: Free RPC Nodes for Ethereum Mainnet & Testnets
The easiest and most efficient way to set up free Ethereum RPC nodes is to use Moralis – the industry’s premier Web3 infrastructure provider. With our intuitive user interface, you can now seamlessly create Ethereum nodes at the click of a few buttons. Here’s a quick summary of the entire process:
- Step 1 – Sign up with Moralis for free.
- Step 2 – Log in, navigate to the ”Nodes” tab, hit the ”+ Create Node” button, and set up your Ethereum node:

- Step 3 – Copy one of your node URLs and integrate it into your project:

That’s it! Setting up Ethereum nodes doesn’t have to be more challenging than this when using Moralis!
If you liked this Ethereum RPC nodes guide, consider reading additional Moralis content here on the blog. For instance, check out our Polygon node guide or explore the best Alchemy Pipelines alternative.
Also, if you want to set up Ethereum nodes yourself, don’t forget to sign up with Moralis. You can create an account free of charge, and you’ll gain immediate access to our node service and premier Web3 APIs!
