Did you know that Moralis’ Python SDK makes Web3 py development more accessible? If this sounds exciting and you want to learn more about building Web3-compatible Python projects, join us in this article as we show precisely how to do so! Thanks to Moralis and the Python SDK, you can integrate Web3 functionality into Python applications in two steps:
- Install Moralis’ Python SDK with the following terminal input:
pip install moralis
- Make a Moralis API call. You can find an example of what it can look like for querying NFT metadata down below:
import json
from moralis import evm_api

api_key = "YOUR_API_KEY"

params = {
    "address": "0xb47e3cd837dDF8e4c57F05d70Ab865de6e193BBB",
    "token_id": "3931",
    "chain": "eth",
    "format": "decimal",
    "normalizeMetadata": True,
}

result = evm_api.nft.get_nft_metadata(
    api_key=api_key,
    params=params,
)

print(json.dumps(result, indent=4))
For more examples and details about the development kit, check out Moralis’ Web3 Python SDK documentation! If you’d like to start using the above code snippet immediately, sign up with Moralis now!
Overview
Python is one of today’s most popular programming languages featuring many different use cases. The language’s general-purpose characteristics make Python suitable for everything from creating straightforward applications to machine learning. Moreover, thanks to Moralis, it is now easier than ever for Python developers to enter the blockchain space. So, if you are looking to integrate Web3 functionality into your Python projects, you can now do so easily with Moralis’ Python SDK. If this sounds exciting, join us in this tutorial as we put the SDK to use and give you a comprehensive introduction to Web3 py development!
To begin with, the article will provide a brief overview of Web3 py. In doing so, you will better understand what Python entails in a Web3 context. From there, the article additionally explores how developers can use Web3 py, where you are provided a brief introduction to Moralis’ Python SDK. Lastly, to top things off, we will show you how to create a Web3 py app by utilizing the Python SDK in practice.
Now, if you are already familiar with Web3 py and want to expand your blockchain development proficiency, you might find other Moralis articles interesting. For instance, check out our guides on how to set up automated Web3 notification emails or how to get NFT collections using Python!
Nevertheless, no matter what Web3 py development endeavors you embark on, sign up with Moralis now. Creating your account is free, and you can immediately leverage the full power of blockchain technology!
What is Web3 Py?
Python is a high-level, object-oriented programming language with an easy-to-learn syntax emphasizing readability. As such, Python is often a highly attractive choice for people looking to get into the development space. Moreover, this partly contributes to Python’s high adoption and is why this is one of today’s most popular programming languages!
In the context of Web3, there are a few things to consider regarding Python development. For instance, if you come straight from conventional Web2 practices, there are a few differences for you to be aware of before taking on Web3 py development. For instance, you might want to become more proficient in using libraries such as ”Web3.py”. This is a Web3 py-based library enabling you to interact with the Ethereum network seamlessly.
For Web3 py development, you might also want to explore some tools that can make your life as a blockchain developer easier. If this sounds exciting and you want to learn more about Web3 py, join us in the next section, where we answer the question, ”how can developers use Web3 py?”.
How Can Developers Use Web3 Py?
Among all the available blockchain infrastructure companies, Moralis supplies the leading Web3 infrastructure solution, supplying tools such as SDKs, enterprise-grade Web3 APIs, and much more. As such, Moralis opens the door to Web3 development, enabling anyone to utilize the full power of blockchain technology to build Web3 projects more easily.
Furthermore, among Moralis’ Web3 development tools, you can find the Python SDK. This software development kit is the ultimate Web3 py tool, enabling you to create sophisticated Python blockchain projects with higher effectiveness and efficiency!
As such, thanks to Moralis’ capabilities and the Python SDK, this presents the best way in which developers can use Web3 py. What’s more, Moralis features cross-chain compatibility, meaning that you can create Web3 py projects for many different networks, including Ethereum, Solana, BNB Chain, and more supported Web3 networks!
If this sounds exciting and you want to learn more about this ultimate Web3 py development tool, join us in the proceeding sections, where we use the SDK to show you how to create a Web3 and Python application in practice!
Example of How to Use Web3 Py
Now that you have a more extensive understanding of Web3 py and Moralis’ Python SDK, it is time for the central part of this tutorial. As such, the following sections teach you how to build a Web3 py application enabling users to log in with their MetaMask wallets.
By following along, you will learn how to build a Web3 py-backed application handling the entire Web3 authentication flow. In combination with the backend code, you will also learn how to briefly set up a frontend React application for demonstrating the auth mechanism in action! Moreover, for simplicity, the tutorial is divided into the following three sections:
- What Are You Working Toward? – Application Demo
- Create the Python Flask App
- React Frontend Application Setup
Perhaps you prefer watching videos to educate yourself? In that case, check out the video below from Moralis’ YouTube channel. In this clip, you are provided a complete walkthrough of the entire process from start to finish by one of our talented software engineers:
Otherwise, join us for the remainder of this Web3 py tutorial, starting with an application demo to show you what you are working towards!
What Are You Working Toward? – Application Demo
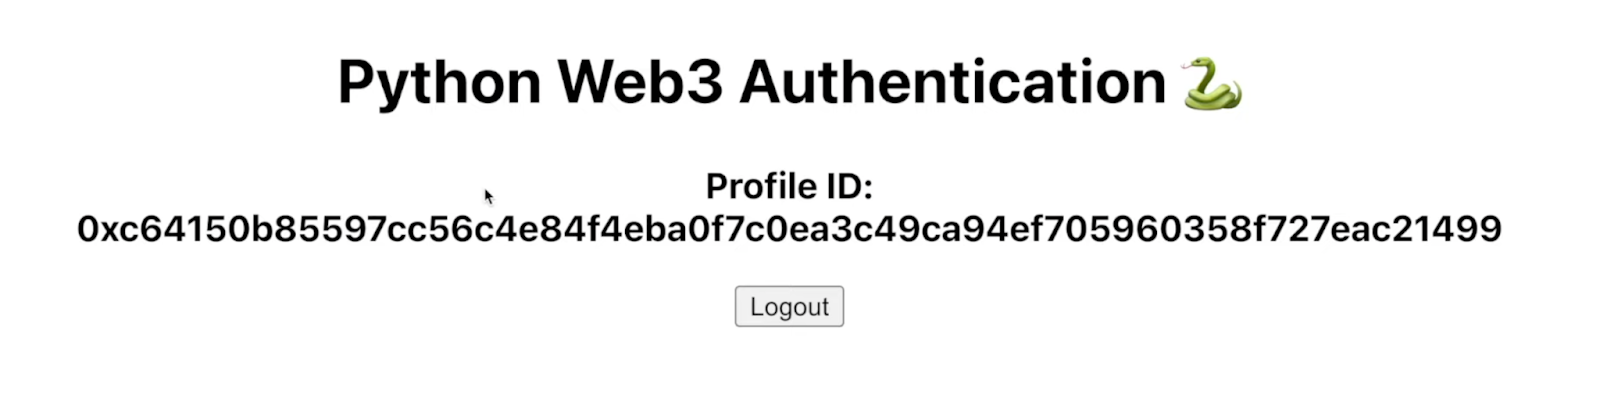
Before exploring the Web3 py example in practice, this section provides an application demo of the final product. In doing so, you get a better understanding of what you are working towards, making it easier to visualize the core functionality of the code. Nevertheless, you will find a print screen of the app’s landing page down below:

The application’s UI features two core elements: a heading and a ”Login” button. If you click on this button, it will autonomously prompt your MetaMask, allowing you to connect your Web3 wallet. As soon as you authenticate, the app sends a ”challenge” request to the Python backend. Further, it’ll ask the Moralis Auth API to generate a Web3 login challenge.
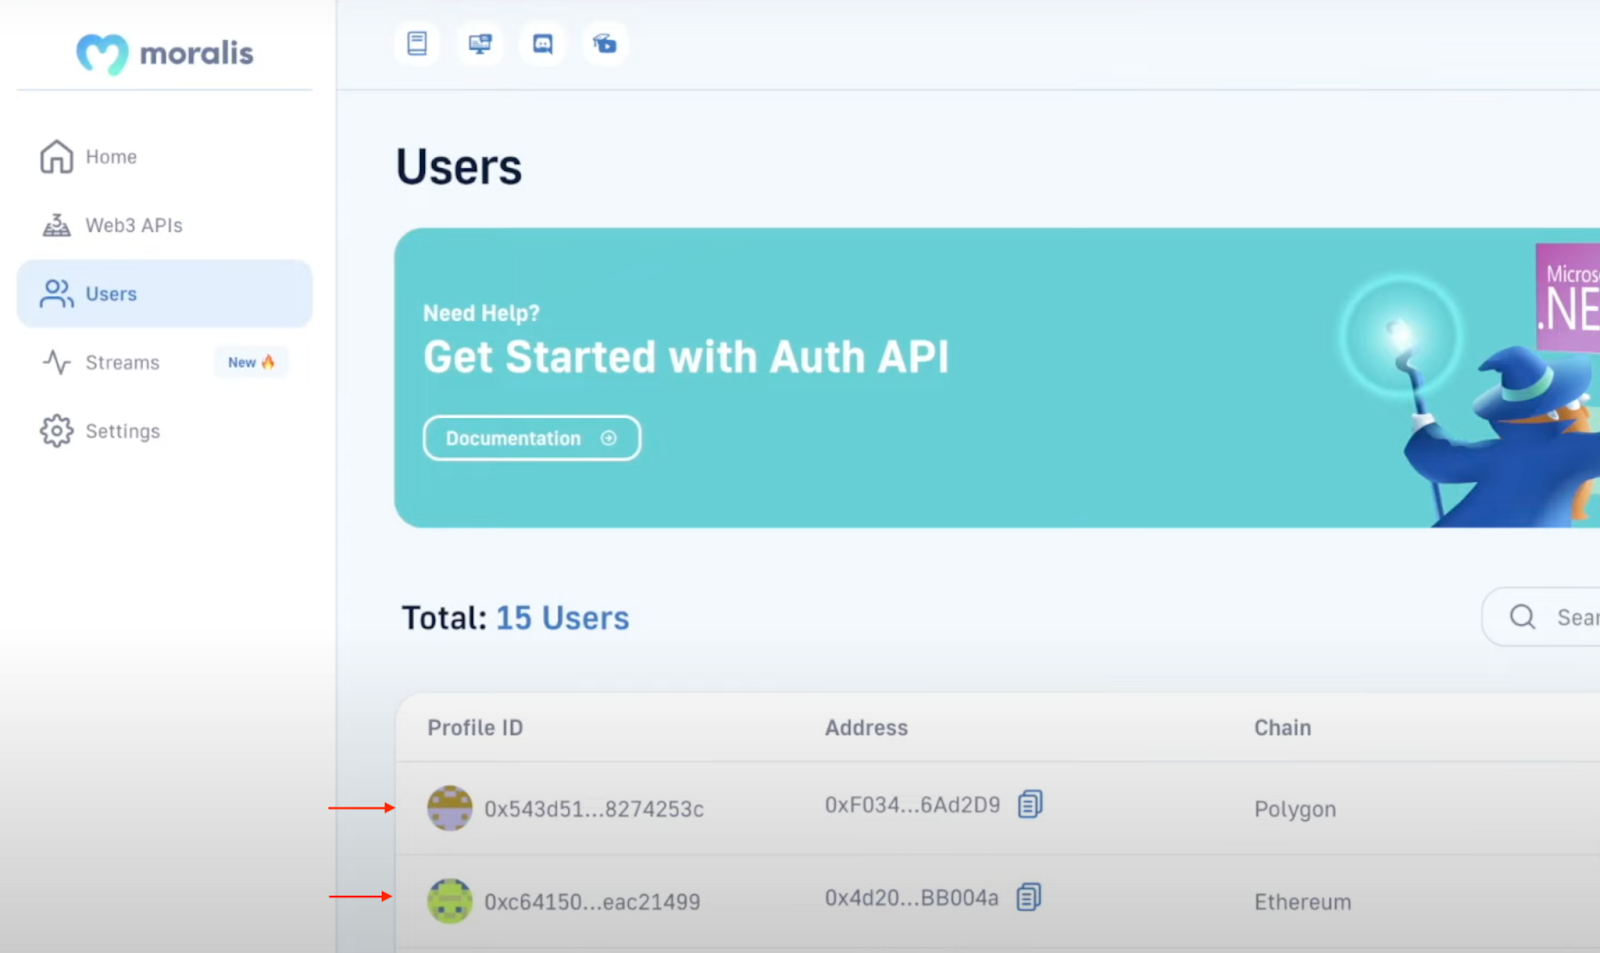
From there, the app sends yet another request for validating your signature. If it is a match – and it is your first time logging in – the app creates a new user ID and displays it on the user page:
Once you sign in, Moralis utilizes the new ID to generate a new user. This user is then autonomously added to the ”User” tab on your Moralis admin panel:
Nevertheless, that covers this demo and the app’s core functionality! Now that you have a more profound understanding of what you are working towards, let’s jump straight into the next section, where we illustrate how to create the Python Flask app!
Create the Python Flask App
In this initial part, we will start by showing you how to set up a Web3 py project. To kick things off, open your preferred integrated development environment (IDE) and create a new Python project. During this tutorial, we will use Visual Studio Code (VSC). So, if you go for another option, the process might occasionally differ.
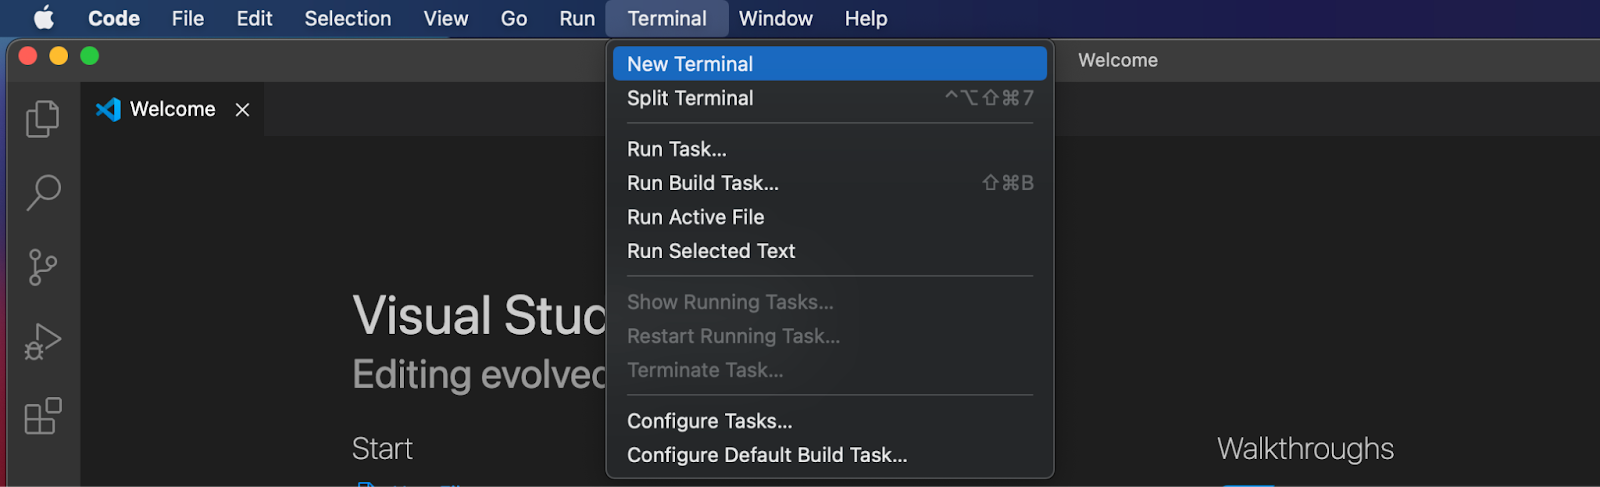
Nonetheless, once you have launched your IDE and created a project, go ahead and open a new terminal. If you also went for VSC, you can do so by clicking on ”Terminal” at the top, followed by ”New Terminal”:
From there, ”cd” into the project’s root folder, input the command below into the terminal, and hit enter:
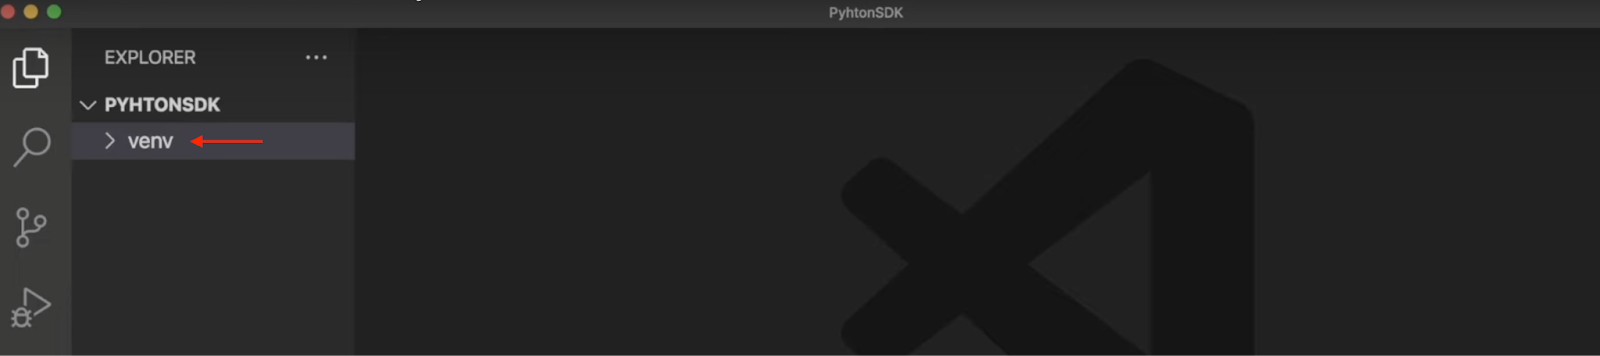
python3 -m venv venv
The command above is used to create a new virtual environment. As such, once you run this, it automatically creates a new ”venv” folder in your IDE:
With the virtual environment at your disposal, you additionally need to initialize it, which you can do by running the command below:
source venv/bin/activate
Next, ensure that you have the newest version of ”pip” through this terminal input:
pip install --upgrade pip
Lastly, the final part of setting up the project is installing the necessary dependencies. In this case, there are three in total, and you will find the installation commands below. Make sure to run each command in consecutive order:
pip install flask
pip install flask_cors
pip install moralis
That covers the initial setup process for the project. Next up, in the following section, we show you how to add the code from the Web3 py Flask application!
Python Flask App Code
With the barebones state of the project, you can now proceed by adding the Web3 py Flask application code. So, to kick things off, create a new file called ”app.py” in the root folder of your project. From there, open it and add the imports for the required dependencies:
from flask import Flask
from flask import request
from moralis import auth
from flask_cors import CORS
After the imports, add the code snippet below to initialize the application and wrap it in ”CORS”:
app = Flask(__name__)
CORS(app)
You can then create a new variable for your Moralis API key:
api_key = "xxx"
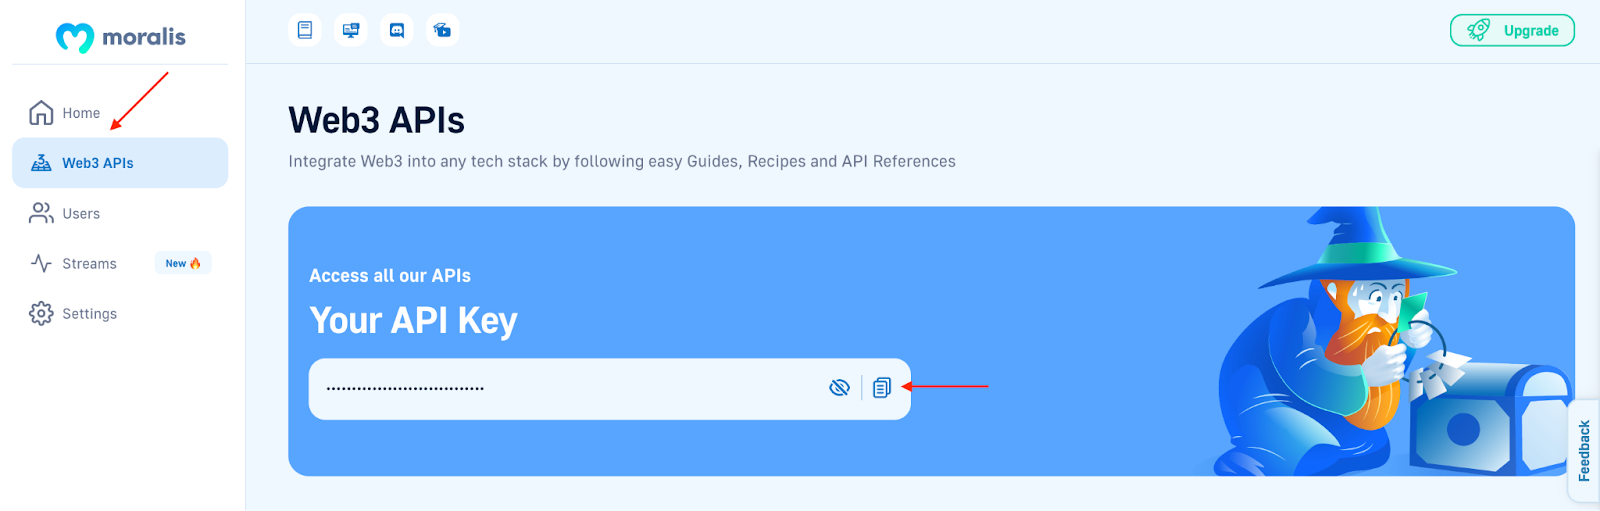
Make sure you replace ”xxx” within the code with your API key. You can easily get the key if you have a Moralis account. That said, if you have not already, join Moralis immediately!
With an account at hand, you will be able to find the key under the ”Web3 APIs” tab:
Next up, you need to add the ”/requestChallenge” and ”/verifyChallenge” routes.
- ”/requestChallenge”: Whenever you authenticate yourself through the application, this initial route requests a challenge from Moralis. Moreover, the central part of the ”/requestChallenge” route is the ”reqChallenge()” function. The function is responsible for getting the request arguments, adding a variable called ”body”, acquiring the results from the ”/requestChallenge” endpoint, and finally passing the results to the client:
@app.route('/requestChallenge', methods=["GET"])
def reqChallenge():

    args = request.args
    body = {
        "domain": "my.dapp",
        "chainId": args.get("chainId"),
        "address": args.get("address"),
        "statement": "Please confirm login",
        "uri": "https://my.dapp/",
        "expirationTime": "2023-01-01T00:00:00.000Z",
        "notBefore": "2020-01-01T00:00:00.000Z",
        "resources": ['https://docs.moralis.io/'],
        "timeout": 30,
    }

    result = auth.challenge.request_challenge_evm(
        api_key=api_key,
        body=body,
    )

return result- ”/verifyChallenge”: Once you sign the message, the application returns the results to the backend and verifies it using the other ”/verifyChallenge” route. This route contains the ”verifyChallenge()” function, which gets the arguments from the request, creates the ”body” variable, fetches the result from the Moralis Auth API endpoint, and lastly, returns it to the client:
@app.route('/verifyChallenge', methods=["GET"])
def verifyChallenge():

    args = request.args
    body={
        "message": args.get("message"),
        "signature": args.get("signature"),
    }

    result = auth.challenge.verify_challenge_evm(
        api_key=api_key,
        body=body
    )

    return result
Finally, after the two routes, add the code snippet below to specify where you want to run the application:
if __name__ == "__main__":
    app.run(host="127.0.0.1", port=3000, debug=True)
Now that’s it for the entire code of the ”app.py” file! All in all, it should now look something like this:
from flask import Flask
from flask import request
from moralis import auth
from flask_cors import CORS

app = Flask(__name__)
CORS(app)

api_key = "xxx"

@app.route('/requestChallenge', methods=["GET"])
def reqChallenge():

    args = request.args
    body = {
        "domain": "my.dapp",
        "chainId": args.get("chainId"),
        "address": args.get("address"),
        "statement": "Please confirm login",
        "uri": "https://my.dapp/",
        "expirationTime": "2023-01-01T00:00:00.000Z",
        "notBefore": "2020-01-01T00:00:00.000Z",
        "resources": ['https://docs.moralis.io/'],
        "timeout": 30,
    }

    result = auth.challenge.request_challenge_evm(
        api_key=api_key,
        body=body,
    )

    return result


@app.route('/verifyChallenge', methods=["GET"])
def verifyChallenge():

    args = request.args
    body={
        "message": args.get("message"),
        "signature": args.get("signature"),
    }

    result = auth.challenge.verify_challenge_evm(
        api_key=api_key,
        body=body
    )

    return result


if __name__ == "__main__":
    app.run(host="127.0.0.1", port=3000, debug=True)
Start the App
Now that you have added the Web3 py Flask application code, all that remains is to launch the project. This is relatively simple, and all you need to do is open a new terminal and run this command:
python3 app.py
Running the command above will spin up the Web3 py Flask application on “localhost 3000“, which we specified earlier. From here, let us dive into the next section of the tutorial, where we briefly show you how to set up the frontend React application, enabling you to test the endpoints!
React Frontend Application Setup
Now that you have launched the Web3 py Flask backend application, the last thing you need to do is set up the frontend. From that frontend, you can handle the Web3 authentication flow and call the endpoints. In order to make this as accessible as possible, we have already built a reusable frontend React application. So, all you need to do is visit the GitHub repo down below and clone the project:
Complete Web3 Py Example Documentation – https://github.com/MoralisWeb3/youtube-tutorials/tree/main/Web3AuthPython
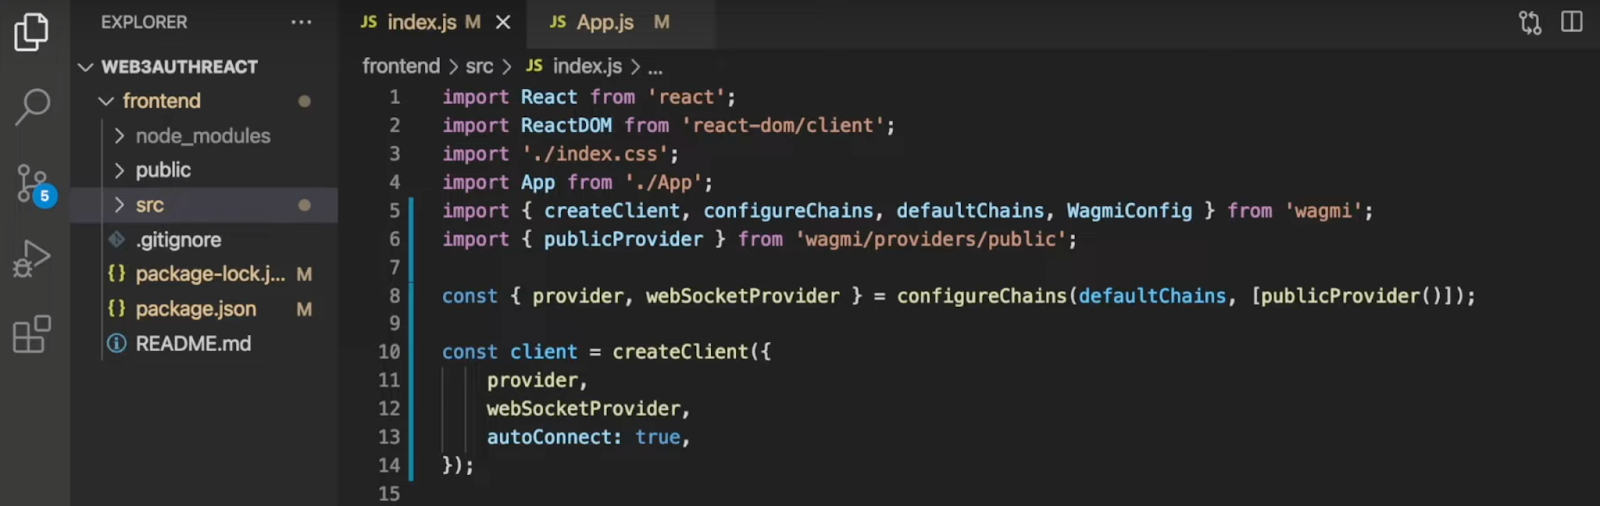
By cloning the repository, you should find yourself with a file structure in your local directory similar to the one below:
Lastly, all that remains is to open a new terminal and run this command to launch the app:
npm run start
Congratulations! You have now completed this Web3 py tutorial! If you want a more detailed breakdown of the frontend code, check out the clip from the earlier ”Example of How to Use Web3 Py” section. You can also find more information on Web3 py by checking out Moralis’ Web3 Python SDK documentation!
What is Web3 Py – Summary
This article taught you how to create a straightforward Web3 Python app using Moralis’ Python SDK. The tutorial was divided into three main sections:
- What Are You Working Toward? – Application Demo
- Create the Python Flask App
- React Frontend Application Setup
By following along, you now know how to integrate Web3 functionality into Python applications easily with Moralis! As such, you can now implement the same fundamental principles in future Web3 development endeavors and, for instance, use Python for Ethereum development!
If you found this tutorial exciting, consider checking out other featured articles here on Moralis’ Web3 blog. For instance, read up on ERC 1155 NFTs or learn how to get all tokens owned by a wallet!
Nonetheless, if you are interested in further Web3 py development, do yourself a favor and sign up with Moralis immediately. To access the amazing tools of Moralis, like the Web3 APIs, you need a Moralis account. Create one entirely for free!
